This project appeared in Make: Magazine volume 73. Subscribe today for more great stuff!

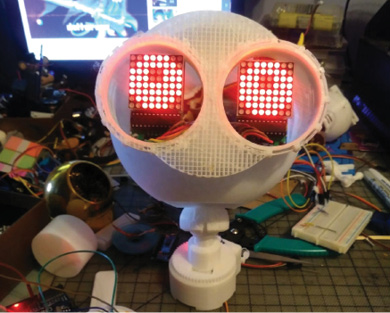
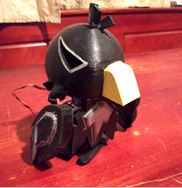
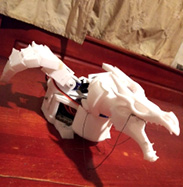
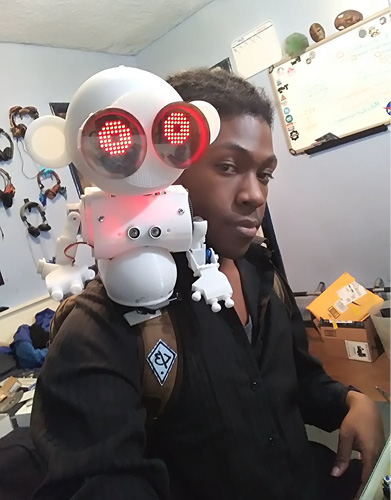
Allow me to tell you the tale of my robot monkey. Last year was a big year for me and my companion bots, entering the eye of the maker world: I even got invited to talk at Hackaday Superconference. Thanks to that event, and me being told about it three months prior, I began working on my robot monkey companion, Dexter.

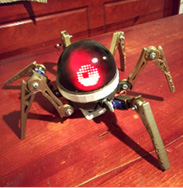
What’s a companion robot? To me, it’s a robot you can take with you on any type of adventure, the way R2-D2 rolls next to Luke Skywalker. I started making them in 2018 and couldn’t stop. When adults see me with a companion bot they might think it’s weird or ask me a polite question, but kids get so excited: “OMG, it’s a robot!” They know where it’s at.

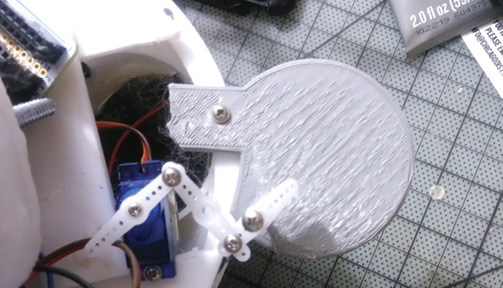
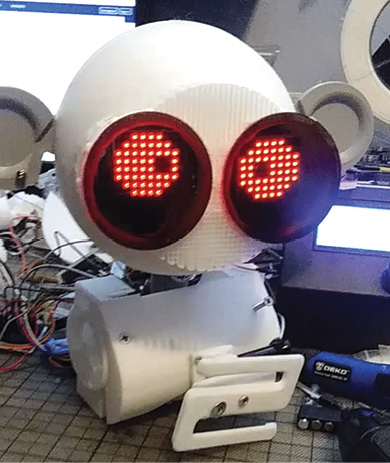
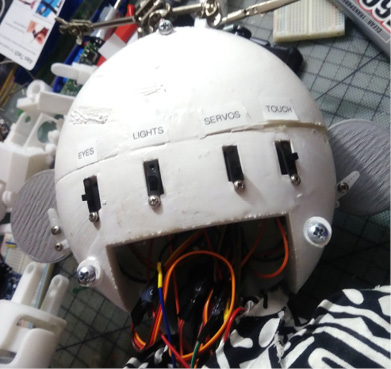
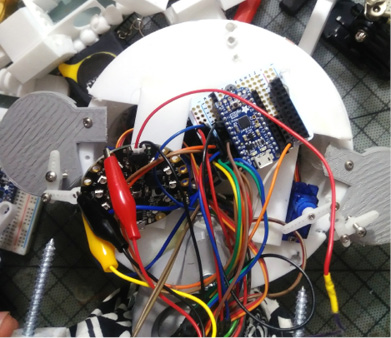
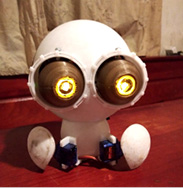
Dexter was a 4-month journey of failure. Dexter V1 was fragile like a baby; I took him out one day and he snapped in half, wires everywhere. Dexter V2 was much sturdier, and I added fingers and constantly kept upgrading him; a lot of things worked, and did not work. I even upgraded him to V3 at the Hackaday event, inspired by some amazing makers there: I gave him his new custom eyes, improved his movements by changing up some screws and adding a power booster, and reprinted a new face for him. Then I showed him off at Maker Faires in Los Angeles and the Bay Area.

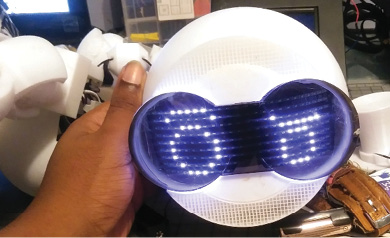
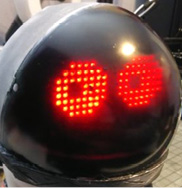
What I’m sharing with you is Dexter V4, the most upgraded version yet. I used Fusion 360, and a bit of SolidWorks, to design him. His eyes are a hacked pair of LED glasses, and I made him with the intention and ability to be upgraded and customized depending on the person making him. He’s still not perfect — I drilled my own holes to add screws, and hot-glued a lot of him — but I hope you like him

Project Steps

ASSEMBLY

I recommend starting with the head, which is made of three parts: the front (face), the back, and the middle plate. I would print these first, then the neck gear and the ribcage. Use these to assemble the head to the neck; that way you’ll quickly have a piece of him built.

Next, the servo gears. Print these at high quality; they should fit any micro servo but I know they tend to warp if the quality is low. Add one gear to the neck servo and fit the servo into its place in the rib cage. I recommend you run a servo test and see how the gears mesh and move the neck. I used the Arduino example code in the arduino compiler at File->Examples->Servo->Sweep. If it works well (or good enough for your specific uses), continue.

The ribcage has two more of the same servo placements, one in each side; add servos there to move the arms, and test those too. In the end I used ball joints to make Dexter’s arms because they can be moved in more directions and adapt to his riding position when he’s on my back.

I recommend printing the belly next. It’s pretty big and will be used to hold most of the circuit inside it. It’s got two block-like platforms; use these to attach it to the ribcage using screws or glue.

SERVO CIRCUIT

Now prepare your circuit. Dexter is cool because he can be customized: I made him so that you can edit his systems and make and put your own circuits in him. For his servos I used an Adafruit Trinket Pro microcontroller driven by a single LiPo and an Adafruit voltage booster board. With this setup I can move as many as 6 servos at random intervals, so Dexter is always doing something.

Next the ears. These are pretty simple. Attach a simple micro servo to the back of the inner skull piece.

Attach the servo arms to the ears in such a way that they’ll push and pull the ears up and down, then attach each ear with a single screw to the top part of the inner skull, so it can pivot. This gives Dexter his moving ear look.

CHEMION EYES

The eyes are next. Dexter V4’s “emote” eyes are actually hacked Chemion LED glasses. There are multiple tutorials online on how to hack these and rewire them; my favorite is this video.

The eye covers are just laser-cut acrylic and they’re hot-glued to the face. I control the eyes from the Chemion phone app; previous Dexters had LED matrix eyes controlled by a microcontroller.

Next I recommend printing out the other parts: the butt plate, legs, hands, and feet. It’s easy to assemble Dexter, but the print time does take a while. I designed the back of the head plate with four slots for switches, so you can wire up the servos, LEDs, etc., separately with the ability to turn them on and off. I usually put the circuit in Dexter’s stomach, so some of the wires show through his neck; I usually hide these with a scarf.

Oh, also his tail. Almost forgot, I used these modular cable covers I found on Thingiverse designed by Greg “sirmakesalot” McRoberts in Toronto to make his tail, and used armature wire as a base so you can bend his tail where you want it, and you won’t have to worry too much about his tail hitting people.

Now for Some Monkey Business

MONKEY ON YOUR BACK

To wear Dexter, I use a GoPro mount to attach his chest plate to a backpack strap, so his center of gravity stays low, behind my shoulder. An earlier version sat up high on my shoulder but that was too tippy.

YOUR BASIC RANDOM MOVEMENT SERVO CODE

This Arduino code moves the servos 0°–180° in random intervals; in my opinion, this just helps simulate life. You can rewrite or replace it with your own Arduino code to make Dexter move however you want. There are 5 servos in Dexter currently but the code provides for 7 because I wanted Dexter to have the ability to be hacked or updated later, by me or other people. You can find the code on my Dexter project page on hackster.

EXPANDABLE AND UPGRADABLE

UPGRADABLE

Lastly I wanted to add what’s special about Dexter. The reason there are 4 switch holes in the back of the head design is so you can add other circuits to him.

In different versions of Dexter I have added an LED circuit to glow inside (NeoPixel rings) and a touch sensor to make him do high fives, hahaha (copper tape on his forehead, connected to an Adafruit Circuit Playground microcontroller inside. There’s room for whatever sensors, brains, and behaviors you want to add.

THE FUTURE

I have other, crazier ideas for companions, like a dragon with a real flamethrower — not sure I’ll be able to bring that one to work — a fairy robot, and a fox I’ve already started sketching. Right now I’m working on a smaller dragon that blows smoke from a vape pen (see sidebar). I’ll still work on a bigger dragon one day, but I want to continue upgrading Dexter and coming up with more ways to make more fun bots. Star Wars doesn’t have to have all the cool droids, we can make some cool ones too!

My Companion Bot Menagerie

I’m a workaholic. I love building robots. It’s been a busy year! You can find all my companion bots on hackster.