

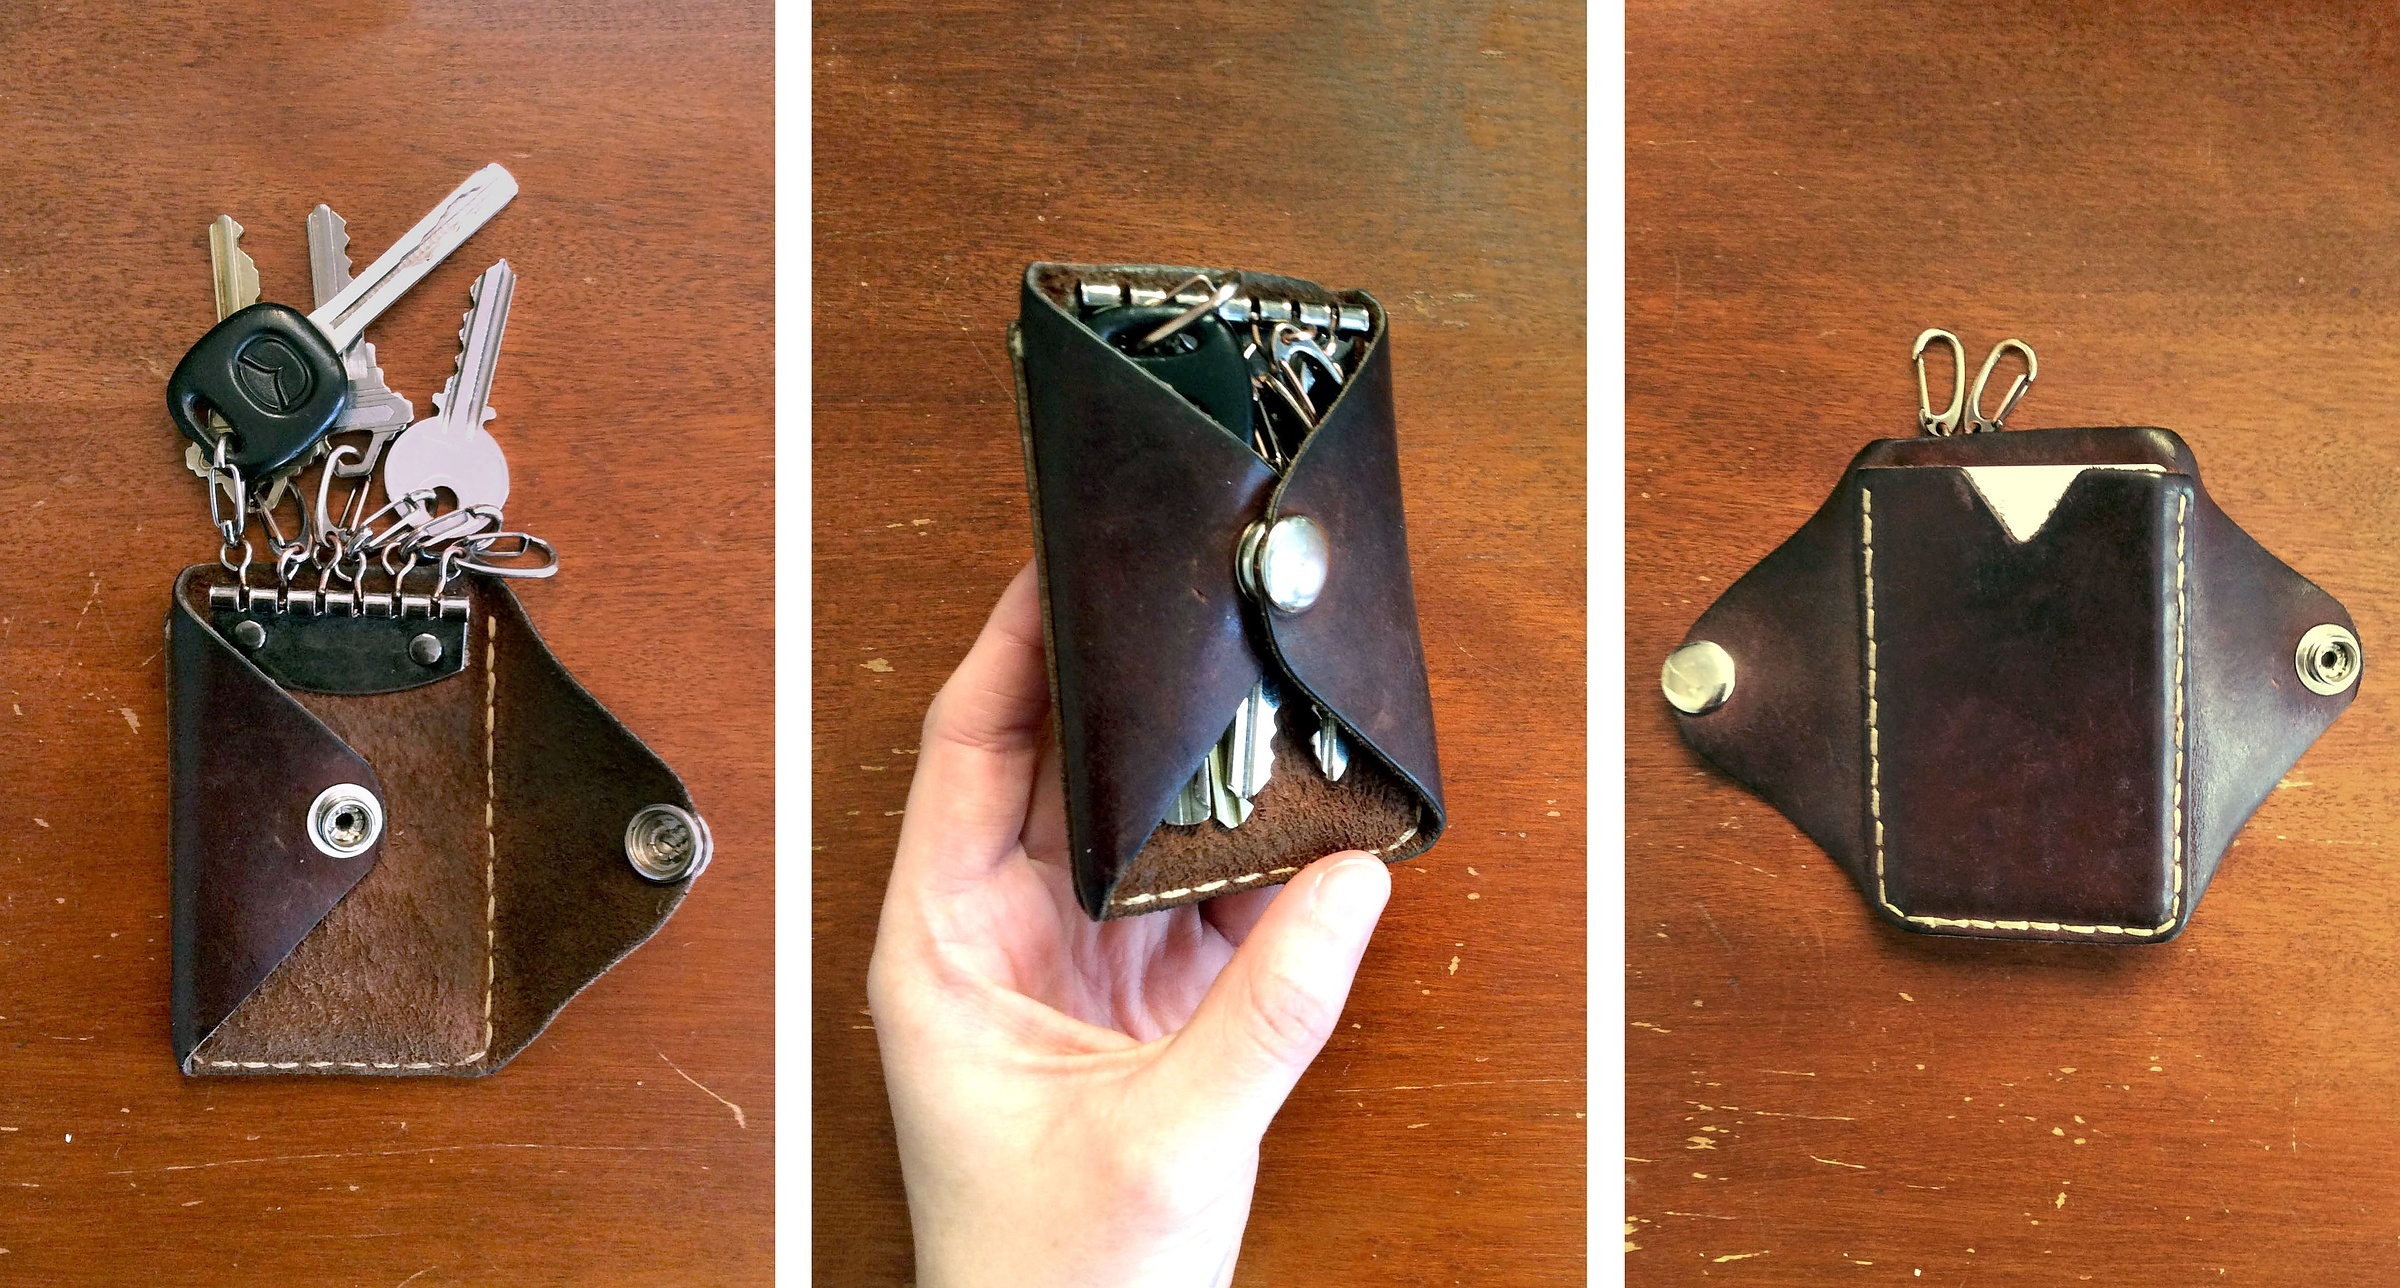

The design for this wallet came out of frustration with how many different things I had to carry to go anywhere. As a human, I tend to fill the allotted space in my purse or wallet to max capacity. The idea here is that by minimizing the available space in a wallet, it forces you to prioritize what you need so that you only carry the bare essentials to leave your house: keys, ID, and currency. No keychains, no forgotten membership cards, no overstuffed coin pocket full of pennies. Cell phone is optional.
I made this key/card holder, honestly, as an afterthought for a fashion collection about 3 years ago, but it turned out to be the most useful thing I made that year. I’ve used it daily and it’s still as good as day one.
Reason #1 that I love working with leather: It ages so gracefully!

Materials Needed
Thick Leather
Getting leather for this project might take some creativity if you don’t have cowhide laying around. (Suppliers usually only sell full hides.)
The material used in this project was from a scrap bin that I had access to through my school, but another cheap way to source leather is a thrift store. Leather purses and motorcycle jackets are a great way to get pieces for a small project. For this project, make sure the material is thick enough that you can’t fully pinch it.
If you’re really ambitious, buy a used leather couch and strip it to stock up for the future! It’s still cheaper than buying a full hide.
Waxed Lacing
You can really use anything here. Find a thick thread, double it up if you want, chip off a piece of a candle, and rub the wax across the thread. Don’t skip the waxing step, it’s so important for durability!
If you work with leather often, I highly recommend this waxed lacing. It’s a very strong, corded thread that doesn’t fray like linen thread.
Hardware
I found the key holder hardware from a thrift store wallet, cut it from the glittery neon blue pleather to salvage it for this project. If you can’t find a used one, you can buy it here.
Snap fasteners are a good thing to have on hand. The one I used is a standard heavy duty 0.5" size fastener. You can get a set here.

Assemble
Print the downloadable pattern here using the “actual size” on letter paper.


