ERICA CHARBONNEAU is a creative technologist and inclusive developer. She currently holds a Master of Design, Inclusive Design from OCAD University in Toronto, Ontario. She is interested in how communities design, develop, fabricate, and share downloadable assistive technologies online.
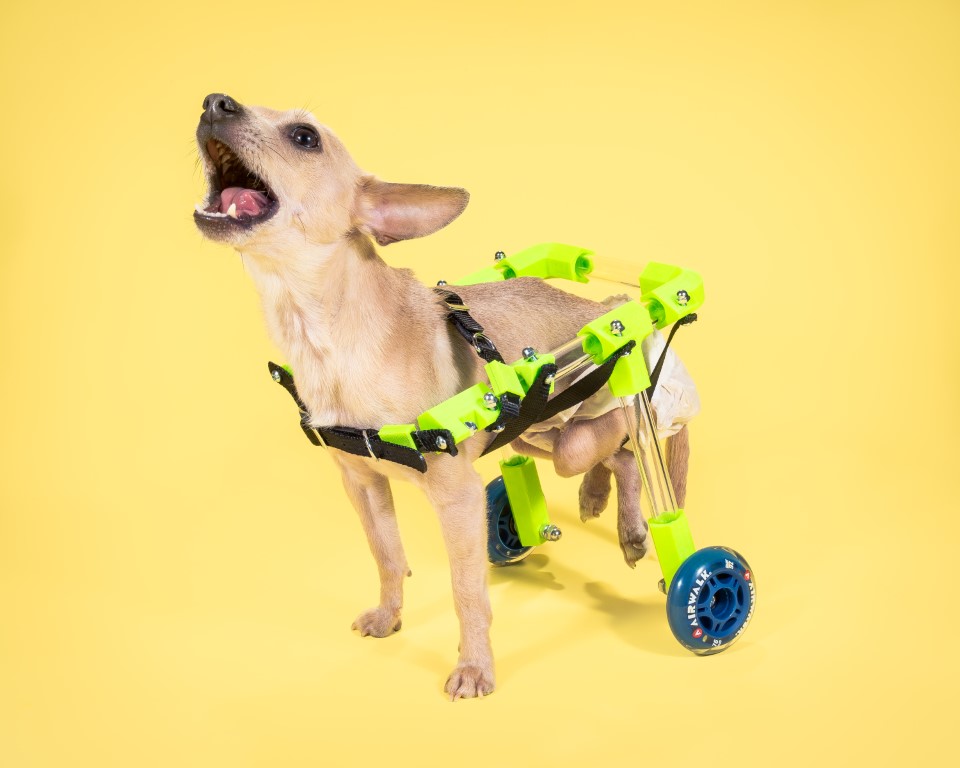
A friend needed a wheelchair for their French Bulldog at short notice. They were unable to afford the costly commercial wheelchairs available online. I rose to the occasion to design something for an adorable dog, and the results were fantastic. Murray loved her chair!
I’ve since built two other chairs for dogs, and I’ve worked on iterating on what I call the “FiGO” design and documentation to encourage dog owners to tackle this project for their pet in need.
This device uses parametrically designed 3D printed joint pieces that fit into acrylic or aluminum tubing. The tubing can be easily customized to the dog for both fit and style, and the 3D printed pieces can also be personalized via the Customizer application on Thingiverse. Currently screw size, tube outer diameter, wheel angle, and your dog’s measurements can be input to view a rendering of your dog’s custom wheelchair. However, the standard pieces are available for download on Thingiverse. I’m working on making the pieces resizable based on your dog’s weight for added strength (currently you can do this by manually scaling the pieces).
All the other materials used in the project can be sourced locally at a hardware store or online on amazon.com.
In order to determine what size your wheelchair frame needs to be, you’ll have to measure your pet properly.
The diagram above depicts the three measurements that need to be taken. Measurement A is the width of your pet, measurement B is the height of your pet from the ground to the top of their shoulder bone, and measurement C is the length of your pet from chest to tail.
Once you have these measurements, you’ll need to do a few simple calculations to determine the lengths of tubing that will be required for your FiGO wheelchair. You will need 6 pieces of tubing, cut to the following lengths:
» 2 width tubes: measurement A plus 1″
» 2 length tubes: measurement B minus the radius of your chosen wheel, then minus 1″
» 2 height tubes: measurement C minus 2″
I have created a simple Google spreadsheet that does these calculations for you as you input your dog’s measurements. Click on File→Save a Copy to edit the file for yourself.
Take both of your A pieces and a width tube, and slide an A piece onto each end of the tube. Make sure the tabs that will be used for the straps are facing in the direction pictured.
Next connect both A pieces to both length tubes.
Slide both B pieces down the length tubes leaving about 1″ or so between B and A (this will change depending on your chair size, and you can easily adjust these pieces later to match your pet’s size). Make sure the tabs on both pieces are facing outward, and are both pointing to the back of the wheelchair (toward piece A) as shown.
Now do the same with both C pieces, remembering that the tabs are on the outside of the wheelchair.
Cap both D pieces on the ends of the length tubes, with the tabs facing outward.
Place both height tubes (measurement B) in both B pieces and then set your wheelchair frame aside.
Now take both E pieces and the remaining width tube and connect them together. (For dogs smaller than 10 pounds, this step is not required; you can print a different version of piece E with no added support bar.)
Connect both E pieces to the bottom of the height tubes on your frame .
NOTE: After the FiGO wheelchair is complete, the width tube between the two A pieces, as well as the height tubes connecting pieces B to E, can be glued with Gorilla Glue to ensure stability of the chair. This is not as important when the dog is very light, but is recommended otherwise.
Make sure you’ve added your bearings to your wheels if they don’t already have them. Then bolt the wheels to the E pieces using the 3″ screws, capped with acorn nuts. You may need to use a screwdriver and/or a wrench for this.
Finally, add the straps . Both collars will be fastened to pieces D at the front of the chair, and the rest of the straps will be made out of a dog leash (or any piece of webbing that you may have). Pieces A will require a longer strap, for the dog’s legs. Pieces B and C’s straps are for the dog’s belly and will need to be the same size.
Cut the dog collars in half; you’ll use the existing buckles to adjust the fit. Later you can cut them down shorter if need be. The fit will have to be very secure.
To measure the body straps, first place the leash around the dog when it’s standing in the chair, to see how long these need to be. Make the leg strap slightly longer than the belly straps.
Cut the straps with scissors, then quickly pass over the ends with a lighter to prevent fraying. Once all your straps are cut to size, punch a hole into each end with scissors (the collar straps only need to be punched at the ends that you cut). Better yet, use a soldering iron to burn a hole through the strap. This will melt the plastic, preventing any fraying.
Secure the straps to the tabs on each joint piece using the ¾” screws and acorn nuts, and make sure they’re tight. (I used a different type of screw in the prototype shown here.)
All dogs will take time to get used to their wheelchair. Some adapt really quickly and some hate their chairs initially. It takes work to train a dog to be comfortable with their wheelchair.
I’ve worked with three dogs so far and I’ve experienced: a very comfortable and quickly adapted dog, an anxious and moody dog, and a timid pup. I’ve learned that leaving the chair in your living space and just letting your dog approach it and sniff it helps!
ERICA CHARBONNEAU is a creative technologist and inclusive developer. She currently holds a Master of Design, Inclusive Design from OCAD University in Toronto, Ontario. She is interested in how communities design, develop, fabricate, and share downloadable assistive technologies online.
IMPORTANT: Consult with your vet if you have any questions or concerns about the fabrication or fit of the wheelchair.
ERICA CHARBONNEAU is a creative technologist and inclusive developer. She currently holds a Master of Design, Inclusive Design from OCAD University in Toronto, Ontario. She is interested in how communities design, develop, fabricate, and share downloadable assistive technologies online.
When you buy through links on our site, we may earn an affiliate commission.
Our websites use cookies to improve your browsing experience. Some of these are essential for the basic functionalities of our websites. In addition, we use third-party cookies to help us analyze and understand usage. These will be stored in your browser only with your consent and you have the option to opt-out. Your choice here will be recorded for all Make.co Websites.
Allow Non-Necessary Cookies
Escape to an island of imagination + innovation as Maker Faire Bay Area returns for its 15th iteration!
Buy Tickets today! SAVE 15% and lock-in your preferred date(s).