Scott Wegner is a musician, maker, entrepreneur, and technology educator who has been working in the education field since the mid-90s. Scott was a founding partner of Atomic Learning Inc, an online Education Training provider. He strives to inspire students, friends and family with novel applications of technology in daily life.
A few times a year I volunteer to an arts organization and serve as their “house sound and light guy.” I usually run sound and do the lights for the traveling acts if they don’t have a tech with them. The auditorium is in a rural Minnesota area, but even so, we try to host a professional quality event for our concert goers and guest artists.
Small details such as pre-show and intermission music in the lobby area before the show make a big difference. Often I toss a CD of royalty-free light music into my ‘go bag’ before I leave home – to play through the house and lobby speaker systems. Sometimes I put on my “radio voice” and do the lobby announcements.
Getting the right blend of background music, voice-over, and a pleasing overall level can be tricky. There is an existing “Intermission Signal Bell” built into the lobby amplifier system…. but no ones uses it because it sounds like something out of the stone age.
I’d often thought: “how could I automate this task and make it stupid-crazy simple?” Wouldn’t it be nice to make it easy and available so that ANYONE could do it and get consistently good results? That way, any teacher or student at the school auditorium could just press a button and have prelude or intermission music start up in the lobby for their concert or program.
So that was the beginning of the need – what follows is my solution.
When I started experimenting with the Raspberry Pi (rPi), I realized that it would be the perfect little device to automate my music and announcement task. Granted, I maybe could have made it work using a less expensive Arduino, but for the cost difference, I’m not sure that the technical “hoops” would have would have been worth it. Some of the inspiration for the device I had in mind came from the Richardson and Wallace article “Simple Soundboard” in issue 33 of Make: magazine. There are some key differences however.
The Raspberry Pi lent itself very well to all of the requirements I had in mind: 1) I could store the playback audio files on the SD Card file system, 2) I could use the GPIO pins for both the trigger switches and for a front panel “ready” light, and 3) the rPi could easily play back audio files through its audio out jack. All I had to do was put the pieces together into a simple and rugged case.
There are five main components that comprise my Pi intermission/announce unit listed on the right of the page. The total investment is probably in the $130 range. Although many of the parts were dug up and found rattling around in my parts/junk bins and scavenged off eBay.
I wanted the device to mount unassumingly into the rack that all the other auditorium hardware was in, so that meant I needed a rack mount case. I was surprised to find that rack mount project enclosures were really expensive no matter where I looked, even on my favorite bargain shopping hangout: eBay. It was far more economical to just buy some sort of rack mount JUNK that didn’t work, rip the guts out, and then recycle and use the rack case. For this project, the case from on old “Alesis MIDIVerb II” worked great. After removing all of the original buttons and switches – I glued a strip of aluminum sheet metal over the front to cover up the existing holes and mount the new buttons onto.
Recycled case showing aluminum strip and mounted buttons.
I also didn’t want a “wall wart” or any sort of external power supply box, so I decided to look for power options that would allow me to mount a standard C14 power socket into the back of the rack case and feed the AC mains from that into switching power supply modules which would then feed the devices. The AC power supply modules were purchased on eBay. They are pretty simple: 120V input and 5V and 24V outputs each.
The power supply units.
I picked up a few RDL Audio Distribution Amp modules on an eBay auction for next to nothing. I see now that they are rather expensive if purchased retail (around $130 each), so all I can suggest is to keep your eyes open for eBay bargains on those! You can still snag an STA-DA3 for around $30 each used on eBay. I used simple Plumber’s Strap to fasten it into the rack case.
The ST-DA3 strapped into the case.
Also from eBay are the momentary contact switches shown below mounted into the case:
Mounted switches
And of course the Pi unit mounted with a simple 3D printed case:
Here is a diagram of the most important bits of the project:
Wiring diagram
I had some trouble with double triggering with the announcer button and so I put a 0.1uF capacitor across the switch terminals. With that and the debounce function of the GPIO event detection routine, the problem went away. Also, the ground of the LED resistor is tied to pin 14 on the Pi header which is generally labeled as “DNC” for “Do Not Connect,” but it appears that many of the DNC pins are just grounded anyhow, so they make a convenient spot to hook into when a ground is needed. I guess they call them DNC because they are planning to use those pins in future revisions of the Pi board and don’t want people getting used to using them. So keep an eye out for that change!
I used header pin jumper wires to connect up most all of the parts to the Pi headers:
Header jump wires
And soldered resistors to the switches and LED as needed:
Wires soldered directly to LED.
The power supply connections and the audio connections were straightforward. For the 5V power to the Pi unit I connected the switching supply up to pin 2 on the Pi header (5V) and pin 6 (ground). It was far easier using header pin connectors than adapting a micro-USB connector to the supply wires.
I used a simple ⅛″ mini-plug to connect audio out (unbalanced) to the input of the distribution amp. I only connected the left audio out channel since the system in the auditorium was mostly mono and and stereo signal wiring would have been wasted effort.
First, a note about the code: Don’t judge me too harshly for it. I am not a code developer. I took bits and pieces of it from places all around the net, and through trial and error I found something that worked.
The pygame toolkit is the heart of the system. Apparently the toolkit’s primary audience is high school students who want to learn to write simple video games in Python, but it has a very nice programmatic interface for handling audio playback. Most importantly, it has methods for layering and mixing various audio channels. That way, a background music track can be playing and one can easily mix another track over the top of it, in this case, a voice announcement.
There was one huge hurdle to start with: Even though I could play various tracks, I had a hard time figuring out how to do the actual layering. I discovered that spawning each audio element as its own thread with the Python “callback” function was the key. That essentially allowed each audio element to exist in its own space and not need any further attention once started.
Also, another bit of the puzzle was using the Pi GPIO Event Detection function to simultaneously detect the button pushes and debounce them and call the appropriate code subroutine. Whew! That’s a lot!
Here is the code as I currently run it:
This file contains bidirectional Unicode text that may be interpreted or compiled differently than what appears below. To review, open the file in an editor that reveals hidden Unicode characters. Learn more about bidirectional Unicode characters
I wanted the program to start up at boot and in case the program crashed, I wanted it to restart automatically. It seems pretty stable, but I have had it segfault/crash on me a couple times as I randomly and quickly pushed the buttons. I didn’t anticipate it being an issue, but having a ‘watchdog’ restart the process in case it died seemed like a good idea. I found something that I could put into my /etc/rc.local that did both things: 1) startup at boot and 2) auto-restart on crash or exit – lines 5-17 below.
[code language=”bash”]
#!/bin/bash
#
# rc.local
PYTHON=/usr/bin/python
function myprocess {
cd /home/pi/soundboard/
$PYTHON sound-control.py start
}
NOW=$(date +”%b-%d-%y”)
until myprocess; do
echo “$NOW Prog crashed. Restarting…” >> error.txt
sleep 1
done
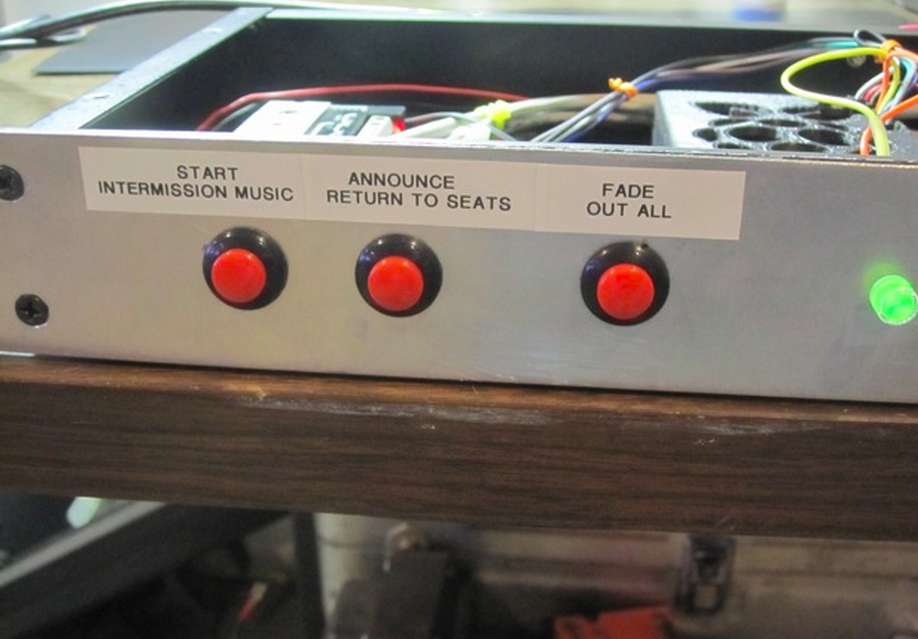
I added a little description on the front panel of what the unit does — instructions if you will — for any student or staff tech people who may wonder what the new box in the equipment rack is supposed to do:
Front panel instructions
Conclusion
I think that the beauty of the Raspberry Pi — or any number of other modular electronic devices appearing on the market lately, for that matter — is that they allow you to “scratch an itch” that you maybe could not afford to in the past. I could have set up a computer with iTunes and hooked that into the auditorium system, but not very long ago, the school district would not have had a computer just ‘laying around’ to dedicate to the task. And even if I did dig up an old computer to serve as an intermission music/announce unit, it would have been a little complicated and I imagine that rather than students using it, they would have let it collect dust. But the “single mindedness” and simplicity of devices built with Raspberry Pi units and Arduinos and Beagle Bones suit them to single, simple tasks. And not to mention they are just plain fun to build.
Scott Wegner is a musician, maker, entrepreneur, and technology educator who has been working in the education field since the mid-90s. Scott was a founding partner of Atomic Learning Inc, an online Education Training provider. He strives to inspire students, friends and family with novel applications of technology in daily life.
When you buy through links on our site, we may earn an affiliate commission.
Our websites use cookies to improve your browsing experience. Some of these are essential for the basic functionalities of our websites. In addition, we use third-party cookies to help us analyze and understand usage. These will be stored in your browser only with your consent and you have the option to opt-out. Your choice here will be recorded for all Make.co Websites.
Allow Non-Necessary Cookies
Escape to an island of imagination + innovation as Maker Faire Bay Area returns for its 15th iteration!
Buy Tickets today! SAVE 15% and lock-in your preferred date(s).