YouTube player

The Chameleon Bag is an interactive messenger bag with a reactive front panel. I wanted the bag to display animations and patterns across its front flap as the user places different RFID-tagged objects into it, and I accomplished this by combining a Boarduino microcontroller and an RFID reader inside the bag, along with 49 RGB LEDs on its front flap.

Designed into the coding are three specific uses, with potential for more. First, the bag keeps track of the RFID-tagged items placed inside and warns the user through light displays if an important item, such as keys or cellphone, is missing. Alternately, the lights can change color to match clothing or accessories embedded with RFID tags. And finally, it can be programmed to display cheery animations when a favorite totem with an RFID tag is placed in the bag, enabling the user to share her good mood with the people around her. Since the user has access to the microcontroller, she can code additional uses to change the colors and animations of the display.


  • Time Required: 6–8 Hours
  • Cost: $180–$200

Project Steps

Set up the electronics.

First, solder your Boarduino following the directions at Adafruit. Connect it to the computer using the FTDI cable; the colored wires with female headers go onto the back wall of pins (black goes to ground, for orientation). Download the project code and open it in the Arduino IDE software, select Tools → Board, and select Duemilanove with ATmega328. Upload the code to the board and launch the Serial Monitor by clicking the icon in the upper right-hand corner. It should tell you that no RFID reader is attached.

Next, set up the RFID reader using the Adafruit tutorial. Solder the two 3-pin strips, but don’t solder the 8-pin strip. Follow the directions to connect the RFID reader to the included 4050 level-shifter pin. Mount the 4050 onto the small breadboard, and temporarily connect it to the RFID reader and to the Boarduino with jumper wires, using the diagram above for reference. NOTE: If you’re having trouble programming the Boarduino, try moving the jumper over one pin.

Now you’ll test the RFID reader with some RFID tags. First, reload the code and open the Serial Monitor. It should now recognize that the reader is attached; if not, check your connections.

Each RFID tag has a unique number, and you’ll see these numbers flash onto the Serial Monitor when you place a tag within 4″ of the reader. Copy and paste these tag numbers into a text document for reference. In the project code, about halfway down, change the cardidentifier variables to your unique tag numbers to choose what animation or colors you’d like to see when the reader reads that number. Then reload the code to your Boarduino. Now you can label your RFID tags to keep track of which tag launches which display.

You’re ready to set up the RGB LEDs. Refer to the Adafruit tutorial for the specific wires. You’ll need to power the LEDs with the 5V plug-in power supply while testing so they don’t try to pull 5V through the Boarduino. Connect the other wires temporarily to the Boarduino as outputs. With the Serial Monitor open, test the RGB LEDs by trying the tags you’ve assigned colors to. You may need to troubleshoot if something is not properly connected.

Once you’ve gotten all the components to work together, you’re ready to make these connections permanent! Arrange all your components onto a 2″×4″ protoboard. Use the 16-prong socket for the RFID reader’s 4050, and two 15-pin strips of female headers to make a strip for each side of the Boarduino. Solder the socket and female headers in place. Solder all the connections between the 4050 and the Boarduino.

Cut extra long wires for the connection between the 4050 and the RFID reader, and solder the wires to the protoboard, waiting to attach the reader until we determine the length we need. Cut extra long wires for the RGB LEDs as well, about twice as long as the RFID wires.

Sew a bag or repurpose one.

When you want a break from the electronics side, start sewing the bag, or skip to the end of this step to repurpose a bag.

Using the downloadable sewing template as a reference, cut out 2 rectangles from the gray canvas, one 28”x20” and one 27”x20”. These are the inside and outside walls of your bag.

Cut a hole for the zipper in the inner rectangle near the top. The zipper should be large enough to access your electronics through. Pin the zipper to the fabric and machine sew the zipper to the bag. This zipper will allow you to access the electronics and switch out the batteries.

Also, at this point, feel free to add any extra pockets you may need: cut out the desired pocket size, fold in 1/4″ on each side, sew the top seam of the pocket, then pin the other three sides to the bag, and sew the pocket on. Finally, add the magnetic snaps per the instructions on the packaging.

Fold the main bag rectangles in half with the right sides facing each other, and sew 1/4” seams down both sides. Fold the seams open and iron, flattening the bottom corner. Sew a line perpendicular to the side seam 2” from the corner (as shown in the middle image above). This seam will give you the flat bottom of the bag. Sew the inner bag to the outer bag, leaving the back edge open for adding the electronics.

Referring to the template, sew all of your strap components: one very long main strap and 2 short strap loops for the sides of the bag. Tuck the short strap loops, with the metal loops threaded through, into the sides of the bag, and sew 1/4” seams around the 2 sides and front of the bag. Do not sew the back panel of the bag!

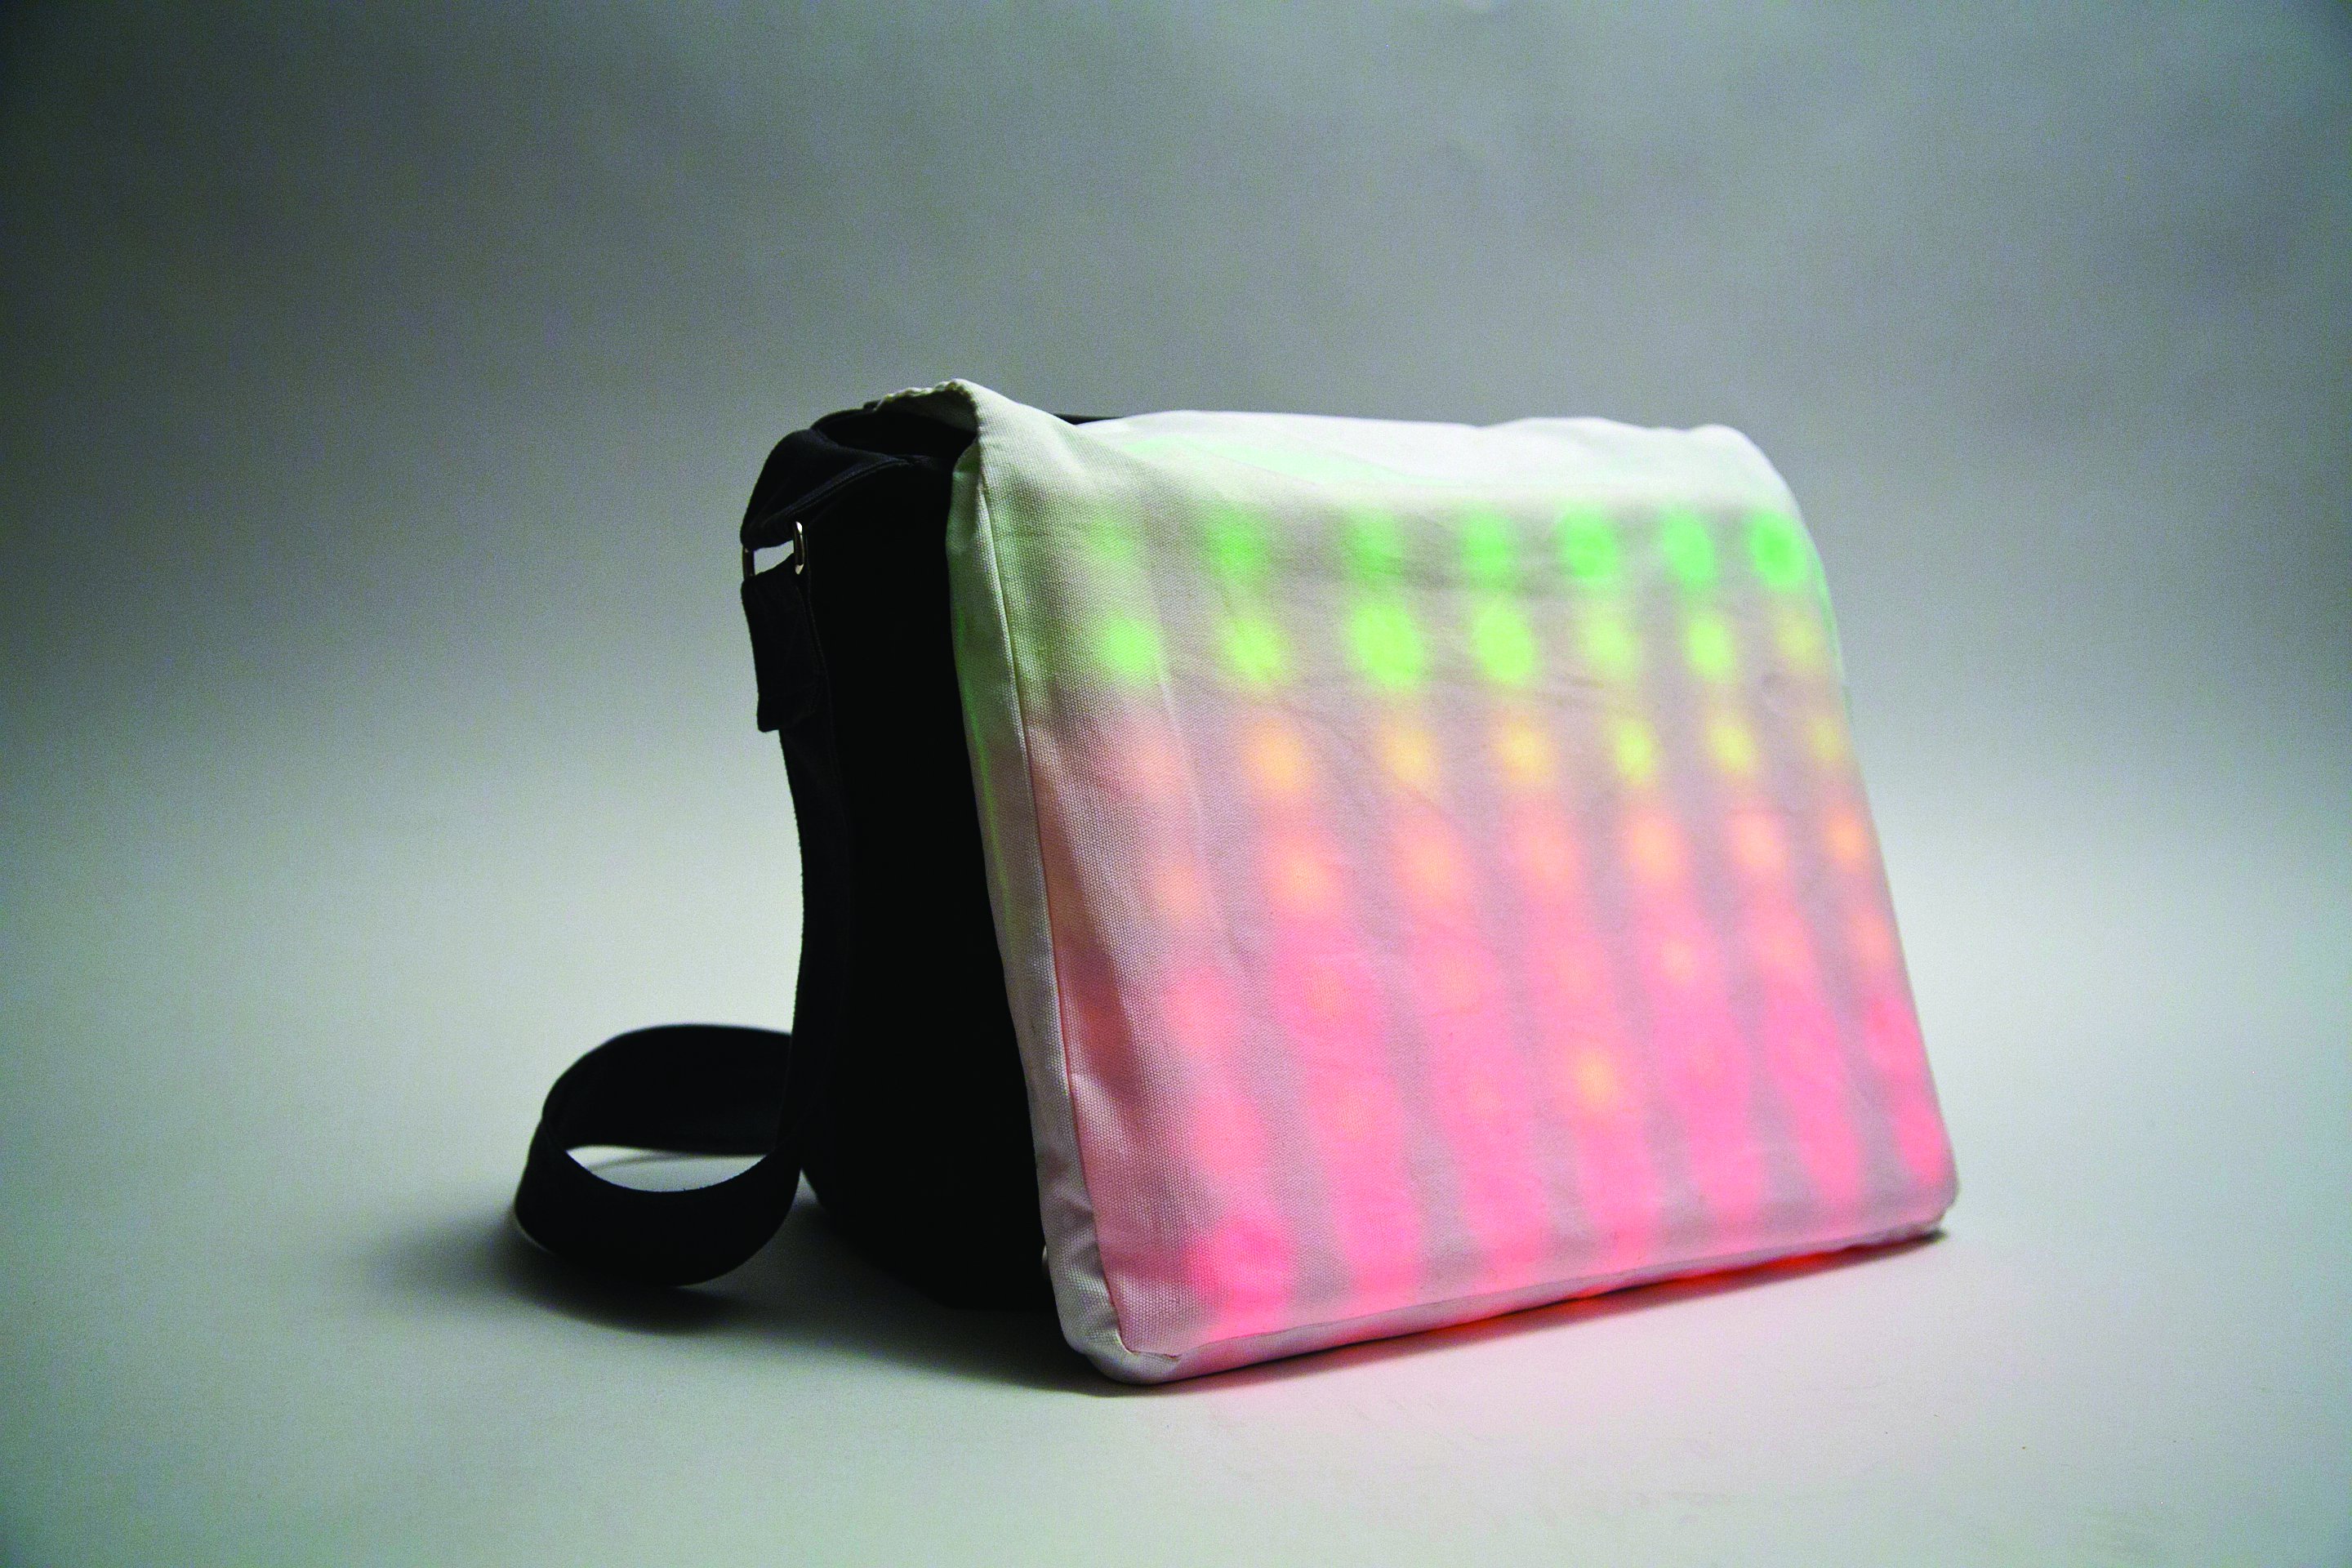
Using the template as a guide, out of the white canvas, cut two 18”x15” rectangles with curved corners and a 39”x2” strip for the front flap. Sew the strip between the 2 rectangles, creating a slot for the front RGB LED panel to fit into. Finally, attach the panel.

Alternately, to repurpose an existing messenger bag, use a seam ripper to open the back panel of the bag and carefully disassemble and remove the front panel. Sew a zipper into the inside of the back panel to allow access to the electronics and batteries. Follow the instructions above to make a new front panel, but adjust the size to fit your bag. Now continue with the directions below, adjusting measurements as needed to fit your bag.

Assemble.

Using the downloadable template, laser-cut or drill holes in the thin plywood to fit the RGB LEDs and hold them in place in a grid pattern. (If you’re repurposing a bag, adjust the template to fit into your bag’s front flap.) Then push each LED into a hole, and use electrical tape on the backs to hold them in place.

Cut your upholstery foam into two 13″×10″ rectangles (or the size of your repurposed bag), one for the back panel and one for the front panel that will cover the LEDs. On the back foam panel, cut out cavities (not all the way through) to hold the electronics. On the front foam panel, use an X-Acto knife to cut Xs where the LEDs will push into the foam. The foam will diffuse the LEDs’ colors and make them flow together.

Insert the electronics in the spaces you cut out in the back foam panel, then trim and solder the wires to the RFID reader. Cover the LED board with the front foam panel and insert it into the white front flap of the bag. Measure where the other half of the magnetic snaps should go on the bottom of the front flap and attach them. Measure and finalize the wire lengths from the Boarduino to the LEDs, take the electronics out of the bag, and solder the final wires in place.

Finish your Chameleon Bag.

Put all the electronics back into their respective bag parts. Insert the front flap’s extra fabric down into the back of the bag. Fold the raw edges of the back panel into itself and pin everything together. Sew the panel together, taking care not to damage the electronics or break your machine’s needle on the LED wires.

Unzip the back zipper, insert the battery holder, plug it into the Boarduino, and test. Now your Chameleon Bag can tell what‘s missing, express how you’re feeling, or just match your outfit.

Conclusion

This article appeared in MAKE Volume 37, page 86.Share it: #chameleonbag