


This is our instructions for the Learn to Solder skill badge sponsored by RadioShack at Maker Faire Bay Area 2012.
Projects from Make: Magazine
Maker Faire 2012 Electronic Skill Badge
Learning to solder has never been so easy.

Learning to solder has never been so easy.
This is our instructions for the Learn to Solder skill badge sponsored by RadioShack at Maker Faire Bay Area 2012.

Check your kit’s contents.
Printed circuit board (PCB)
(2) Light Emitting Diodes (LEDs)
Battery holder
3V battery
Tie-tack pin
Tie-tack clutch
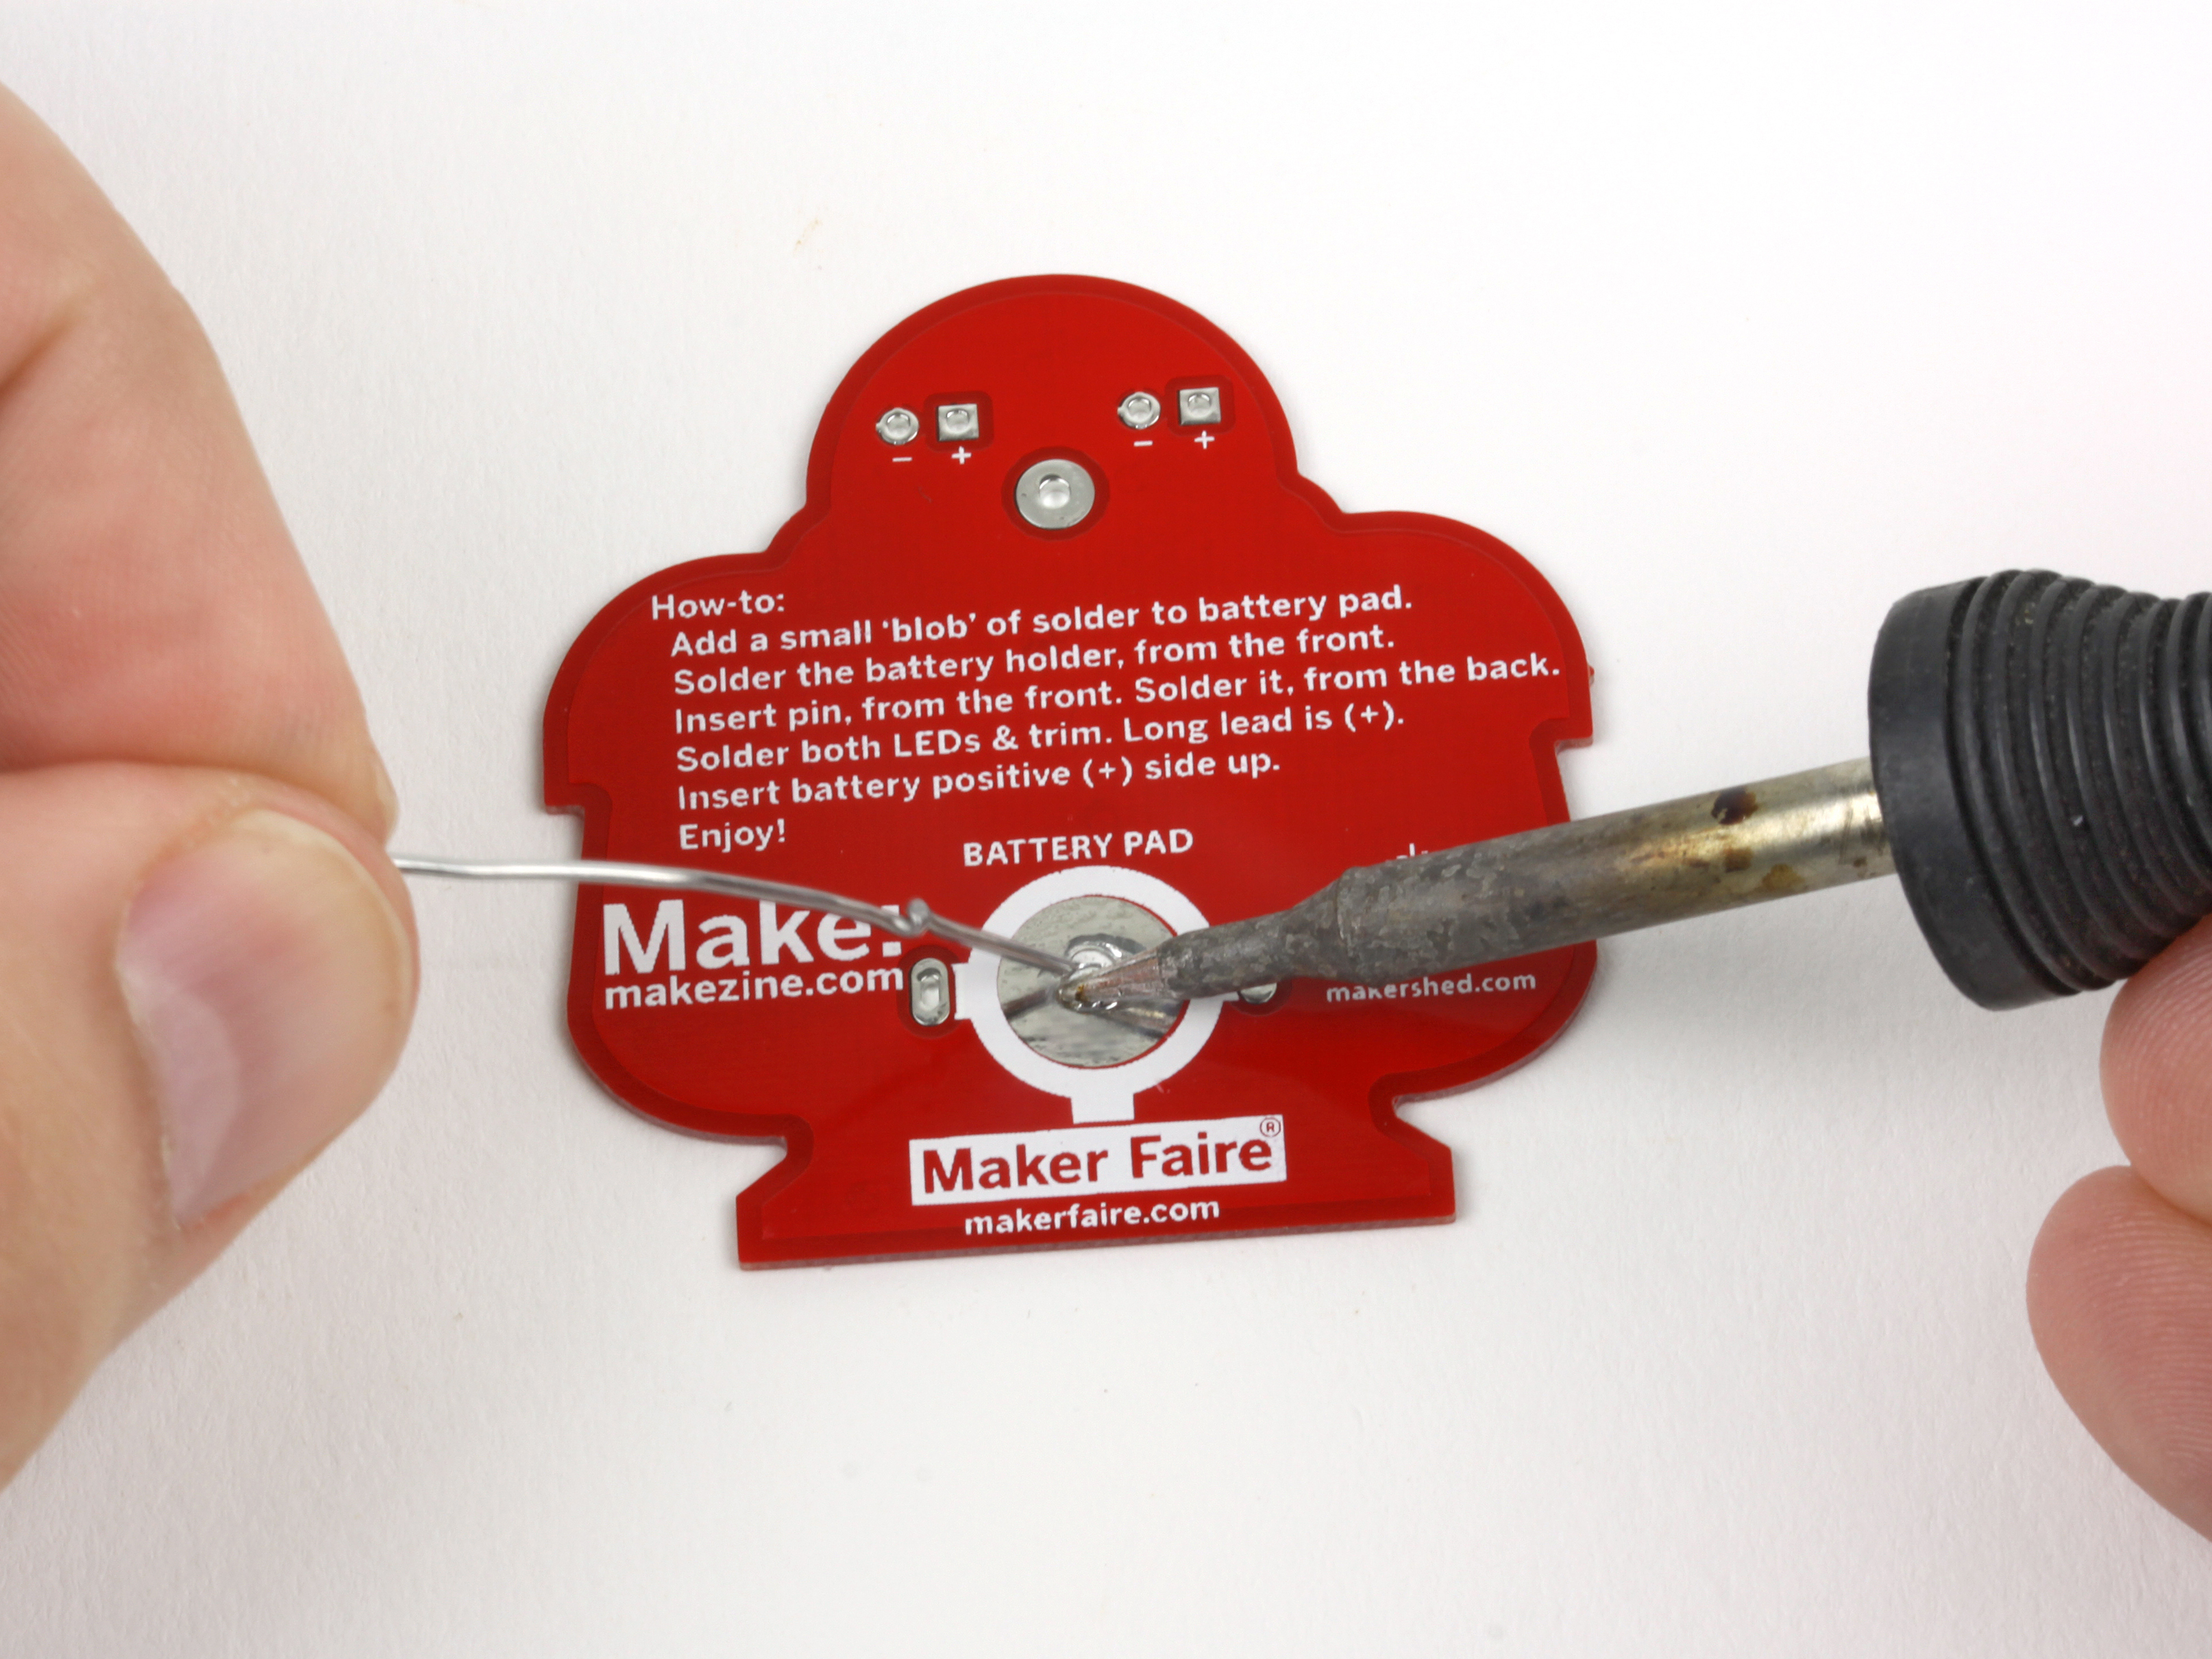

We’ll start by adding a “blob” of solder to the battery pad on the back. Heat up the pad (it looks like a silver disc) for 2-3 seconds, feed in some solder, and spread it around with the tip of the iron. It should look like a shiny, flat puddle that covers the entire surface of the silver pad.
This will act as a “cushion” to help keep the battery in place later.

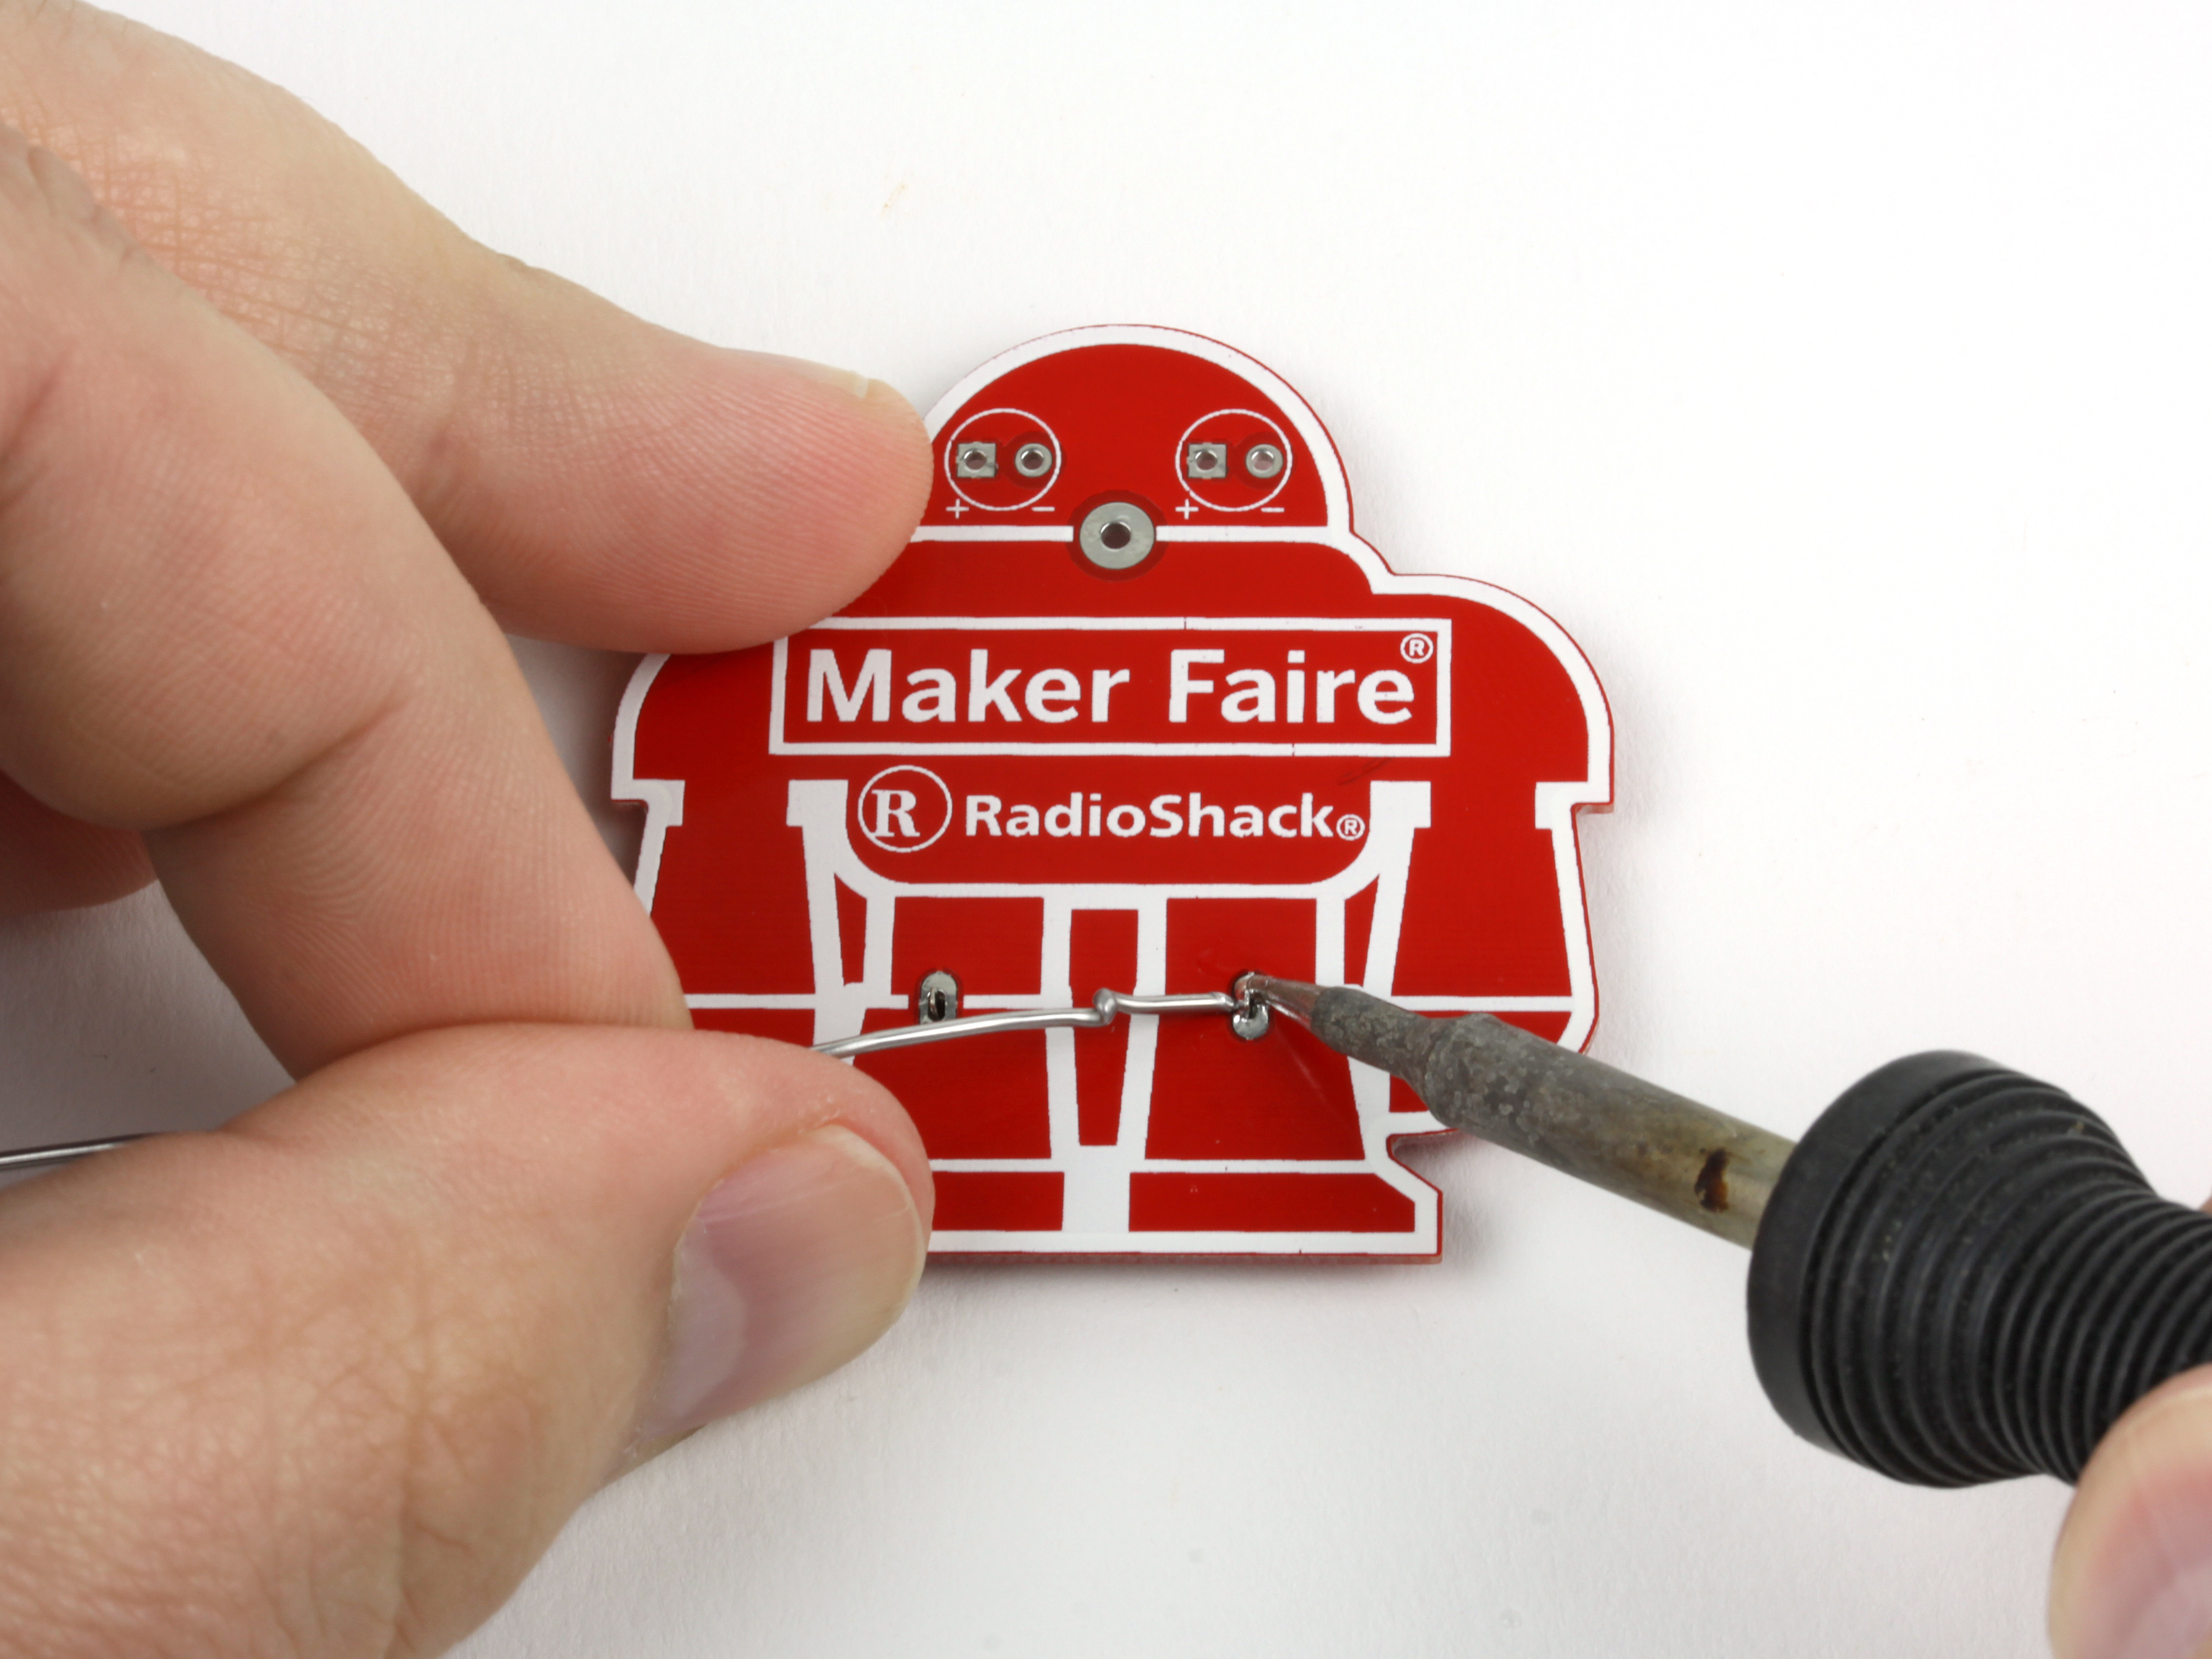

Next, arrange the battery holder on the back of the pin. Place the little “arms” of the battery holder through the tiny holes in the PCB. It should NOT be flush to the PCB, but sit on top of it like a table, leaving space for the battery to be inserted later.
Gently flip it over onto its back, and place it on a flat surface. Solder the battery holder in place by heating up the “knee” joints on the front of the PCB and applying solder where the points of the battery holder peek through the knee joints.

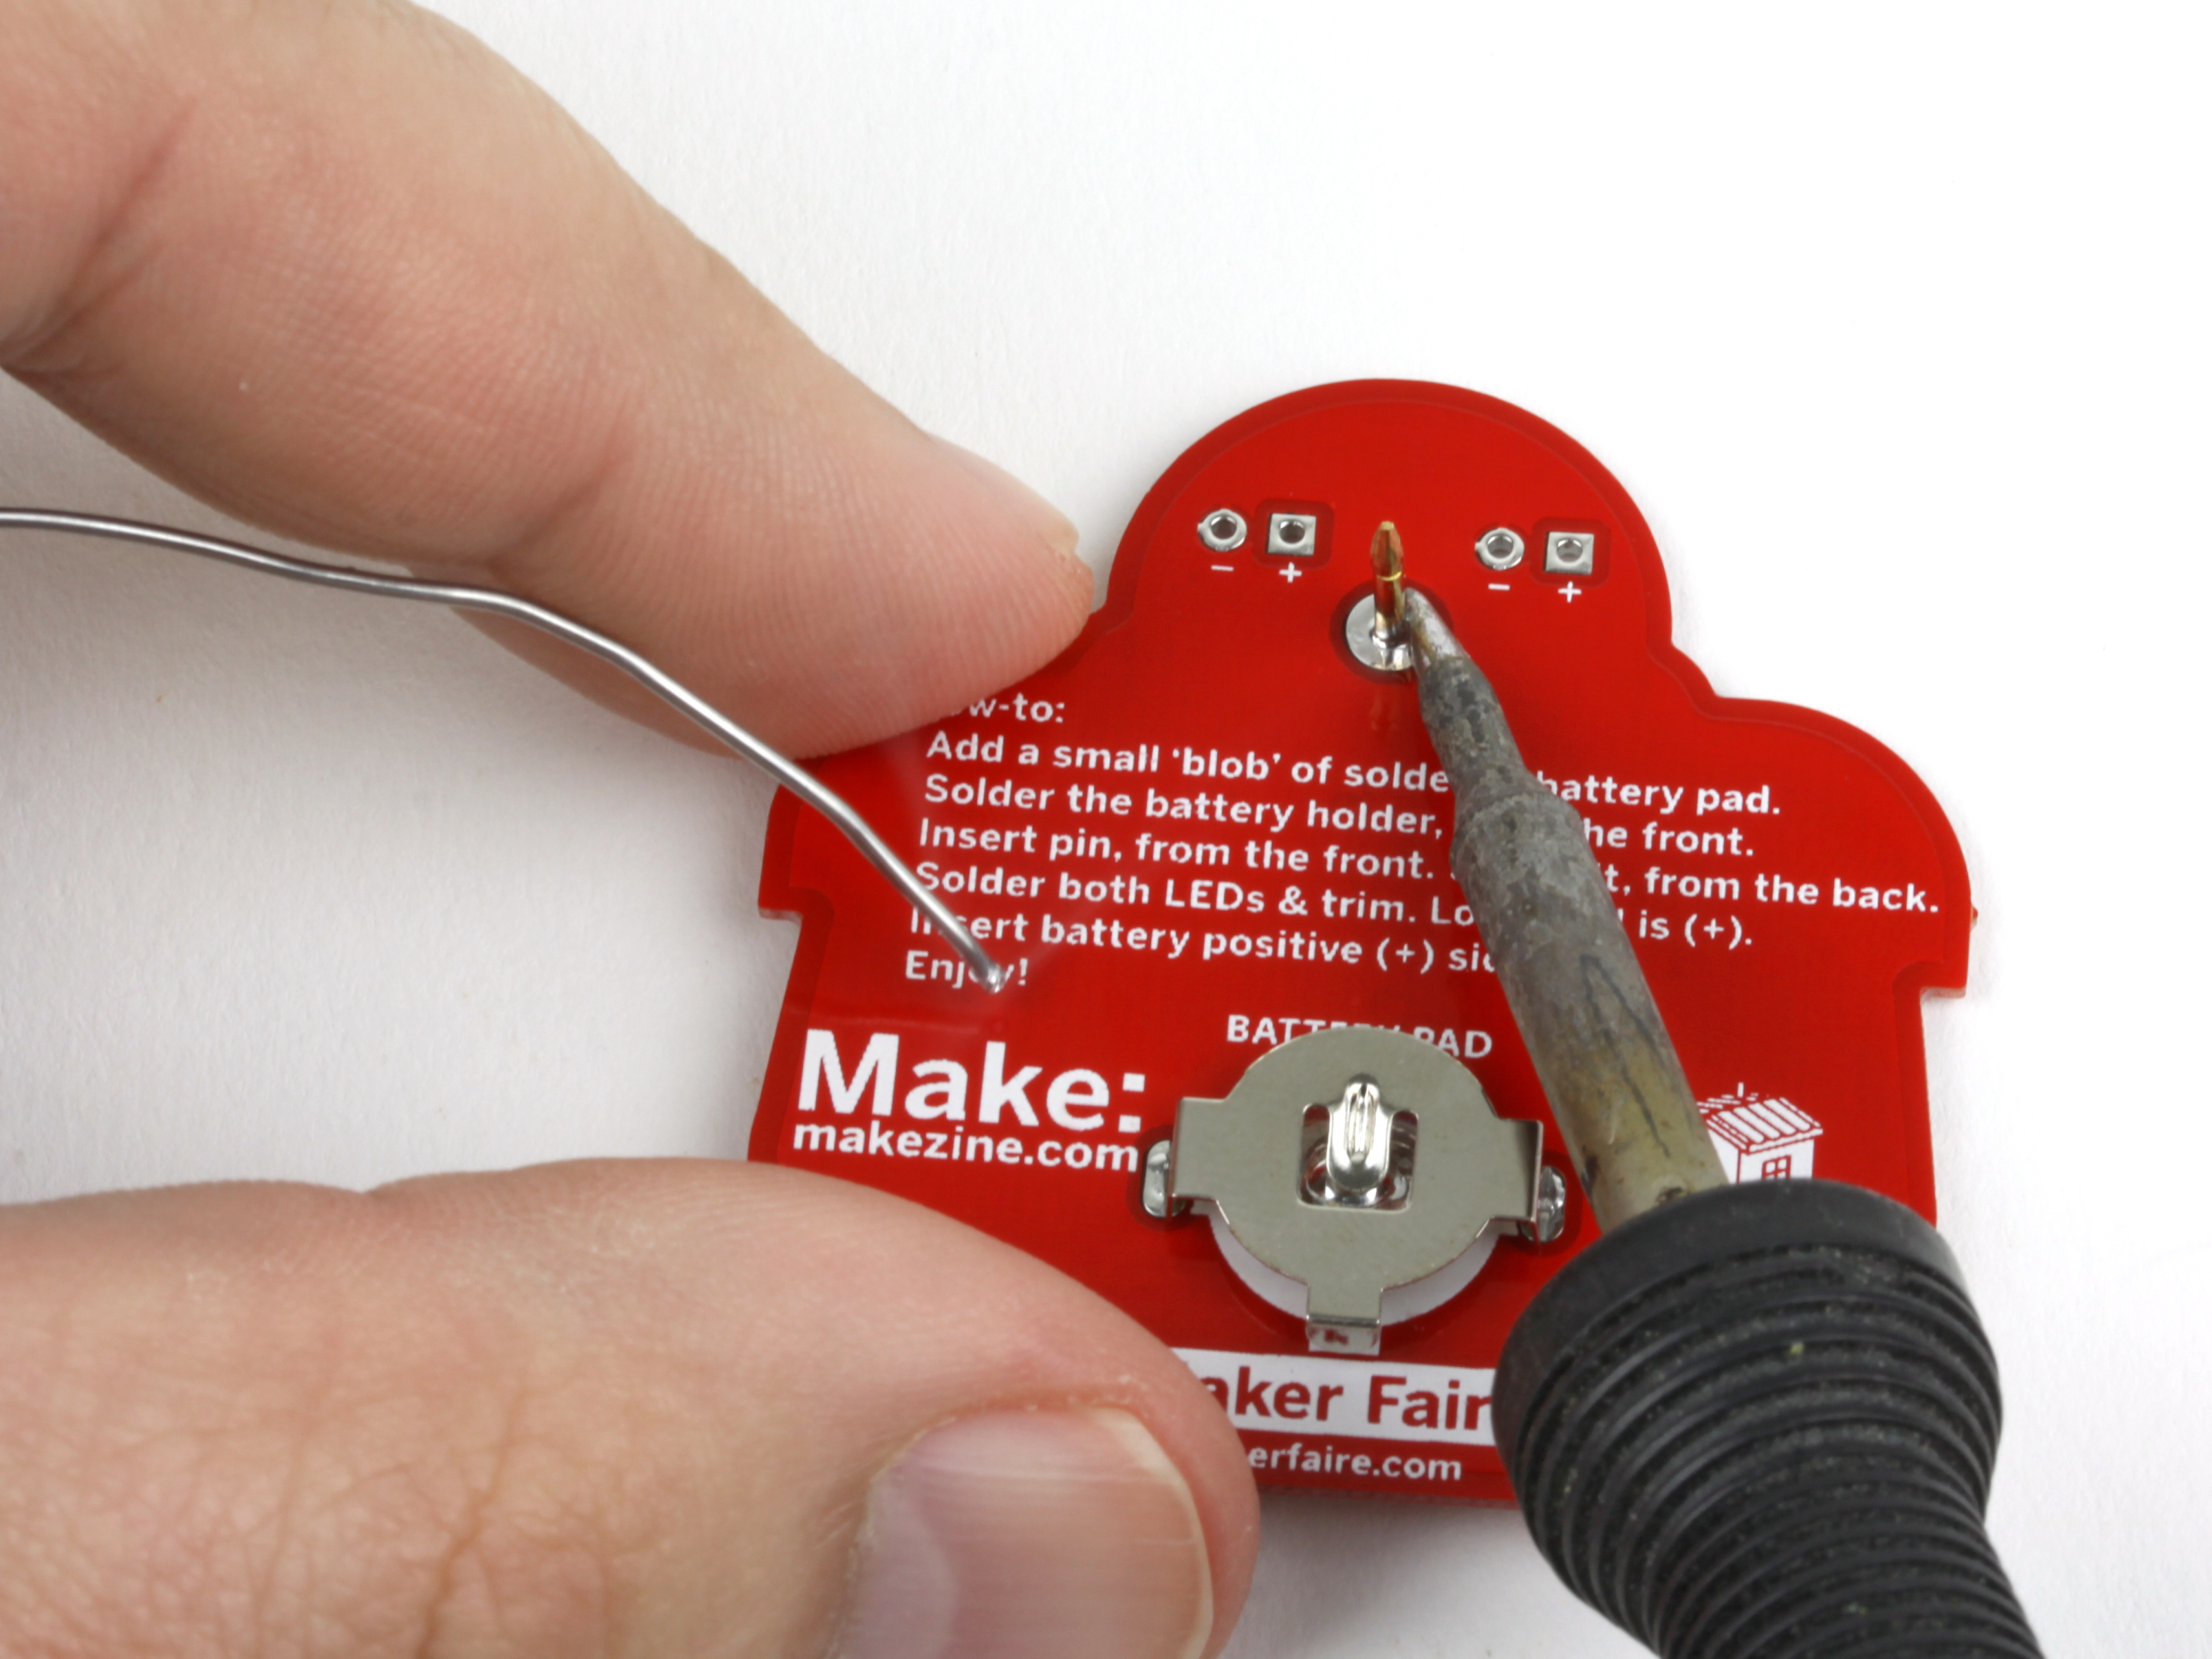
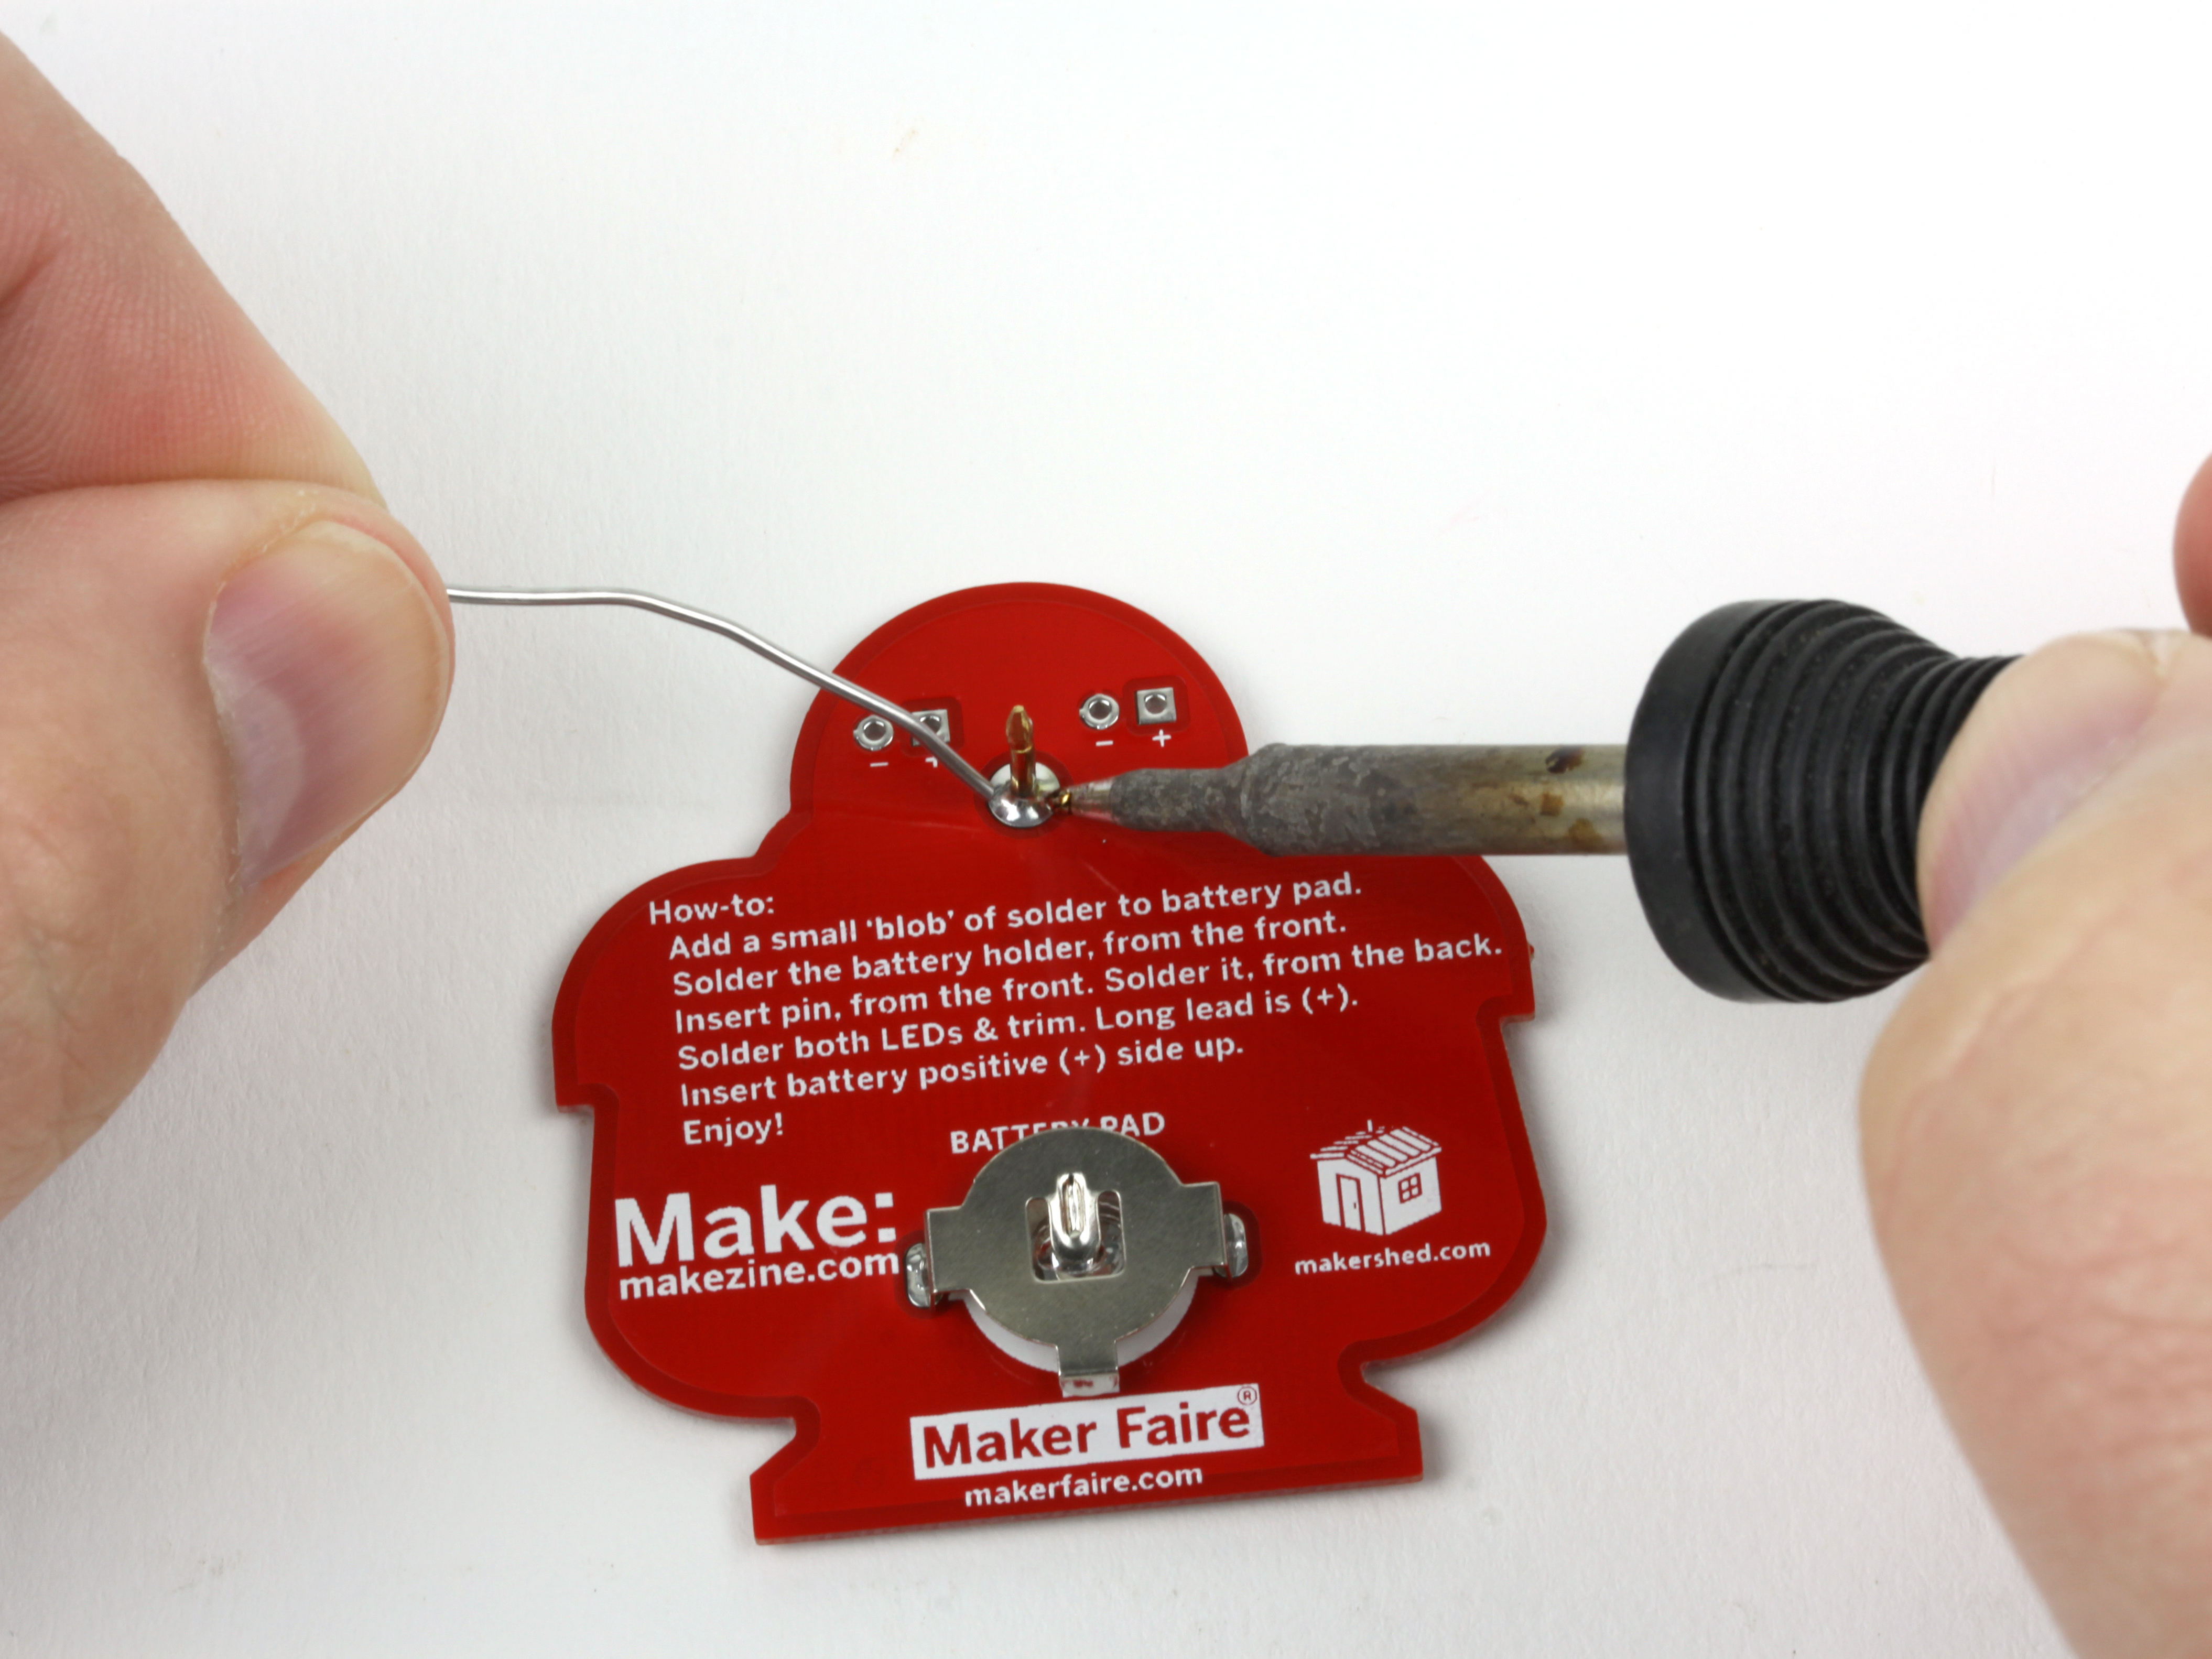
Next, we’ll solder in the tie-tack pin. This will be the post that will hold the pin-back in place once the badge is finished.
Place the pin though the hole in the front of the PCB. It should be inserted from front to back.
Now apply heat to the pin from the back, and solder it into place.


Now add the LEDs (light-emitting diodes) .
First, note which wire lead is longer on the LEDs. This is the anode (+) lead and will be inserted into the hole marked (+) on the PCB.
The shorter lead on the LED is the cathode (-). This is placed in the (-) hole on the PCB.
Flip the board over, and spread the leads apart. This will keep the LED in place while you solder it.
Solder the LED in place, making a strong connection between the LED and the PCB.
Be careful not to create “bridges” of solder– the back of the pin should have 4 distinct dots of solder which don’t touch at all.

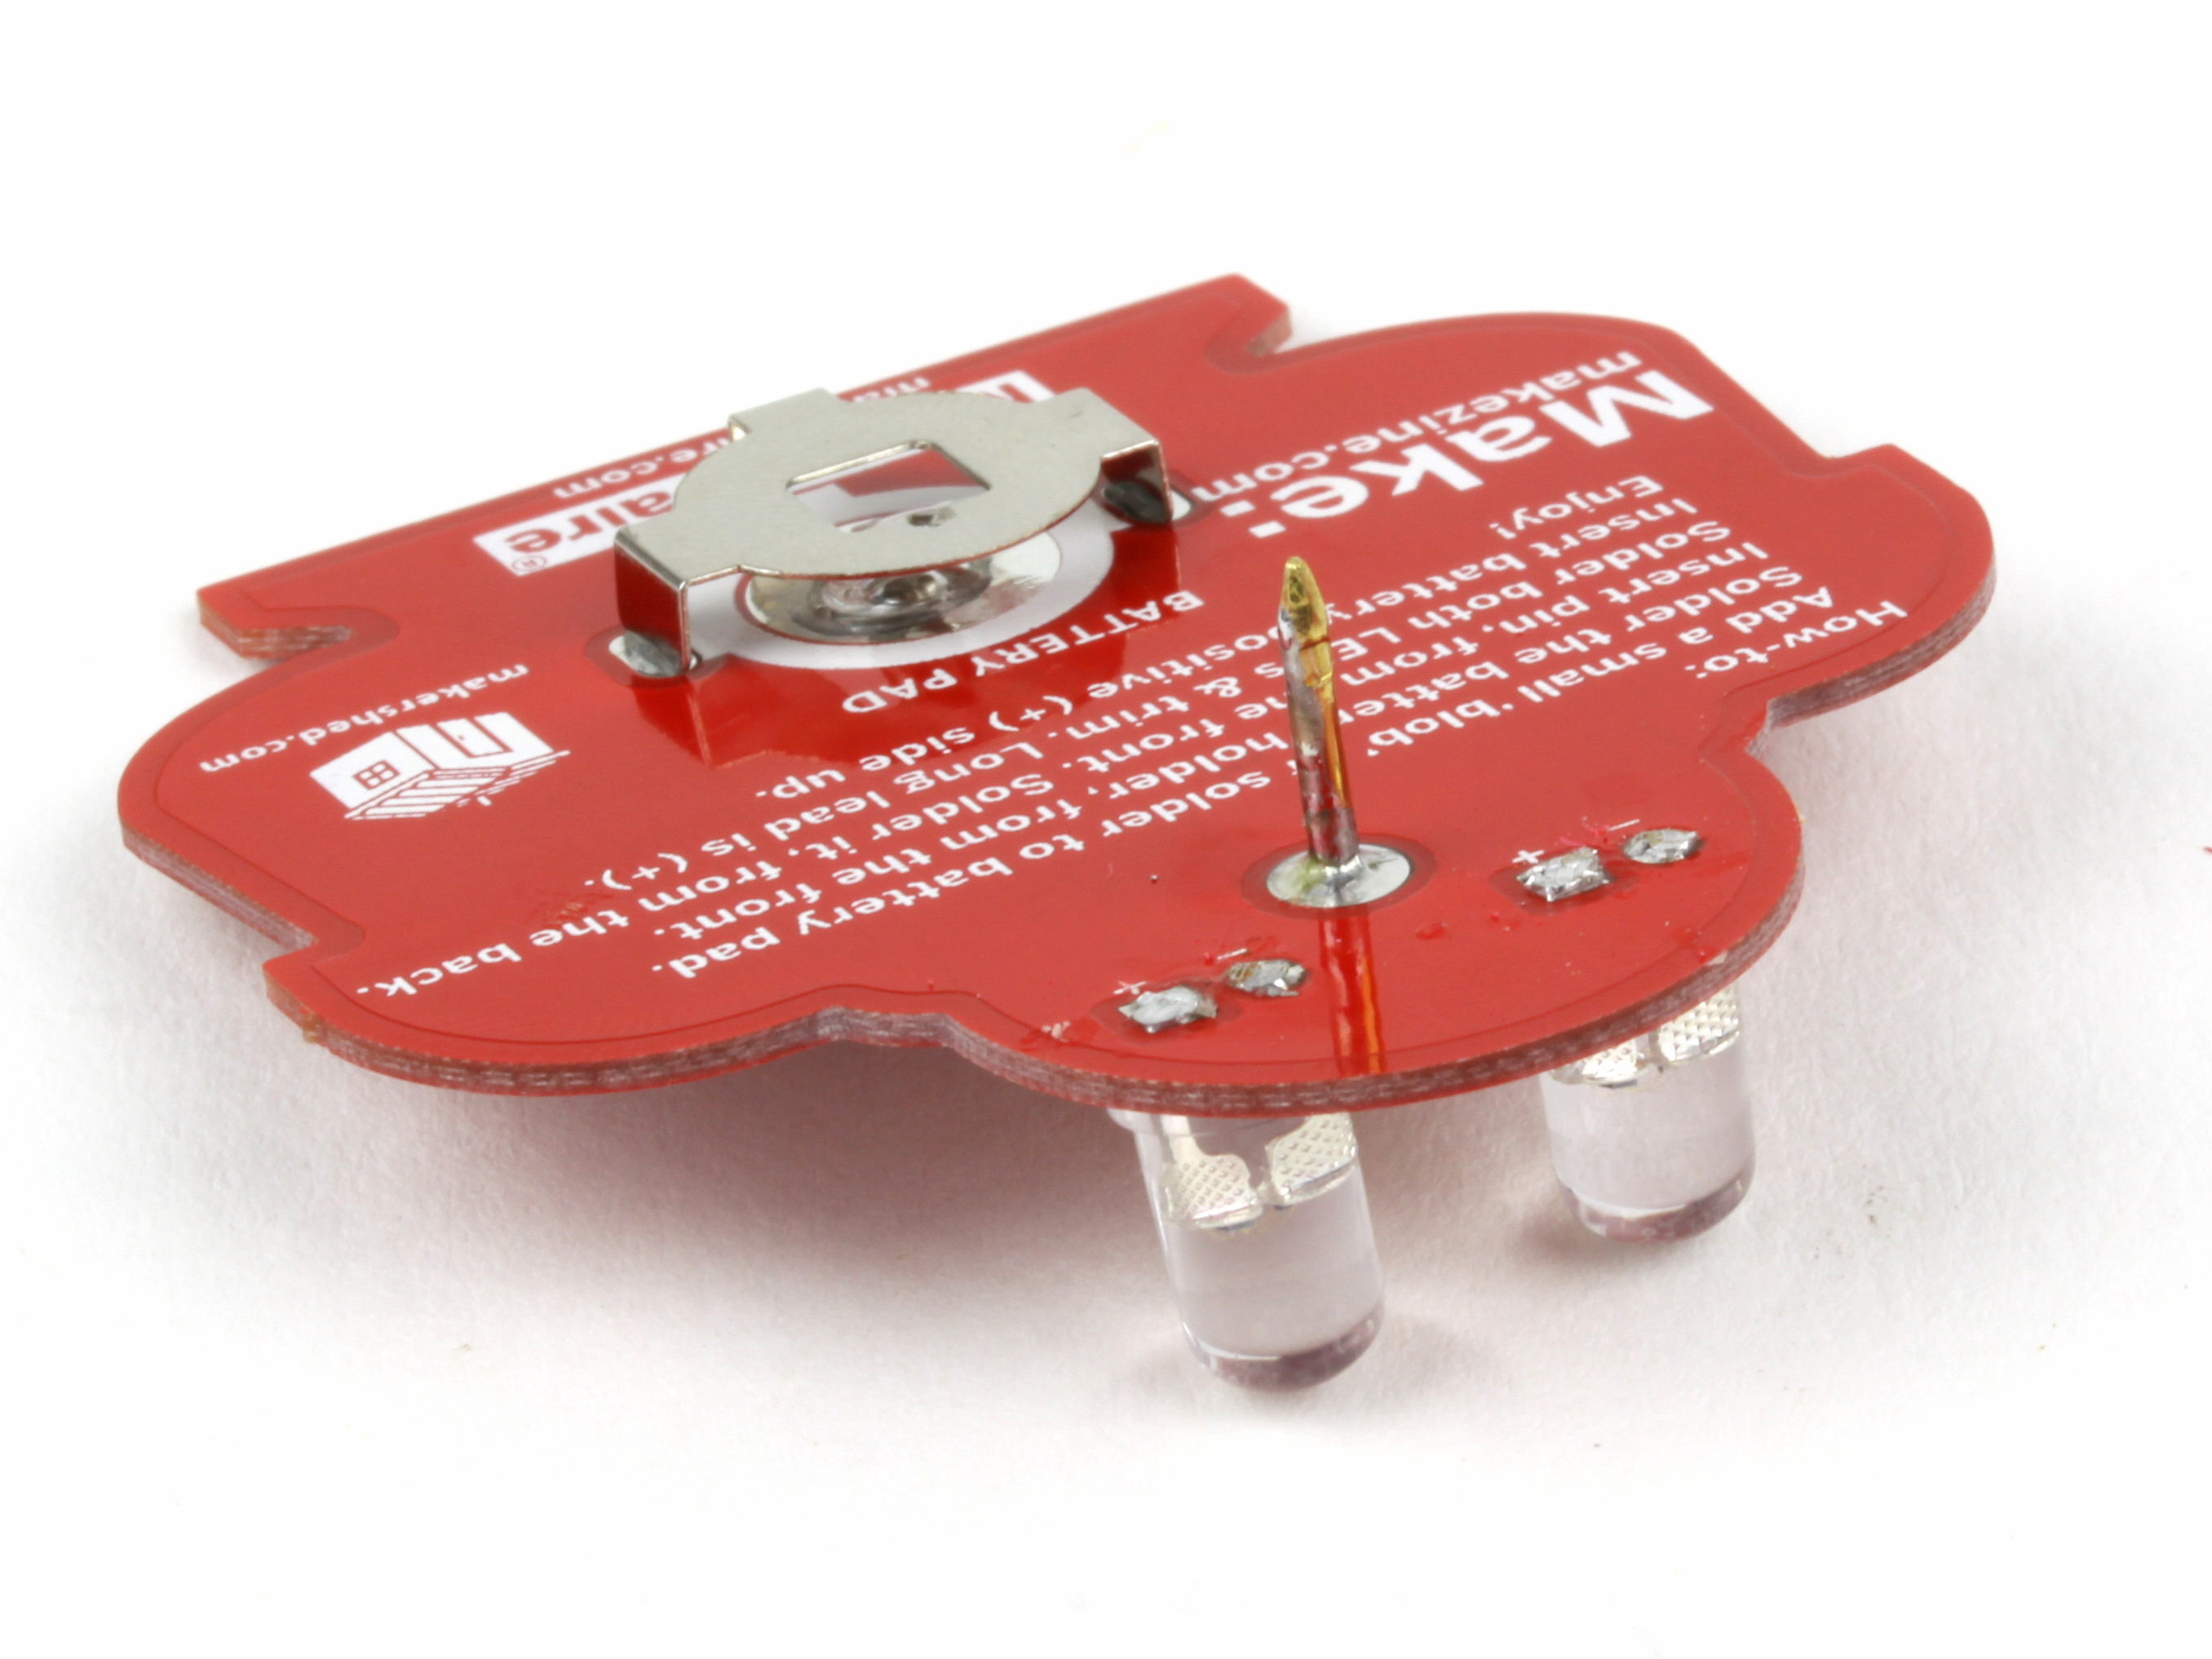
Trim all the leads of the LEDs flush to the PCB.
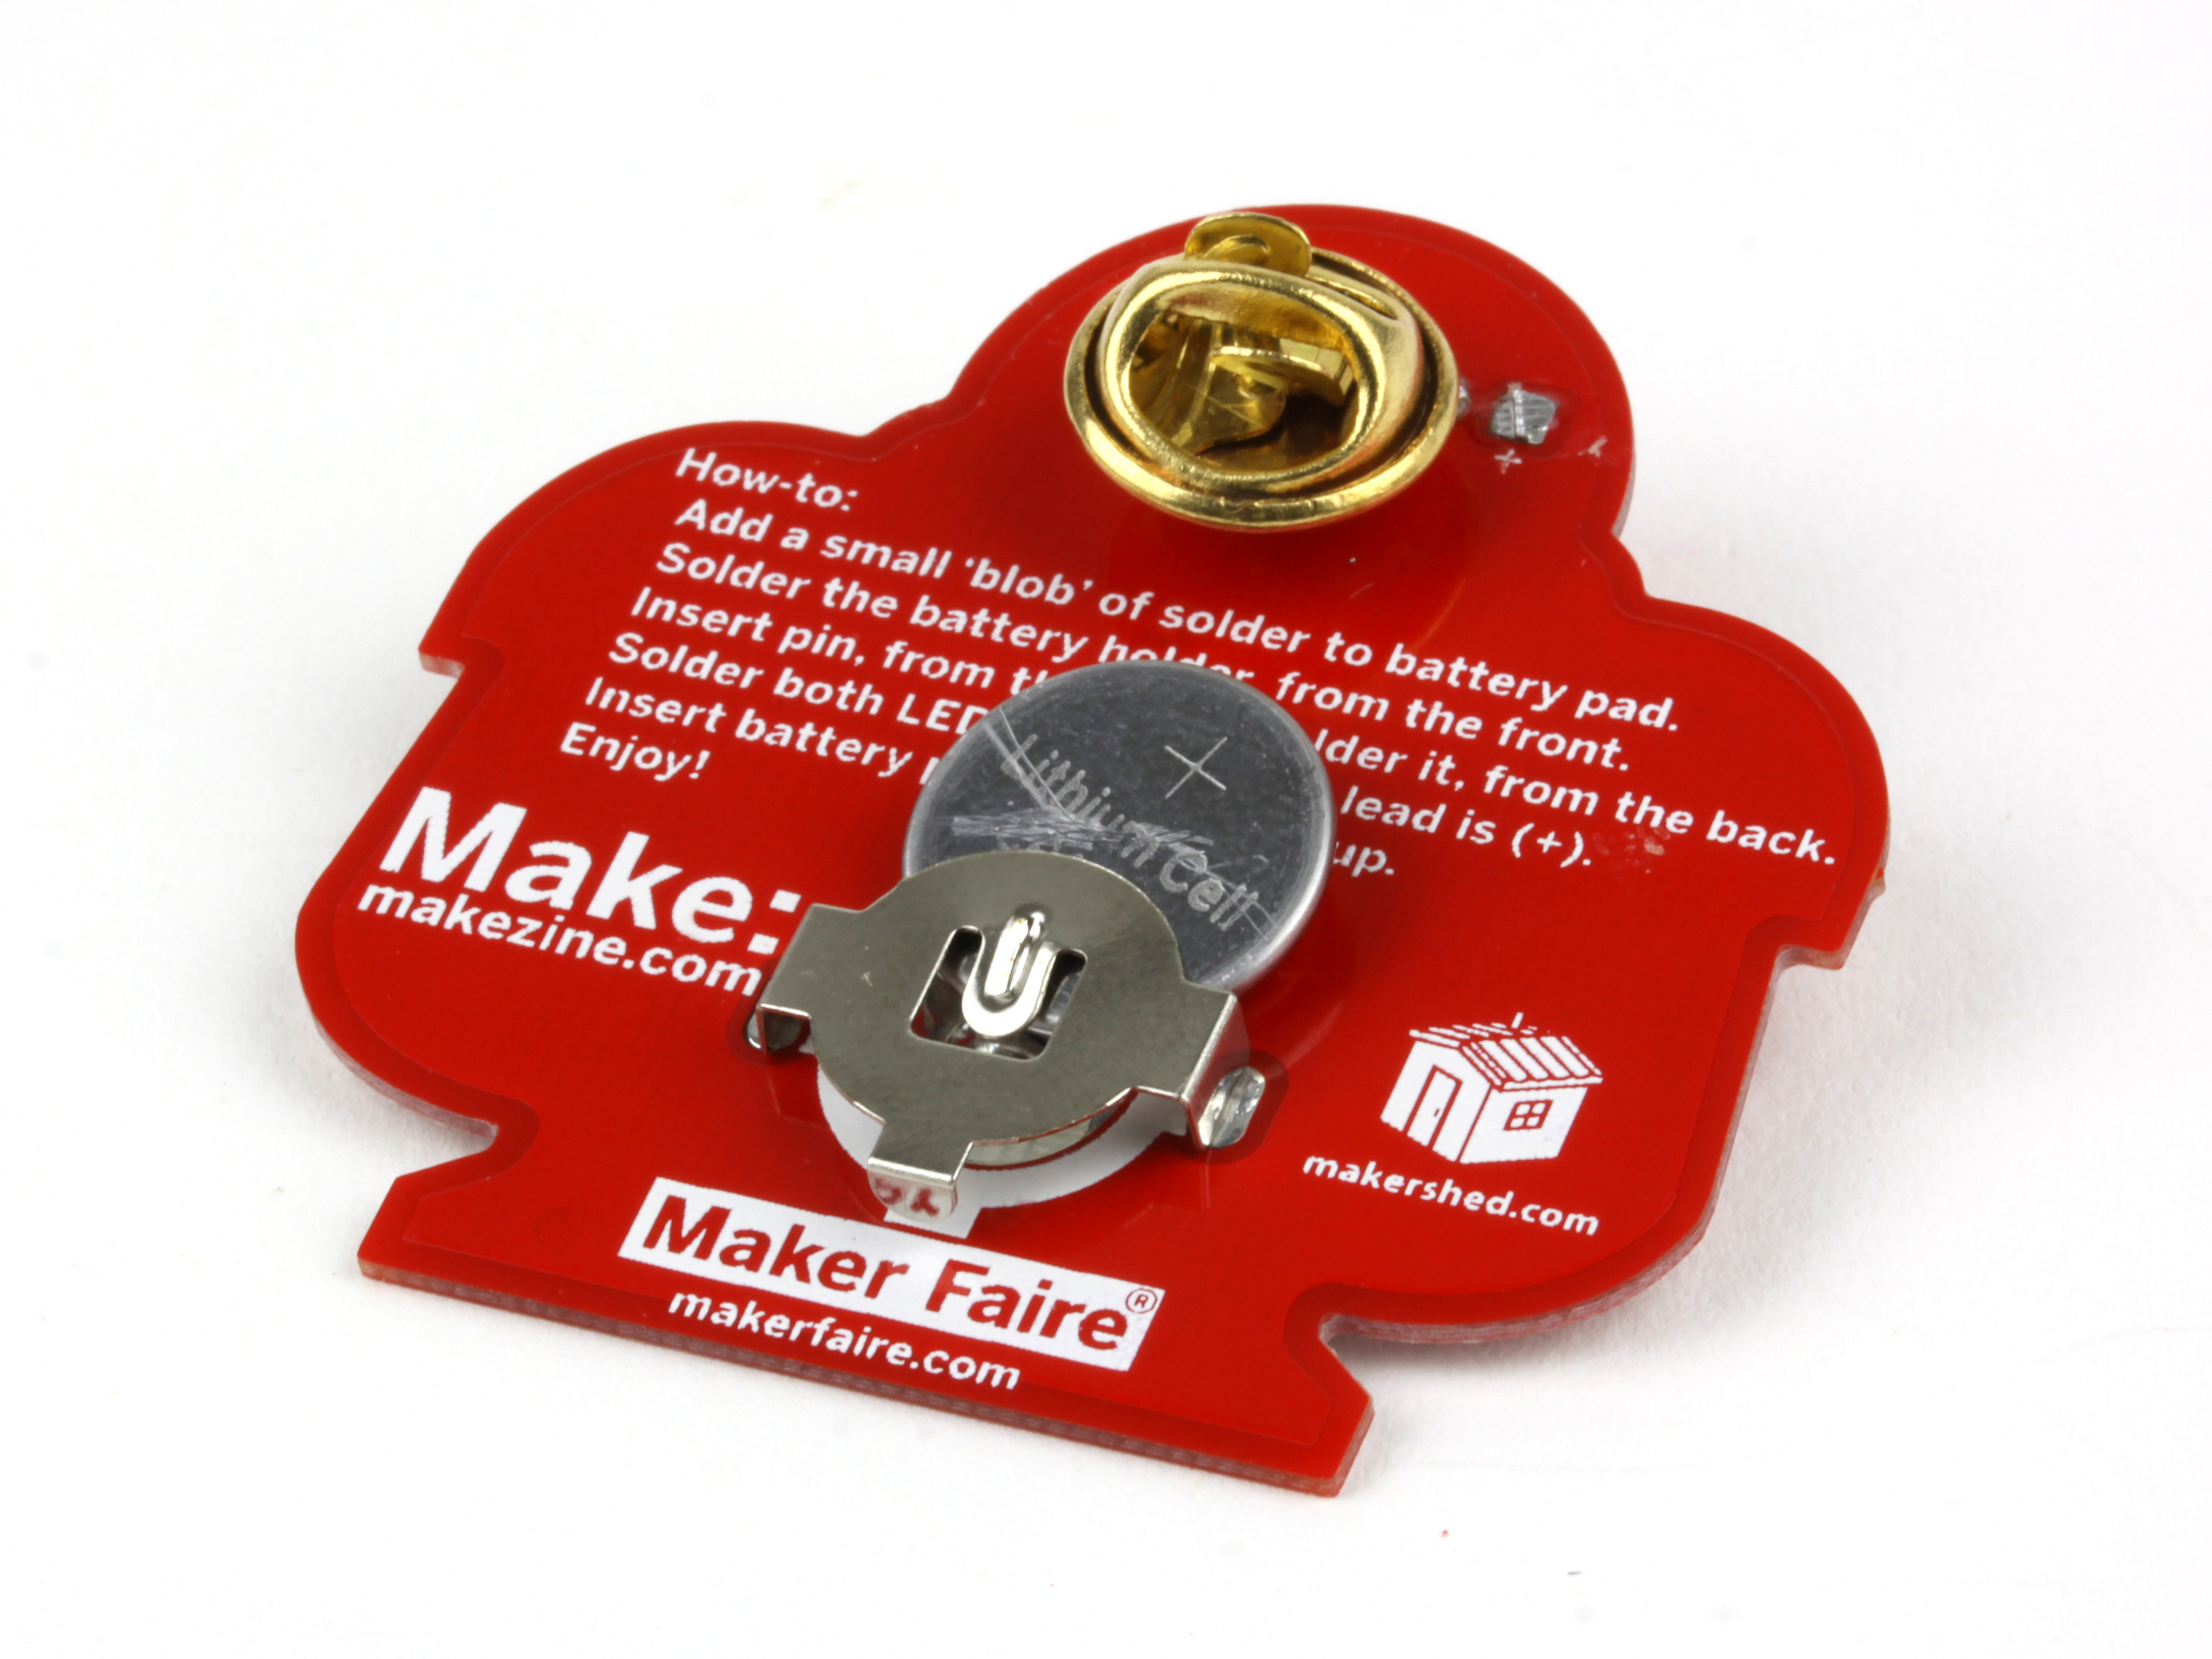

Now all you have to do is insert the battery.
Make sure the (+) side of the battery is facing up. (This is the wide, flat, shiny side)
Now you can pin it to your bag, hat, or anywhere you like, and show off your soldering skills!
Optional: You can cut a small piece of paper and insert it behind the battery to keep the LEDs from flashing and extend their life.


