
Read articles from the magazine right here on Make:. Don’t have a subscription yet? Get one today.
Morse code is a super simple communication protocol that can be used in all kinds of ways — from secret signals tapped out by hand, to lights, whistles, radio beacons, you name it. It was humanity’s first means of long-distance electronic communication, and appearances in fictional (and sometimes factual) tales of adventure and intrigue have been propping up its vintage mystique ever since.
Like many youngsters, we were intrigued by codes and ciphers, especially Morse. We sent Morse coded letters to our friends, and used flashlights to transmit Morse messages between the shore and our family’s sailboat. Our first Morse telegraph system was made of two hand-wound electromagnets connected by a salvaged telephone wire. An AC transformer powered the magnets, which rattled against strips of scrap metal with an ear-wrenching 60Hz buzz with each dot and dash.
Luckily, our technical skills have improved since then. What would happen, we wondered, if we took the bare-bones simplicity of a physical Morse key and connected it to the internet? When the Raspberry Pi Zero W came along, offering a web-connectable board that would fit in a project box for $10, we decided to find out.
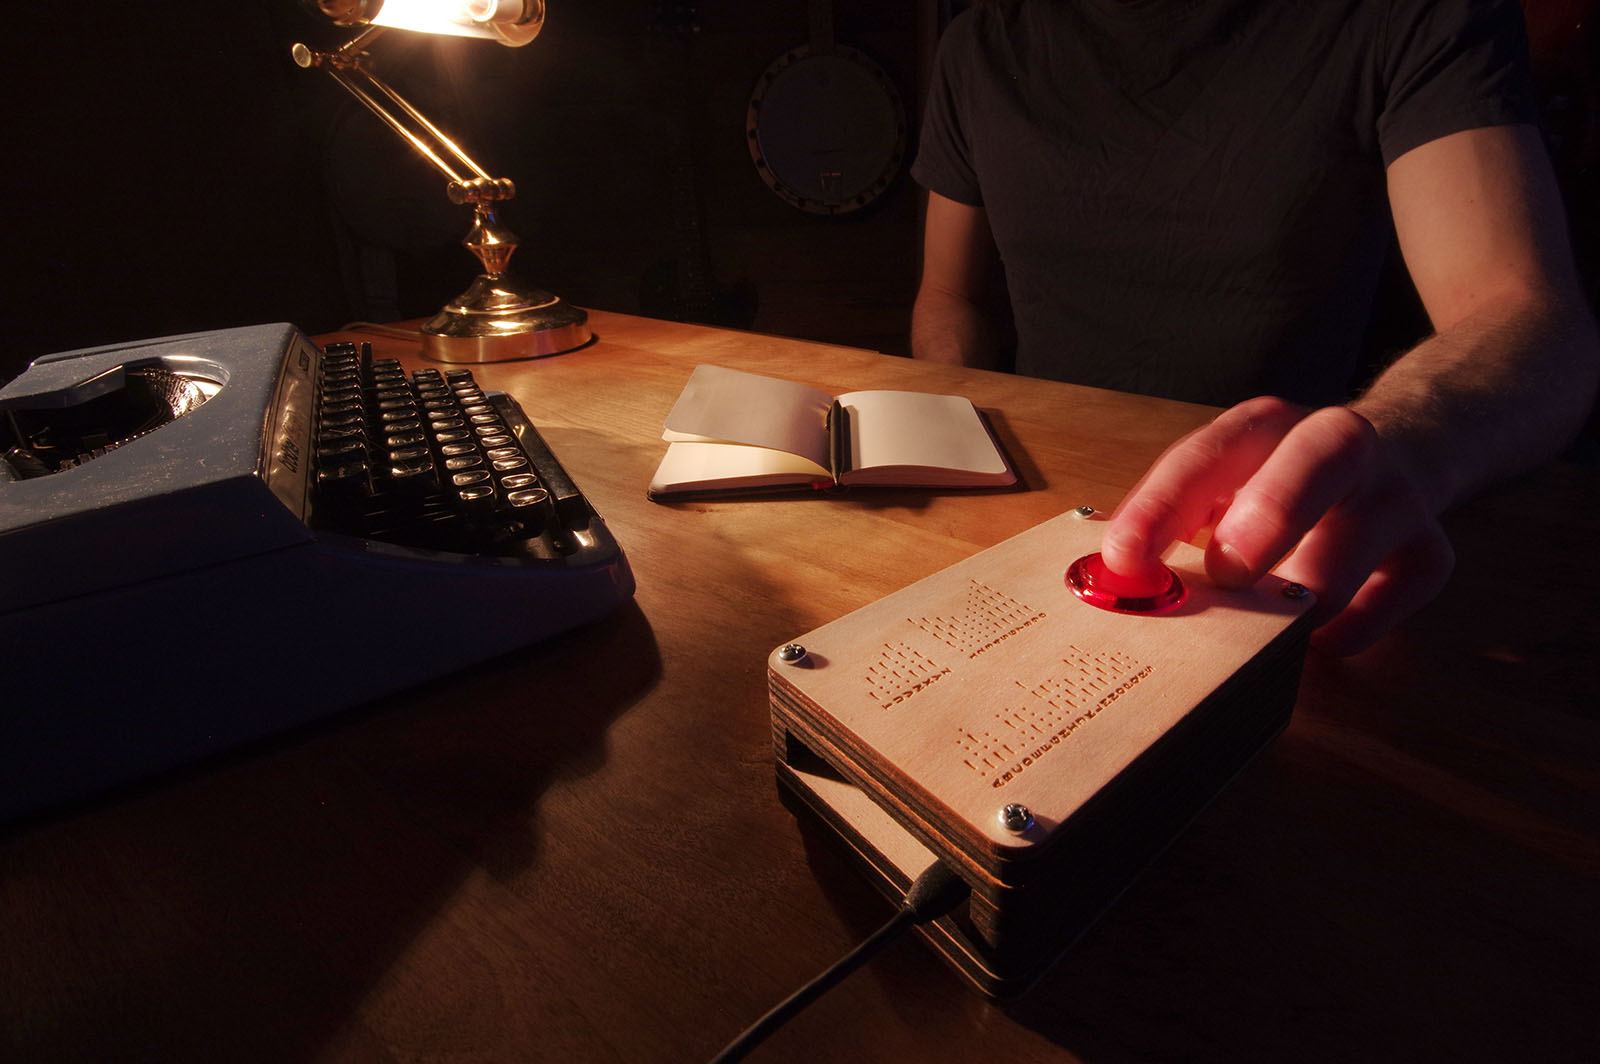
Several prototypes and programming languages later, we had a tidy laser-cut 3″×5″ box with the Pi, buzzer, and one large button. Push the button, and a Golang client on the Pi sends a signal through a WebSocket server, turning on the buzzer in all the other connected telegraphs. The Pi’s configuration lets you set the channel to which your telegraph connects, allowing open channels that anyone can listen and talk on (like amateur radio Morse bands) and private ones for you and your cohorts. Both server and client code are open source, so you can hack and modify at will.
All Systems Golang: Sending Morse over the internet requires a real-time communication protocol — you wouldn’t want to wait for an HTTP request to complete every time you tried to send a dot or dash! Luckily, there is a protocol for that: WebSockets.
We went through several different technology stacks in the quest for a simple client-server WebSocket implementation for the telegraph. These included Node.js, which is equipped with a nice WebSocket library but is complex to implement on the Pi, and Python, which works nicely on the Pi but not so nicely, we found, on the server end.
We settled on Go. Go, or “Golang,” is a relatively new open source programming language originally developed by Google. It combines features of some high-level languages like Python or JavaScript (such as online package management and relatively compact syntax) with features of low-level languages like C++ (static types, compiles to machine code), and then adds some special sauce of its own, like the ability to add threads easily through “goroutines.”
1. Load the Pi
The simplest way to get the telegraph code set up on your Pi is to use the pre-packed disk image. Download and unzip the disk image. The disk image includes the Raspbian operating system, so it will take a few minutes to download. (For advanced options, or to install the telegraph client manually, check the instructions in the GitHub repo).
If you don’t already have a tool for burning disk images, Etcher is a good option. Insert a blank microSD card into your card reader. Launch Etcher, click “Select Image,” and select the Internet Telegraph disk image (internet-telegraph.img). Click “Select Drive” and select your microSD card (be careful with this one — you don’t want to write the image to your hard drive!). Click “Flash” and wait for Etcher to do its work. Eject the SD card and pull it out of your card reader, then put it back in. It should mount as a disk that’s accessible through your file manager.
2. Configure Your Telegraph
Set the wireless network info
The telegraph can be run over Ethernet (using a micro USB to Ethernet adapter such as Adafruit #2992), or connected to a wireless network. To connect it to a wireless network, open /etc/wpa_supplicant/wpa_supplicant.conf from the SD card, and update the network info at the bottom of the file with your network’s SSID and Wi-Fi password.
Set telegraph channel and server
Open config.json in the root directory of your SD card. There are two configuration options you can set: The “channel” determines who else you’ll be communicating with. To send private Morse messages with your friends or relations, set this to an obscure series of words or string of characters that only you and your buddies know. The default channel is the “lobby.” Anyone with a telegraph who doesn’t change their channel will be in the lobby.
By default, telegraph messages go through our server at morse.autodidacts.io. You can also grab the server code from GitHub and set up your own server either on the web or on your local network. If you’re running your own server, change the “server” value from morse.autodidacts.io to the URL or IP address of your server.
Once you’ve saved the updated config, eject your SD card and pop it into the Pi Zero.
3. Wire It Up!
The first step for connecting things to your Pi Zero is to solder on the GPIO pin header. Put the header in from the top, then flip the Pi over and solder a pin in at each end to hold the header in place. Solder the rest of the pins, taking care to avoid bridging the gaps between pins with any errant solder blobs (Figure A). Check out Adafruit for a more detailed tutorial.

Figure A
Slip a couple of sections of heat-shrink tubing over the leads of one of the JST connectors, and then solder the leads onto the terminals of the arcade button (Figure B). It doesn’t matter which wire goes to which terminal on the button. When you’re done, slide the heat-shrink tubing over the joint and shrink it on with your soldering iron (Figure C).
- Figure B
- Figure C
Solder the other JST lead onto the buzzer. This one is polarity-specific: Make sure you connect the black or dashed negative wire onto the longer pin (Figure D).

Figure D
4. Cut the Pieces
If you have access to a laser cutter, cut the top and bottom panels (InternetTelegraph-top-and-bottom.svg) from ⅛” plywood paneling, and optionally laser-engrave the Morse alphabet on top.
Cut the box sides (InternetTelegraph-enclosure-sides.svg) from 6 layers of ¼” plywood. If your cutter can handle it, these can alternatively be made from 3 layers of ½” plywood.
You can also order the plywood parts from a laser cutting service. Talk to local makers about the best cutting service in your area or check out Make:’s guide.
5. Assemble the Telegraph
Stack the plywood layers, leaving off the top panel, and drop the machine screws into their holes temporarily to keep the layers lined up (Figure E).

Figure E
Get Outside the Box: We’ve used stacked laser-cut plywood for the enclosure. This is a convenient and attractive approach, but it’s only one of many options for housing your telegraph. Our first prototype was sawn out of a solid 2×4. You could use clear acrylic, 3D print your enclosure, or even install the telegraph in a cottage cheese tub, like many of our early electronics experiments. Let your creativity, available materials, and aesthetic preferences lead the way.
Cut four 2mm (0.078″) slices of the plastic tubing (Figure F). Place one of these over each of the pilot holes in the enclosure (Figure G), and then place the Pi on top with the ports facing toward the edge of the enclosure (Figure H). Secure the Pi with four #3×1/2″ screws.
Standoff-ish Behavior: We’ve found that most electronics projects require standoffs: small spacers, ideally non-conductive, to separate circuit boards from surfaces above or below. These often need to be a precise length in order to make things fit into unexpectedly tight spaces, and finding the right standoff for a job — especially if you live in a remote area — can be a problem. Our solution is to make our own standoffs by slicing sections off of a length of acrylic tubing. This means we can instantly create a standoff of an arbitrary length, and experiment as needed until we get the size just right.
- Figure F
- Figure G
- Figure H
Plug the buzzer lead into GPIO pin 19 and ground (Figure I), making sure the negative side is toward the edge of the Pi, and glue the buzzer down with a dot of hot glue to prevent it from knocking around in the box like a poltergeist (Figure J).
- Figure I
- Figure J
Thread the arcade button’s wire through the hole in the top plate, and press the button into the hole. Plug the button’s lead into GPIO pins 26 and ground (Figure K). This one can be oriented either way.

Figure K
Remove the machine screws. Add the laser-engraved top panel to the top of the sandwich, oriented so the button is at the opposite end from the Pi (Figure L). Put the screws back in, and secure them with 4 acorn nuts (Figure M).
- Figure L
- Figure M-1
- Figure M-2
6. Power Up
Plug in the USB power and wait about 30 seconds for the Pi to boot up. When the Pi is booted up and connected to the Morse server, it will beep out “ready” in Morse code ( .-. . .- -.. -.–).
To test your connection, push the button on your telegraph. If you hear a beep, your telegraph is talking to the server. All systems go!
May the Morse be With You!
The standard Morse alphabet includes letters, numbers, and a variety of punctuation symbols. The numbers and letters are shown in the engraving on the top of the telegraph for easy reference. For a more complete set, as well as some tips on learning Morse, print out a copy of InternetTelegraph/Docs/translate-morse.pdf from the GitHub repo. You’ll want to have a notebook handy for transcribing incoming messages.
Morse is made up of dots, dashes, and spaces (gaps). Each of these has a specific length in relation to the other symbols. Keeping these lengths in mind will help you send well-formed messages that are easy to decode, at whatever speed you’re punching them out. A dash is 3 times as long as a dot. Gaps between symbols within a letter are as long as one dot. Gaps between letters are 3 dots long, and gaps between words are 7 times as long as a dot.
Once you (and any other telegraph operators on your channel) are ready to go, it’s time to send a message!
We suggest something short and sweet, like “hi.” In Morse, that’s 4 dots, a space, and then 2 dots: dit-dit-dit-dit dit-dit. (As it happens, “hi” was also the output sample that came just before the first ever use of “hello world” in a 1972 programming tutorial by Brian Kernighan. We’re sticking with historical precedent here.)
Try going very slowly at first, and sending simple messages. You might want to jot down the Morse as it comes in, and then decode it after the transmission. The same works for sending: write out the Morse first, and then key it into the telegraph.
Less Is Morse: Morse code, and the telegraphs to send and receive it, were invented by painter and tinkerer Samuel Morse and machinist Alfred Vail around 1840. For a century, Morse code was the primary means of long-distance communication, both over wires and by radio.
The original Morse telegraph used a solenoid-actuated stylus to press dots and dashes into a moving sheet of paper. Eventually, telegraph operators discovered they could hear the code in the solenoid movements and do away with the stylus system altogether.
Morse code has also found some more arcane uses. Thomas Edison famously proposed to his wife in Morse code, and the two would send surreptitious messages to each other by tapping out the code silently with their fingers (a trick that we’ve tried on several occasions as well, though not with marriage proposals). U.S. Navy commander and POW Jeremiah Denton rose to celebrity status after using Morse-coded eyeblinks during a television interview to sneak a message out from under the nose of his North Vietnamese captors in 1966.
Because of its simplicity, Morse can be transmitted by sounds, light beams, radio, touch, telegraph wires, or just about any other medium that can be varied or turned on and off. Morse radio transmissions are less susceptible to weak signals and interference than voice communications, which makes it a popular mode for long-distance amateur radio operators.
Troubleshooting
If the telegraph runs into an error connecting to the Morse server, it will give out a string of 8 short beeps when the button is pressed. This means it’s time to check that the Pi’s internet connection is working and the telegraph client is configured correctly.
The easiest way of troubleshooting is to attach a monitor, mouse, and keyboard to your Pi. Once you’ve got these peripherals hooked up, first make sure that the Pi is connected to the internet. Second, try running the telegraph client from the command line by opening up a terminal and typing cd / && ./internet-telegraph. Then try pressing the telegraph button. Check to make sure the terminal is logging key presses, shows the client is connected to the server, and hasn’t thrown any errors.
If you’re feeling 1337, you can do all this through SSH rather than plugging in a monitor. Use nmap to obtain your Pi’s IP address (or try ssh pi@raspberrypi.local), SSH into your Pi, and start debugging.
If any problematic issues show up, we’re happy to help. Just open an issue on the GitHub repo, or shoot us an email at info@autodidacts.io.
You can get a real Morse key here, for $16:
https://www.arrl.org/shop/Morse-Code-Key
That arcade button is going to get old real fast.
In addition, you can’t hold it correctly. The straight key knob is held, not tapped. There are some WWII training films online that show how it is done properly. https://www.youtube.com/watch?v=iC5RQNSSZH0
LOTS of ham radio enthusiasts (yes I’m one) use Morse code on a daily basis and it can be tons of fun! I use it almost exclusively and rarely talk via voice. If you decide to get serious about Morse code, don’t think about is as “dots” and “dashes” Think about it as “dit” for dot and “Daah” for dash. This trains your mind from the beginning to hear a sound and know it right away rather than slowing yourself down with a sound to “punctuation symbol” mental translation.
Sending “HI” is also a way to “laugh” in code. Listen to it a few times and you will see why!
Have fun with Morse!!!
73
Paul Hurm, N8OT
Myself, my wife and all 6 of our kids are also Ham Radio operators. Pressing that button up and down is going to get old quickly. The telegraph key suggested by another commentor is a good idea, but here’s a better one: research “keyer” and you will find what serious morse code people use now-a-days. A keyer is two switches that are mounted horizontally, where your thumb will press to the right whenever you want to send a self-completing (and self spacing) “di” (do NOT think “dot”) and likewise, your index finger will press towards the left for “dah” And if you hold left or right without letting off one of the switches, you will continue to get di’s (or dah’s) continuously, and perfectly spaced, except when you can interject the other character by a quick stab with either finger against the switch being held down. This makes for VERY fast transmission of morse code, even upwards of 60 words per minute! it is a whole lot less fatiguing on your hand and wrist than a straight telegraph key! The 2 switches input to a very simple digital logic or micro-controller circuit that does all this automaically for you. The circuit includes a speed control so you can ramp up your speed as you get more proficient. Over our 38 years of marriage, we even taught all of our dogs to come when we whislte their first and second name initials in Morse!
Hi Henry! My name is Emma, and I’m a journalist with Google working on a project about tech in the home. I’d love to learn more about your family’s use of morse code. Let me know if you’d be open to speaking with me!
Sure, write me an email and I will give you my cell number. I HATE TEXTING. henryburrow@gmail.com
It’s a Pi so why not have an LCD that can decode what you’re sending and/or receiving. As mentioned before a proper keyer would be a better idea.
Learn to send and receive manually first. If you can do that, you can send code by touching two bare wires together even if you don’t have a proper key. The fancy stuff can come later once the fundamentals are mastered..
I learned the code 60 years ago and still use it often today as a ham radio operator (K9LJB). Avoid the temptation to learn the code by looking at a chart and visualizing the dits and dahs. I learned from a WWII Navy operator. He started by saying to get out paper and pencil. Then he said that he was going to send a particular letter over and over while we wrote it down each time we heard it so that we associated the sound with the action of writing that letter. I strongly encourage learning sending initially with the old fashioned straight key. Get good with that before you try an electronic keyer with paddles. I still use a straight key a lot as I am a member of an on-air/online group called Straight Key Century Club which espouses manually sent code. No electronic keyers allowed. Yes, there are code readers out there that do a fair job if the signals are clean, but you don’t learn the code as well that way. If you are interested in this and ham radio, I would suggested finding a local club. They should be able to help. Using the code on the air is extremely effective so I often use less than 5 Watts of transmit power and have talked to Europe from the Midwest with just a wire antenna. It’s a blast.
Excellent advice Roger and Paul above. Learning by “sight” instead of sound will ultimately be throttled by the brain’s ability to translate three layers instead of two (Sound -> visualize dots/dashs -> alphanumeric char. – vs – Sound -> alphanumeric char). I regretfully made this mistake decades ago while trying to learn Morse for the Novice license. Once “imprinted,” it’s nearly impossible to eliminate the visualization step in your head.
Interesting idea that requires a ton of dependencies (mains power, internet service, yada yada). You can build a Bitx40 HF single band transceiver and send CW for $50. It will run off of a small stack of batteries for days. Get your license, amateur radio has something for everyone and we could certainly use new fresh blood in the hobby.
Very interesting project, if someone is a Maker, in the development board trouble, we can provide them free of charge raspberry PI 3 or Banana Pi M3. I am Allchips Site Operations Manager, you can find me on facebook.
Felix, would you mind contacting me directly at paulhurm@gmail.com about a Pi 3?
Thanks.
Has anyone tried this project? I am running into trouble with the image setup. I downloaded the zipped image, then used etcher to write it to the sd card. It appears to work, but I don’t see the files or structure referred to in the article (for configuration of wifi, etc. I’m excited to try this out; it’s an interesting blend of technology. I have a J-38 ready to go for this project. I foresee this being a good way for new radio club members to practice CW with each other and a mentor. Many people today get into ham radio today with just a Baofeng on VHF/UHF, and have no HF rig yet. They can also be intimidated with being “on the air”, or have trouble with interference. This could really help out in these areas!
To learn Morse Code by sound, one of the best methods is with the free open source program below. (Available for all operating systems.) This program introduces one new letter at a time, only as you become proficient in the letters up to that point. In other words, it learns from you what letters you need to practice, and sends those more often.
http://c2.com/morse/
The author is Ward Cunningham, K9OX; inventor of the Wiki. Ward and I were at Purdue University back in the 1970’s. So I used the program then to get my Morse up to speed for the FCC Amateur Radio Advanced Class license.
William Croft, KD6RG
Nice project. I use everry day to talk with french people in order to learn. Thank you for this project. Can we use a 16chr screen in order to have the words description?
ConfigureACCEPT
Privacy Overview
Necessary cookies are absolutely essential for the website to function properly. This category only includes cookies that ensures basic functionalities and security features of the website. These cookies do not store any personal information.
Any cookies that may not be particularly necessary for the website to function and is used specifically to collect user personal data via analytics, ads, other embedded contents are termed as non-necessary cookies. It is mandatory to procure user consent prior to running these cookies on your website.