safetyglasses-feature
Safety Glasses Hacked With Detachable Lights. Photo by Jude Pullen.

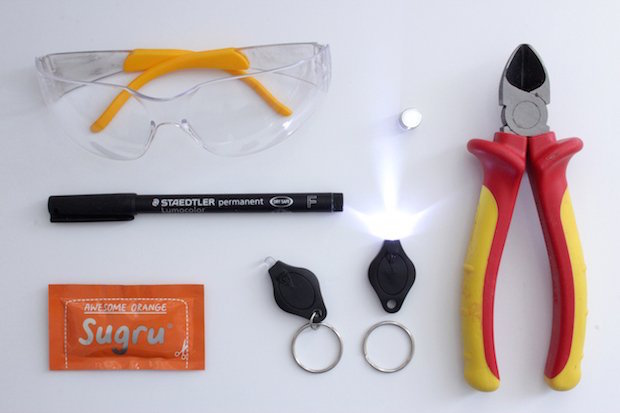
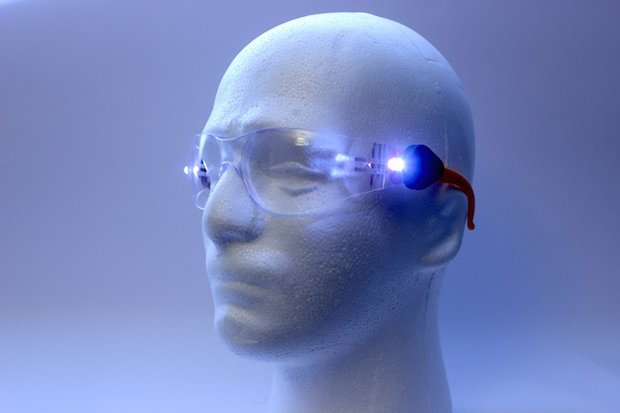
You’d be amazed at how much better your projects turn out when you can actually see what you’re doing. The trouble is, flashlights are easy to misplace and they’re difficult to hold onto when your hands are occupied with a project. To solve the problem, we’re going to hack your safety glasses with some useful, rotating, detachable LED lights.

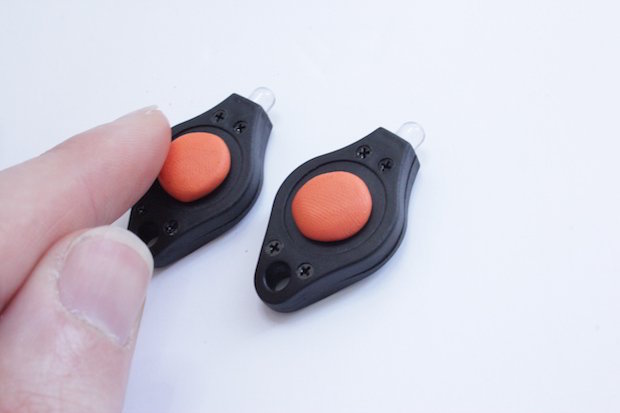
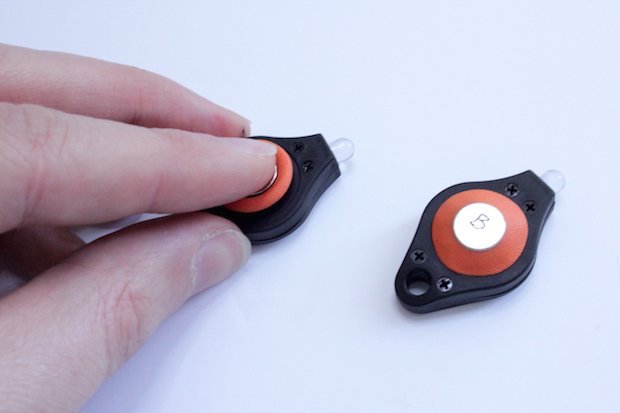
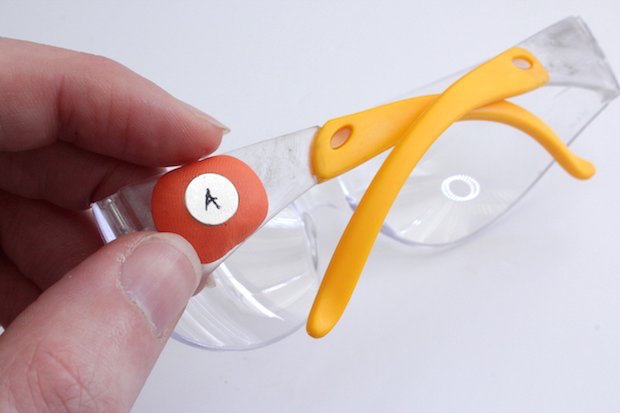
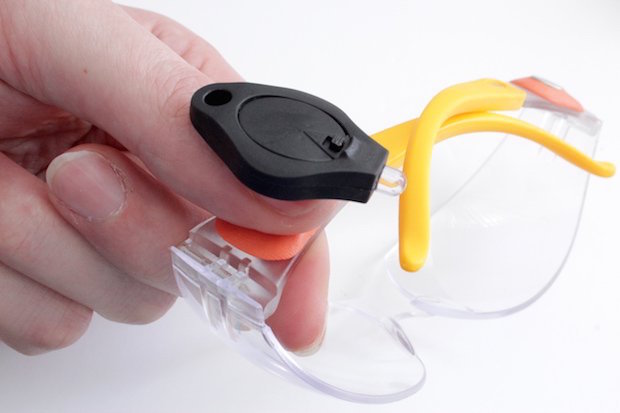
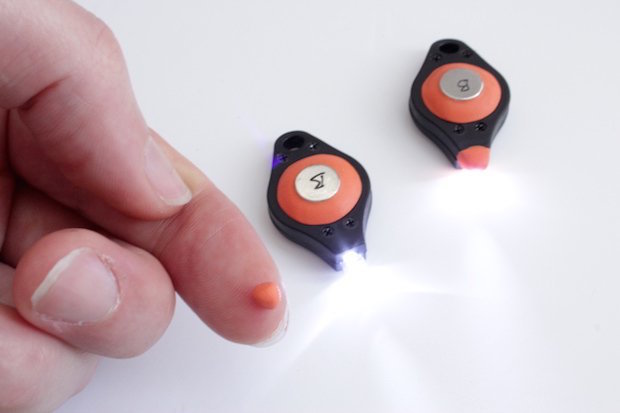
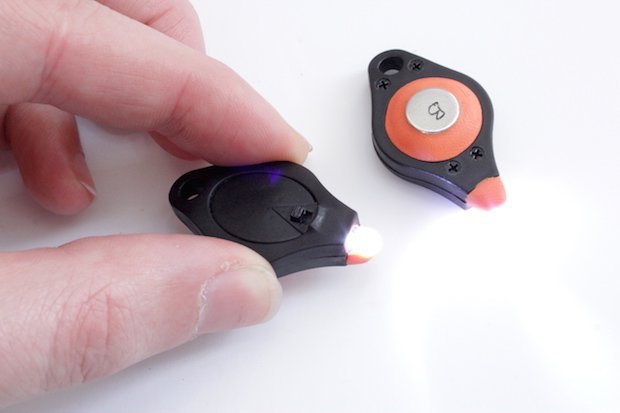
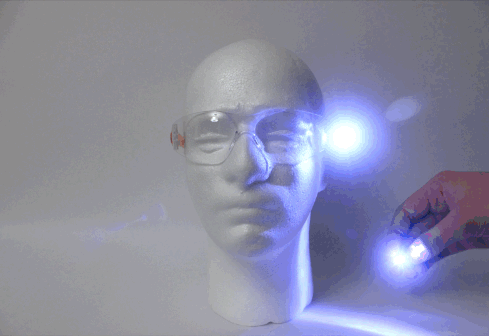
These magnetic lights (or “Mag-Lights”) stick to the side of your workshop glasses, allowing you to direct light to illuminate where you are working.

These headlight glasses are just the thing for anyone working in tight/poorly-lit corners, such as plumbers, electricians, and DIY enthusiasts who may well need to wear eye protection anyway. This only adds about 0.5oz to your glasses, but delivers a lot of illumination. In addition, the magnets allow the lights to be detached and repositioned anywhere, from metal surfaces to being combined with tools.

Ultimate Safety Glasses Shine Light Where You Need It

This idea originated from speaking to a friend who wanted to BBQ late into the night, but wanted to have a cheap, hygienic, and repositionable light to check if the meat was cooked. The Mag-Lights were an evolution of just experimenting with this idea and realizing the potential of using magnets as a rotational mechanism.

YouTube player


Project Steps

Tools you will need

This project requires only a handful of tools and materials, including safety glasses, neodymium magnets, LED key rings, Sugru, a permanent marker, pliers or cutters, and an optional screwdriver for changing the battery of LED lights.

Liberate your light

Ensure that your LED has the ability to be permanently switched on.

Cut the key ring with pliers. Do this for both lights.

Prepare Sugru

Prepare the Sugru by kneading and portioning it into approximate sizes as shown.

Apply to LEDs

Apply small blobs of Sugru to the back of the LEDs, taking care not to cover the screw holes.

Label the polarity of the magnets, so that opposites attract.

Press the same “B” (or south poles) to the LEDs.

Apply to glasses

Apply Sugru to both sides of the glasses. Press the alternate magnet into Sugru and smooth out.

TIP: Before the Sugru dries, double-check that the lights/glasses attract correctly by putting your thumb in between and feeling the slight attraction.

Blocking glare

Apply a small piece of Sugru to the inner side of the LED. This helps reduce the glare in your peripheral vision. Make adjustments accordingly.

Adjust as needed

Although other glues are available, this is where Sugru is particularly useful in making fine adjustments; in this final step (while the Sugru is still not yet cured/set), go into a dark room and adjust the angle of the lights/magnets to the perfect point for you.

Because Sugru is a thick hand-moldable putty, it will hold the position you set the LEDs at.

Leave to dry overnight and you’ll have the ultimate pair of workshop glasses!

Conclusion

I hope that building these Ultimate Workshop Glasses has inspired you with a few new interesting ideas, such as using Sugru for delicate repositioning and using the magnets to allow the lights to be easily detachable. Personally, I think the rotational use of magnets is the most intriguing aspect of the design and I'm interested in seeing other applications of this idea.