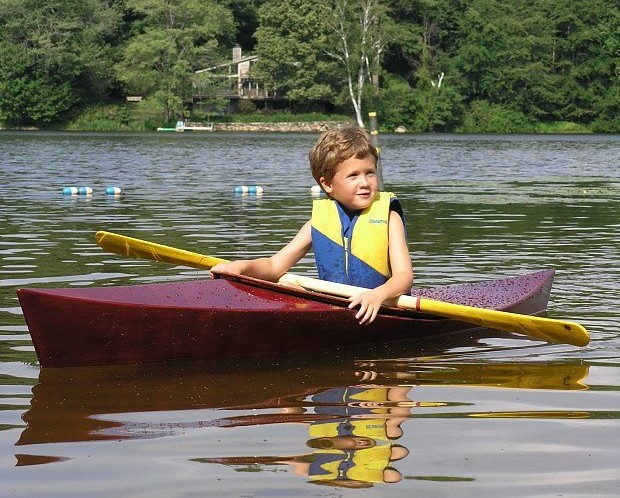
There is a beautiful spring fed lake near my sister-in-law’s house where she takes her kids swimming. No powerboats are allowed. I design and build wooden kayaks for a living and I judge all bodies of water by their potential for kayaking. Diamond Lake is a very nice lake.
When my oldest nephew was about 5-years-old I decided he really needed a kid-sized kayak to fully appreciate the lake. I wanted it to be something that was fun to paddle, easy to handle, light weight, easy and inexpensive to build, and had some character.
I typically design high performance sea kayaks that tend to be fairly complicated to build. I wanted a very straightforward build for this project, but I wanted to use “real” boatbuilding methods, and I set myself the goal of using a single sheet of plywood.
The building method I chose is called “stitch and glue” where plywood panels are wired together then glued with epoxy and reinforced with fiberglass. The result is lightweight, strong, durable, and shows off the wood nicely.

THE KAYAK DESIGN
Plywood comes in 8-foot-long sheets; this pretty much defines the upper limit for length if I didn’t want any joints. Usually when people think about a boat for kids, they want something really stable and thus “safe.” But my nephew was 5. He should never be on the water without close adult supervision, and when I was a kid playing with boats, the most fun thing was capsizing and getting under the upside-down boat and yelling. I thought the kayak should be more of a pool toy than a mode of transportation. The adult supervision would provide the safety; the kayak would provide the fun.
Little kids are by definition, little, therefore the kayak needed to be proportioned appropriately for the size of the paddler, this means it should be fairly narrow. Narrow means tippy, but in the eyes of a kid, this means it would be fun. I would give the design a relatively big cockpit so my nephew wouldn’t have any risk of getting trapped.
Keeping the design simple suggested a three panel hull — two sides and a bottom. The most obvious design is just a decked pirogue. A pirogue is a classic little canoe from Cajun country Louisiana, a flat bottom boat with flared sides. Slap a deck on top and you could call it a kayak, but it wouldn’t really look like an honest kayak. I wanted something a bit jauntier.
Nearby where I live is the old fishing port of Noank, which is still known for lobster. Like many fishing villages, they had their own particular style of lobster boat. The Noank lobster boat has an interesting cabin treatment, the hull side straight continues up beyond the apparent sheer to head room in the cabin, and there is a transition beside the pilot house where the top edge turns down so the lobsterman can haul traps.
This styling feature gave me an idea for the kayak. I could make the front deck high so there was room for legs and feet under the deck, while also allowing for a stylish, low back deck. I gave the front deck a bit of “V” to shed water, and left the back deck simple and flat. By extending the back deck up in front of the cockpit a bit, I made it easy to add a coaming around the cockpit. With a little upward sweep at the ends of the sheer to cut through waves, I felt I had a cute little kayak that had a little class, but was only made from six parts.
I do my design work in MaxSurf, a naval architecture specific application good for designing long, skinny things that float. It also has a module which will “develop” 3D surfaces by unrolling them into flat 2D outlines. Essentially there are 4 different panels: the bottom, 2 identical sides, 2 identical front deck pieces, and the back deck. I added a couple more bits and pieces to make a simple coaming around the cockpit. This serves as reinforcement around the hole, and gives a more finished look to the kayak.
The developed panel shapes were transferred into my standard CAD package (Vectorworks) where I did final layout. The panels were arranged on to a single 4′ × 8′ drawing and by chopping up the coaming bits I was able to tuck these parts into the interstices of the drawing. While in the CAD I laid out the holes for the wire stitches.
I sent the resulting DXF file out to a CNC shop to have them cut the panels out of 4mm Okoume marine plywood. This is a good quality 3-ply plywood with no interior voids, this is what puts the “marine” in marine plywood. It is not that marine plywood uses special glue, but that there isn’t any place inside the wood to collect water and promote rot. Okoume (aucoumea klaineana) is a fast-growing, plantation-grown tropical hardwood, that makes a high quality plywood with pleasant color and nice grain. Often available in metric thickness, 4mm is the standard for stitch and glue kayaks, but actually for a boat this small, 3mm would be lighter and while a little weaker, probably strong enough for a little kid.


