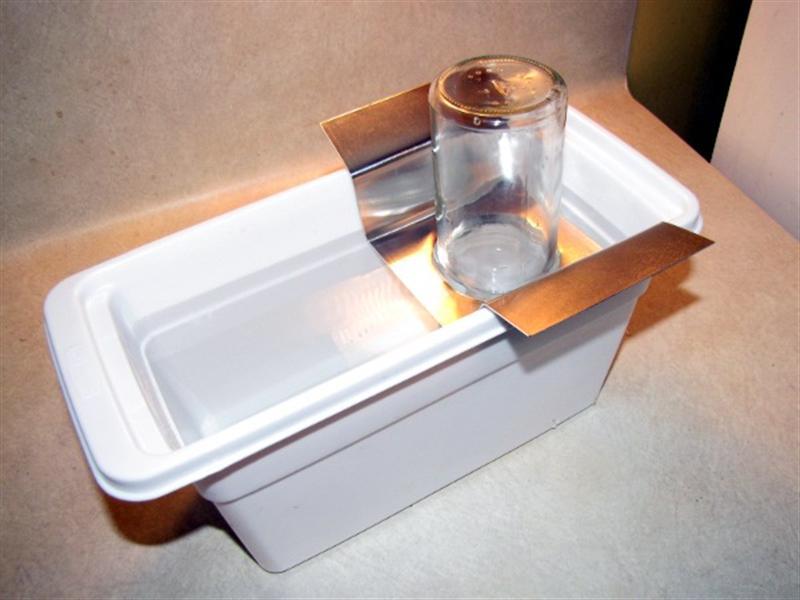
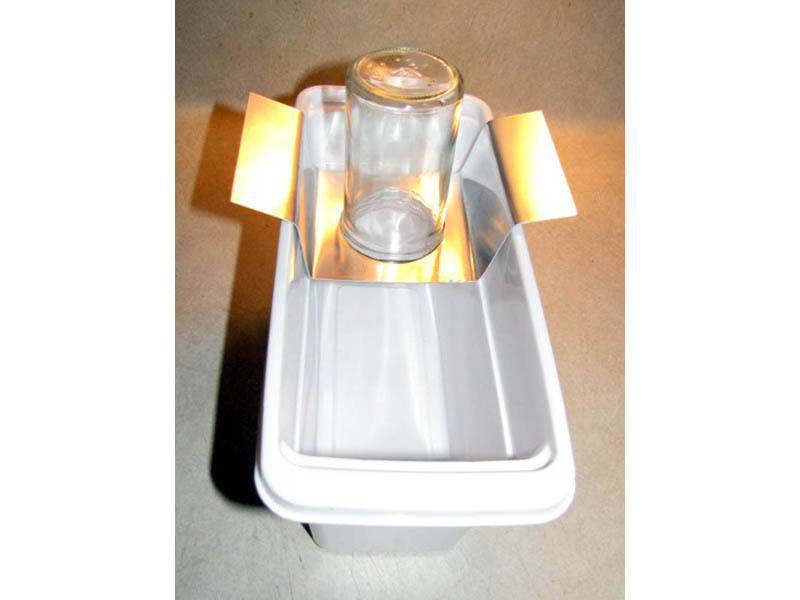
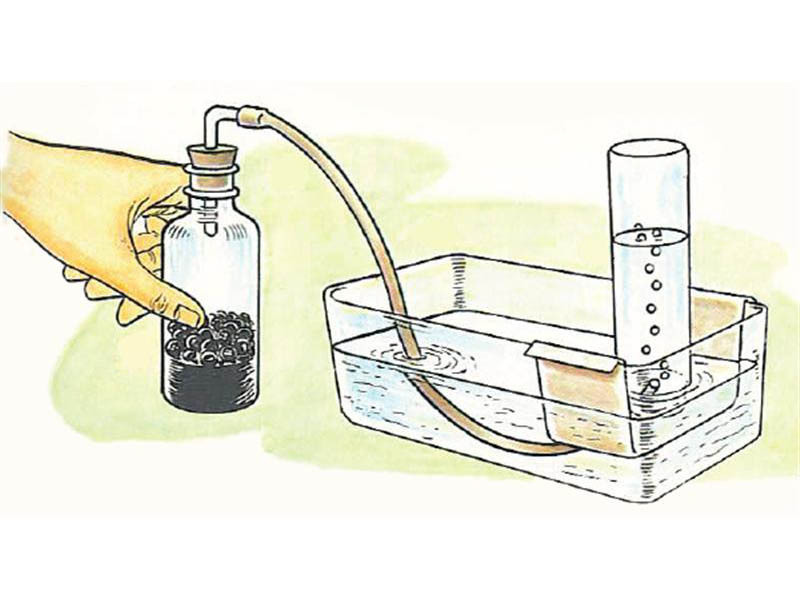
Although it sounds like some kind of euphemism from Brave New World, a “pneumatic trough” is actually a very handy piece of classic chemistry lab kit. Besides providing a convenient means to collect samples of pure gases for various experiments, a pneumatic trough with a graduated container allows the easy volumetric measurement of reaction yields for gas-producing reactions.

If that all sounds too complicated, don’t sweat. What I’m going to show in this tutorial is just how to build a simple apparatus that allows you to collect pure gas samples over water. You can collect carbon dioxide, oxygen, hydrogen–almost any gas you can generate and direct down a hose.

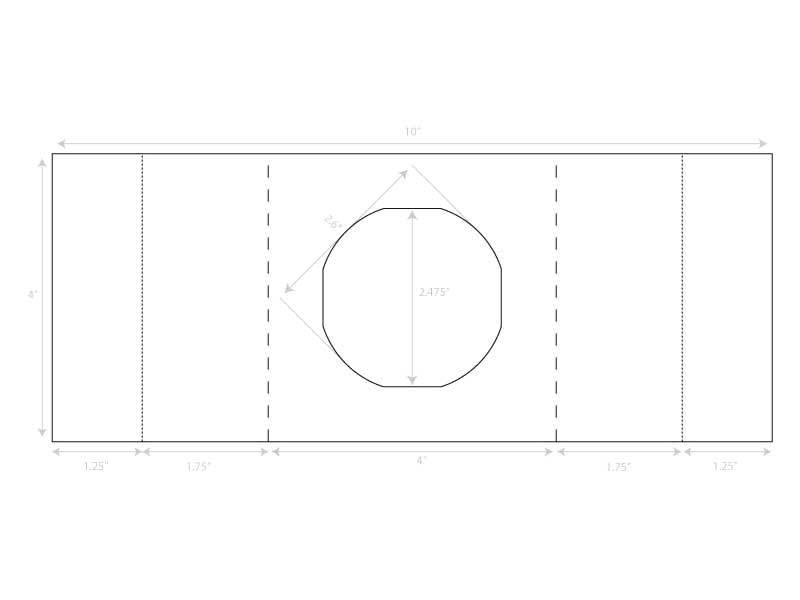
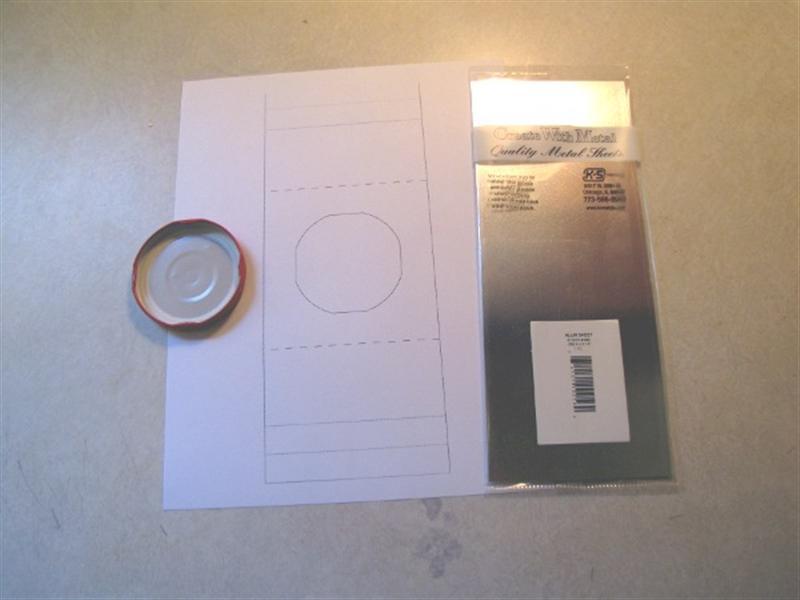
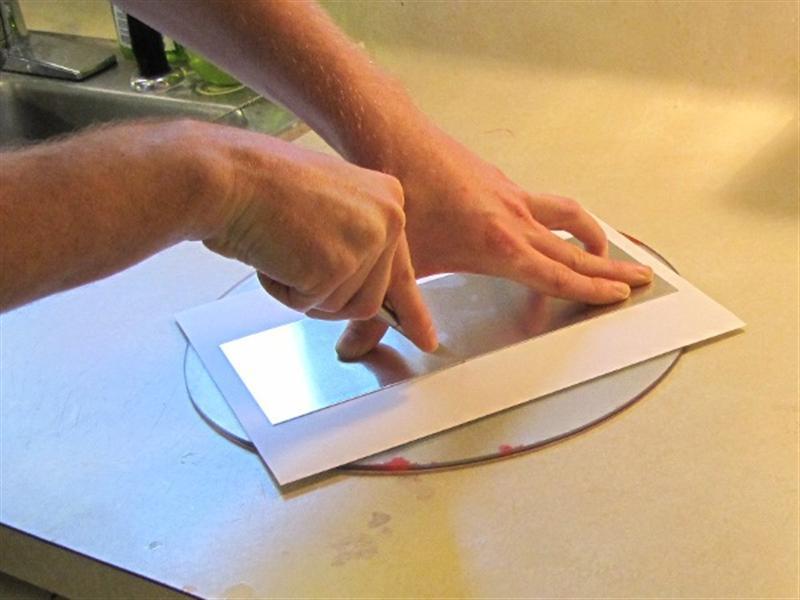
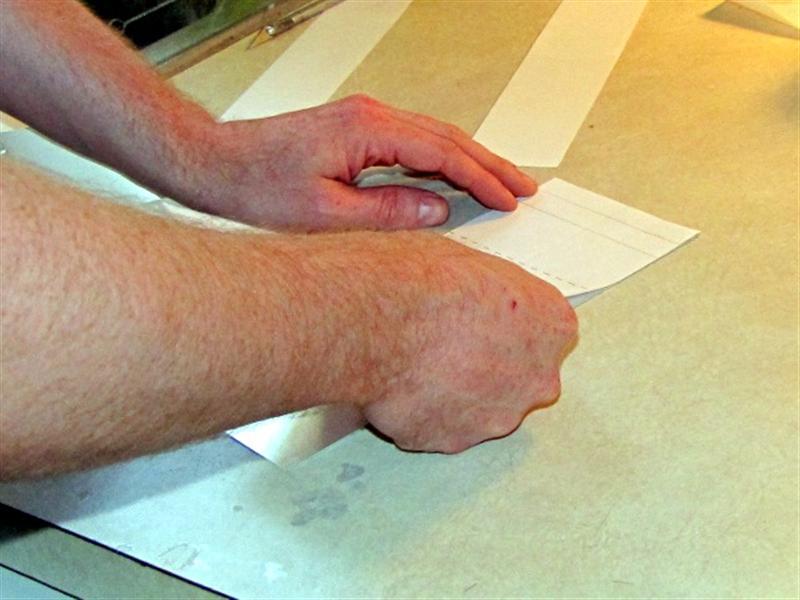
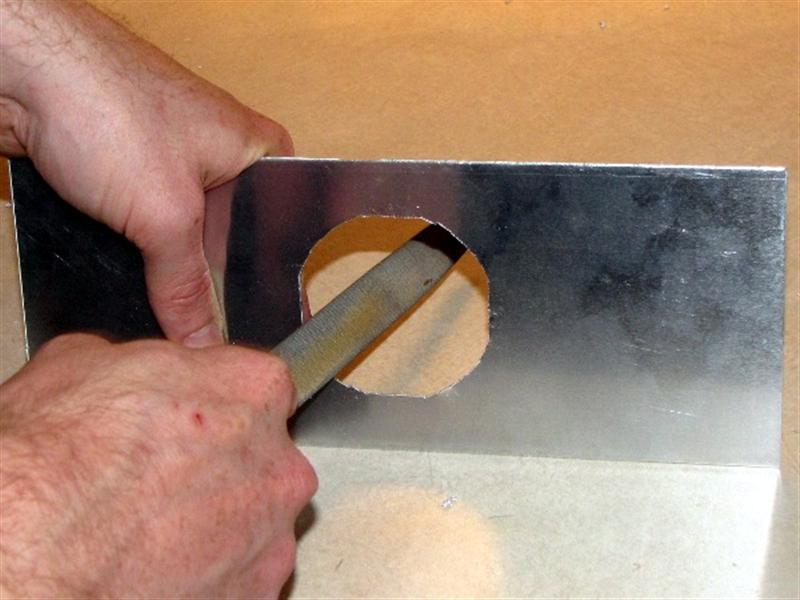
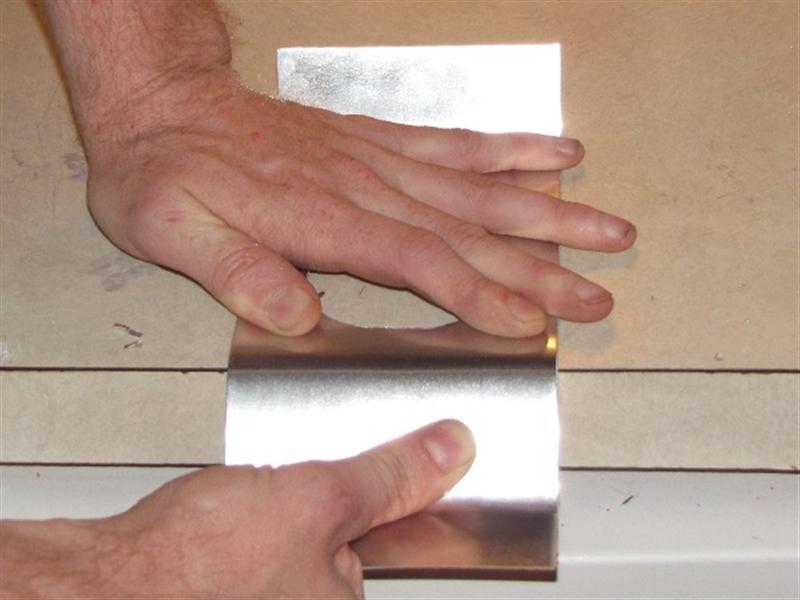
It seems like a simple enough bit of equipment: all you need is an upside down container suspended in a bucket of water. Finding a convenient way to set that up, however, is tougher than it sounds. The pneumatic trough presented here, which uses a sheet metal “bridge” to secure the glass column, is by far the most painless and economical way to make it work that I have found. The basic idea is derived from illustrations in Robert Brent’s 1960 Golden Book of Chemistry Experiments (from which the title diagram is taken), but the addition of an aperture shaped to accept the threads of a glass jar is of my own devising.

Project Steps

Measure internal dimensions of jar lid

Most glass jar closures these days use a simple lid design, like that shown in the photograph, consisting of an opening having the shape of the intersection between a circle of a particular diameter, and a square of dimension slightly smaller than that diameter. Put simply, it’s a circle that’s been flattened a bit on four sides. The jar will thread into any aperture that has an opening of this shape, so what we’re going to do is reproduce it.

Measure the inside dimensions of the lid opening across the circular diameter, and between the flats.

The lid I used had an internal diameter of 2.6″ and a flat-to-flat “diameter” of 2.475″.

Prepare template

I used Adobe Illustrator to prepare my template. If you use the same materials I did, you can use the same template, which is attached to this project as a PDF. If you don’t have access to the same materials, you can of course make your own template, using Illustrator, other software (like InkScape), or manual drafting.

Print out your template on a full-page adhesive mailing label.

Kindly disregard the two extra lines on the template in the photographs; I originally intended to put two more bends in the bridge but that proved unnecessary. The extra lines are not included in the template image, nor in the downloadable PDF.

Cut out and affix template

Overlay the sheet metal blank on the printed template and cut around it using a hobby knife.

Peel off the adhesive backing, carefully align the label with the sheet metal, and smooth it in place.

Rough out opening

Using a 1/4″ bit, drill a circle of closely-spaced holes about 1/4″ inside the outline of the opening. The holes should be about 1/16″ apart.

Cut the narrow “bridges” between the drilled holes with side-cutting pliers. Discard the cut-out bung.

Finish opening

Use a hand nibbler to carefully trim out to the finished edge.

The nibbler should leave a fairly clean cut, but you may want to follow up with a few light file strokes here and there to smooth things up.

Be sure to test the jar fit as you go; better to have a messy edge than to remove too much material and ruin the fit.

Bend sheet

There are four bends to make in the template. Start with one of the “end” bends and work across the template to the other end.

For each bend:

Position the sheet metal over the edge of a counter, aligning the counter edge with the line you want to bend.

Being careful not to distort the opening, bend the sheet metal with your hands.

Be careful of the edges of the sheet metal. You may want to wear gloves.

Assemble

Peel the template label off the metal. Use rubbing alcohol to remove any residue that remains.

Fill the ice bin with water to a level slightly deeper than your jar is tall.

Position the bridge across the ice bin, at one end, as shown. The opening in the bridge should be submerged by about one-half inch. Add more water if necessary.

Submerge the jar at the free end of the ice bin, and tilt it slightly upward to fill it with water.

Keeping the jar under water, rotate it so the open mouth is facing down.

Without lifting the mouth above the water level, raise the jar until it can be moved over the opening in the bridge.

Thread the jar into the opening in the bridge. If you’ve done everything right, the jar should still be full of water, with no bubbles.

Conclusion

To collect gas, a tube from the running gas generator is inserted into the water below the upended jar, and the bubbles rise to displace the water with the generated gas.

See an example of its use in my tutorial on collecting oxygen from the decomposition of hydrogen peroxide.