The thing about folding tables is, the tops–which are commonly made of cheap particle board–tend to wear out much faster than the legs–which are usually made of steel. So the world is full of old folding tables with mutilated tops and perfectly serviceable legs. Here’s a cheap and easy way to replace that old top using a hollow-core door, including a clever trick for reinforcing the mountings with spray-in foam.

Project Steps

Materials

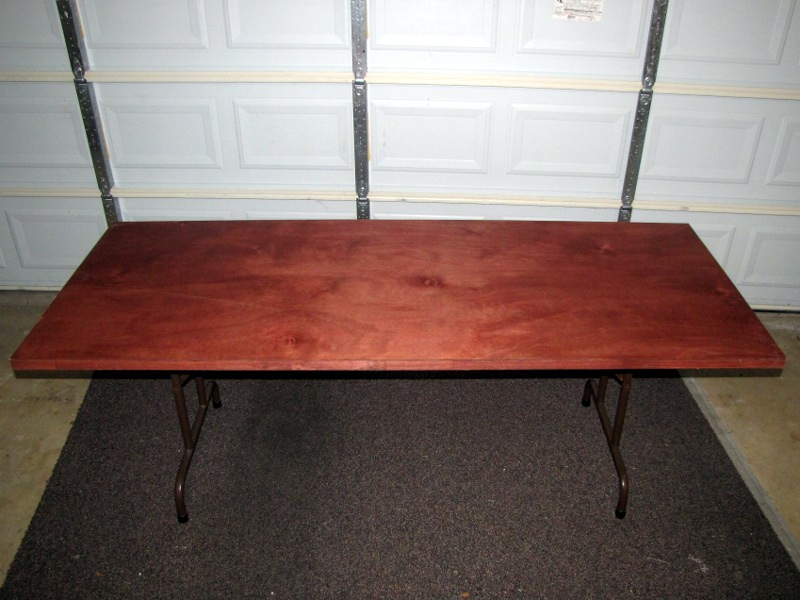
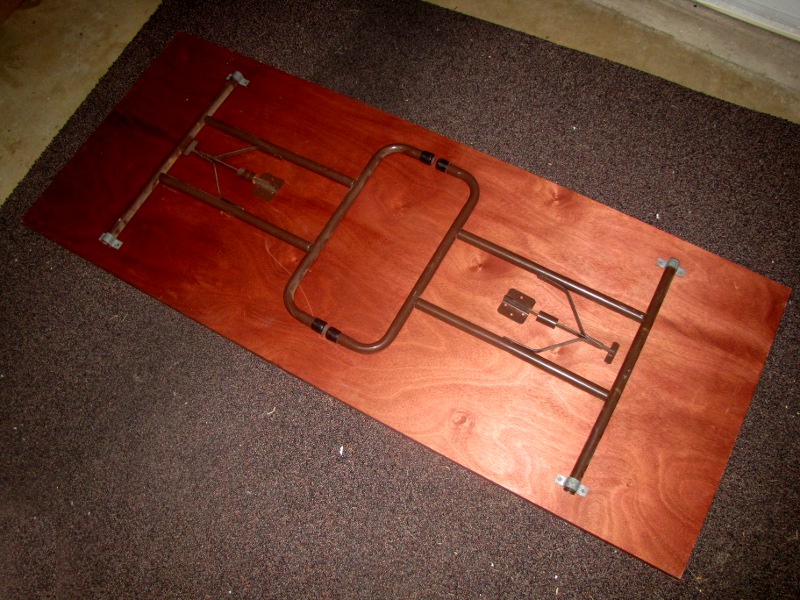
Used hollow-core doors are not hard to come by. The tricky part is finding one that doesn’t have a knob hole and/or hinge mortises. But even these can be found. Habitat for Humanity ReStores have a wide selection of donated construction materials, including hollow-core doors, available for a song. Likewise, big chain hardware stores often have “seconds” that they will be glad to get rid of.

If all else fails, doorknob holes and/or hinge mortises can be patched, covered, or simply ignored. If you’re going to be using the table as a desk, a doorknob hole actually makes a handy place to mount a desk lamp and/or pass cords through.

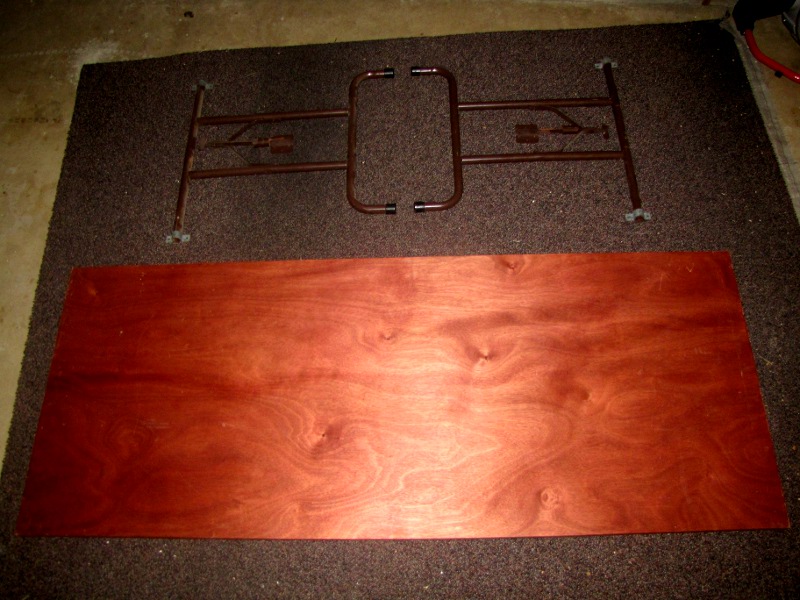
The door I bought was a second from Lowe’s, and it came already stained. If your door is unfinished and/or you want to refinish it, I suggest finishing the bottom surface between steps 7 and 8 in this guide, then finishing the top and sides once the legs have been mounted so you can stand the table on its own legs and work at a more comfortable height.

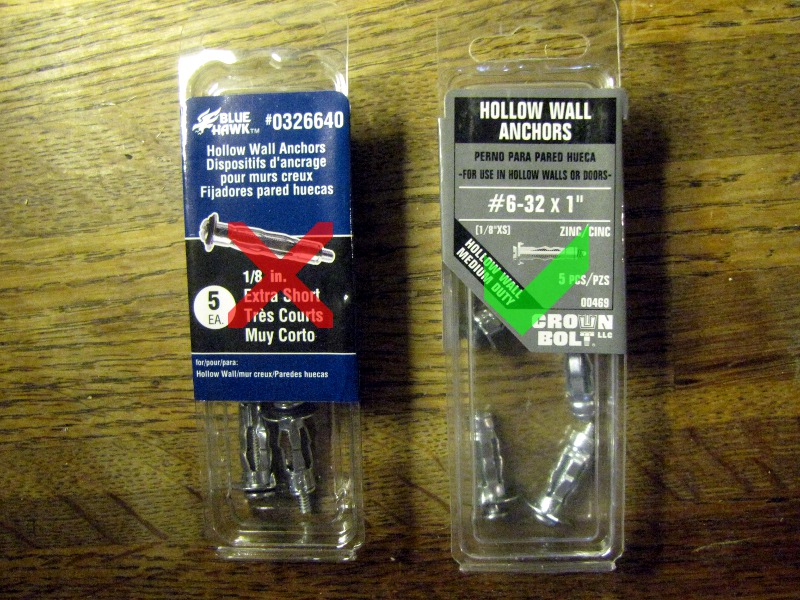
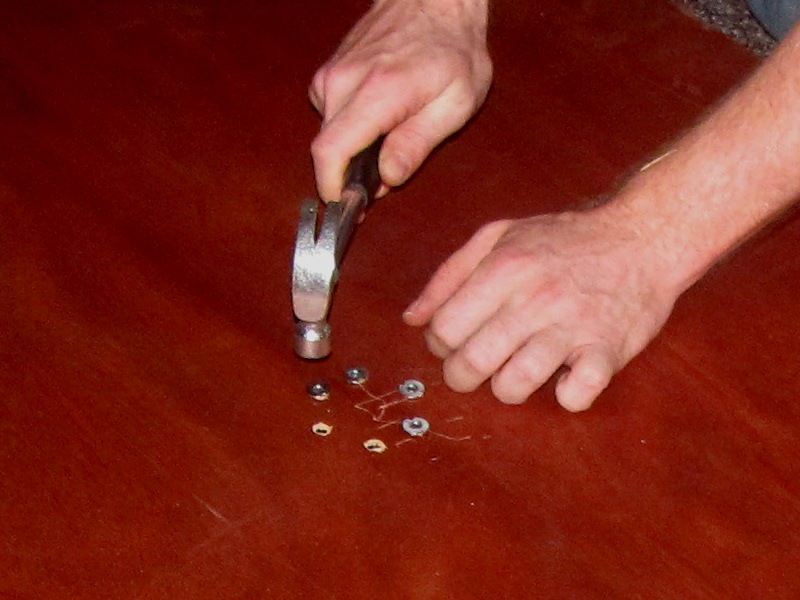
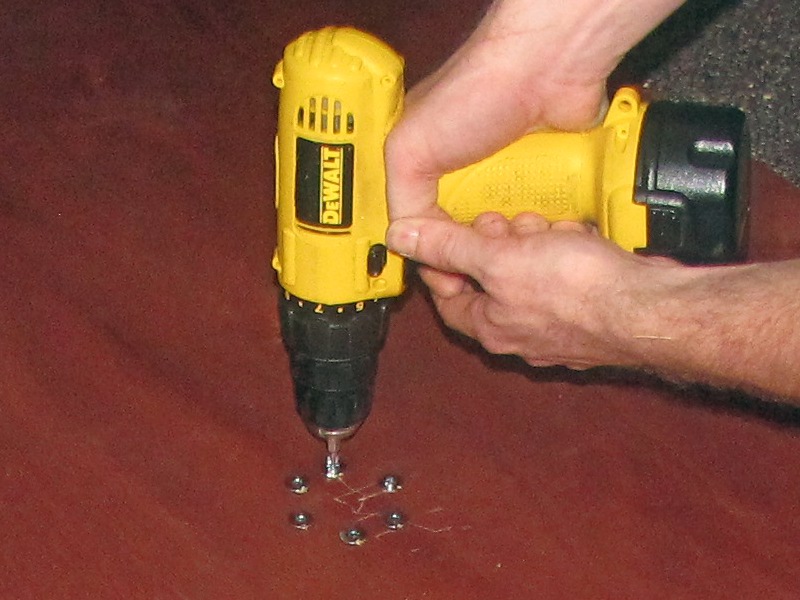
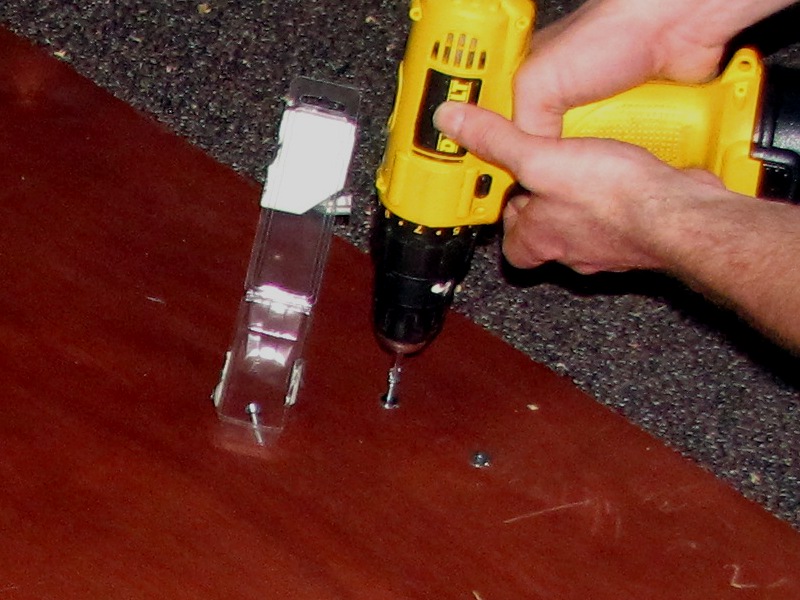
I advise against using 1/8″ XRS Molly bolts purchased from Lowe’s, as shown to the left in the photo. I started with these, and found them to be of terrible quality–the teeth on the bolt sleeve would fold over instead of driving in, the screw threads would strip out at the slightest provocation, and one time the body of the sleeve even separated from the head inside the door. Those by Crown Bolt, pictured, were purchased from the Home Depot and worked great.

Mark drilling locations

With the door good-side down, lay out the folding leg hardware roughly where you want it mounted.

Measure the distances to the edges of the door for each set of leg hardware and adjust their positions to make them symmetrical.

I think it’s best to put the legs as close to each other as they can get, while still unfolding properly, in order to minimize the unsupported distance between them when the table is set up.

Use a Sharpie to mark the surface of the door through the holes in the leg hardware.

Drill holes

Drill pilot holes, where marked, using a skinny bit to start. Mine was 3/32″.

Step-drill the pilot holes up to 5/16″, or whatever the appropriate finish diameter for your anchors. I did this in one step with no problems.

Hammer in bolt sleeves

I found it easier to drive in the bolt sleeves with the bolts themselves removed.

Align the two “teeth” on the bolt sleeve with the grain of the wood, as shown.

Use a small hammer to drive the teeth of the bolt sleeve into the surface of the door. Dead blows are more effective than rebounding blows.

Expand bolt sleeves

Insert the bolts back into the hammered-in sleeves and carefully tighten them down.

Do not overtighten! You will feel the anchor “pull down” a bit when it is expanded sufficiently inside the door, and there’s no reason to tighten the bolt beyond this point.

With all the sleeves expanded, remove all the bolts again and set them aside.

Blow in foam (optional)

Shake up the can of foam for at least 30 seconds.

Wearing gloves and goggles, and with good ventilation, align the nozzle of the foam can with the holes in each of the anchor sleeves.

Spray foam into the door through each of the holes for about one second per hole.

Foam will probably “spooge” out of the hole when you remove the nozzle, and possibly out of adjacent holes. For now, just leave it in place.

Clean up foam (optional)

Once you’ve blown foam in all the holes, come back with your knife and carefully lift off any excess foam and discard it on a scrap of cardboard.

Don’t try to wipe off spilled or excess foam while it is still wet. This will just smear a film across the surface. It’s easier to wait until the foam hardens and scrape it off mechanically.

Keep an eye on the foam. As it cures, more will probably “spooge” out of the anchors. Clean this off every fifteen minutes or so, during the first hour, using the knife as above. The idea is to make sure the expanding foam has plenty of “breathing room” as it cures so that it doesn’t bow out the surface of the door.

Once the foam has cured completely (usually about 8 hours or so), scrape off any excess using an inverted wood chisel, as shown. Remember that the area between adjacent anchors will probably be concealed by the leg hardware.

Add split washers

While the foam is curing, add a split washer between the head of each bolt and the black flat washer supplied with it.

A split washer is a type of “lock” washer that, by applying tension against the tightened bolt head, prevents it from loosening due to mechanical vibration in use.

Mount legs

Once the foam is cured and cleaned up, put the leg hardware back in place.

Insert the anchor bolts, with added split washers, through the holes in the leg hardware and into the threads of the anchors.

If you’ve used foam, the anchor holes will be full of it, but this does not create a problem in practice. The bolts cut/crush through the foam with no problem.

Tighten the anchor bolts into the anchors using a screwdriver. As before, be careful not to overtighten.

Conclusion

I wish I could say for certain that blowing in the foam makes a difference in the durability of the finished product. Without a control, however, I'm just speculating. I can say, for certain, that the foamed-in anchors feel more solid than the anchors without foam. Tap on the door where it's without foam and it goes bong, whereas if it's been foamed it just goes thud.

The foam makes a bit of a mess, however, and if too vigorously applied can cause the surface of the door to bow out annoyingly. So whether or not it's really worth doing is still an open question in my mind.