YouTube player

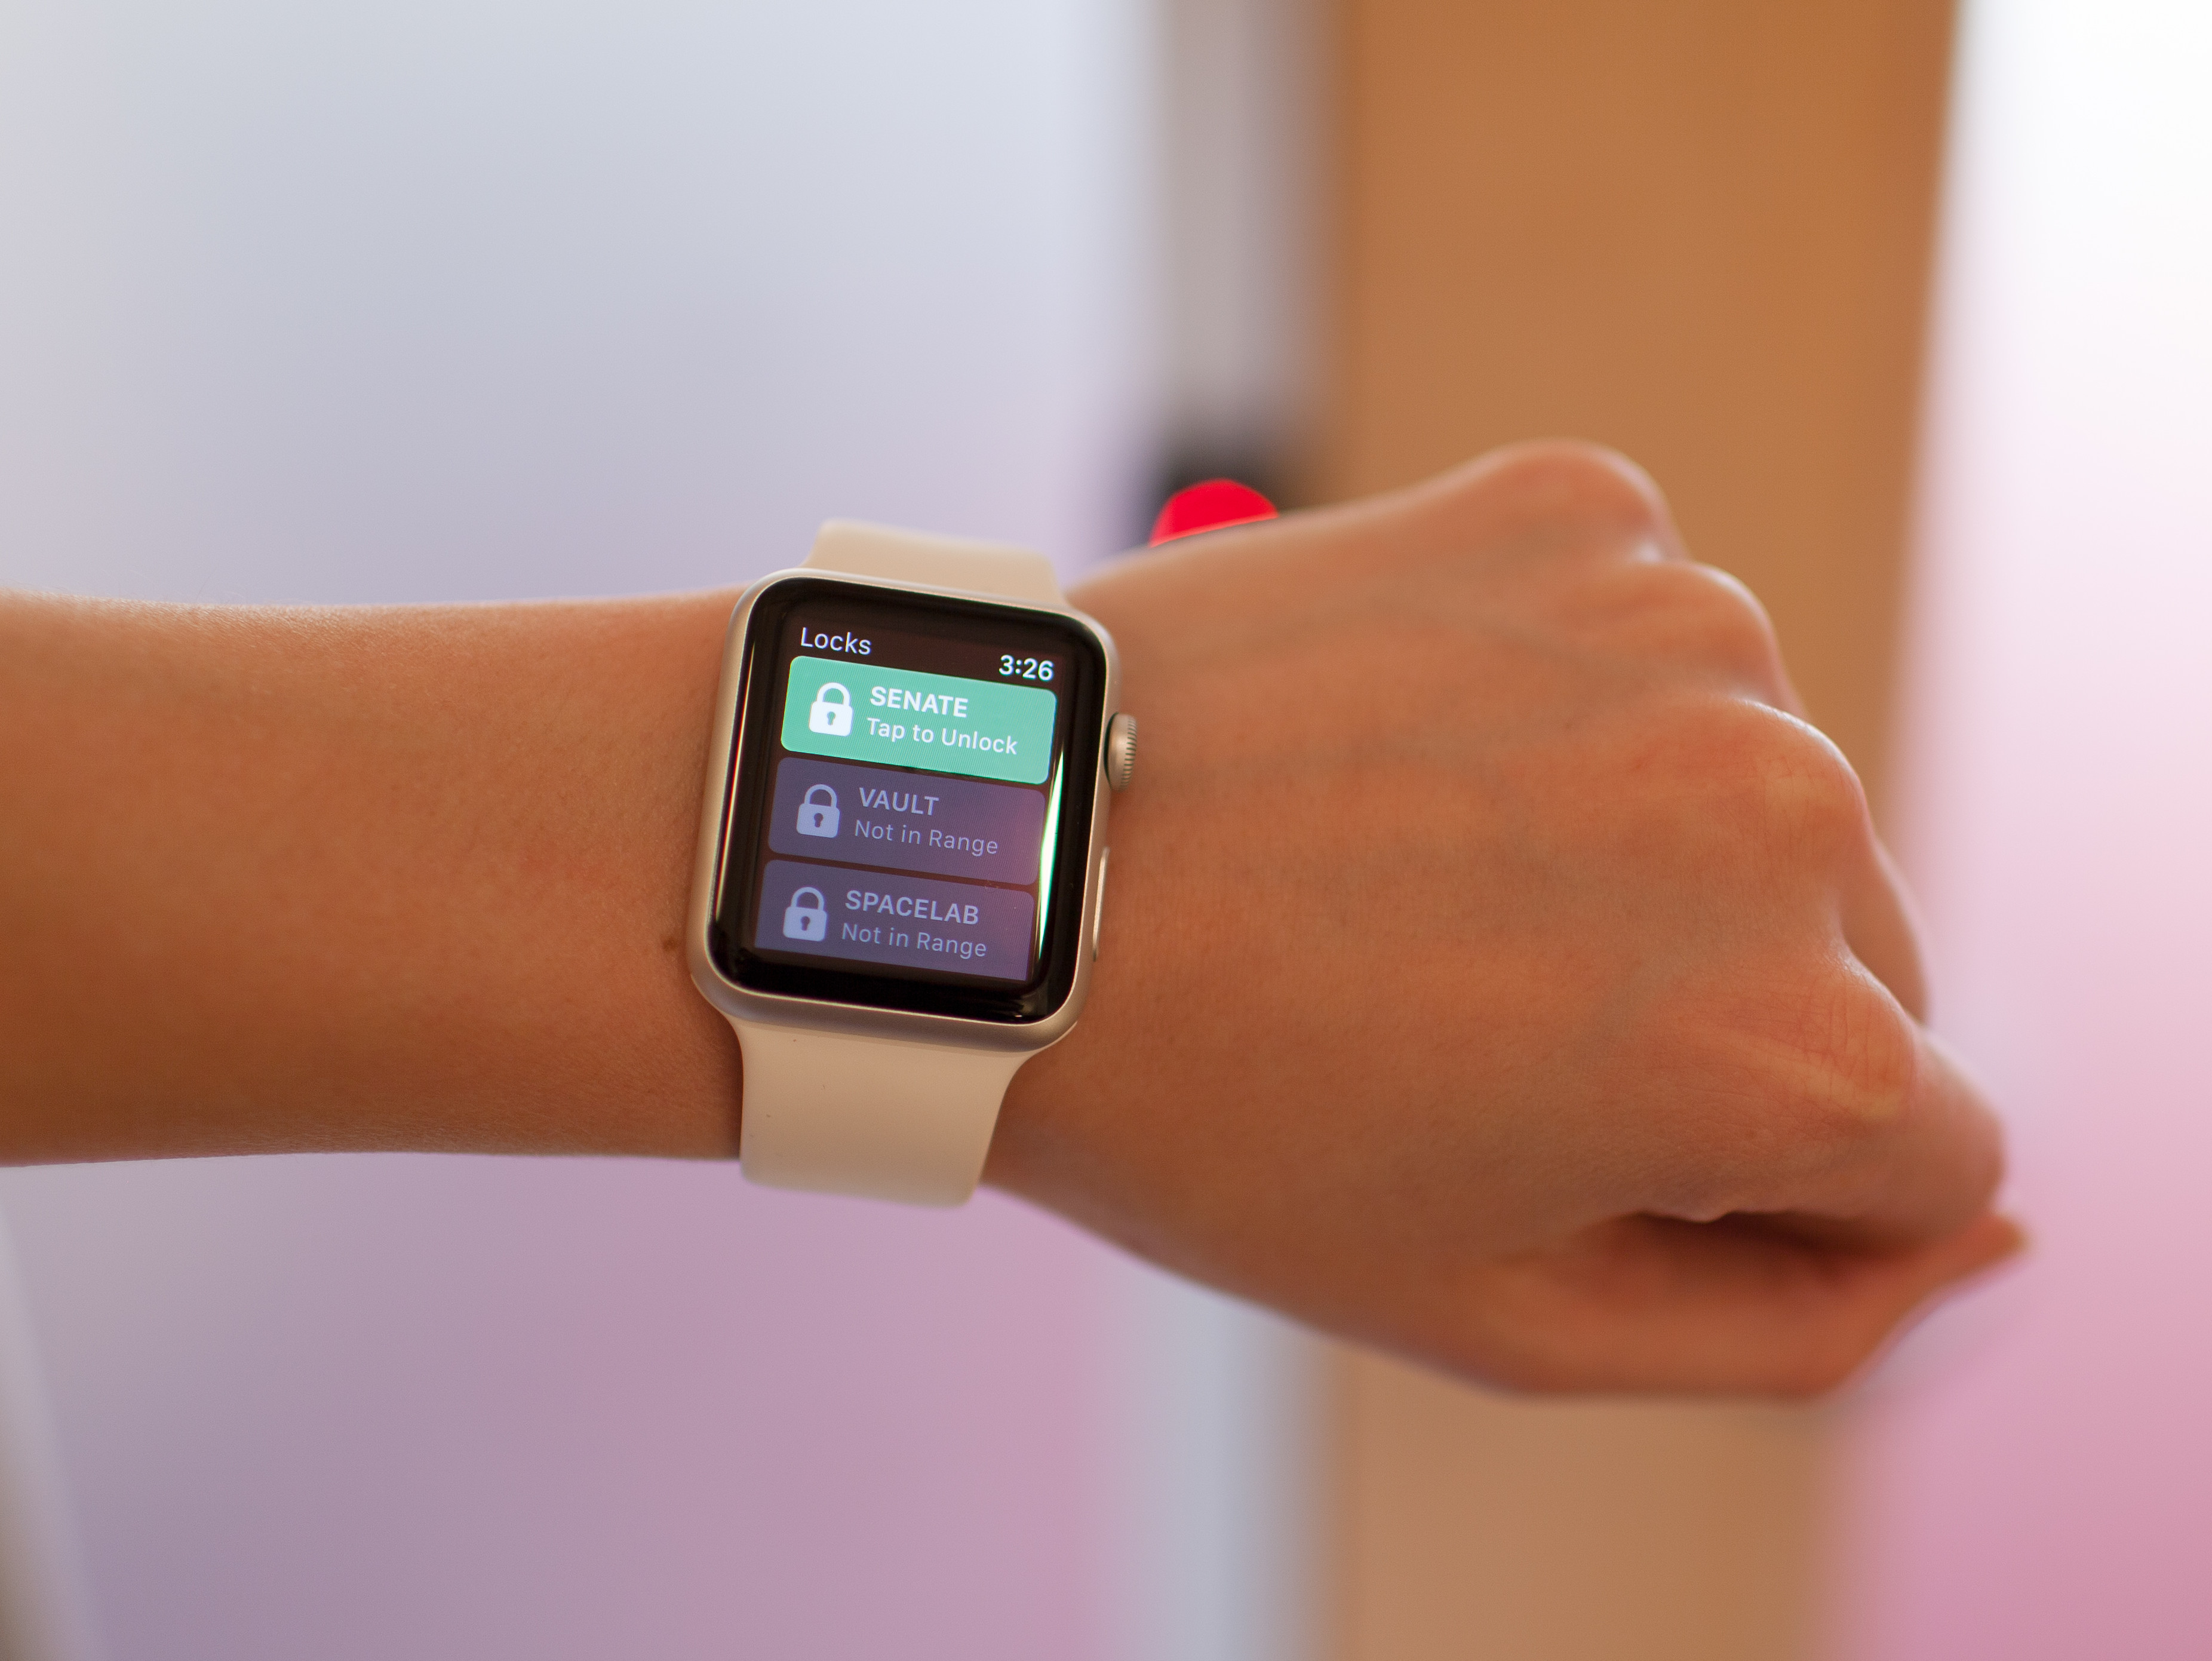
What’s an Apple Watch good for? How about unlocking doors with just a tap on an app? We figured out how do something no one else has done for under 150 bucks, using standard door-strike hardware, our custom app, and a tiny RFduino microcontroller. In this Weekend Project we’ll show you exactly how to do it.

We started this project to help solve a real-world problem: prevent our employees from being locked out of our office. Our security system automatically locks the doors outside of normal business hours. If someone steps out of the office without their security card or keyfob, they’re locked out. When this happens, people use their phone to call or email people at the office to let them back in. This showed us that people may forget their security card — but they don’t forget their phone. With this insight, we set out to create an mobile app that would serve as a virtual security card. The Apple Watch would make this even more convenient, and since Apple Watch apps are extensions of iPhone apps, we created a bundle that includes both apps.

All photos taken by space150.

Beyond the convenience of allowing people to securely open doors with the Apple Watch, we had three main goals for this project:

  • Leverage our existing security system: integrate with the security system and electronic doors we currently have in place.
  • Extend our existing system: augment what we have by adding additional electronically secure doors.
  • Learn how to best use the Apple Watch: this is a new platform, and it will take us (and others) a while to understand the most natural way to interact with it.

We didn’t want to compromise or complicate our existing security system during this process. To this end, we made sure all existing keys would work as they did before, and chose our hardware and approach to ensure this.

This project is built on these main components:

  • Electronic door strike: Each door needs one of these; it’s a device that allows the door to be opened electronically, even if the door latch itself is locked. The strike we’ve chosen is compact and is a fail-closed model, meaning it remains locked when powered off. In the case of a power failure, it remains secure, and can be unlocked normally with a physical key.
  • RFduino module: Each door needs the capability to communicate wirelessly with our phone and watch apps, and to send the proper signal to the door strike to open the door. We chose the RFduino wireless microcontroller, because it offers BLE, has a compact form factor, and is Arduino compatible. The RFduino module runs a small application that securely communicates with our phone and watch Apps, and opens the door when activated.
  • iPhone and Apple Watch app: Apple Watch apps are extensions of iPhone apps, so we created one app that bundles both together. This app will authenticate the user, and will communicate wirelessly with the door to allow it to open.

This project can be used by multiple people in a household, and we’ve created the ability to share the doors and virtual keys between users. (For our company, we used a different approach that leverages our authentication services, so it’s automated.)

This project tutorial outlines the steps required to turn a normal door into a door that can be opened remotely using the Apple Watch (or iPhone, if you don’t have an Apple Watch).

Required Online Resources

All source code for this project is available as open source software on GitHub and can be modified to suit your needs. This repository includes the source code for the iPhone and Apple Watch app, code for the RFduino, the circuit diagram, and a link to the App Store version of the app.

Additional Resources and Information

Learn more about how and why we created this project, on our blog.

You’ll need about 12–16 hours to build this project, at a cost of about $100 per door. The door strike is $60 and the electronics for the door module are about $40.


Project Steps

Build the circuit

In Steps 1 through 6 you’ll build the door electronics module and install the software onto the RFduino.

The door strike requires 12 volts while the RFduino only requires 3.3 volts. To keep things simple, we use one 12V power supply, and use a voltage regulator to step down the voltage for the RFduino.

Build the circuit as shown in the schematic diagram (second image here). We recommend building on a solderless breadboard to start, and then later transferring your working circuit to a PCB. This will ensure the whole system works properly and you can take your specific mounting location into consideration.

Our module is very compact when completed, but with some simple changes to the layout, it can be made even smaller or made to fit optimally to your space.

Download the iOS iPhone and Apple Watch app

Download the app for free from the Apple App Store (all instructions here assume the App Store version).

The source code for this project is available on GitHub, so you can examine and modify the code, and build your own version.

Configure a door

Launch the iPhone app and go into the Keys tab. Tap the plus icon to add a new door, enter a name and unique ID (the app will generate some unique keys below).

The key and handshake are AES-128 bit encoded strings and are the keys to your lock. The app will allow you to copy these strings, which we’ll copy into our sketch in the next step.

If you’d like to add a photo of your door you can touch the photo icon to take a picture that will be associated with the lock.

Arduino IDE and RFduino setup

Make sure you have the Arduino IDE version 1.6.3 or later. Grab a copy of the latest IDE for your OS here.

In the Arduino IDE go to the Edit Preferences dropdown menu and add http://rfduino.com/package_rfduino_index.json to the Additional Board Manager URLs field, then click OK.

Next go to Tools→Board, and click on Boards Manager.

In the boards manager, click Install on the Arduino SAM Boards. Once this finishes installing, scroll down to the bottom of the boards manager and install RFduino Boards.

After both board packages have installed, you should see the RFDuino board in the Board section of the Tools menu.

Install the RFduino software

The RFduino software will broadcast the presence of the lock, and securely communicate with the iOS app. Follow the RFduino’s instructions to connect it to your computer using the USB Shield.

Before you flash the RFduino you’ll need to change a few variables at the top of the software program (called a sketch). Open the sketch in the Arduino IDE, then copy the door name, key, and handshake from the app for the associated door you’re setting up.

Now upload the sketch to the RFduino.

NOTE: If you have an RGB LED Button shield for the RFduino, plug it in. The sketch will provide a red light/green light display to show the doors in locked/unlocked states.

Connect the door strike

Use the JST connector to connect the module to the wires on the strike. The Levitron strike we’ve chosen has 2 inputs and polarity does not matter.

If you’re using a different (or existing) door strike, check to see if polarity is important for your connection.

Test the system

At this point, you should be able to power up the RFduino and run the iPhone/Apple Watch app.

The iOS app will detect any locks in proximity and display them in the app. They are added as they are discovered, and stored for future use. When you’re in close proximity to a lock, you can press on the Tap to Unlock button, and you should hear the door strike open.

NOTE: The default value is to leave the strike unlocked for 7 seconds; this is configurable.

Prepare existing door

In Steps 7 through 9 you’ll add an electronic door strike to a normal door.

Remove the existing door strike, and examine the door to be sure the new electronic door strike will fit. You’ll likely need to remove some material from your existing door frame.

The largest part of the strike that will need to be fitted is 2.6″ tall, 1″ wide, and about 1.3″ deep. Most doors should be able to accommodate this.

You’ll also need to run low voltage (12V DC) wires to the door strike, so now is a good time to plan where those will be run.

Install the new door strike

We used the door strike itself as the template for measuring the material we needed to remove from the door. The key thing here is to be sure that the new strike fits centered on the existing door latch.

Once you measure the material that needs to be removed, it is time to get it out of the way; a wood chisel, Dremel, or small hand saw work well depending on your exact layout. Be careful removing material here, as you don’t want to remove too much.

The door strike will attach at the top and bottom with 2 screws, and these should be mounted as securely as possible.

Power the door strike

The door strike we’ve chosen is a fail-closed model. When there is no power to the unit, it will be in a closed (locked) state. When the strike is installed properly, the door should function just as it did before. Unlocked, it will open normally, and when it’s locked, a key can be used to open the door.

To test the electronic release, you just need to apply 12V DC to the leads of the door strike. When the strike is powered it will release the latch, allowing the door to be opened.

Finalize setup

When the RFDuino module is built and tested, and the door strike is installed in the door, you’re ready to complete the installation. Just connect the JST connector and install the RFduino module on your wall or door frame.

A small project box can be used to hold your RFDuino module, or you may be able to fit the entire module into your door frame, depending on your setup.

Conclusion

Once we installed this in the office and started using it, we instantly saw how convenient it was. This is the type of thing that is easy to get used to, and the more you use it, the more you get used to using it.

Once you’ve finished a single door, it’s very simple to add this to more doors.

There are many ways this project can be taken farther:
  1. More Security There are many ways to increase the security of this system: you could require a connection to an existing (secure) wifi network, for example, or limit times of day that doors allow access.
  2. Push Notifications The version we’ve published does not have push notifications built in. Adding this allows the Apple Watch to push a notification automatically when you are near a door, increasing the convenience of this.
  3. Sound Over time we have been trained to associate unlocking doors with a beep or sound. Adding a piezo speaker and sound to the circuit would be a nice upgrade for the user experience.
  4. Android The Android platform would be a great addition, and a similar system can be created using Android phones and Android Wear smartwatches.
  5. Tracking and Notifications The Bluetooth beacon technology used here can also store and track when people are near a door. This information can be stored for future reference or pushed proactively to other users on the systems when door are accessed.
  6. Deeper Integration Using a system like IFTTT, you could easily trigger other events when a door is access or unlocked. Adjusting your Nest thermostat, turning on lights, or automatically sending messages to people are all easily possible through IFTTT.
  7. Network Connectivity (Particle/spark.io) The system we’ve designed does not require the doors to be connected. By adding Wi-Fi to the doors, you could have them report status back (open, closed, locked, unlocked). Additionally, new cellular-connected devices like the Electron from Particle (formerly Spark.io) could do this over a cell connection, and wouldn’t be dependent on Wi-Fi or Ethernet.