m49_ChippyRuxpin-3
Before Furby, AIBO, or Pleo, 1985’s Teddy Ruxpin storytelling plush bear from Worlds of Wonder was the first animatronic toy that used data on a tape drive to choreograph motor movements, while also using the tape for audio playback. Photo by Hep Svadja

It was December of 1985 when I watched in horror as my father began ripping apart my favorite toy. Teddy Ruxpin, for those unfamiliar, was an animatronic storytelling teddy bear that was a close friend to many children of my generation. When an official Teddy Ruxpin cassette tape was inserted into his back, he would spring magically to life, blinking his eyes and moving his mouth to speak in a gentle, non-threatening voice. My dad was certainly sick of hearing Teddy sing songs and regale me with tales of high adventure, so he had decided to add a custom headphone jack and spare his sanity.

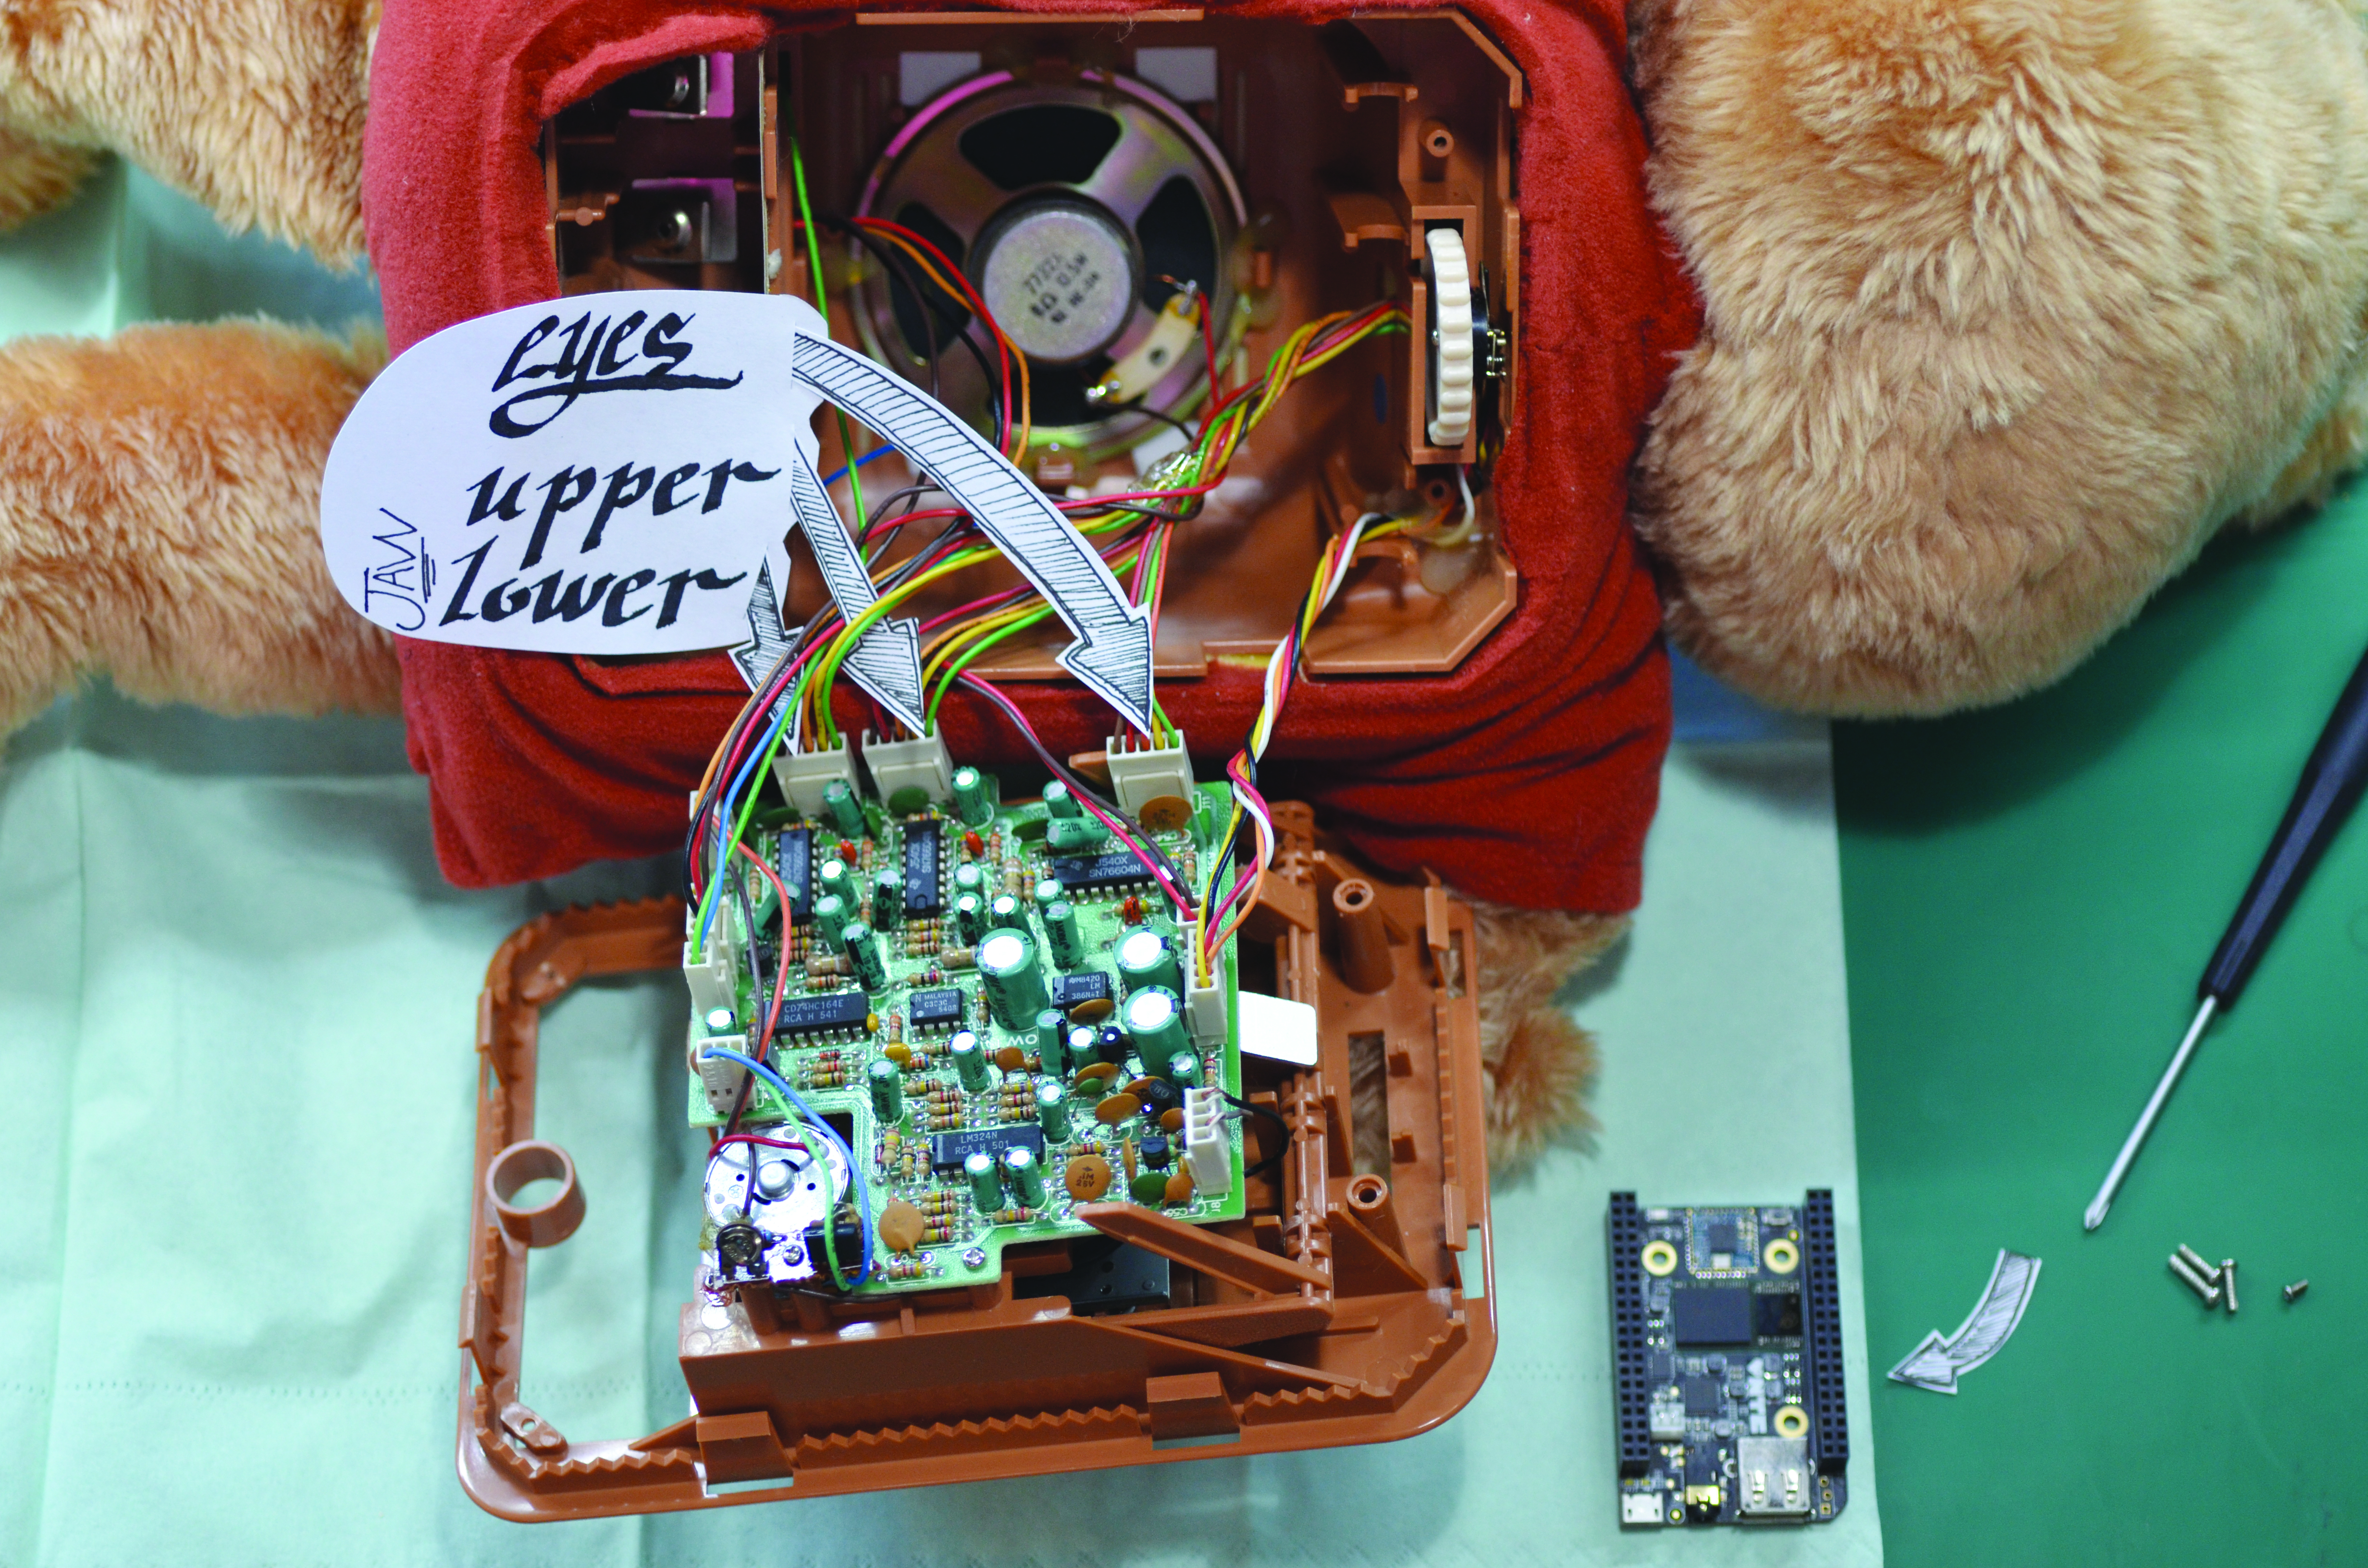
While I feared for my animatronic friend as he went on the operating table, I was fascinated as my dad explained the inner workings of the bear. The audio cassette tape contained two tracks: one reserved for the voices and music, and the other containing audio frequencies that told the circuits how to move the mouth and eyes in perfect synchronization. It was all pre-programmed. There was no magic involved.

GUS_2204
Photo by Richard Reininger

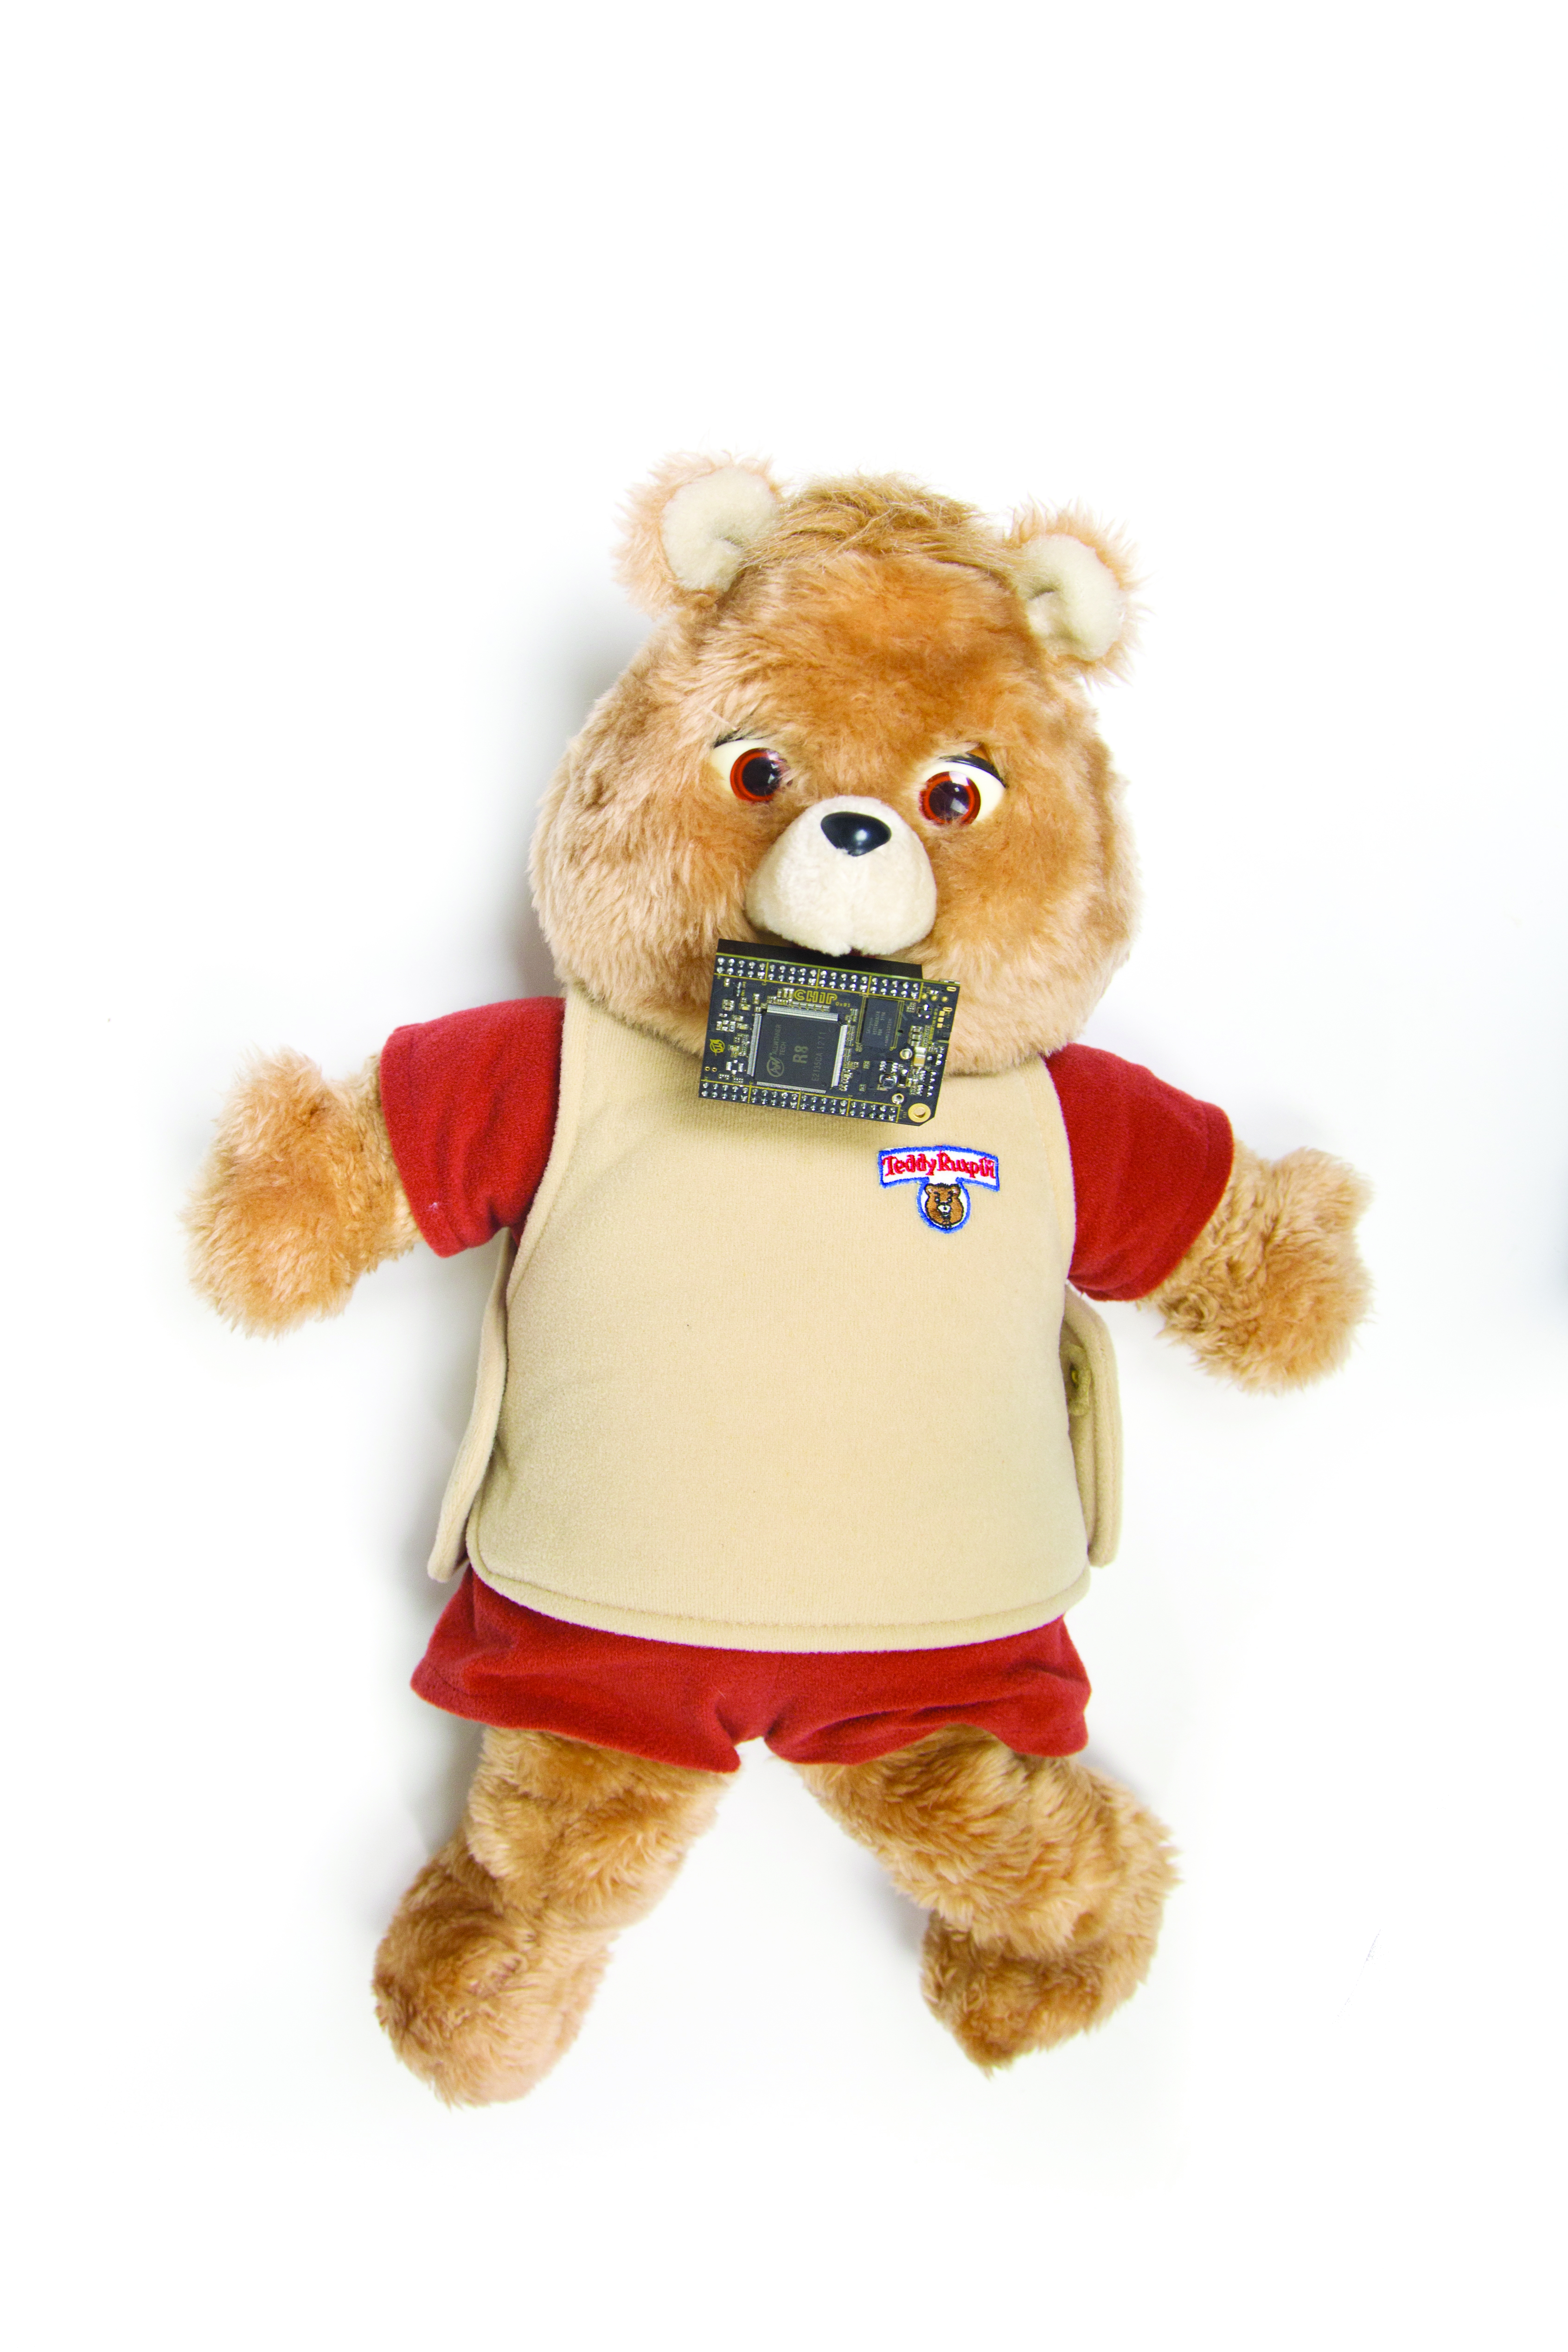
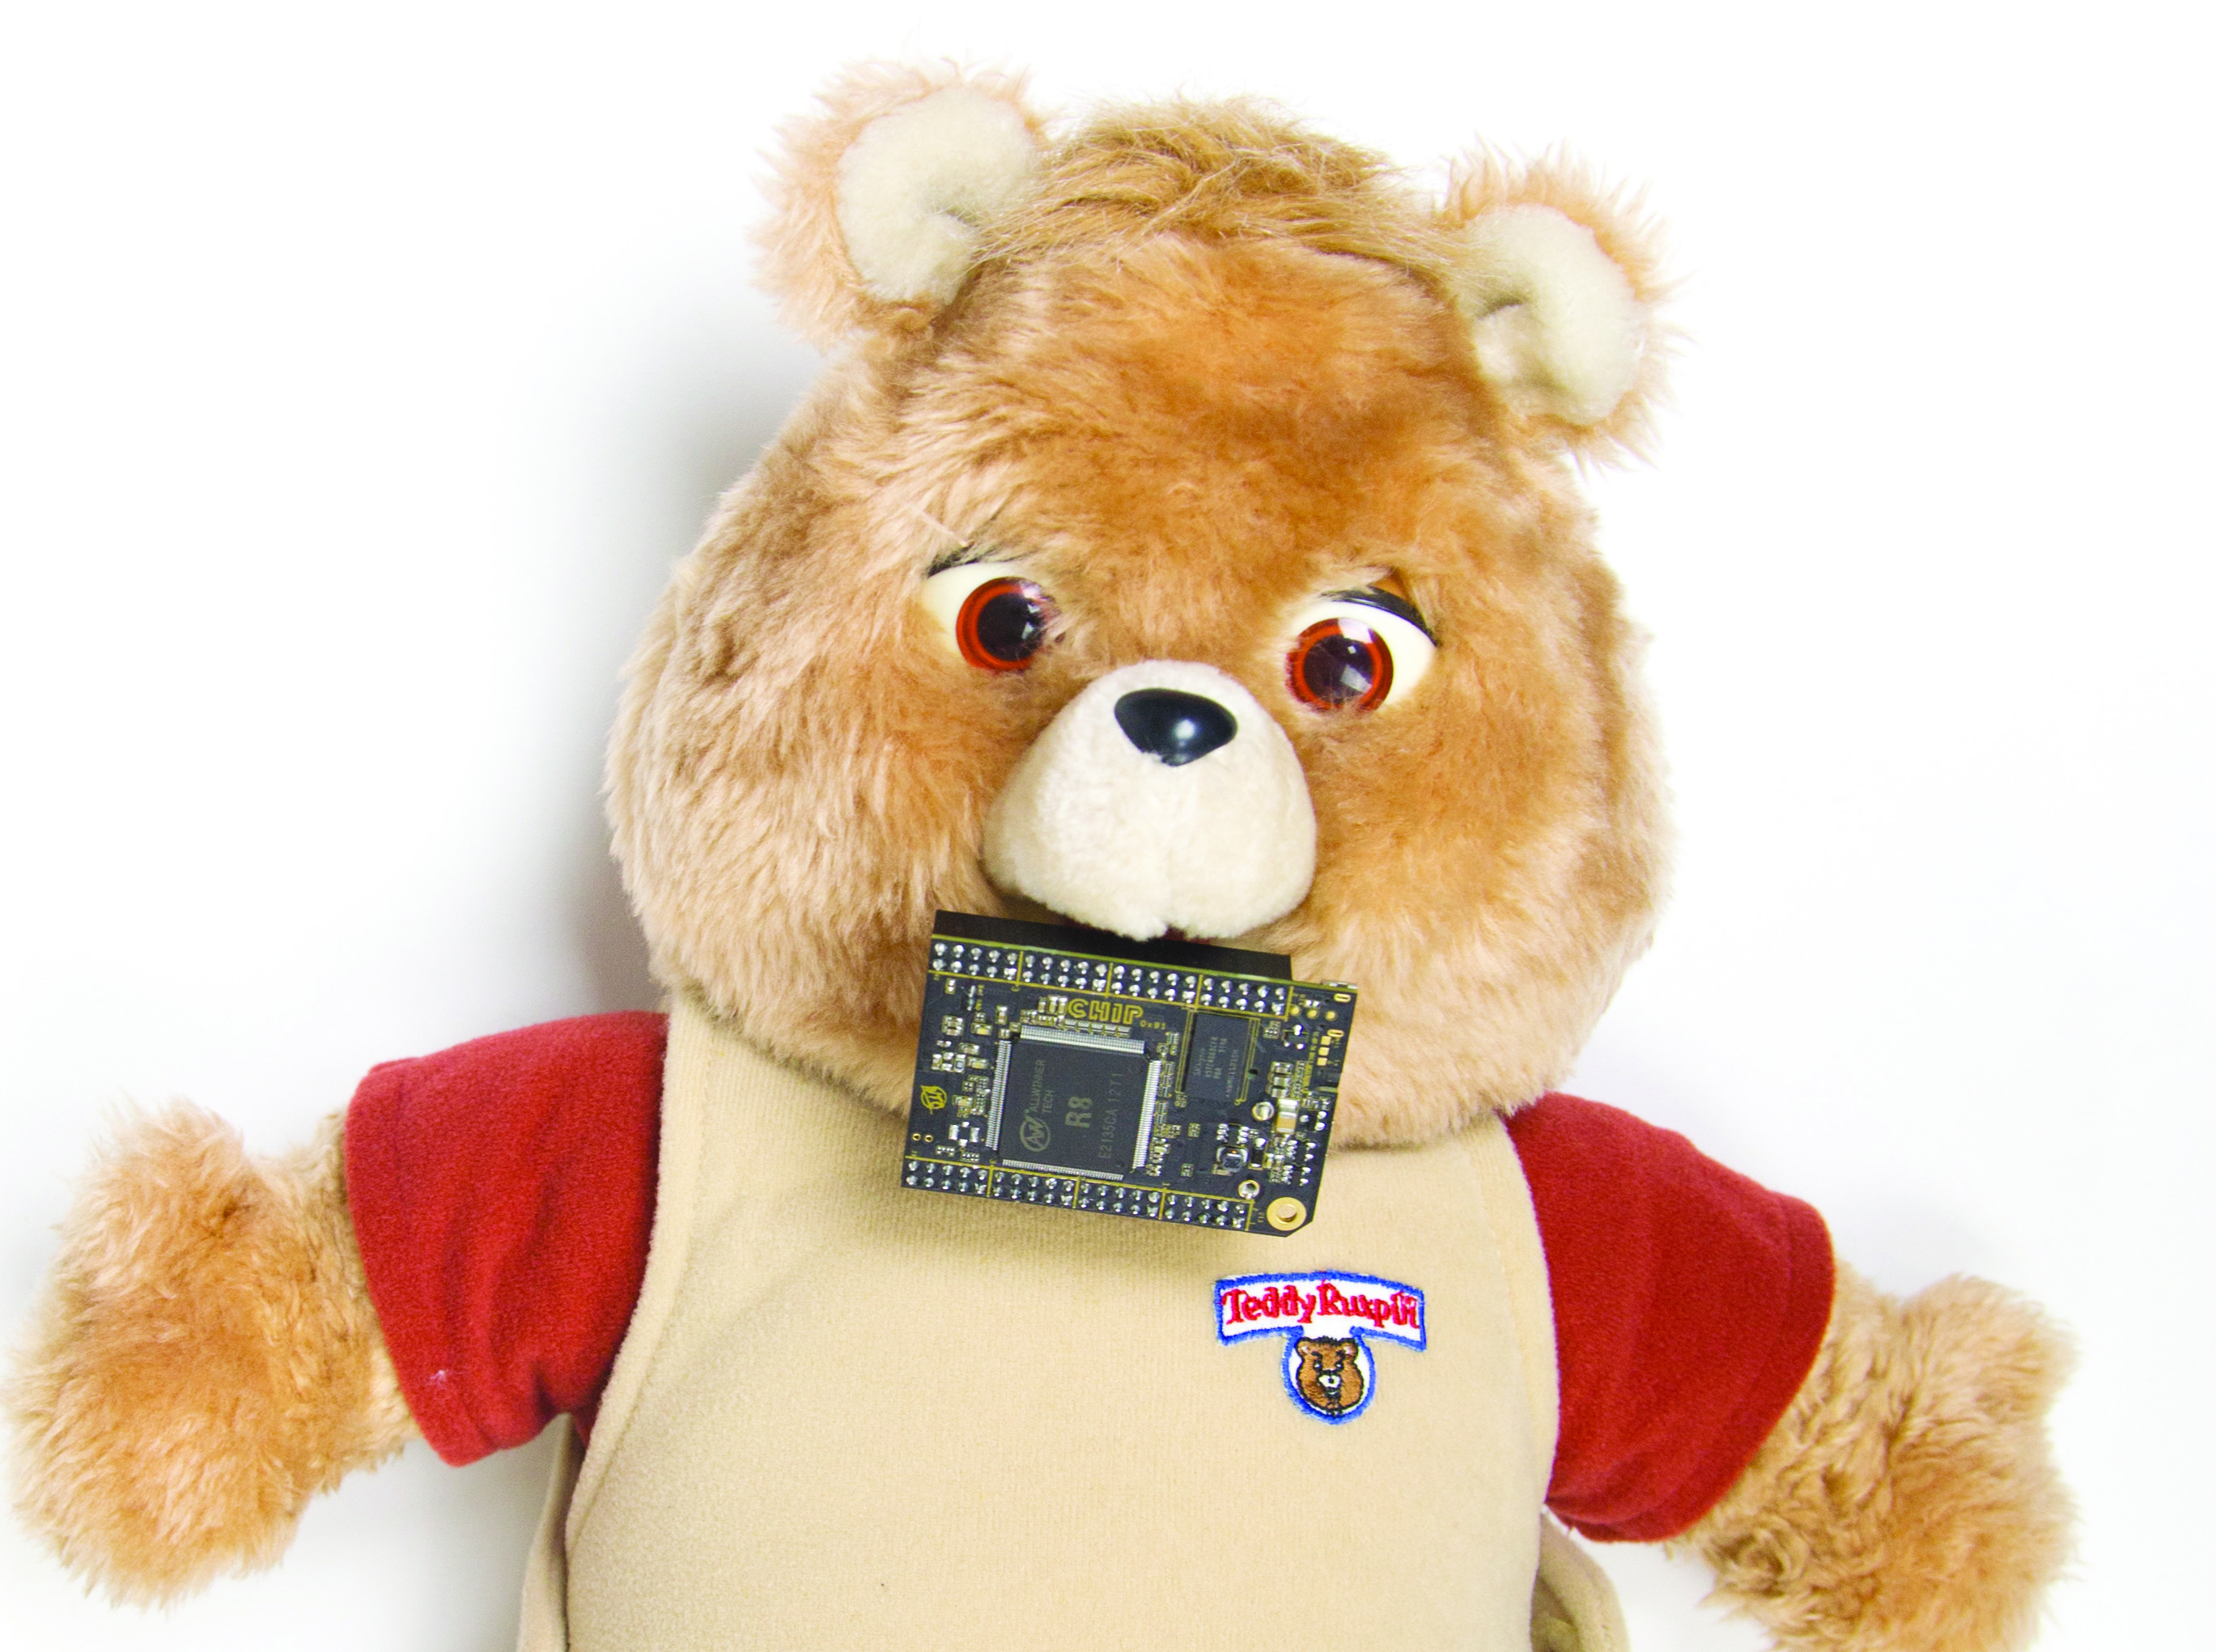
More than 30 years later, I found myself at Next Thing Co., brainstorming ideas of entertaining things we could make with C.H.I.P., the world’s first $9 computer. Remembering back to that cold December afternoon, I suggested we hack a Teddy Ruxpin so we could control him over Wi-Fi and make him say whatever we wanted. Maybe read us tweets. Why not?

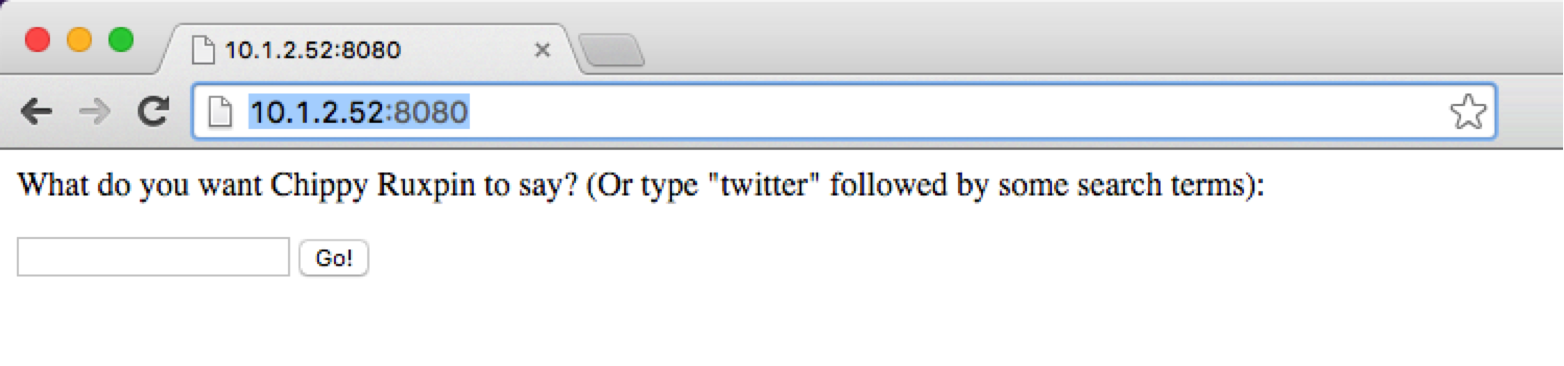
Thus, the goals of the project were established: C.H.I.P. would log on to your existing Wi-Fi network and present a custom web page with a text box. Users would type what they want the bear to say, or tell him to read Twitter messages based on specified search terms. A text-to-speech engine would be utilized to read the results out loud and automatically move the mouth to perfectly match the voice. All of this would be powered by a 3.7V LiPo battery, using C.H.I.P.’s built-in charging circuit through a micro USB connection.

Screen Shot 2015-12-23 at 1.37.52 PM
1. Original servomotors move the toy’s eyes and mouth.
2. Original speaker plays speech and other audio.
3. Remainder of Teddy’s antique guts are removed: circuit board, cassette tape drive, audio/data cassette, and 4 hefty D batteries.
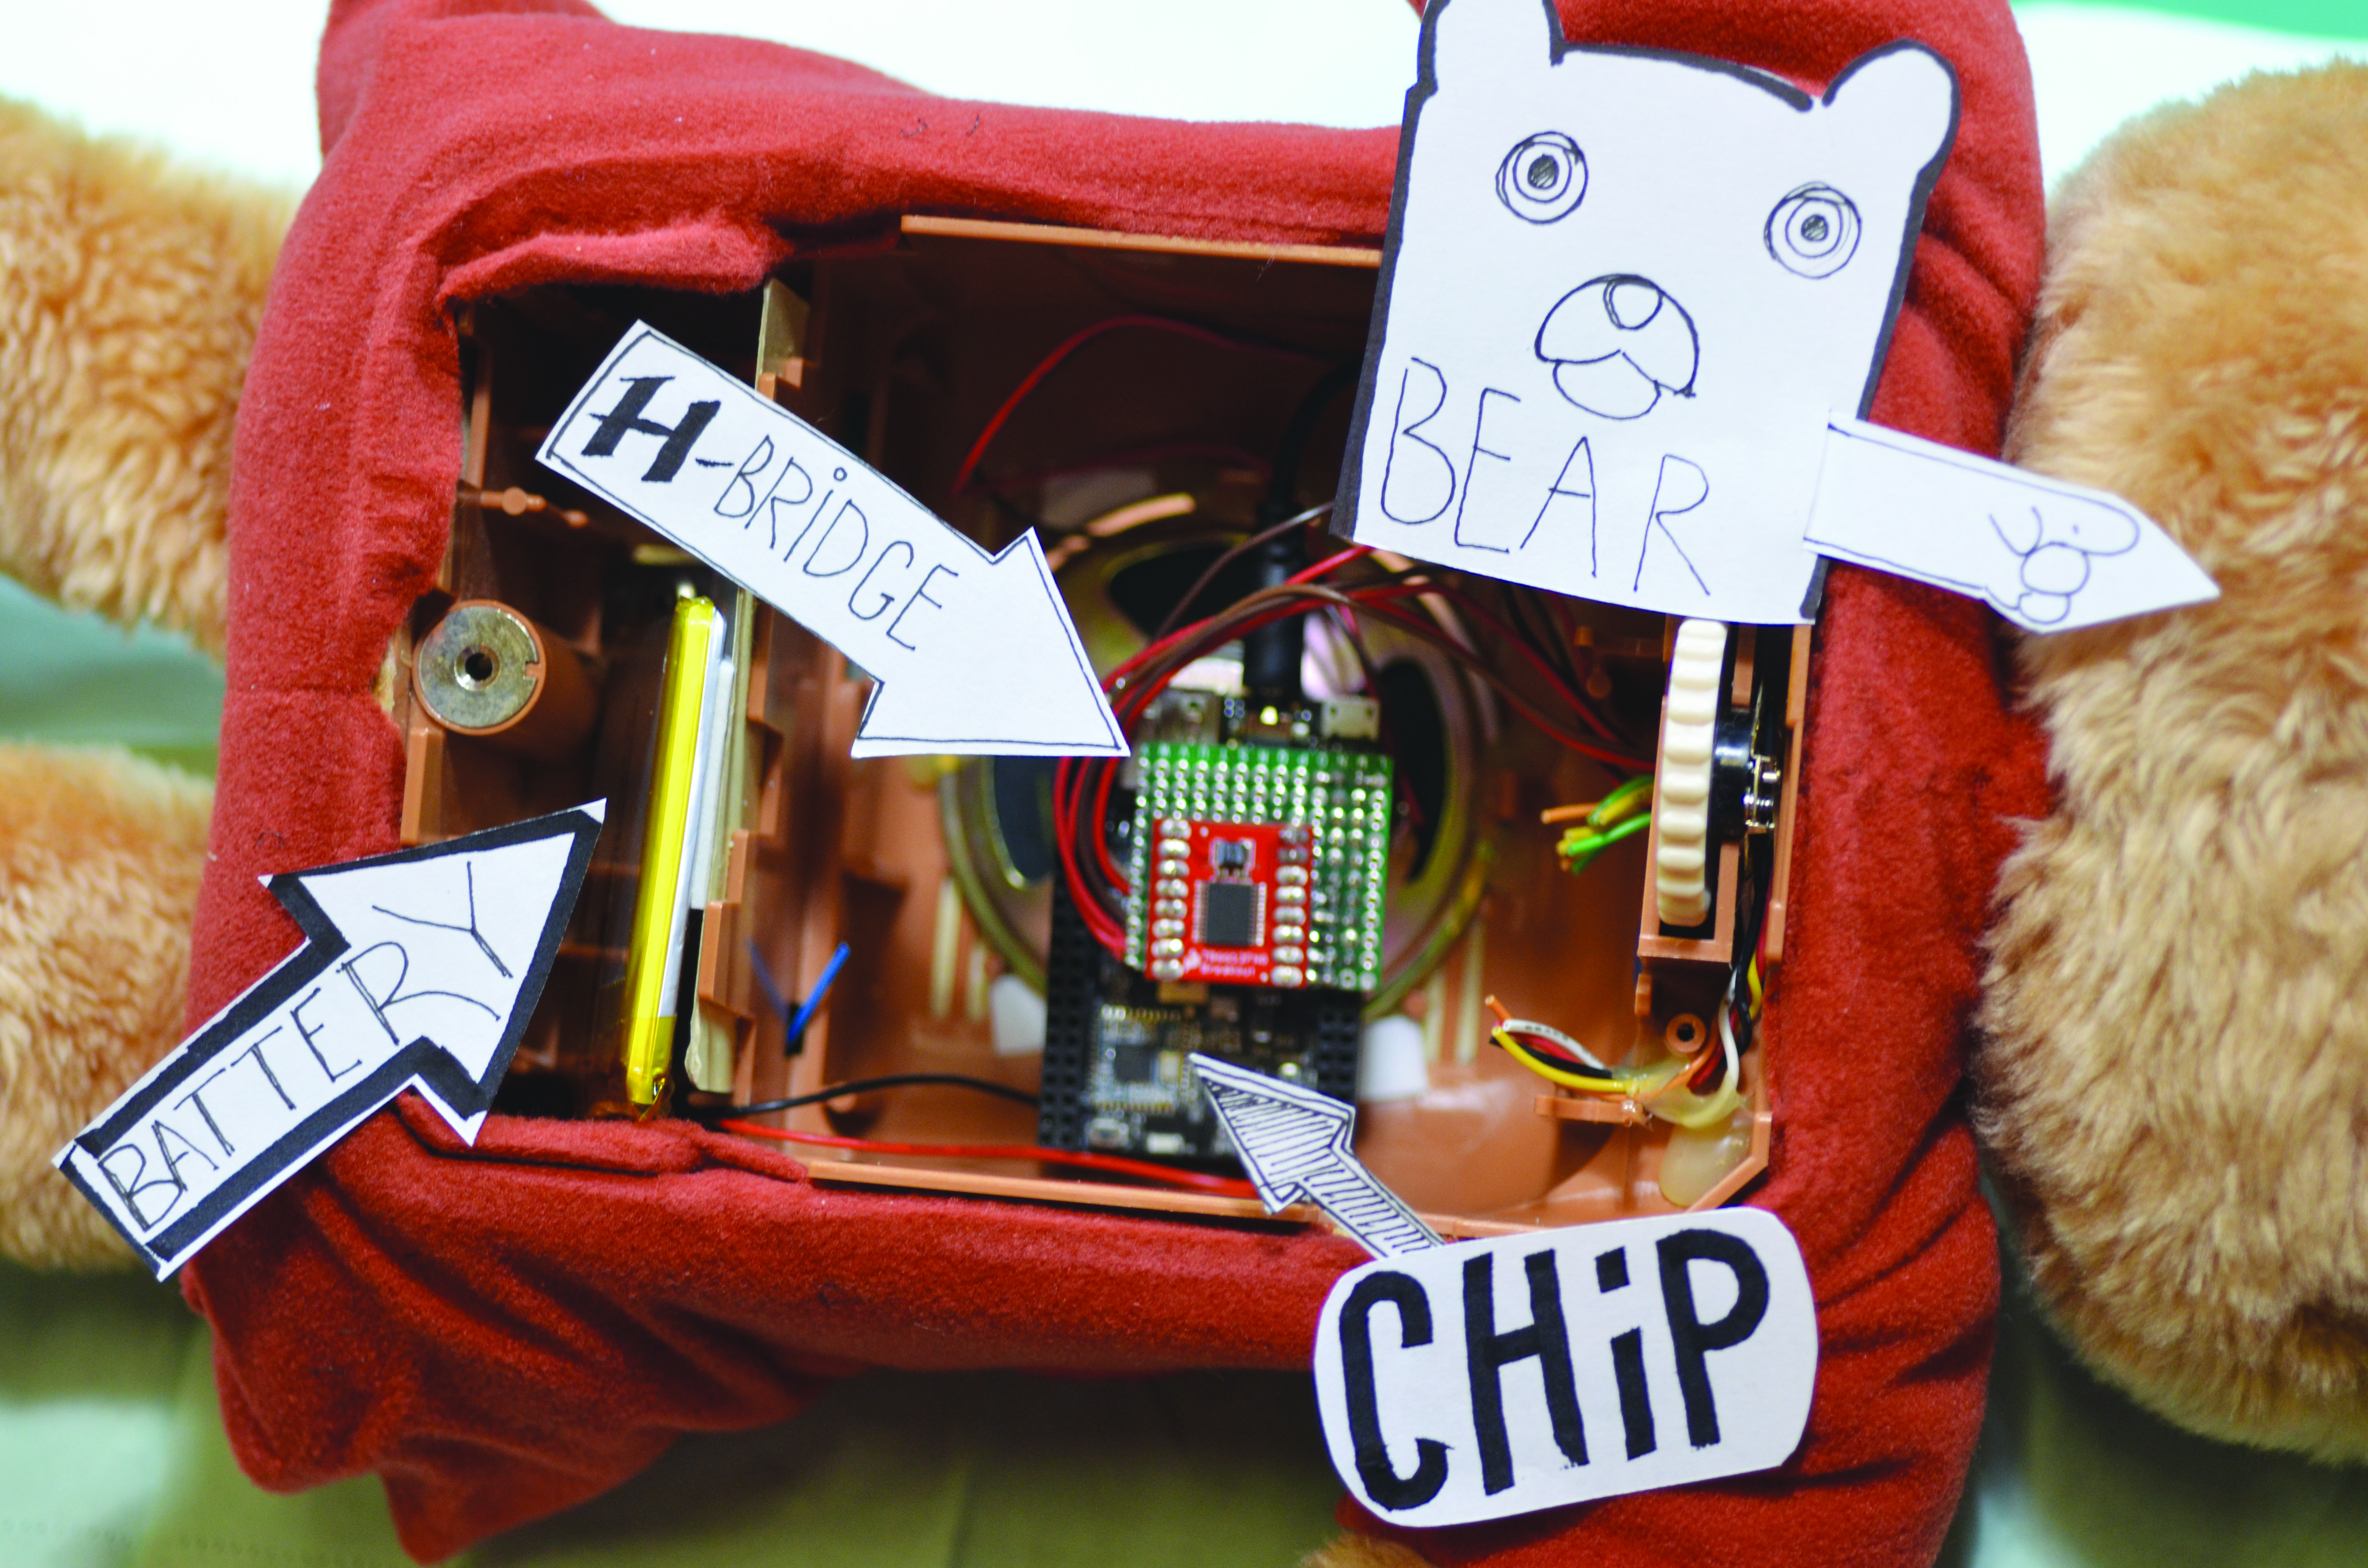
4. C.H.I.P. computer connects to internet via onboard Wi-Fi, then converts incoming text or tweets to speech and sends it to the speaker, while analyzing audio amplitude to create synchronized motor signals.
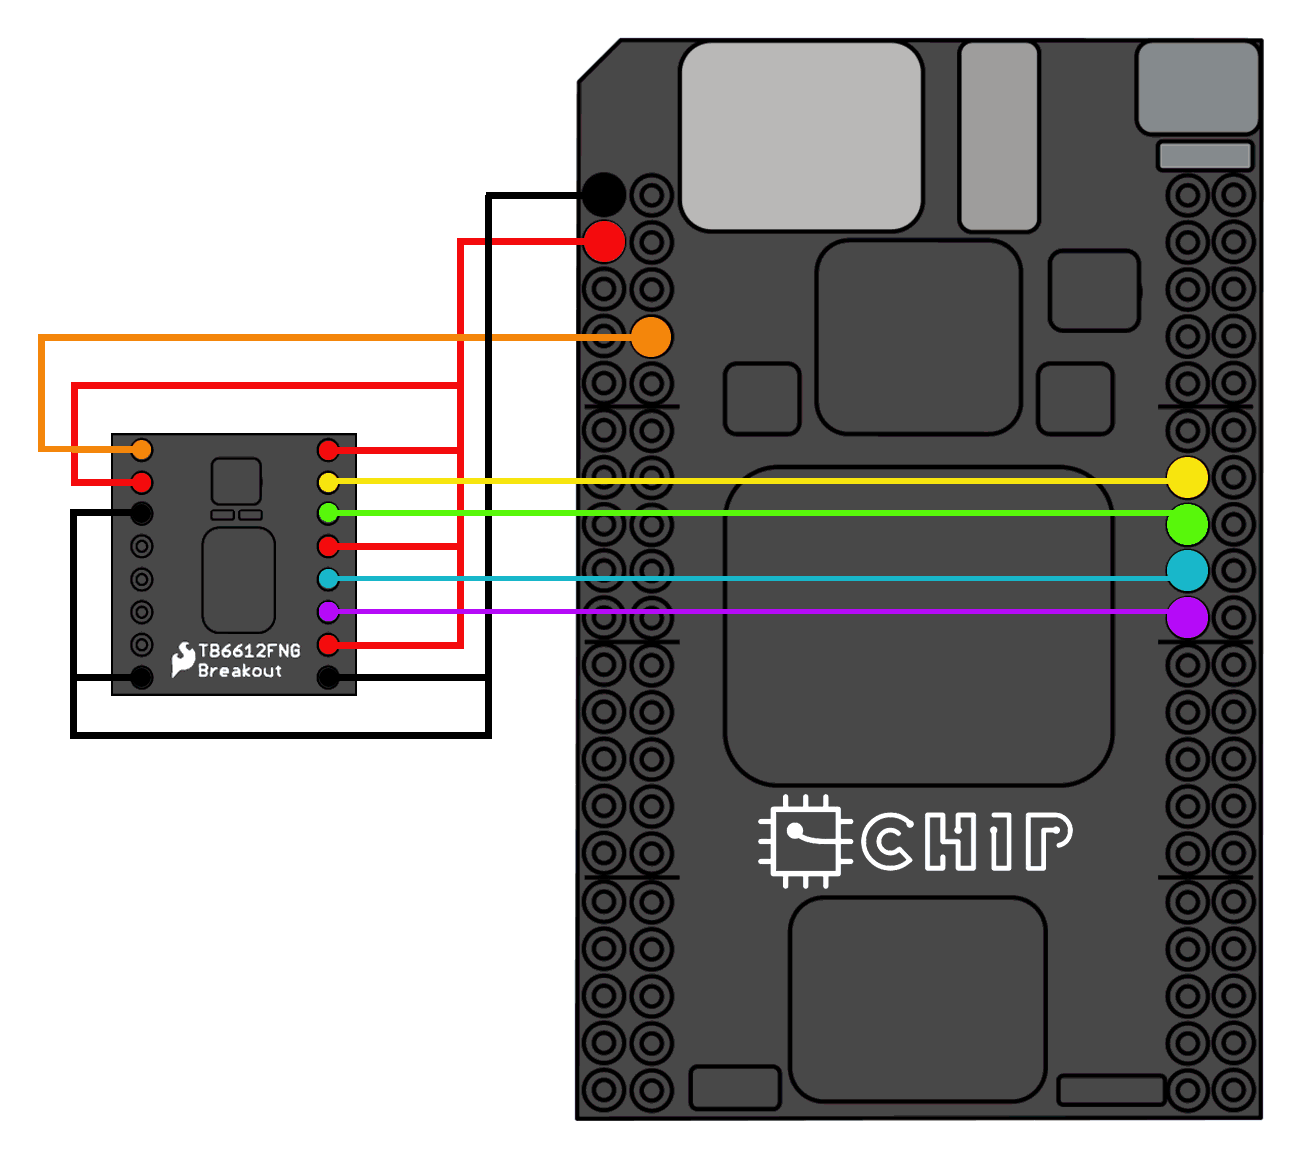
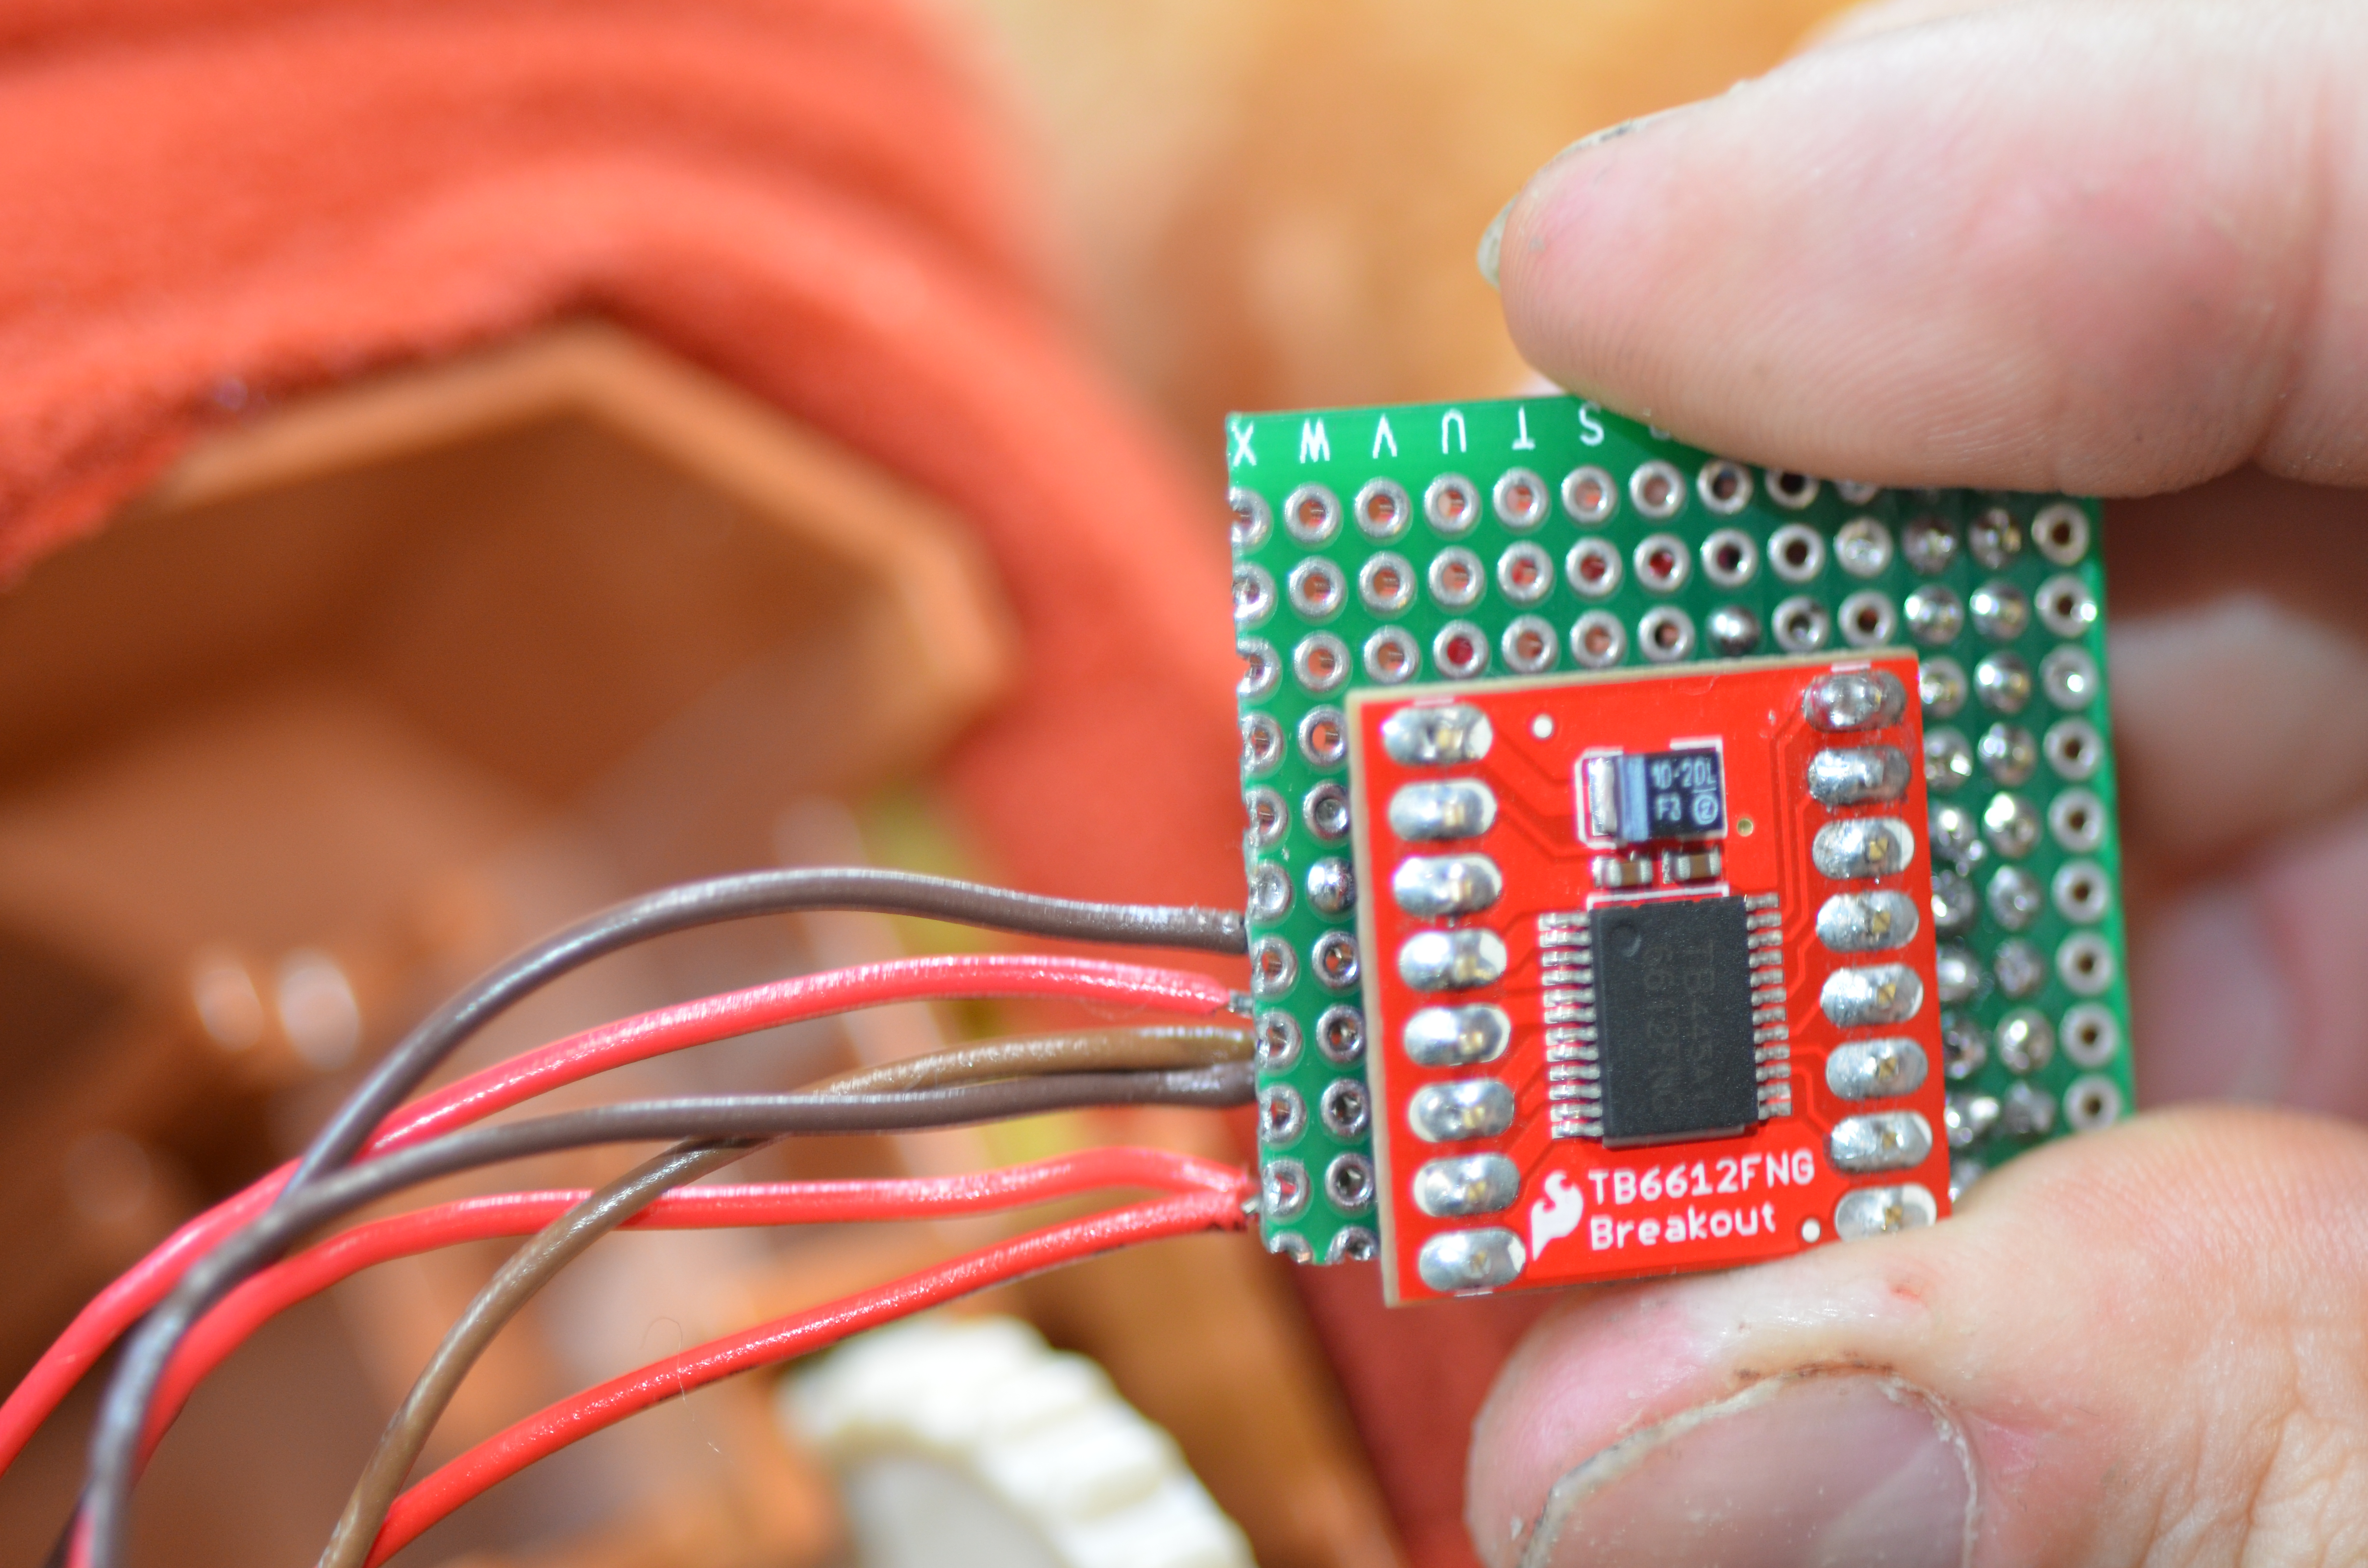
5. H-bridge motor controller board on a DIY “shield” plugs into C.H.I.P. and drives the original servos.
6. 3.7V LiPo battery plugs directly into C.H.I.P. to power everything.

Illustration by Damien Scogin


Project Steps

Surgery

The first step was opening up Teddy Ruxpin to see how exactly we could use C.H.I.P. to control the motors. Attached to his original circuit board were 3 connectors powering 3 different motors: for the lower jaw, upper jaw, and eyes. Each connector contained 5 wires, 2 of great interest: one that moves the motor forward, and one for reverse. Perfect for our needs.

Bridging the motor gap

The motors for the upper and lower jaws are wired independently from one another, so in the interest of synchronizing them together, you’ll need to connect them. An H-bridge circuit works perfectly to control the direction of the motors. In this example, we’re using the SparkFun Motor Driver which has various pins that need
to be connected to C.H.I.P.

First, connect the motor driver’s VM pin to the BAT pin on C.H.I.P., and connect the VCC, PWMA, STBY, and PWM B pins to C.H.I.P.’s VCC-5V line to provide power and enable the motors. Then connect all GND connections to GND on C.H.I.P.

Now connect the I/O signals to tell the motors what direction to move. Sending a logic signal to one pin will drive the motor forward, and sending another will reverse it. This controls the eyes moving up and down and the mouth being opened or closed.

Connect the motor driver’s AIN1 pin to C.H.I.P.’s XIO-P0 pin, AIN2 to XIO-P2, BIN1 to XIO-P4, and BIN2 to XIO-P6. Finally, connect the motor driver’s A01 and A02 pins to Teddy’s upper and lower jaw motors, and B01 and B02 to the eye motor.

To organize these connections, we made a DIY “shield” from protoboard to plug into C.H.I.P.’s I/O headers. You could use a mini breadboard and jumper wires.

Let the bear speak!

Teddy Ruxpin already has an internal speaker, so we just spliced the 2 wires coming from the speaker to our 3.5mm audio cable and connected it directly to the audio/video jack on C.H.I.P.

Plug the 3.7V LiPo battery into C.H.I.P., and your hardware’s all connected. Go ahead and stuff it into the bear. It’s time to move on to the software side
of things.

The software side of things

Part of the magic of Chippy Ruxpin is controlling it via Wi-Fi. So let’s get it connected so you can download the software. You’ll want to log into C.H.I.P.’s operating system to type in some commands. You can either hook up a screen and keyboard to C.H.I.P., or access it over a network by following our tutorials at 42.nextthing.co.

Once logged in, you need to get the Wi-Fi working. Type the following, all on one line:

nmcli dev wifi connect [YOUR SSID] password [YOUR PASSWORD]

Once you’re signed in and have a working network connection, take a moment to update C.H.I.P. using the following commands.
sudo apt-get update
sudo apt-get upgrade

Now it’s time to install the software you need, which you can download by typing these commands into the terminal:
cd ~/
sudo apt-get install git
git clone https://github.com/NextThingCo/ChippyRuxpin.git

Now you’re nearly there, but before you fire up the python script, you’ll need to install a few more software packages used by this project.
sudo apt-get install python-setuptools python-dev build-essential espeak alsa-utils
sudo apt-get install python-alsaaudio python-numpy python-twitter python-bottle mplayer

This pulls the project’s Python code, which is split into various components: an audio player, a Bottle web framework, a Twitter library, and a class to control the GPIO pins on C.H.I.P. to drive the motors.

Part of the code uses eSpeak, a free text-to-speech engine, to generate a WAV audio file from text. The cool part is our audio code: in addition to playback, it also analyzes the WAV file to evaluate its amplitude. If the audio level is loud, the motors in the jaw will activate, opening the bear’s mouth. If it’s quiet, it will close. Mouth synchronization makes it magical.

You can start the application by typing this:
cd chippyRuxpin
sudo python chippyRuxpin.py

You should see a message that looks something like this:
CHIPPY RUXPIN IS ONLINE!
In your browser, go to http://10.1.2.52:8080

Now on any computer, tablet, or smartphone, you’ll see a web page with a simple text input box. Typing into this box will send the text to C.H.I.P.’s Python script to generate the voice audio and play it over Teddy’s internal speaker with a realistic moving mouth.

Chippy Ruxpin can also search for tweets and read them out loud. This involves a bit of setup on your part in order to allow C.H.I.P. to access your Twitter account. Instructions can be found in the README file. Imagine the fun of hearing Chippy speak every tweet from @nextthingco, @colbertlateshow,
@NASA, or even (caution: definitely NSFW)
@WhatTedSaid!

Going further

This project only scratches the surface. Perhaps you’d like to take control of Chippy Ruxpin from the other side of the world and have him terrorize your friends. Or have Chippy Ruxpin create his own Wi-Fi hotspot. With C.H.I.P.’s low cost and integrated wireless capabilities, there are endless projects that you can make on your own. ʕ•ᴥ•ʔ