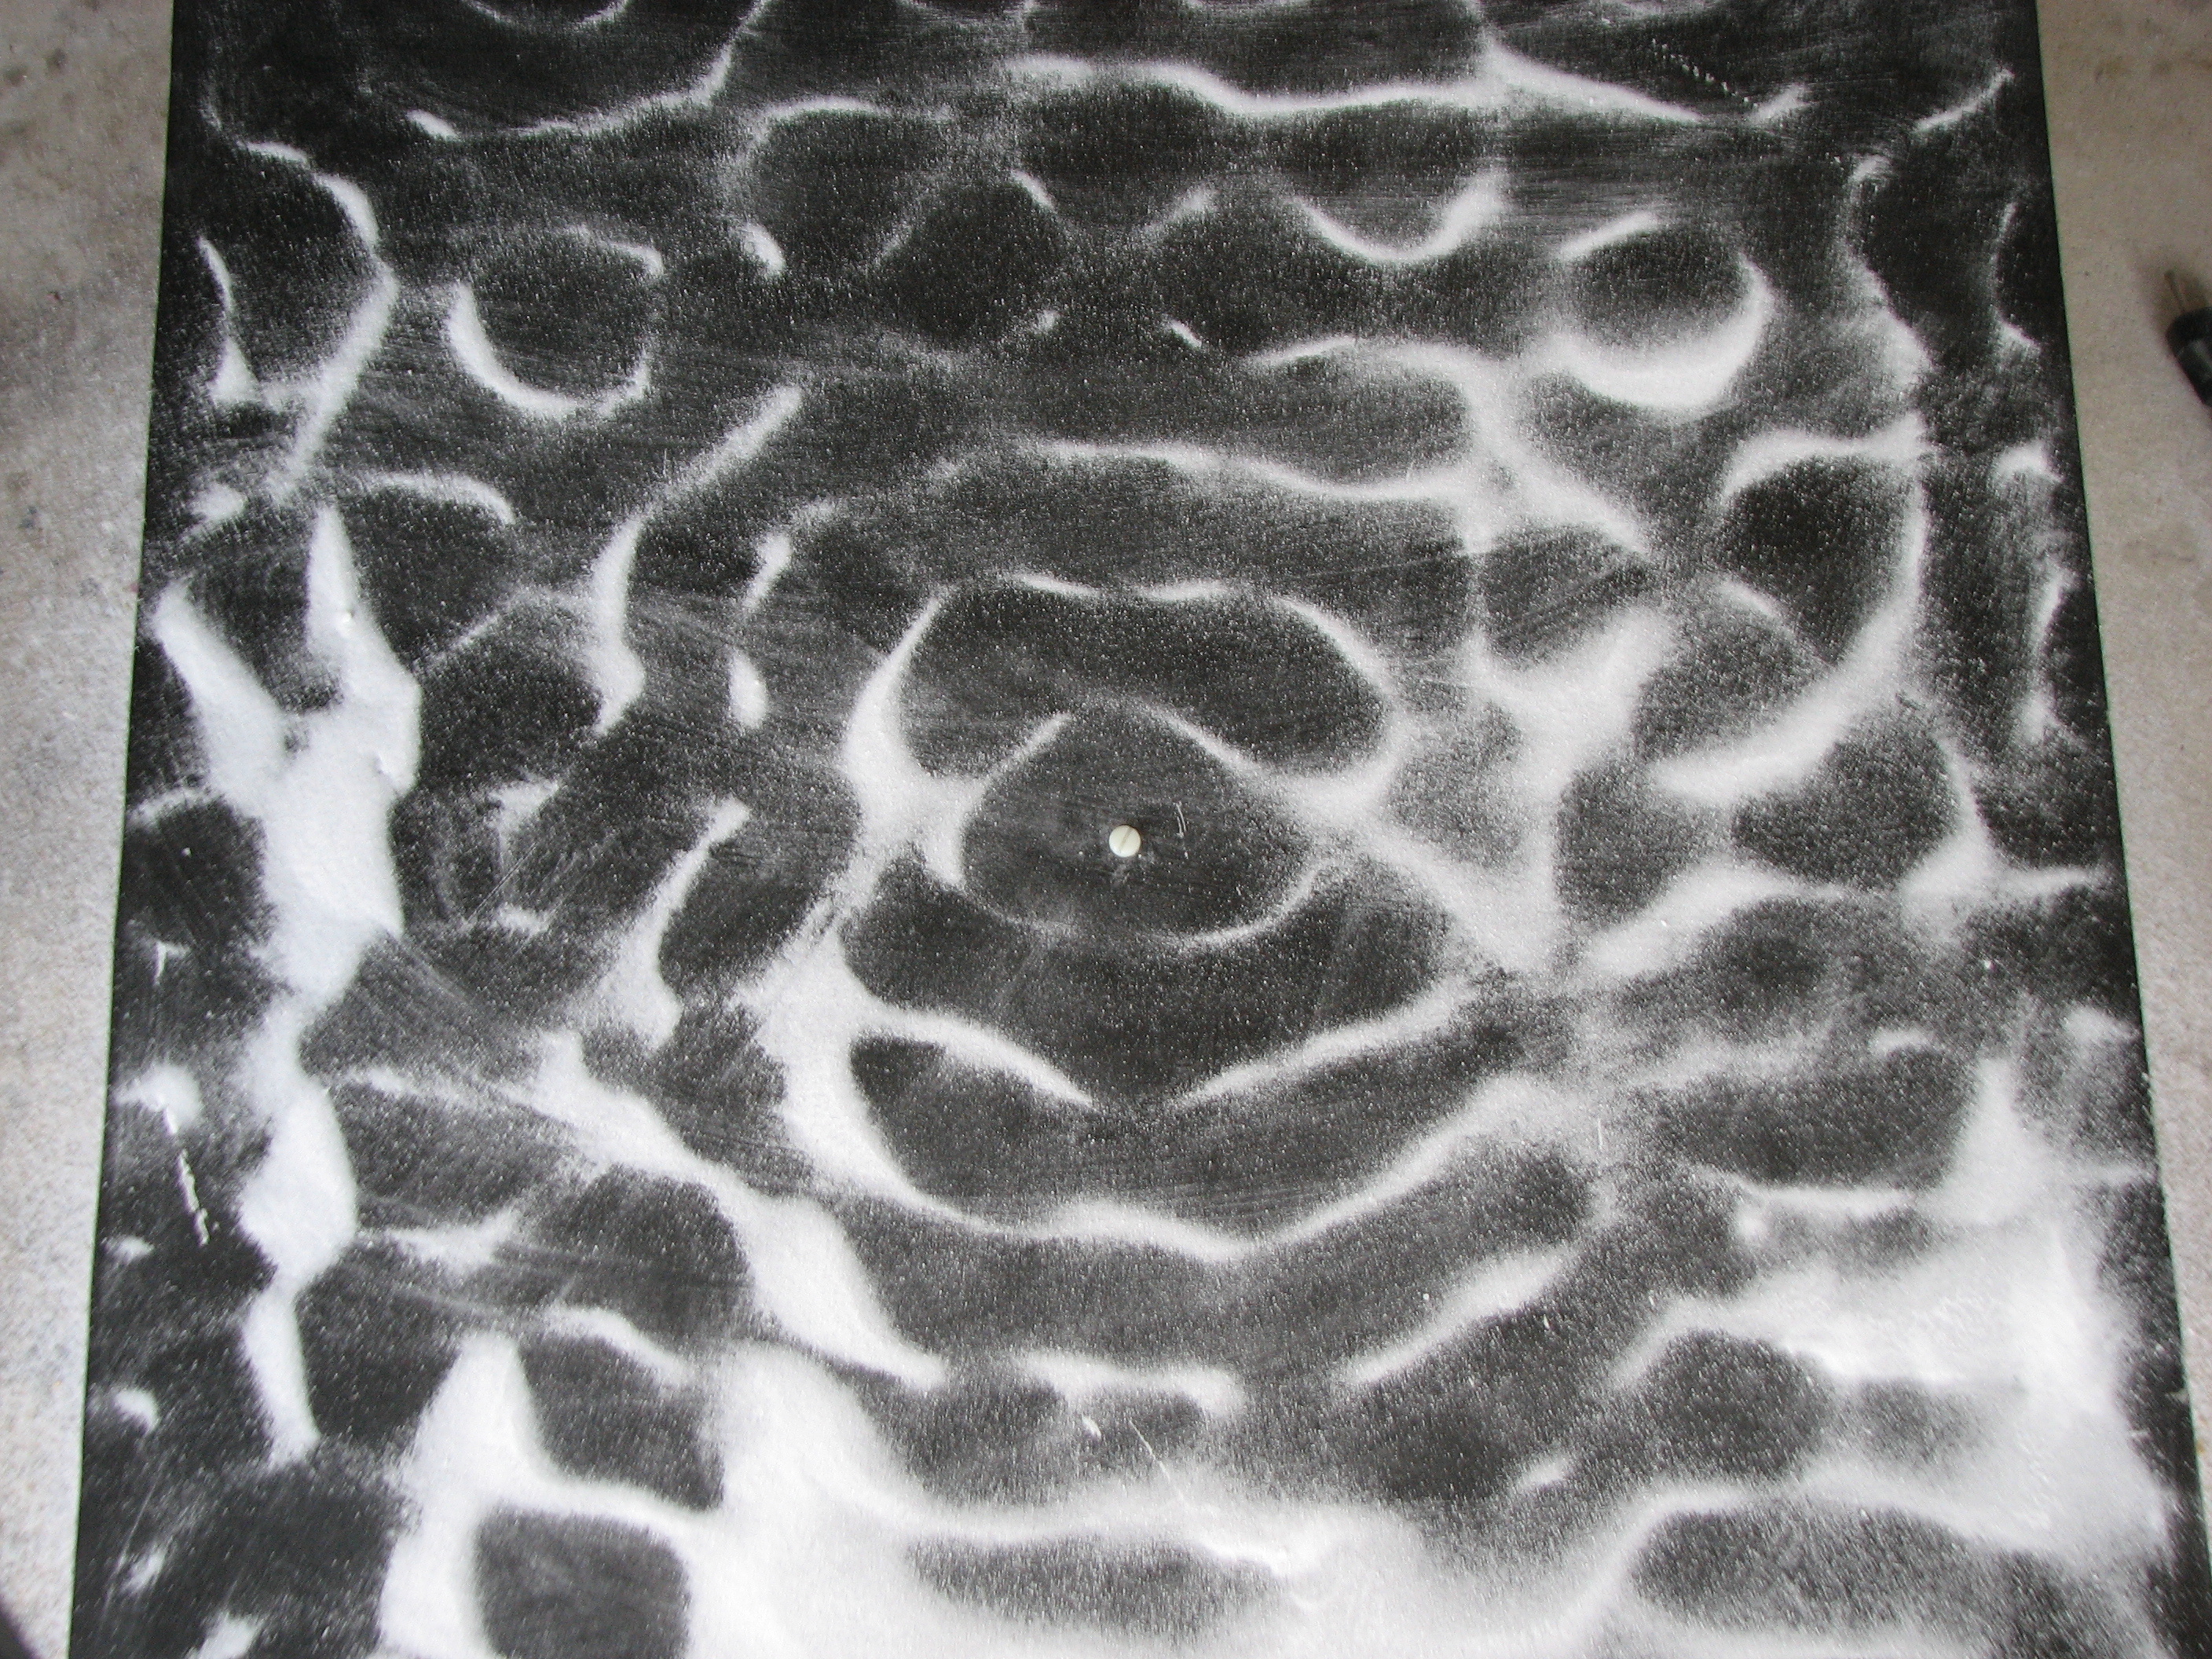
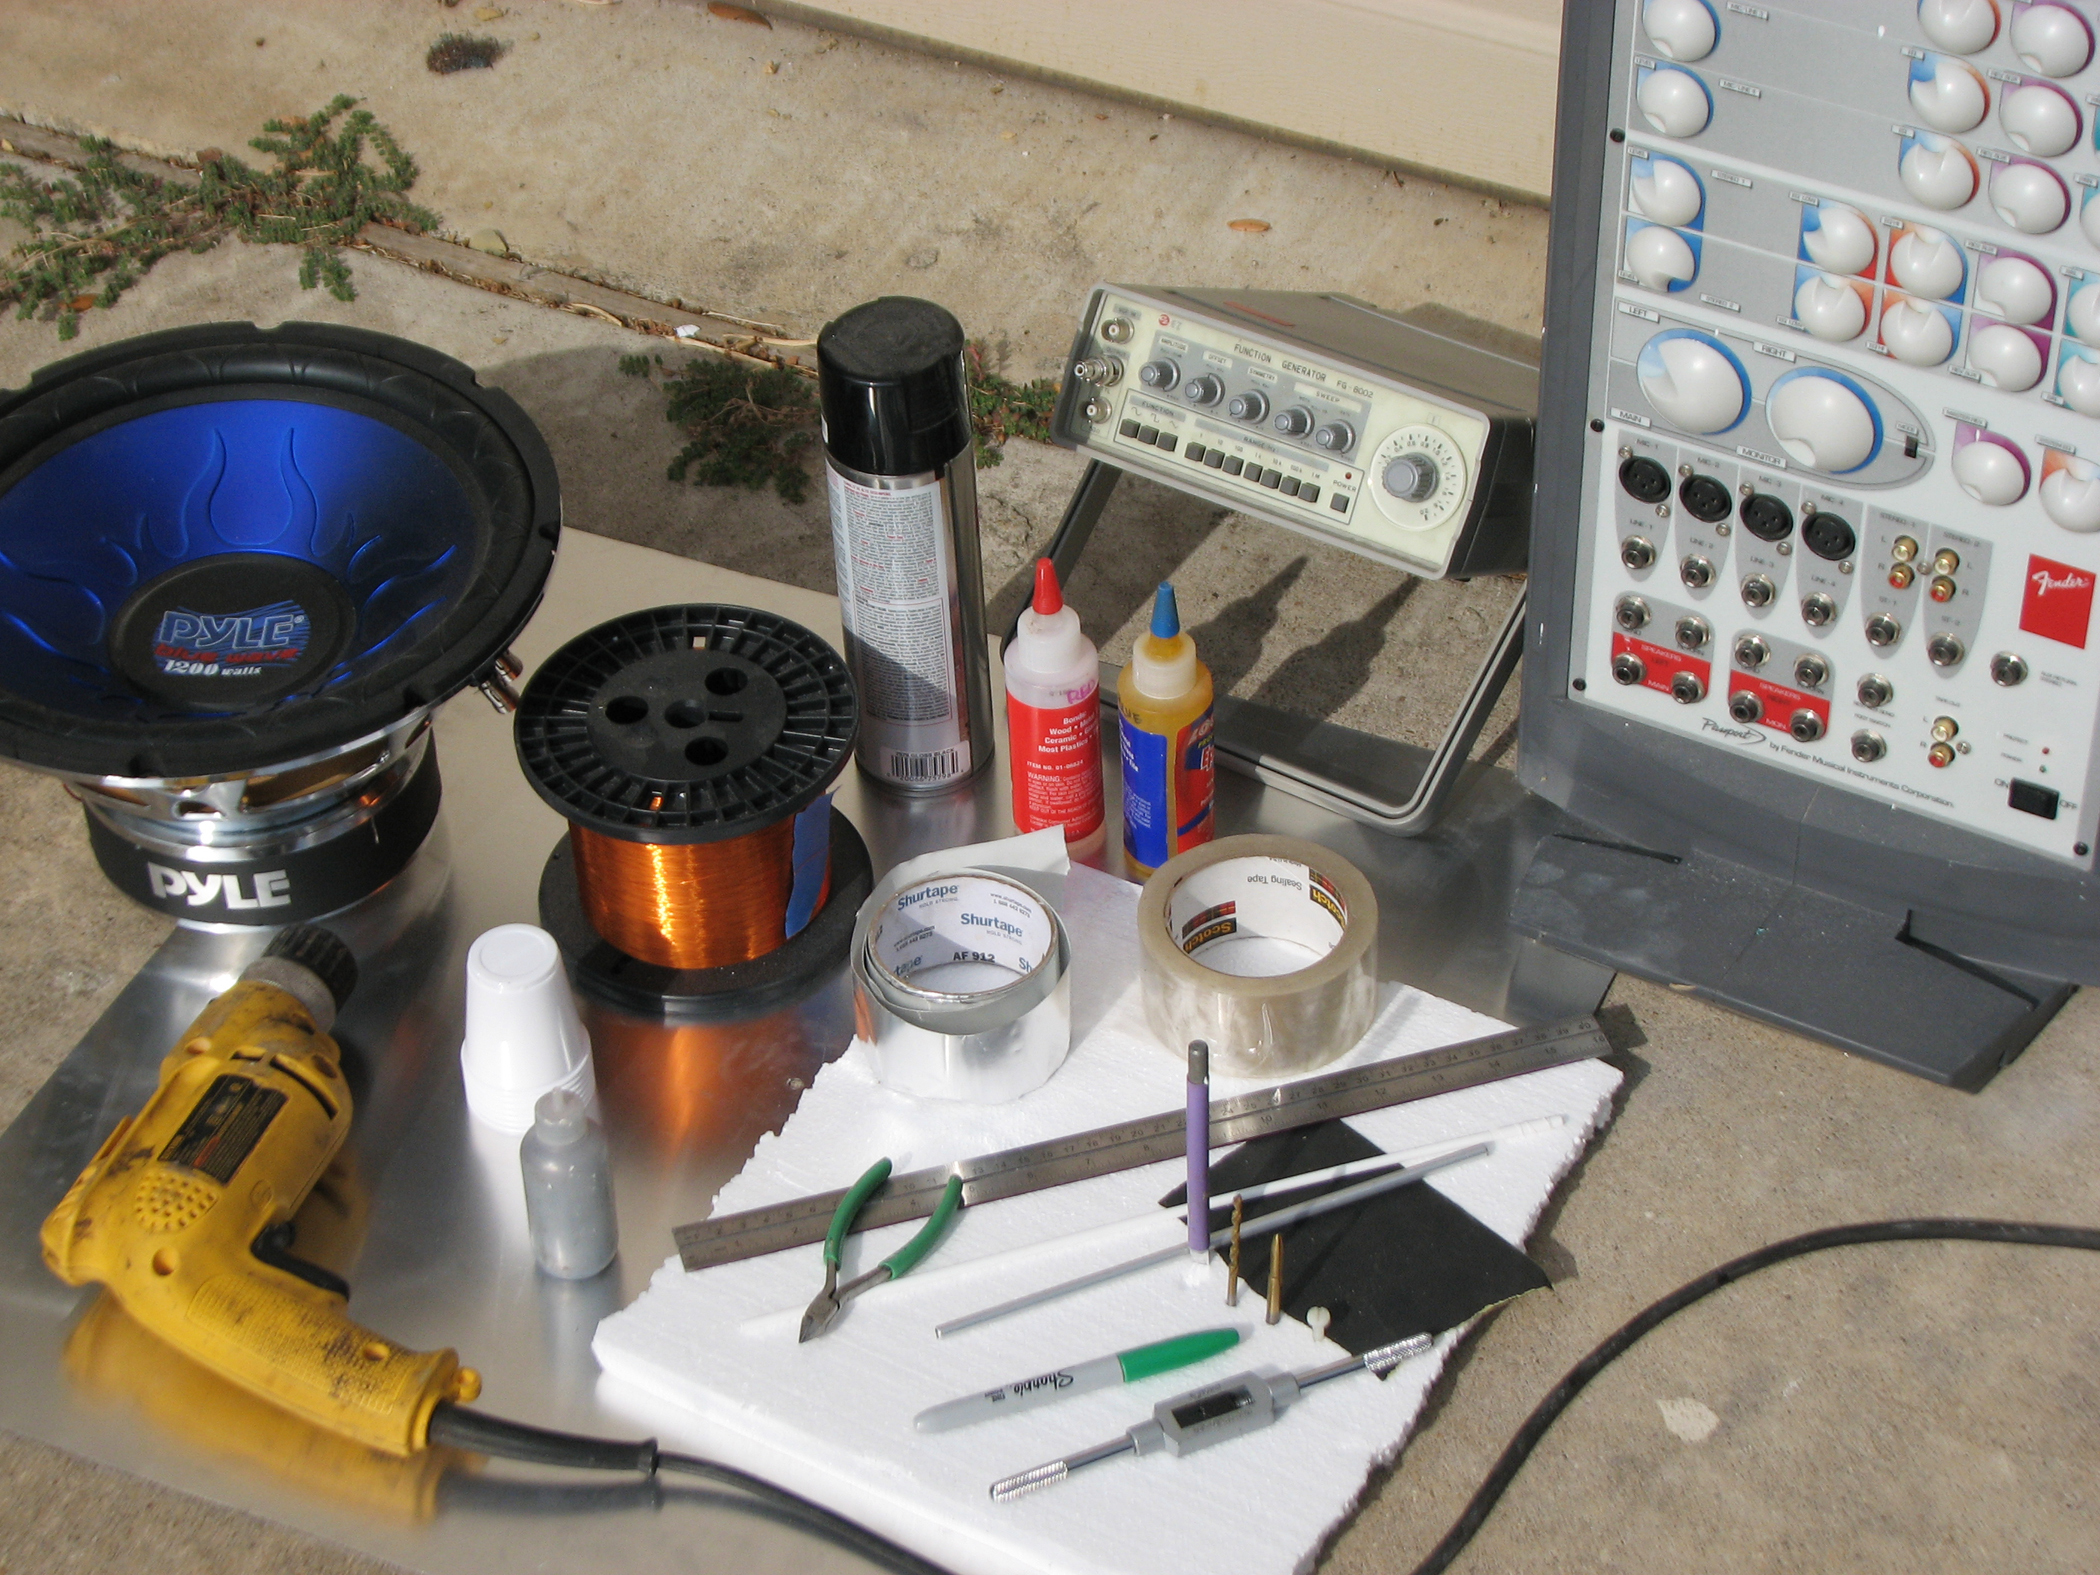
Use a broken speaker, bits of wire, and tape to prepare a coneless voice coil driver, then use it to generate standing waves on a sheet of metal, making sound visible. Magic!

My knowledgeable friend Robin once said that you don’t need to worry about having too big an audio amplifier, because speakers are usually damaged by under-powered amps working too hard and clipping the signal, creating rough square waves with too much power. I learned that this is true when I melted a speaker’s coil by running a strong 20Hz signal through it, to drive a vortex cannon (MAKE Volume 15, page 114).

On the bright side, I now had a nice speaker magnet to use as the foundation for something else I wanted to try, a Chladni plate!

Early acoustics researchers Robert Hooke and Ernst Chladni (CLOD-knee) found that fine powders sprinkled on a vibrating plate would settle in patterns that showed how the plate was vibrating. They got their glass and metal plates vibrating for their experiments by running a violin bow across the edges. In our updated version, we’ll generate the vibrations using a voice coil driver, which is basically a speaker without the cone.

What will the next generation of Make: look like? We’re inviting you to shape the future by investing in Make:. By becoming an investor, you help decide what’s next. The future of Make: is in your hands. Learn More.

Project Steps

Tear down the speaker.

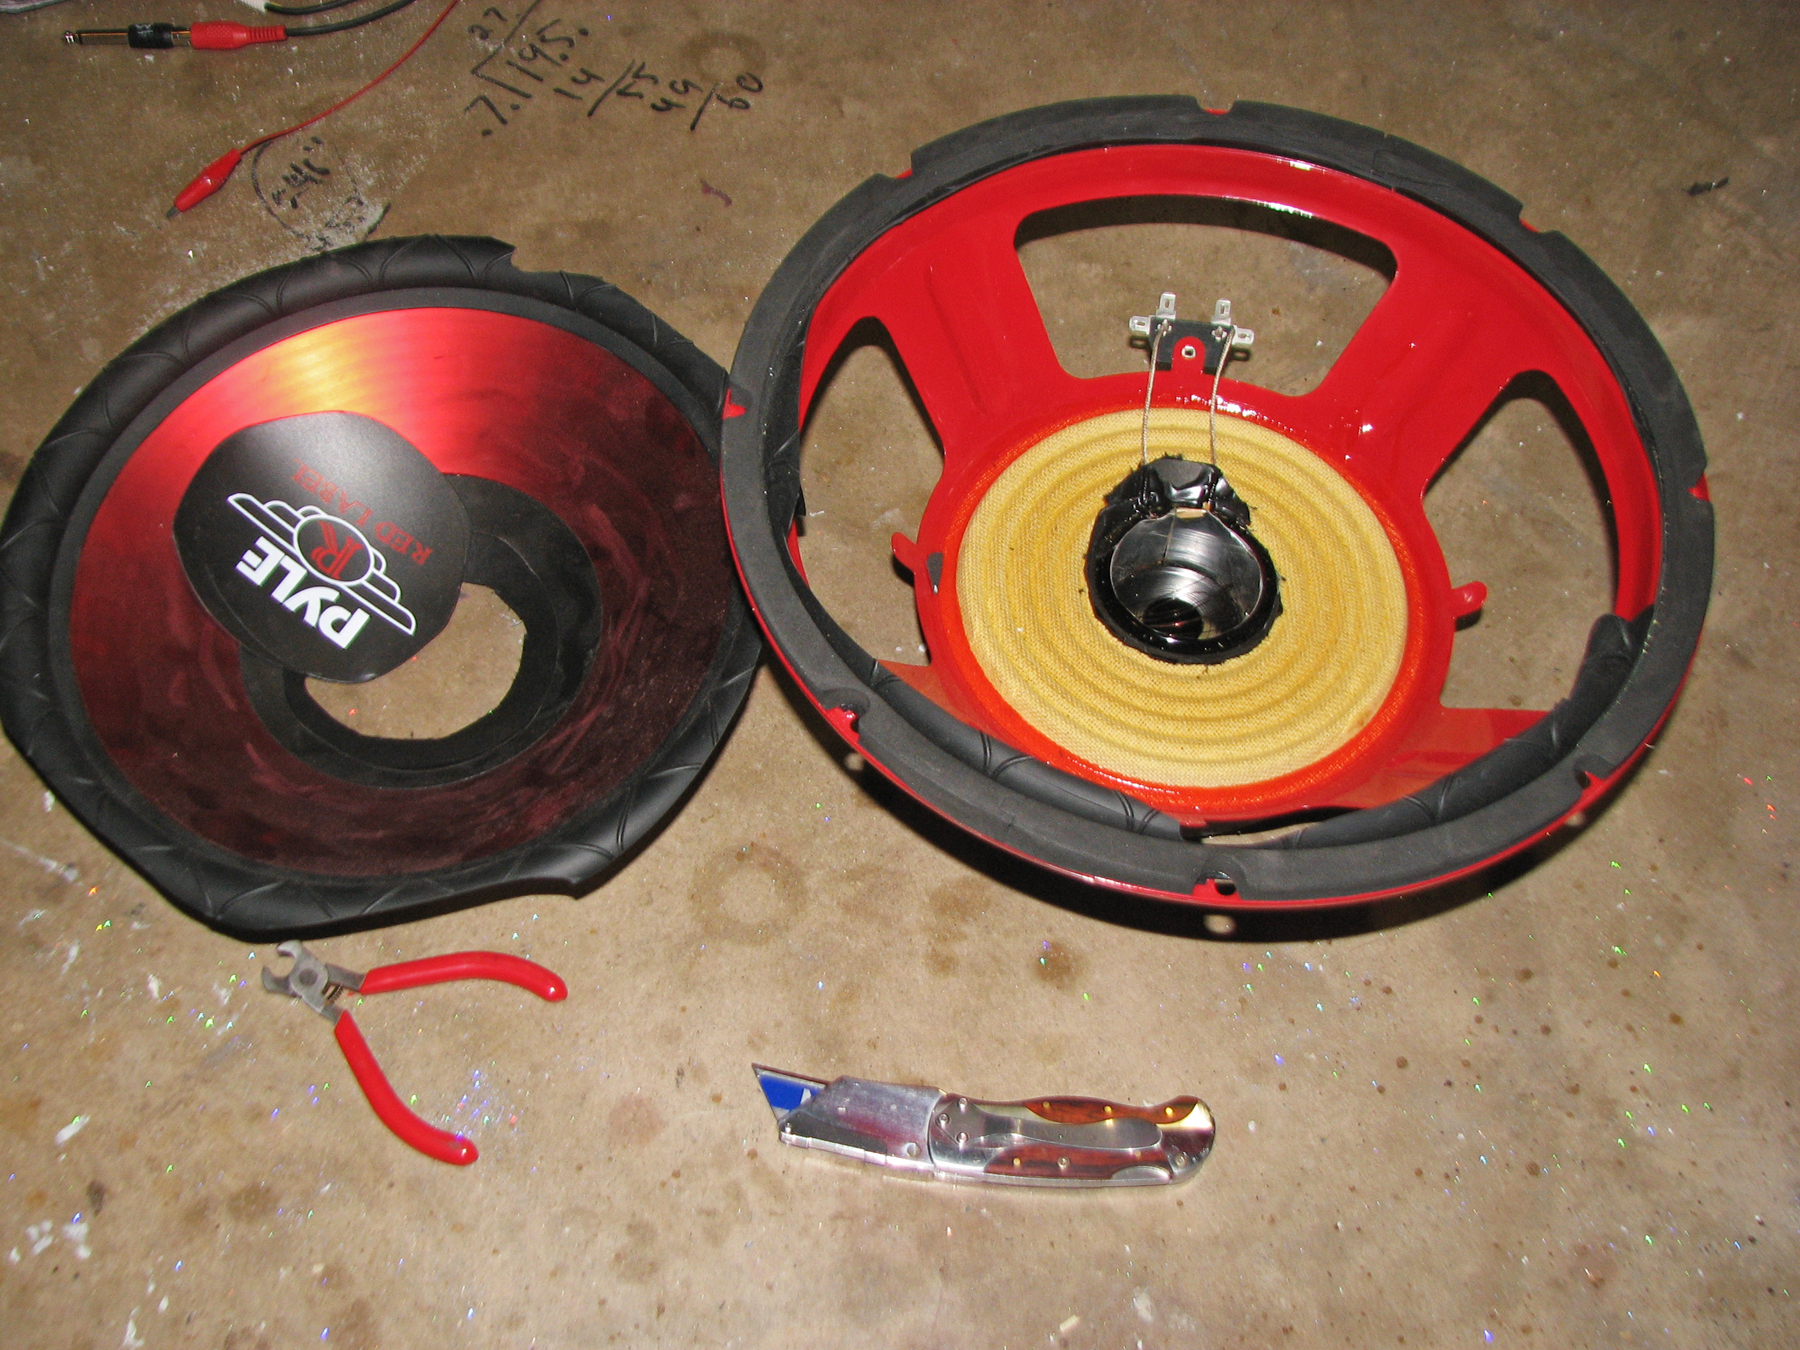
The first step is to tear apart a speaker to get at the good bits. We’ll need the magnet assembly and the former, which is the cylinder that the voice coil wraps around.

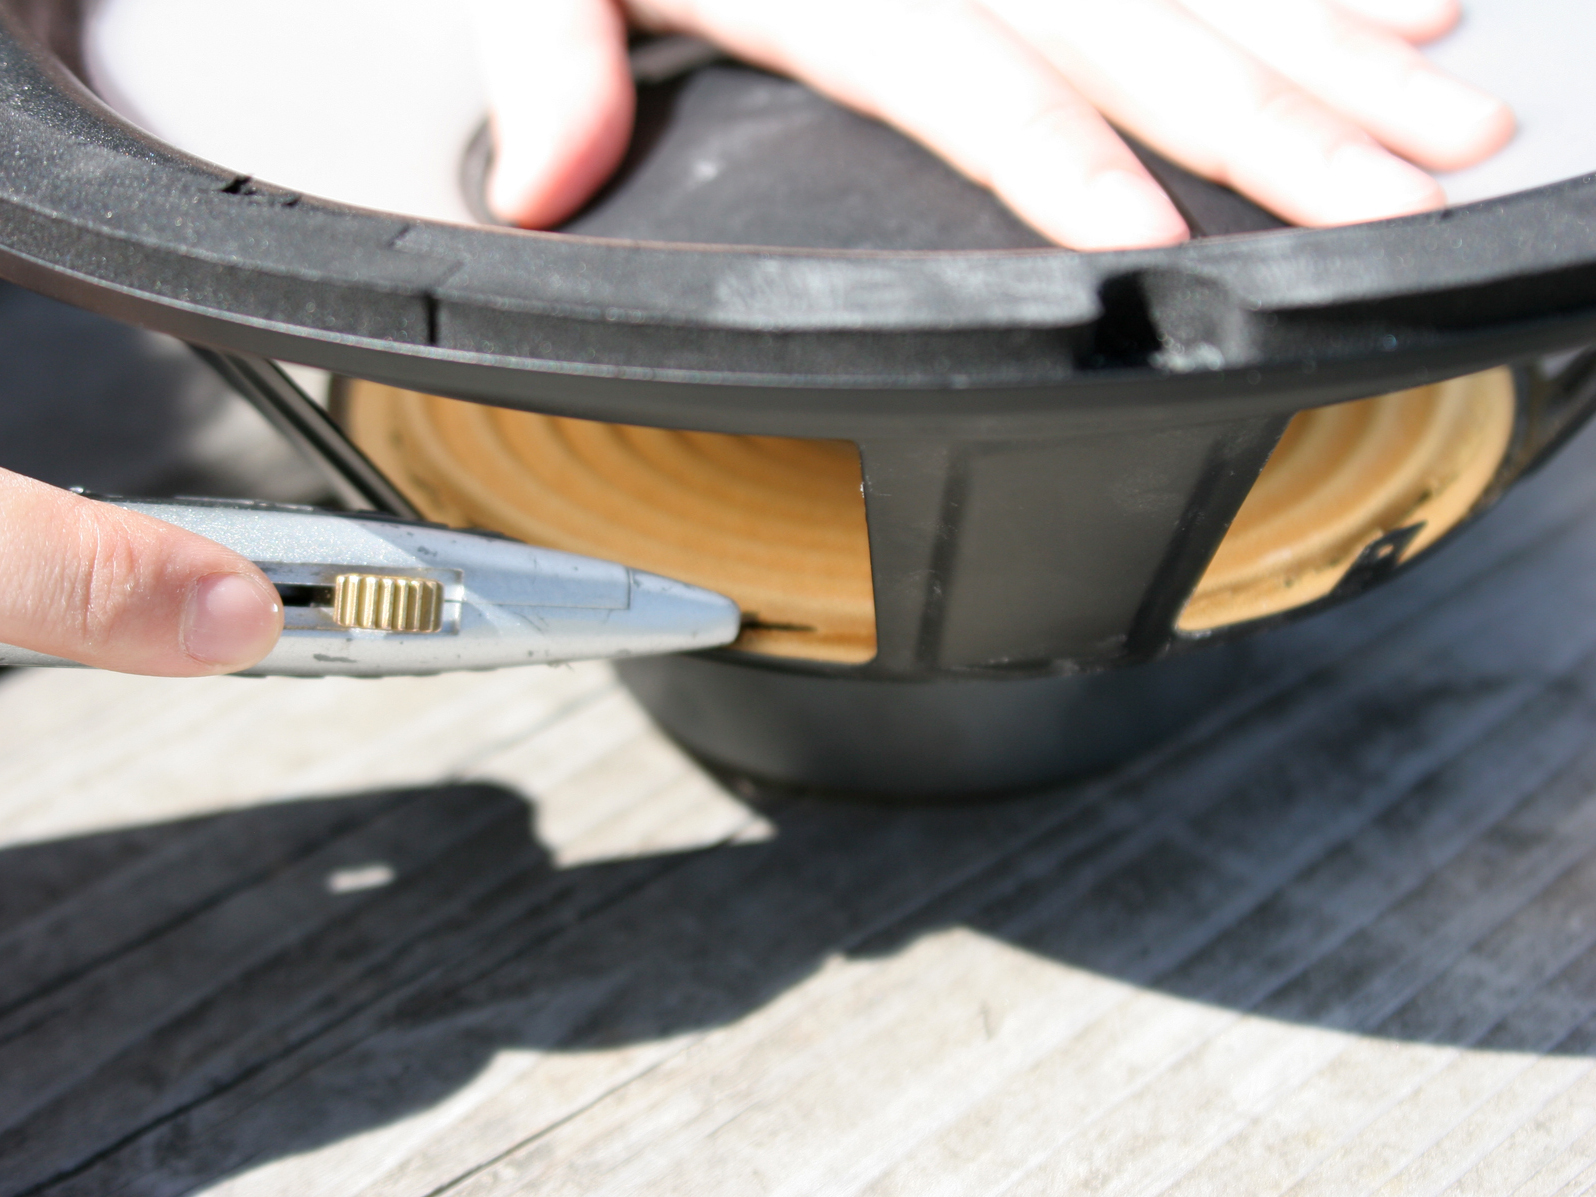
Cut through the speaker cone around its outside edge and around the dust cap in the center. Remove the cone.

Cut the outside edge of the “spider,” the flexible ring-shaped fabric membrane under the cone that runs between the former and the speaker’s frame.

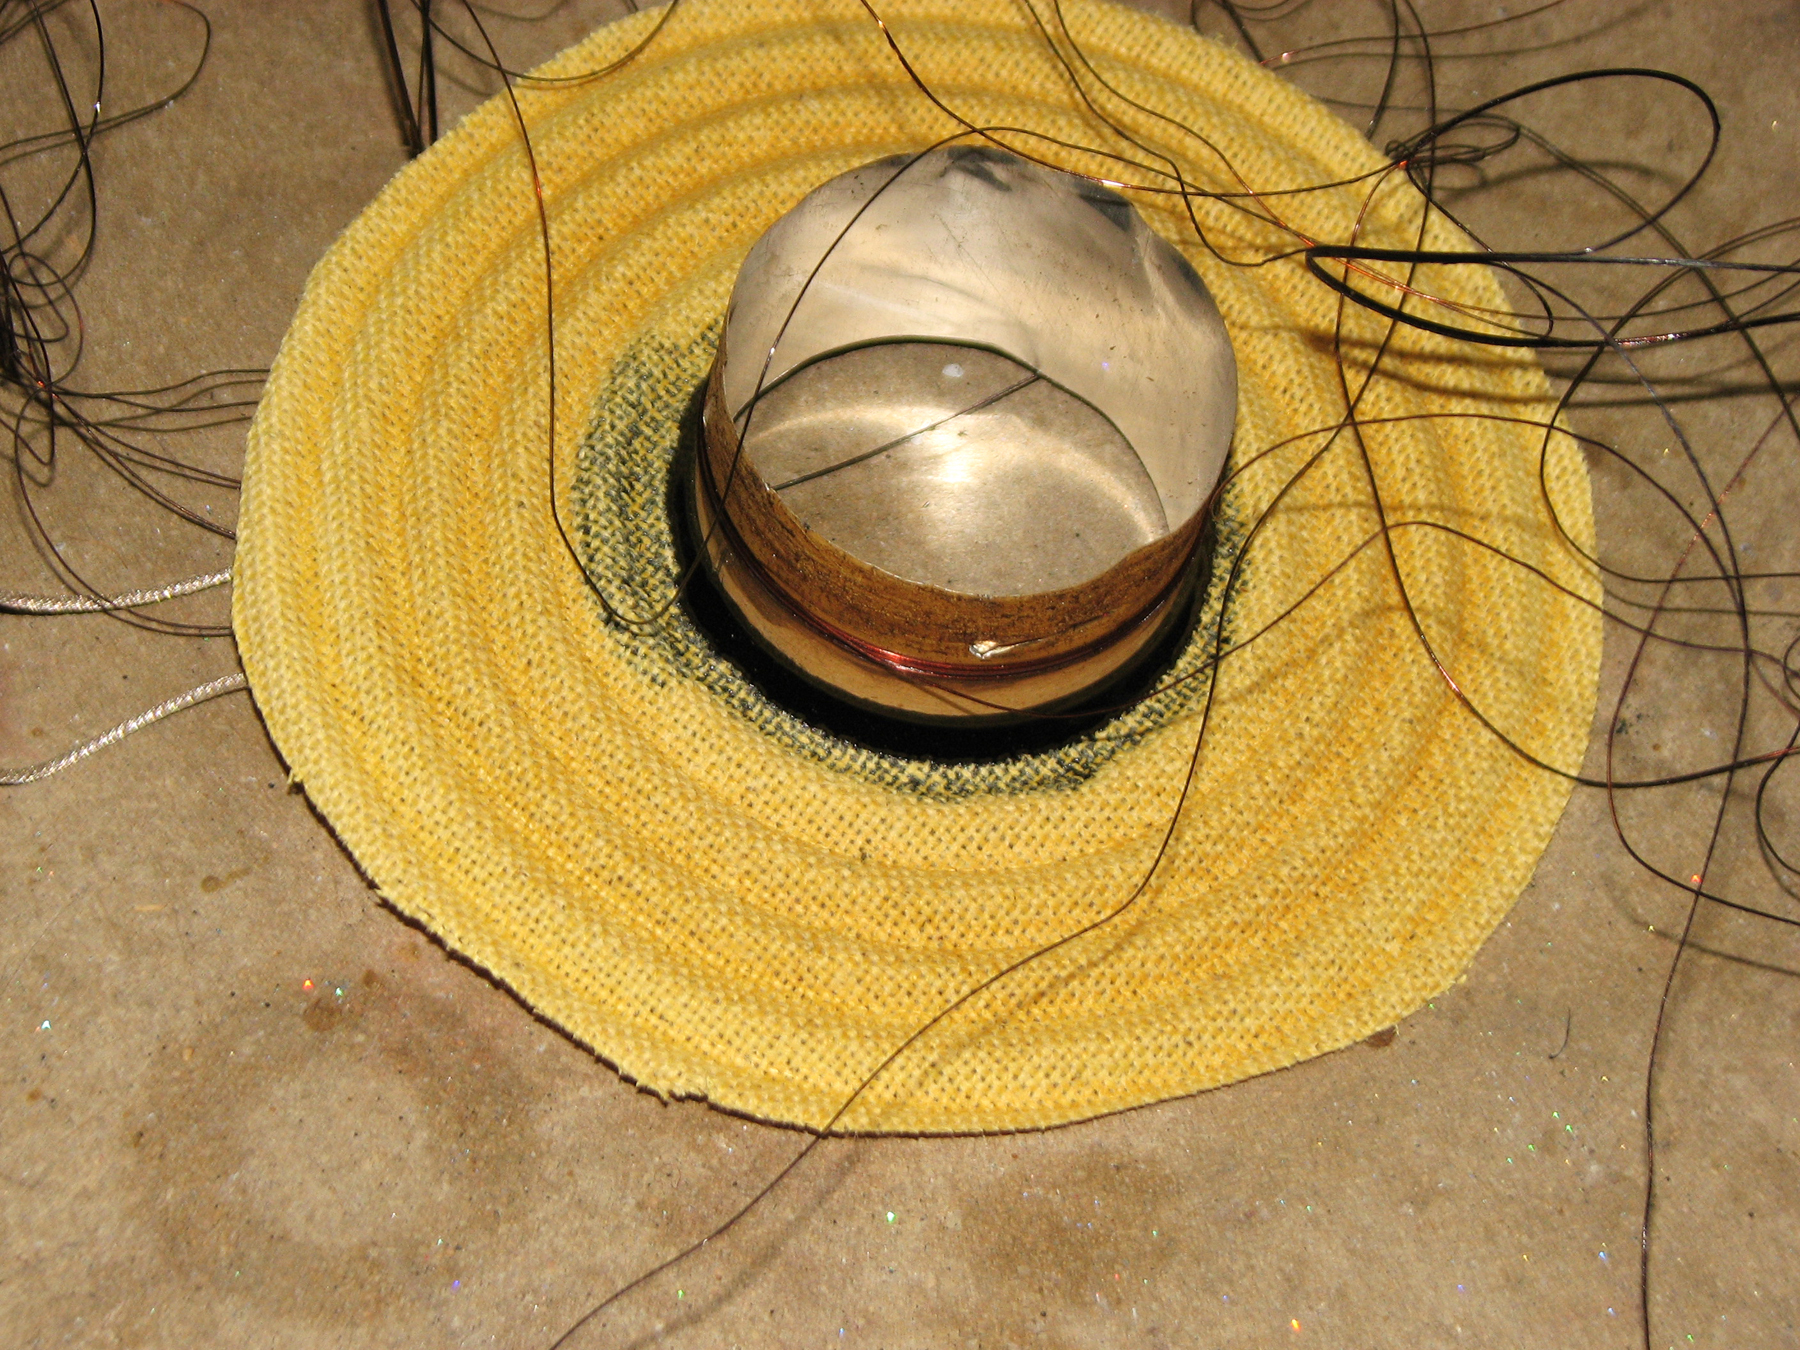
Lift the spider and former out of the ring magnet and speaker. At some point you’ll need to snip the braided wire that leads into the coil.

If your speaker coil is deep enough to let you mount an extension and has wire beefy enough to handle some high-voltage driving, you can skip the next step and add the riser (Step 5) to the existing coil. Otherwise it’s a better bet to wind your own coil as follows.

Gently untangle, extract, and unwind all the old wire from the former. Carefully prod the former into good shape. If the former has rough spots, sand them down. If it’s bent, unbend it. If it’s sticky, rub on graphite powder to seal it.

Wind a new coil.

Create a new former by wrapping a tight loop of packing tape around the old former with the sticky side out, so you can slip it off later. It may take several tries to get a clean, smooth cylinder.

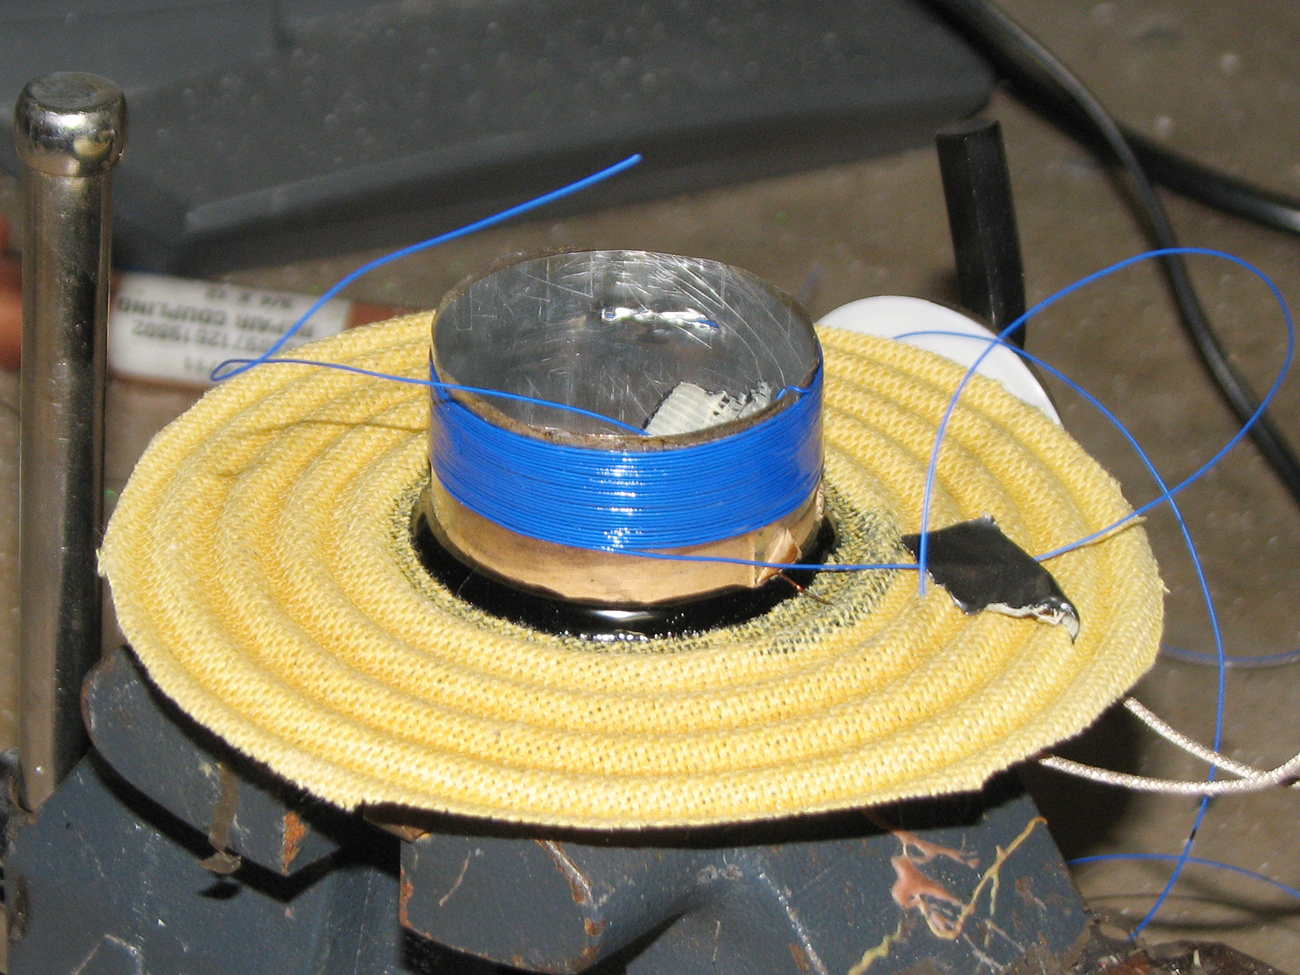
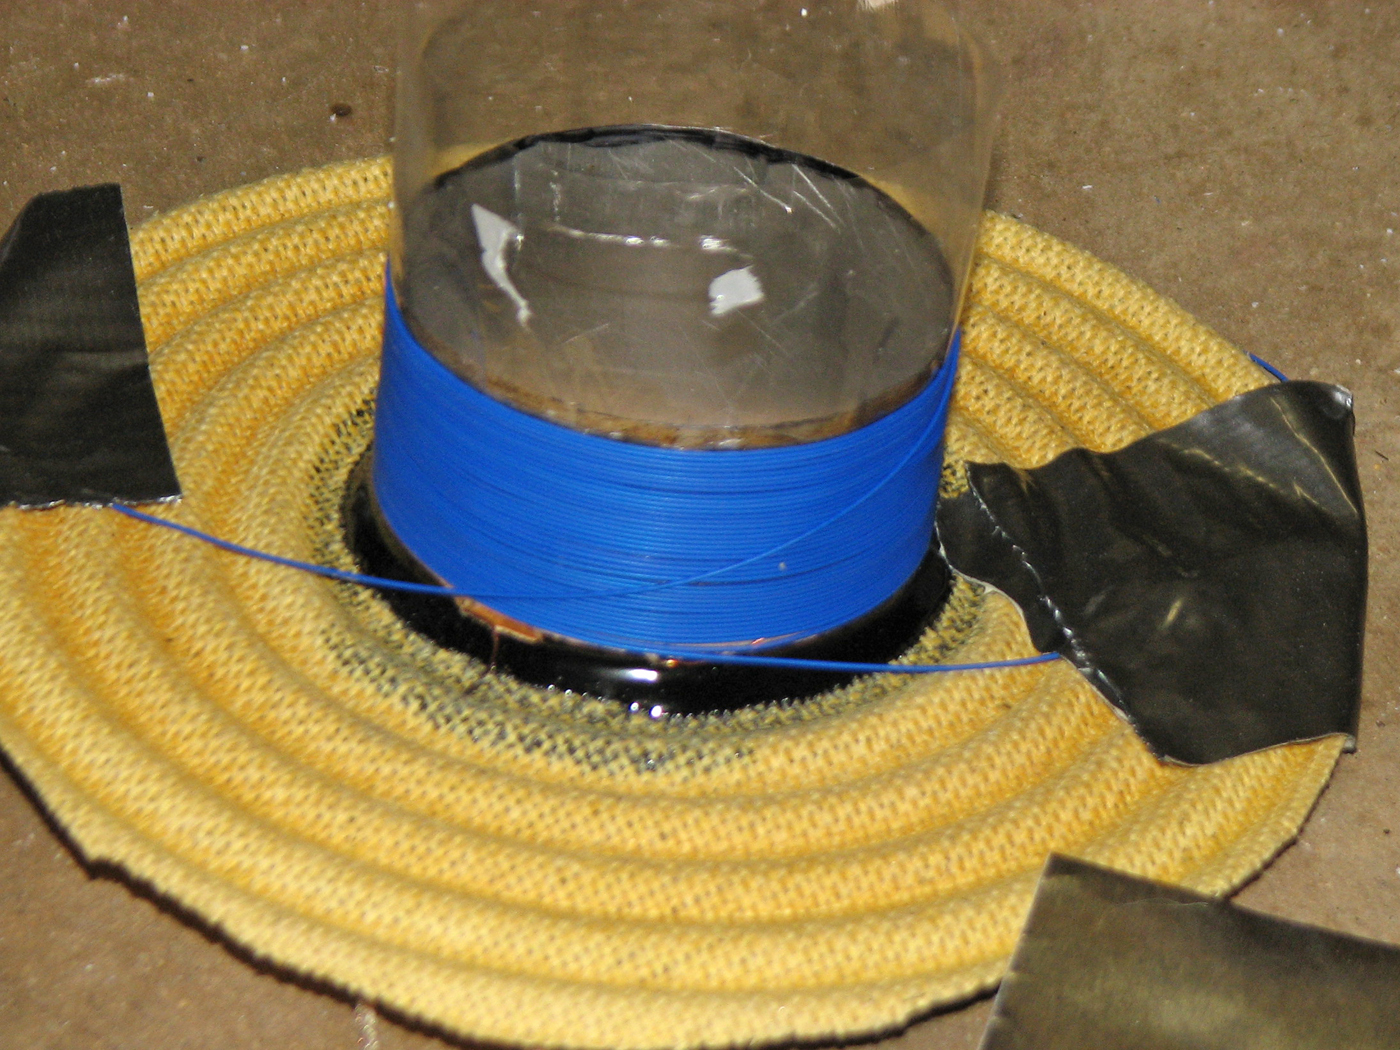
Wind a new voice coil onto the tape. Start by taping the end of your magnet wire securely to the spider on both sides, leaving some extra length. Then wind a tight, single-layer coil around the former with 50 to 100 loops. Don’t make multiple layers of wire, or the coil will jam in the magnet or overheat.

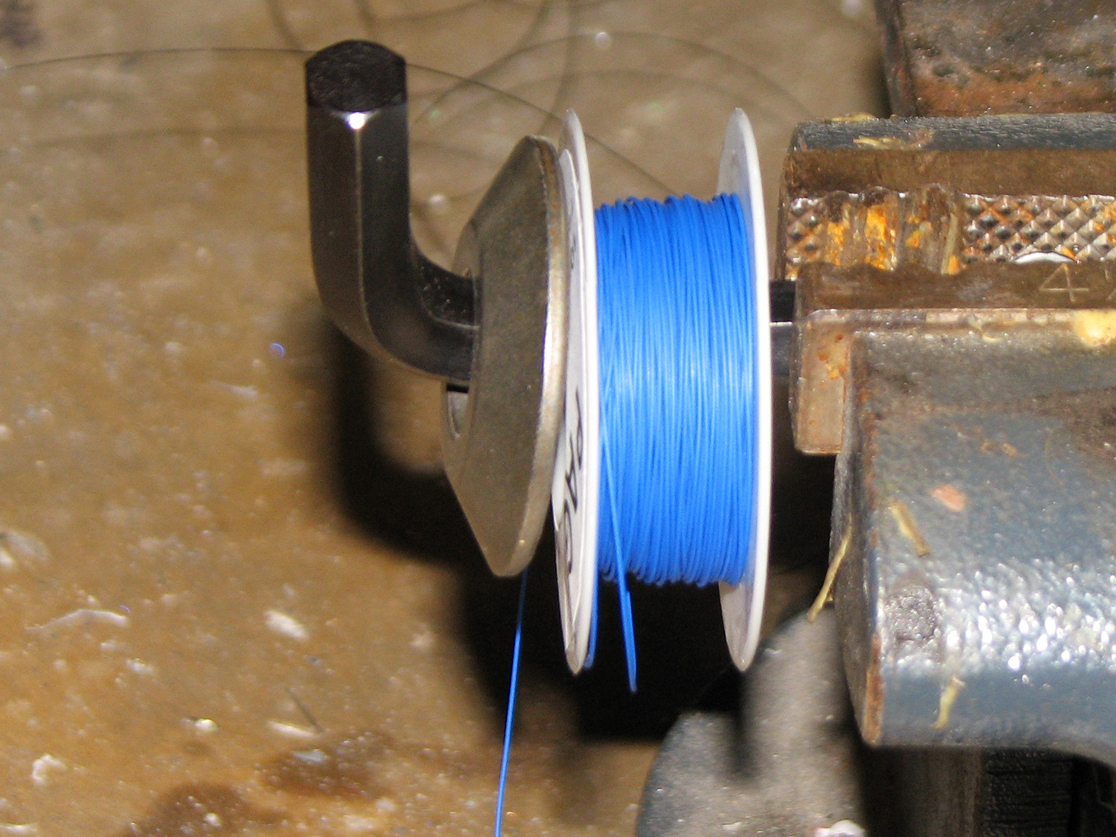
When winding a coil, the first loop is the most important, because it sets the standard for the rest. To make winding easier, pull the wire off of its spool tangentially, so it doesn’t kink. To help with this, I used a large Allen wrench in a vise as a spool holder. Spin the former in your hand as you pull the wire and lay it down firmly.

After you’re done winding, spiral the outer end of the wire down the former and tape it to the spider. Cut the wire and strip both ends.

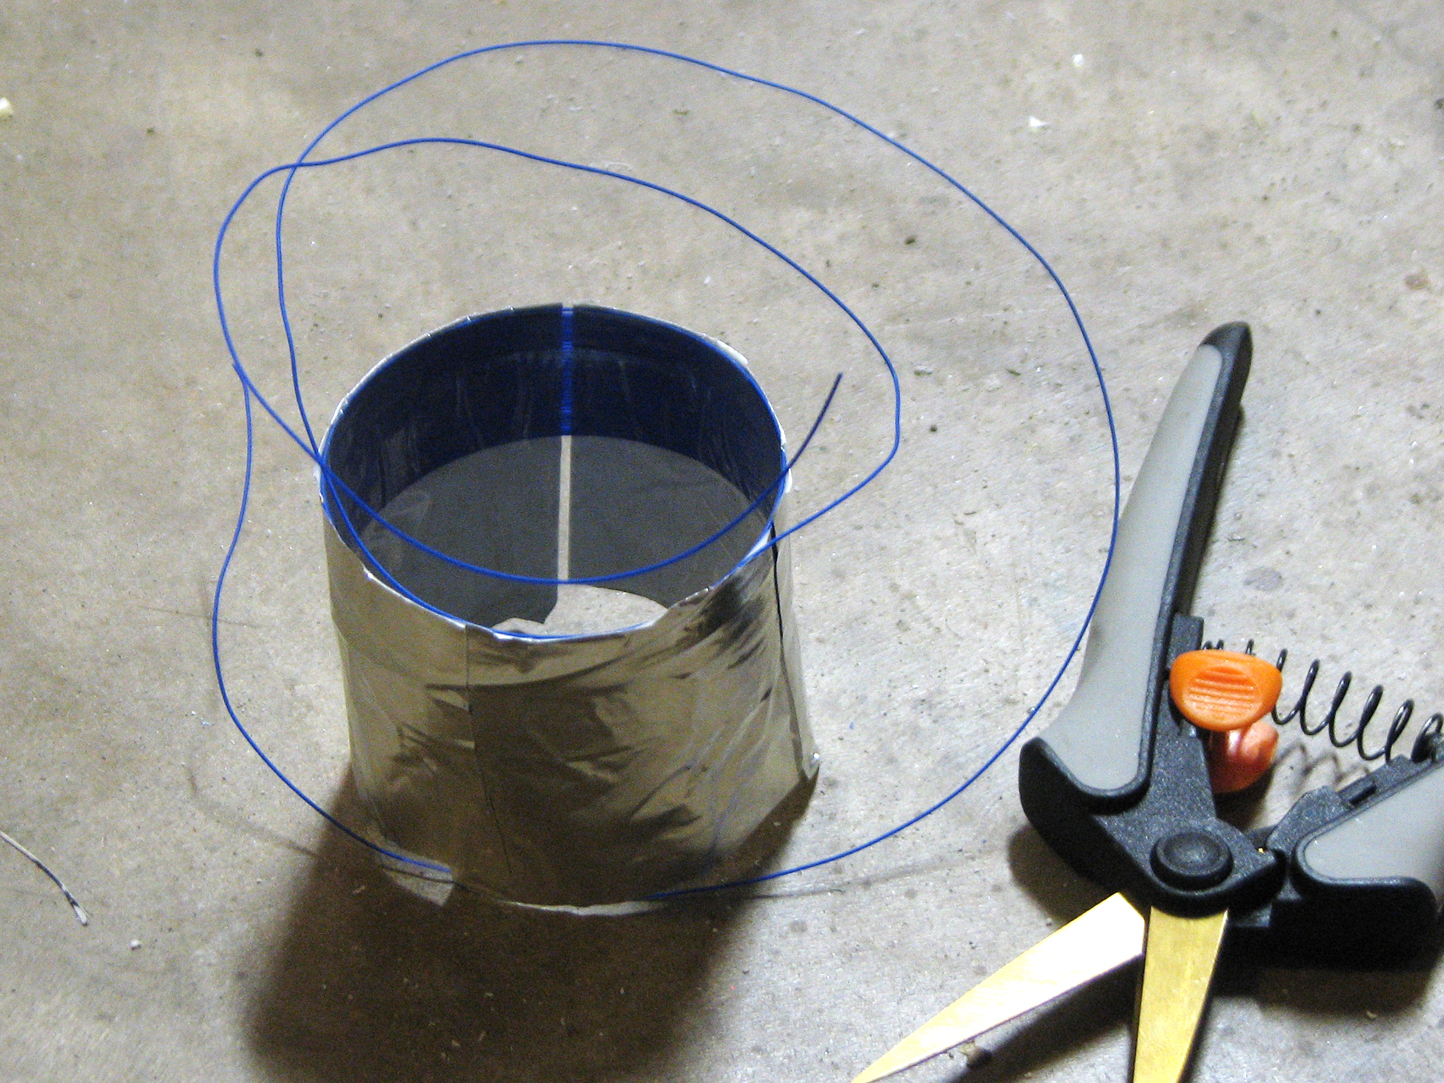
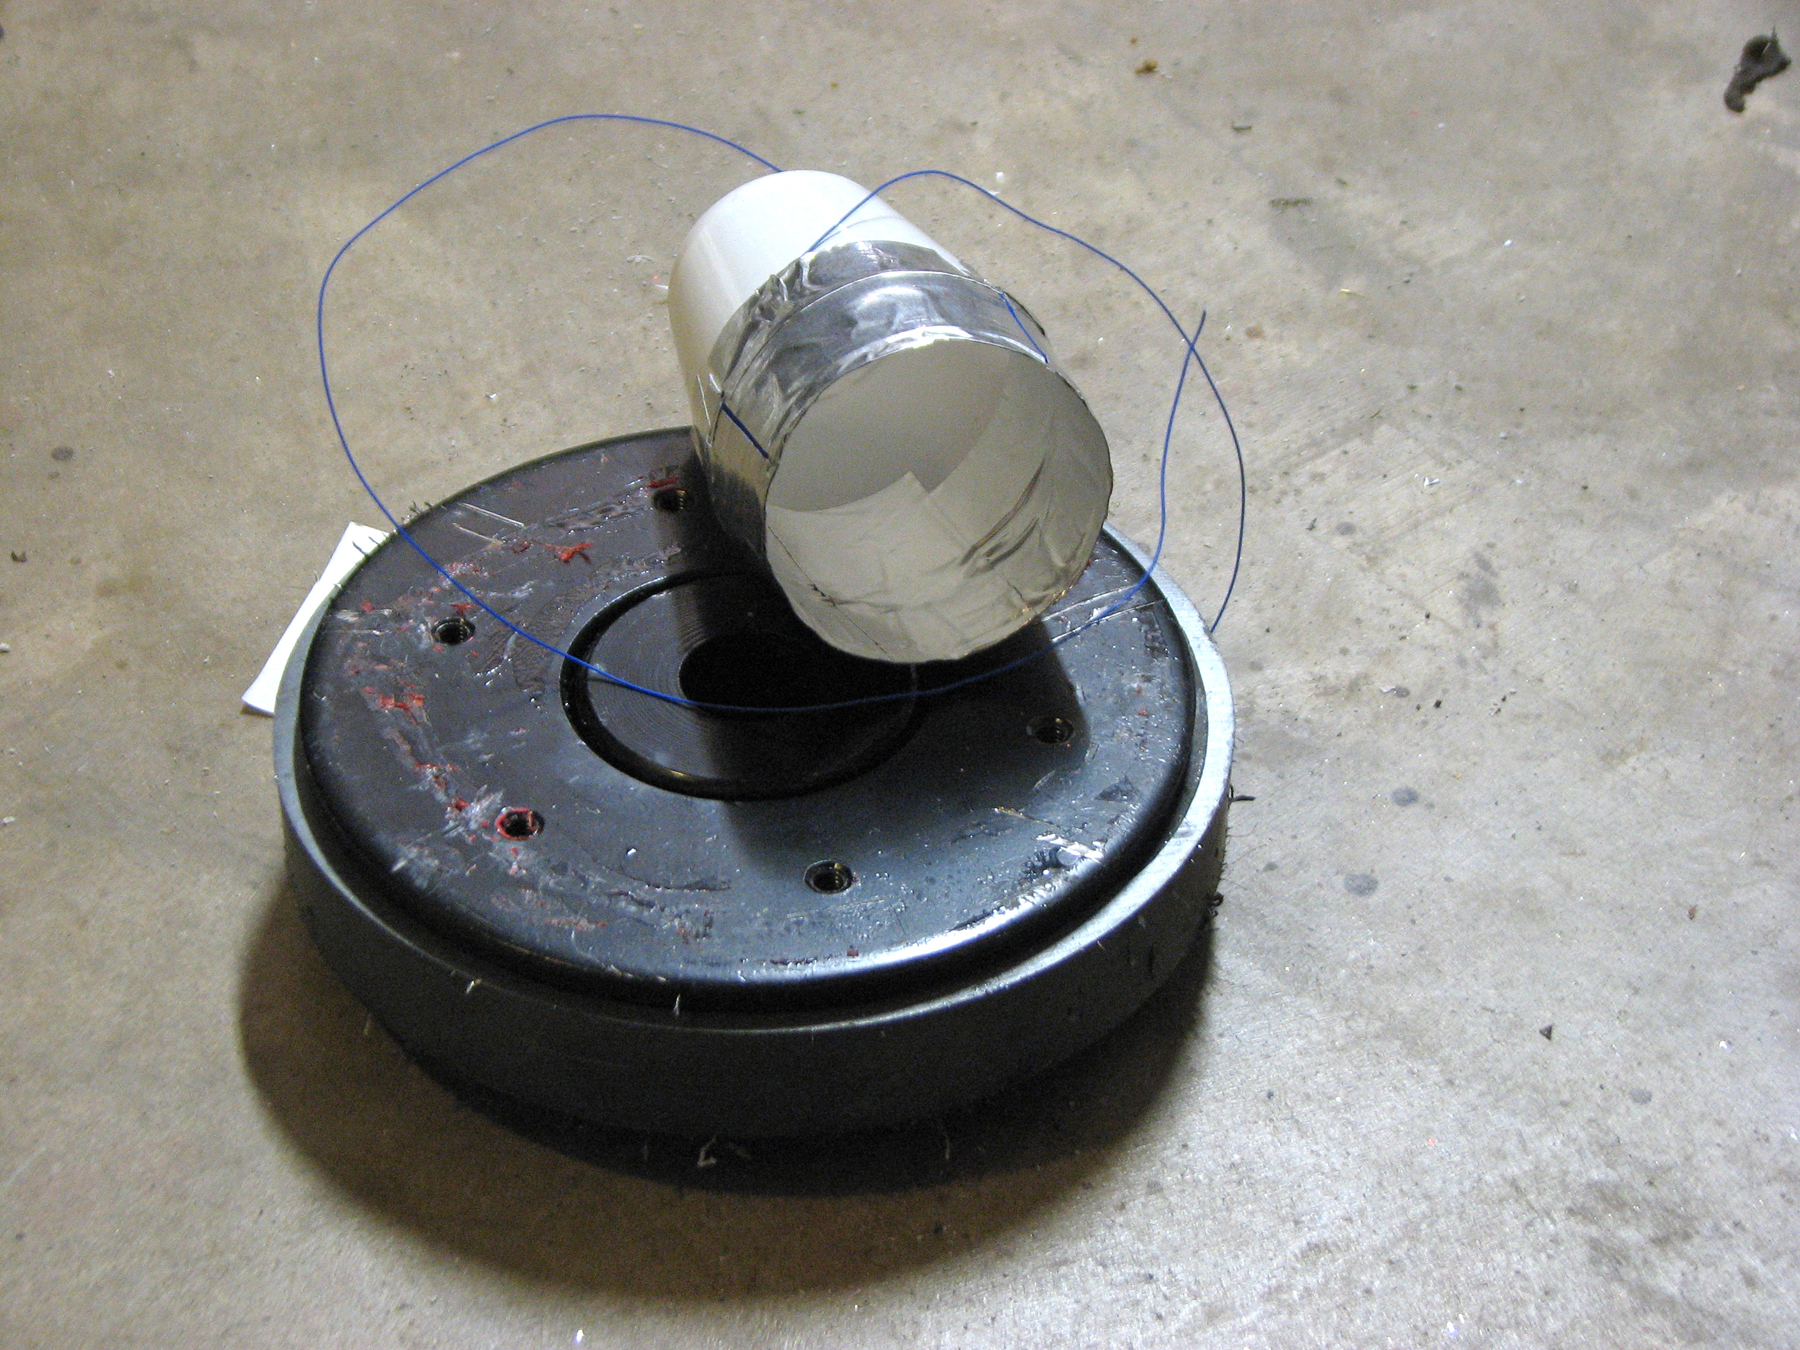
Use squares of aluminum tape to cover the coil and at least ¼” of the packing tape that sticks out underneath, but leave a small gap down 1 side so that the aluminum doesn’t create a conductive ring. Make sure no tape is sticking to the original former.

Use several small squares of tape rather than 1 piece, because aluminum tape is tricky to manipulate, and a single cylinder of tape would fit poorly on the conical-shaped cup later.

Slide your new coil off the former.

Calculate your coil’s resistance by multiplying its length by the wire’s resistance. For example, my coil had a 2″ diameter, 60 windings, and 30-gauge wire whose resistance is about 0.1Ω per foot. This gives (2×π×60) × 0.1/12 = about 3Ω.

Add the riser.

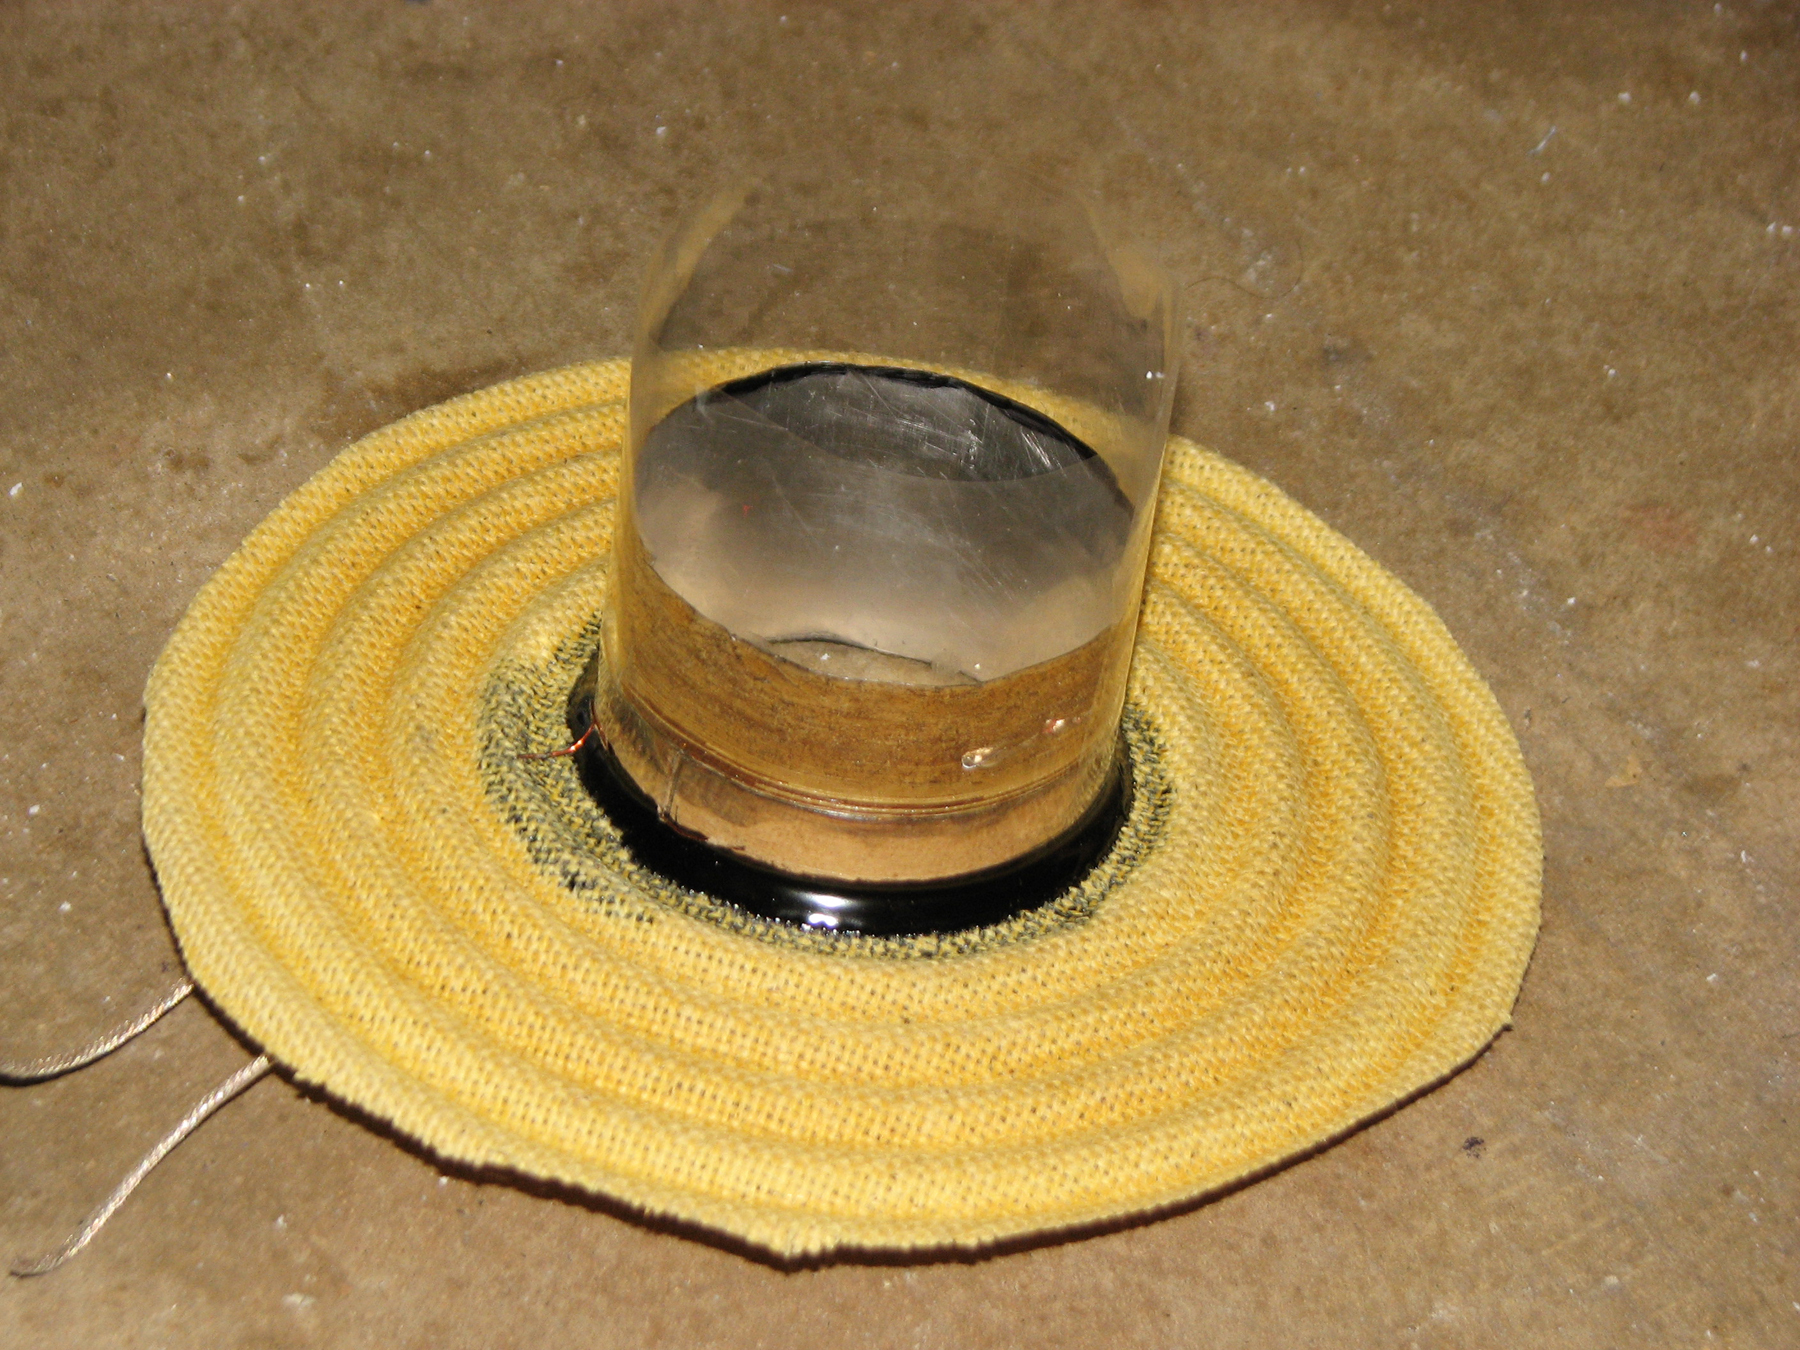
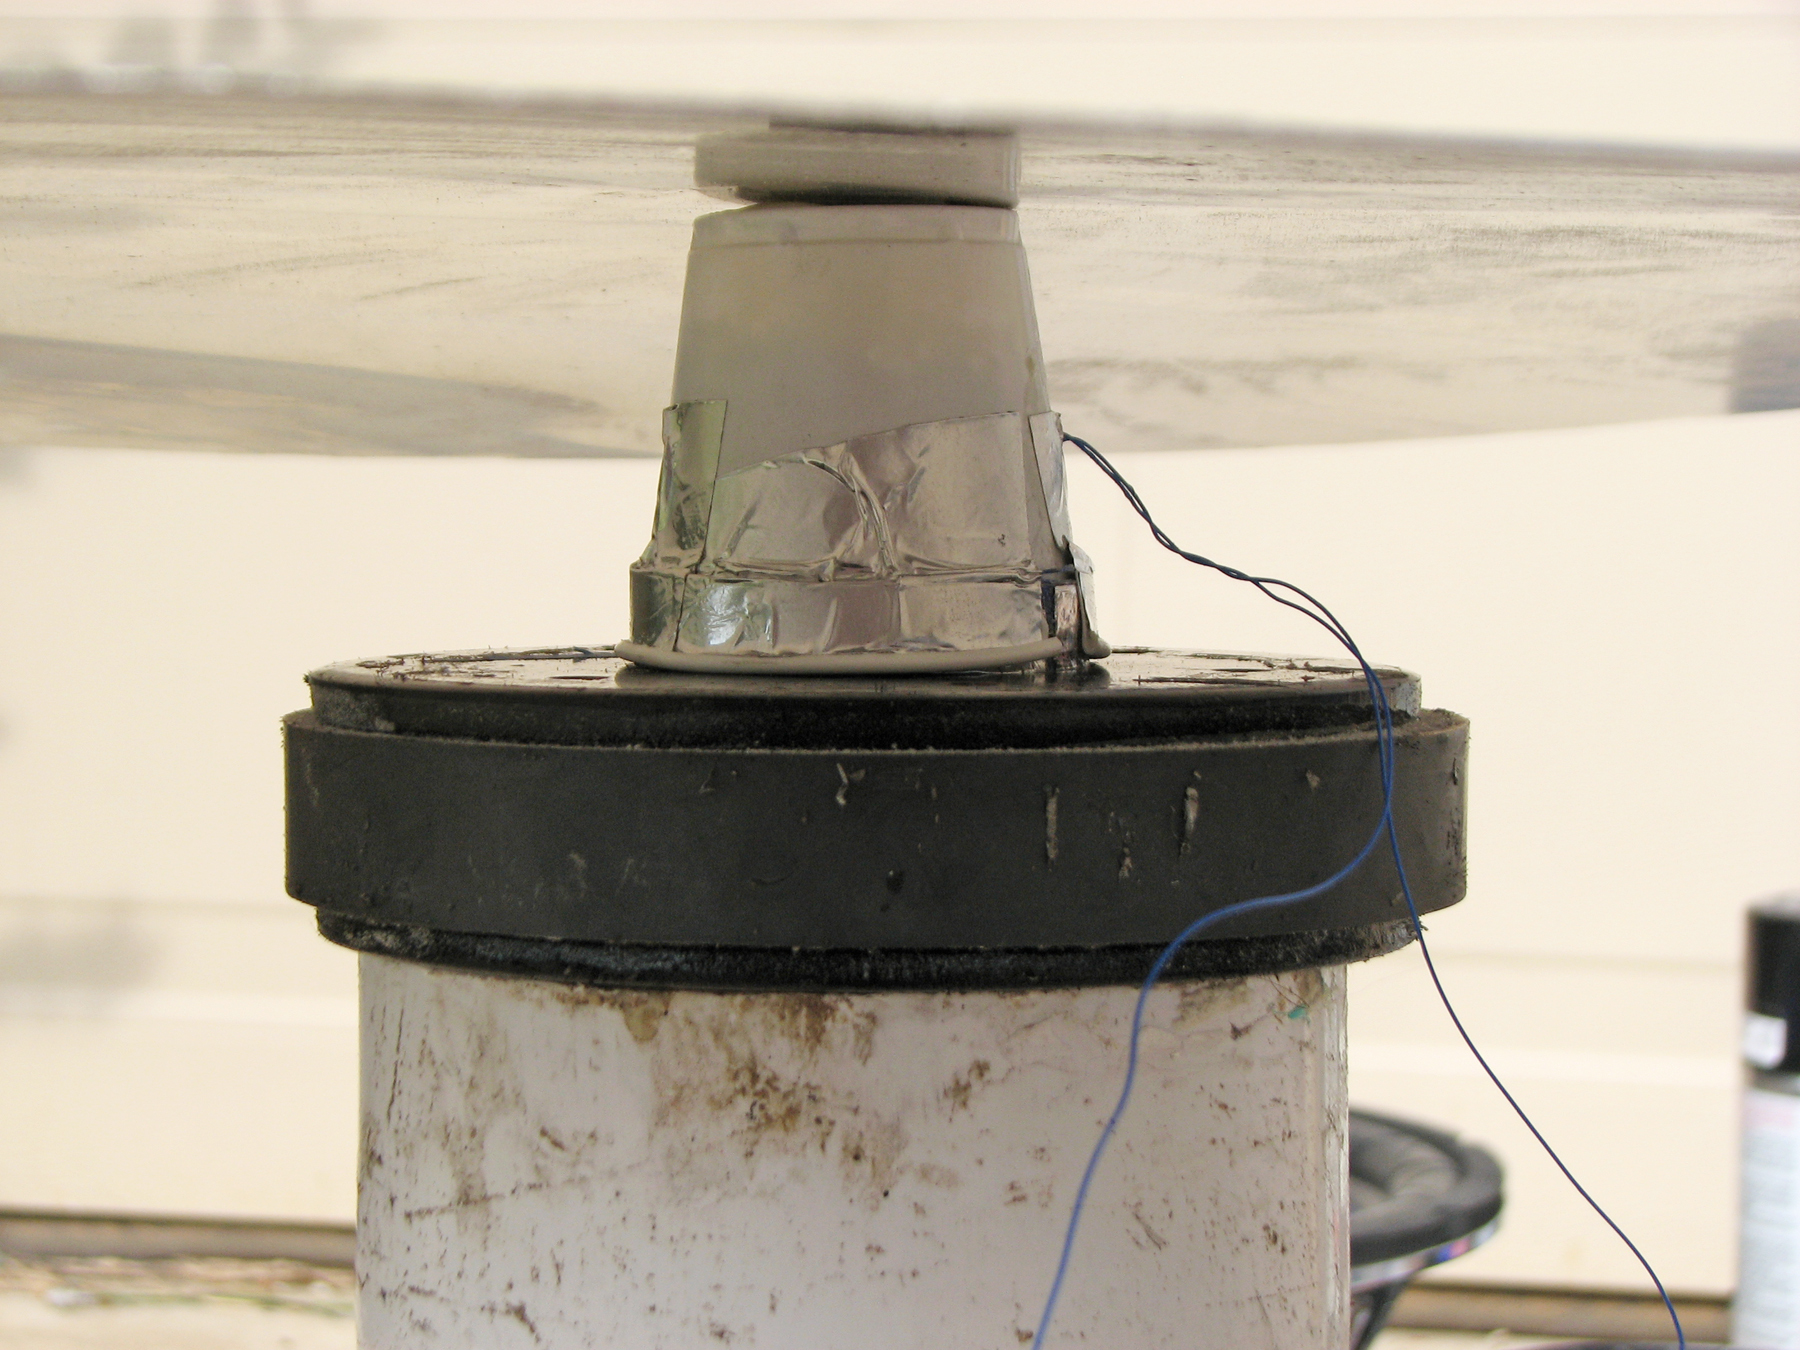
The plastic-cup riser makes a strong connection between the coil and the Chladni plate.

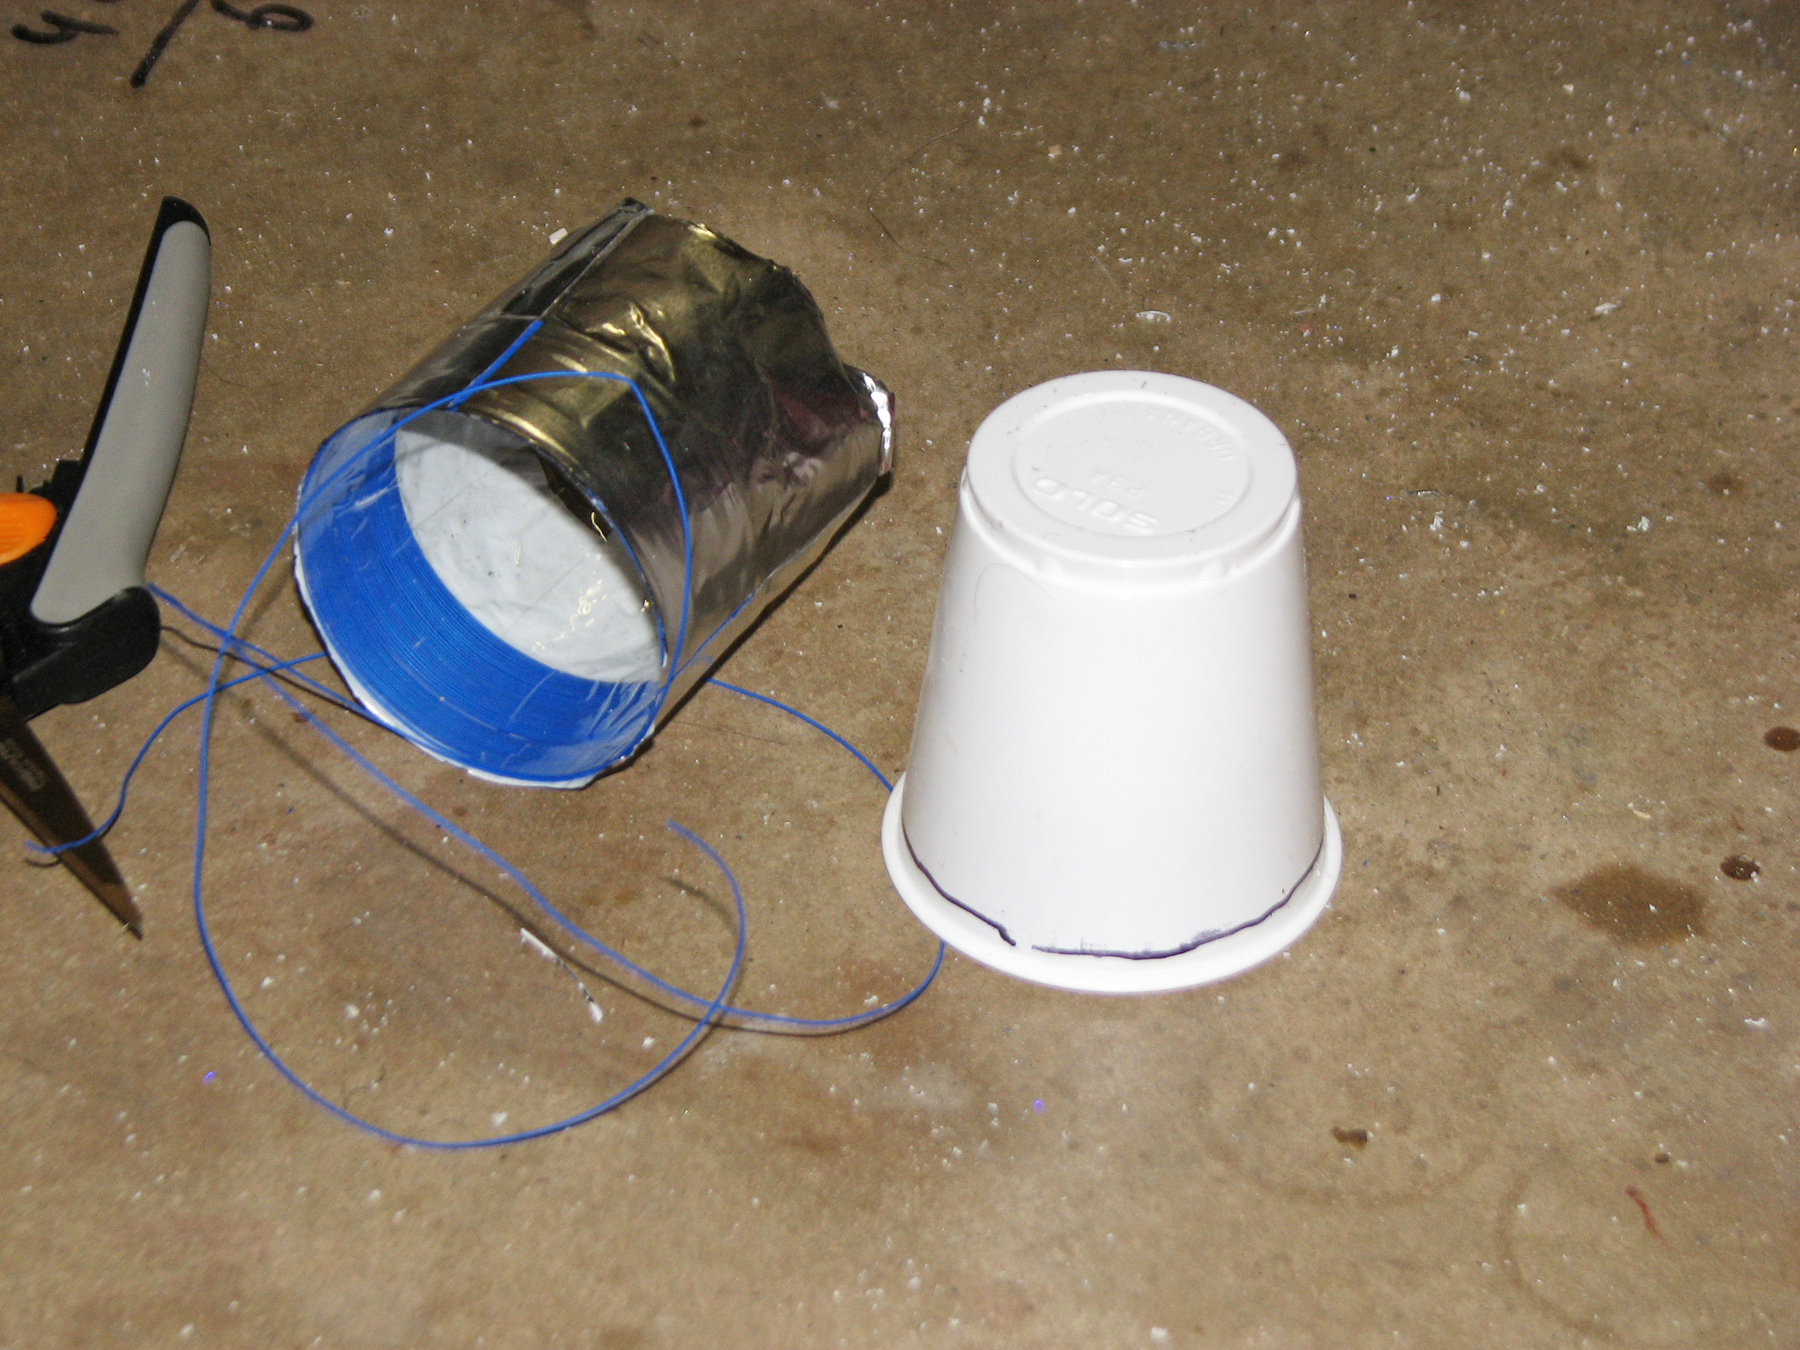
Insert the narrow end of a plastic cup into the coil until it stops, and draw a line around it along that edge.

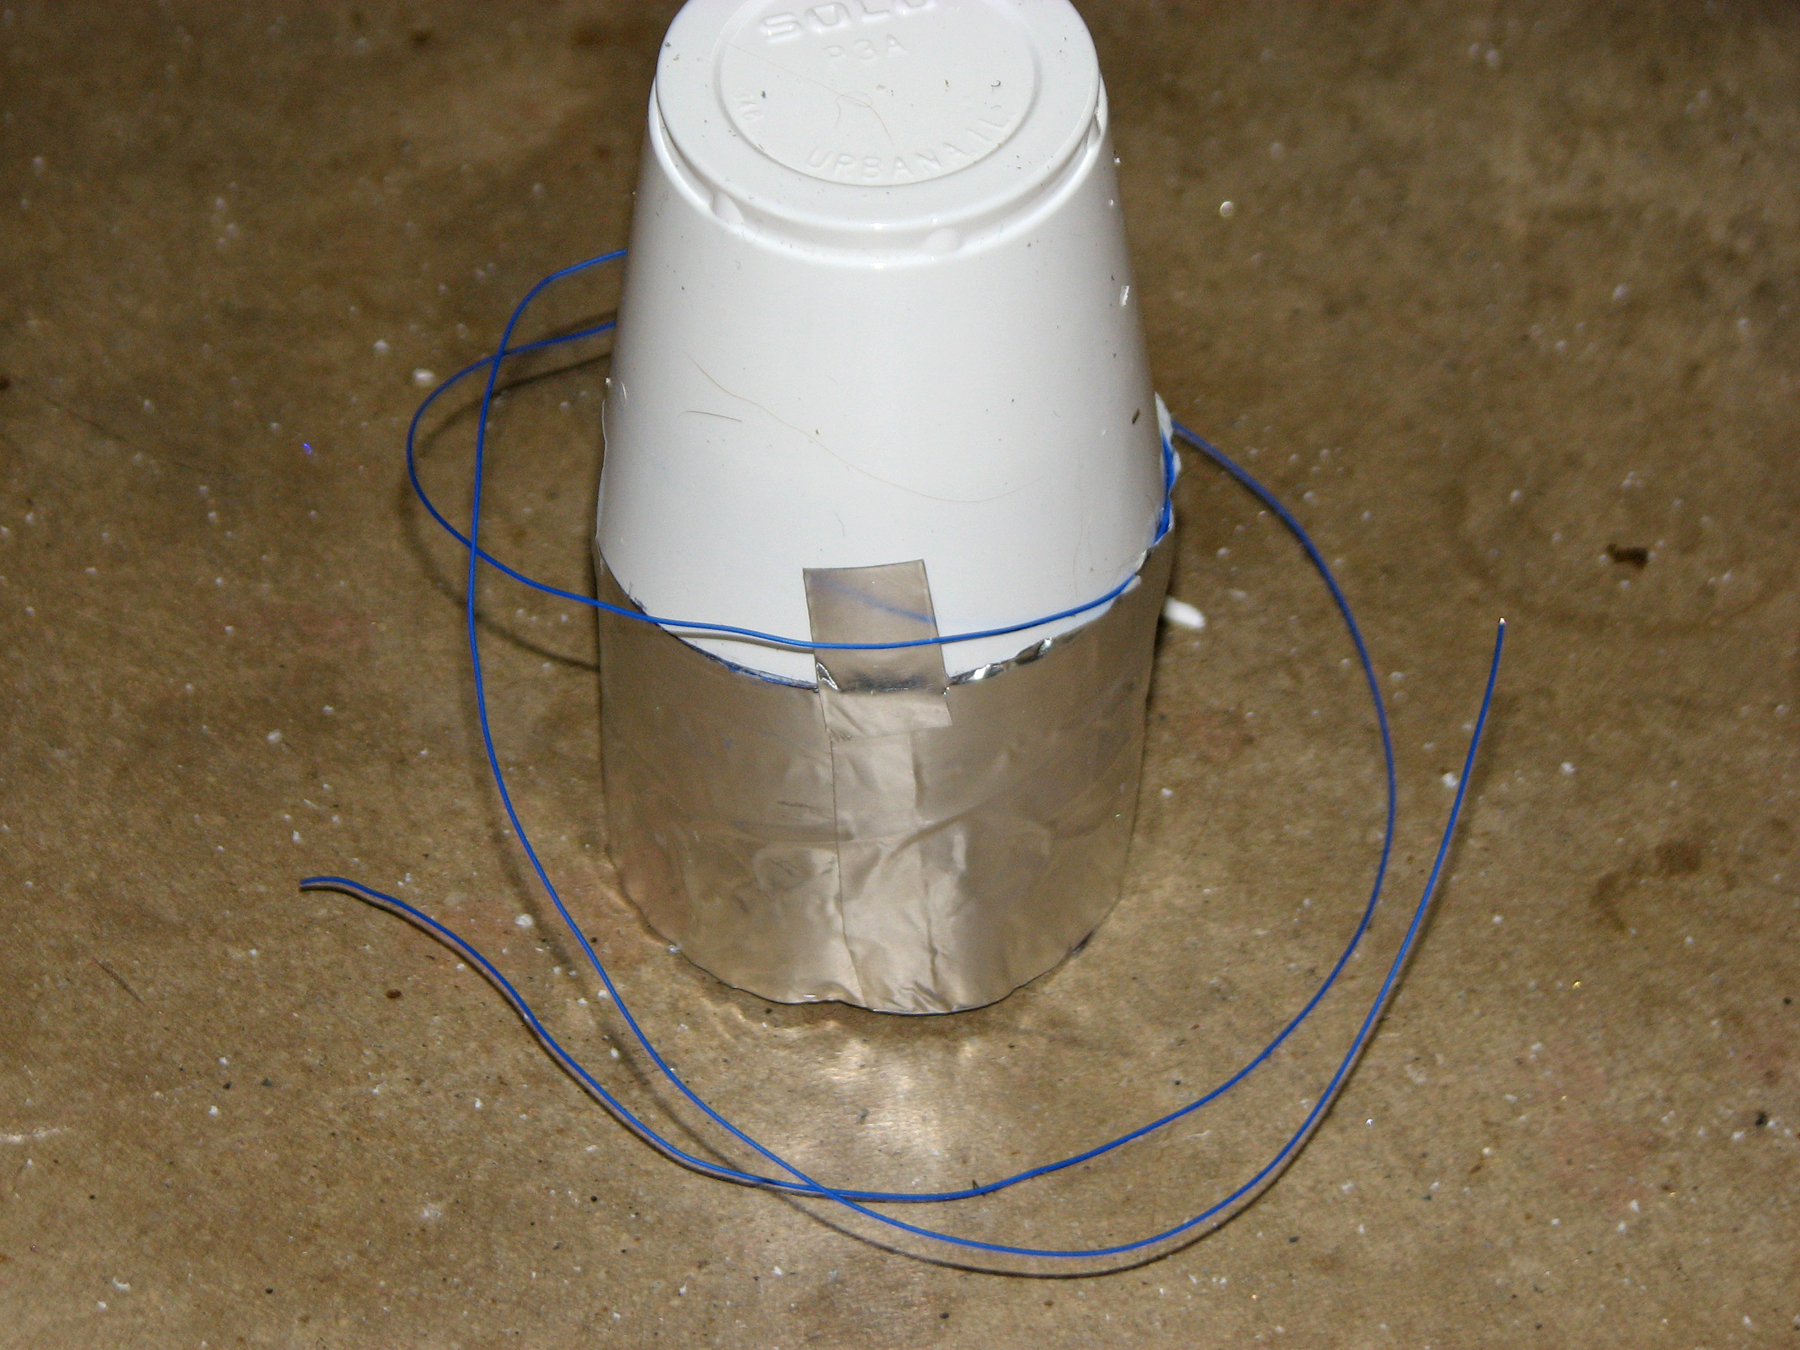
Cut away the wide part of the cup so that it fits through the coil. Use small bits of tape to tack the cup onto the coil, with the wire coil side toward the cup and the empty tape side away from the cup.

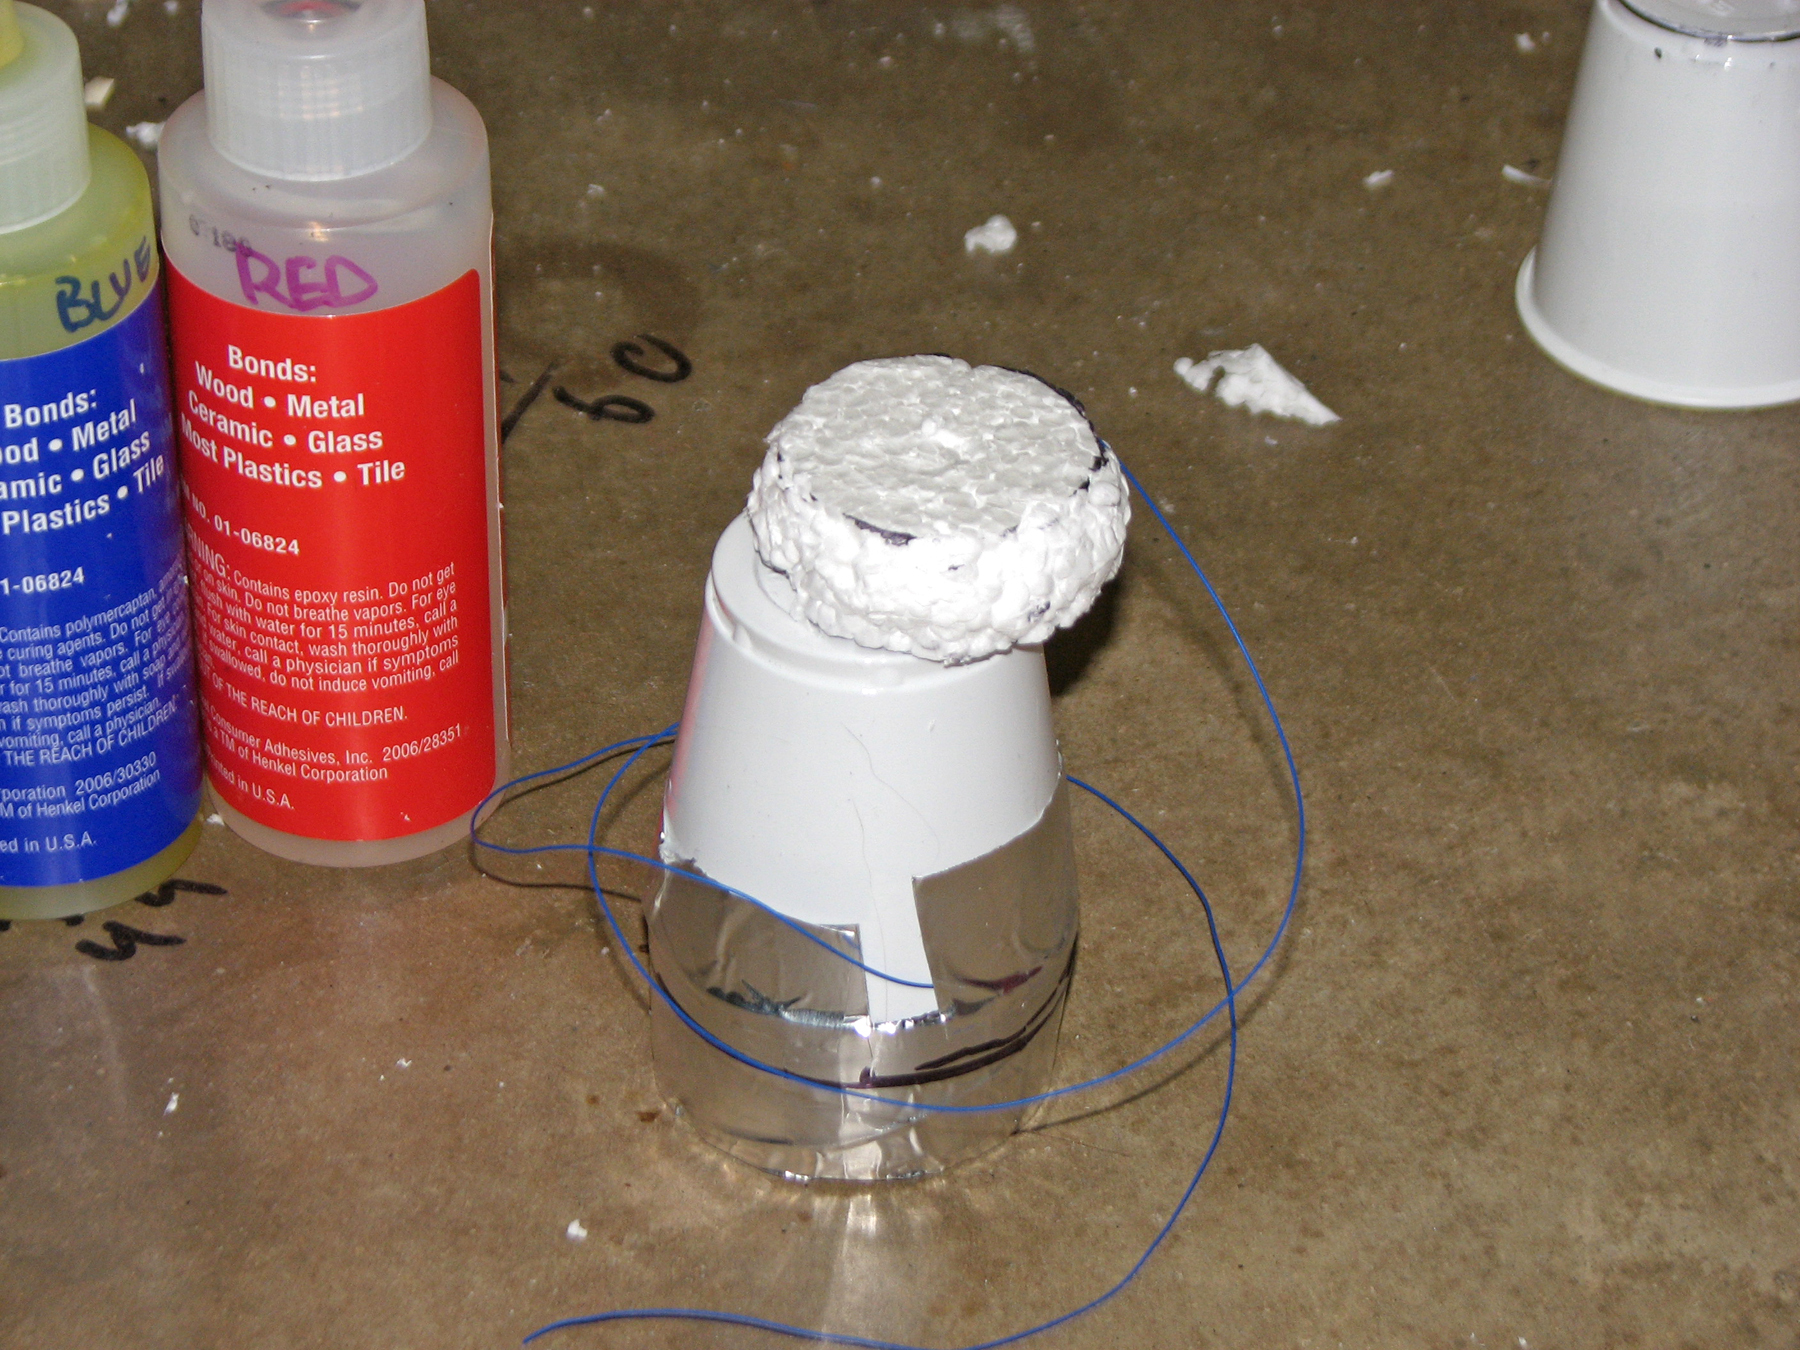
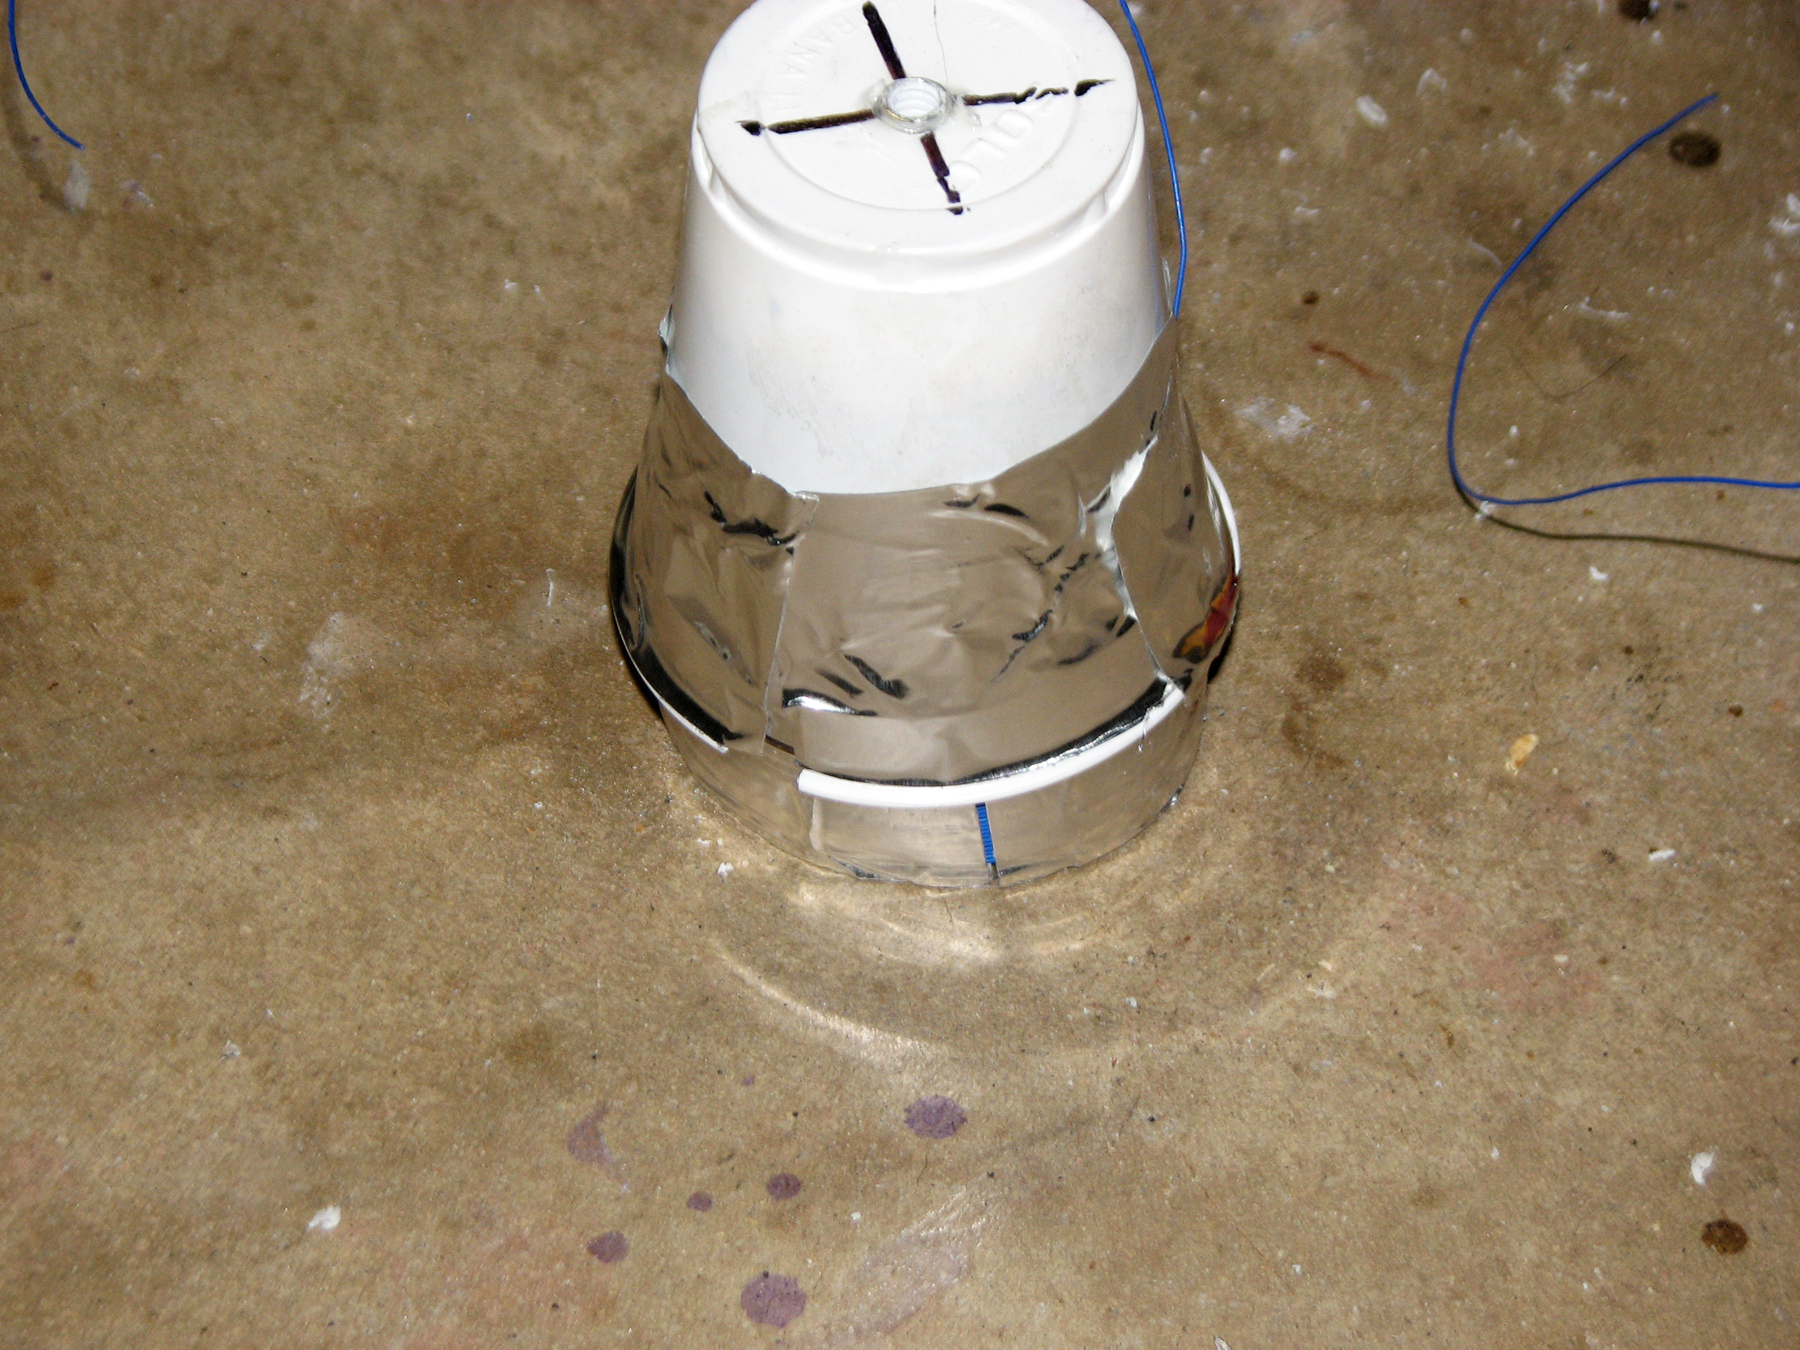
Use aluminum tape to tape the cup to the coil from the inside, covering all the wire, ¼” of the packing tape, and at least ¼” of the cup. You can add more aluminum tape to the outside of the cup for strength, but don’t tape very far down past the coil or it may become too thick to slip into the speaker.

This coil/cup connection will take a huge amount of abuse during operation, so make it strong; we don’t want it to slip or buckle.

Use a sharp knife to cut a clean edge through the 3 layers of tape about 1″ beyond the coil. Remove the excess tape.

Cut a ½”-thick styrofoam disk that fits snugly into the bottom of the plastic cup, and use epoxy on its face and edge to glue it in.

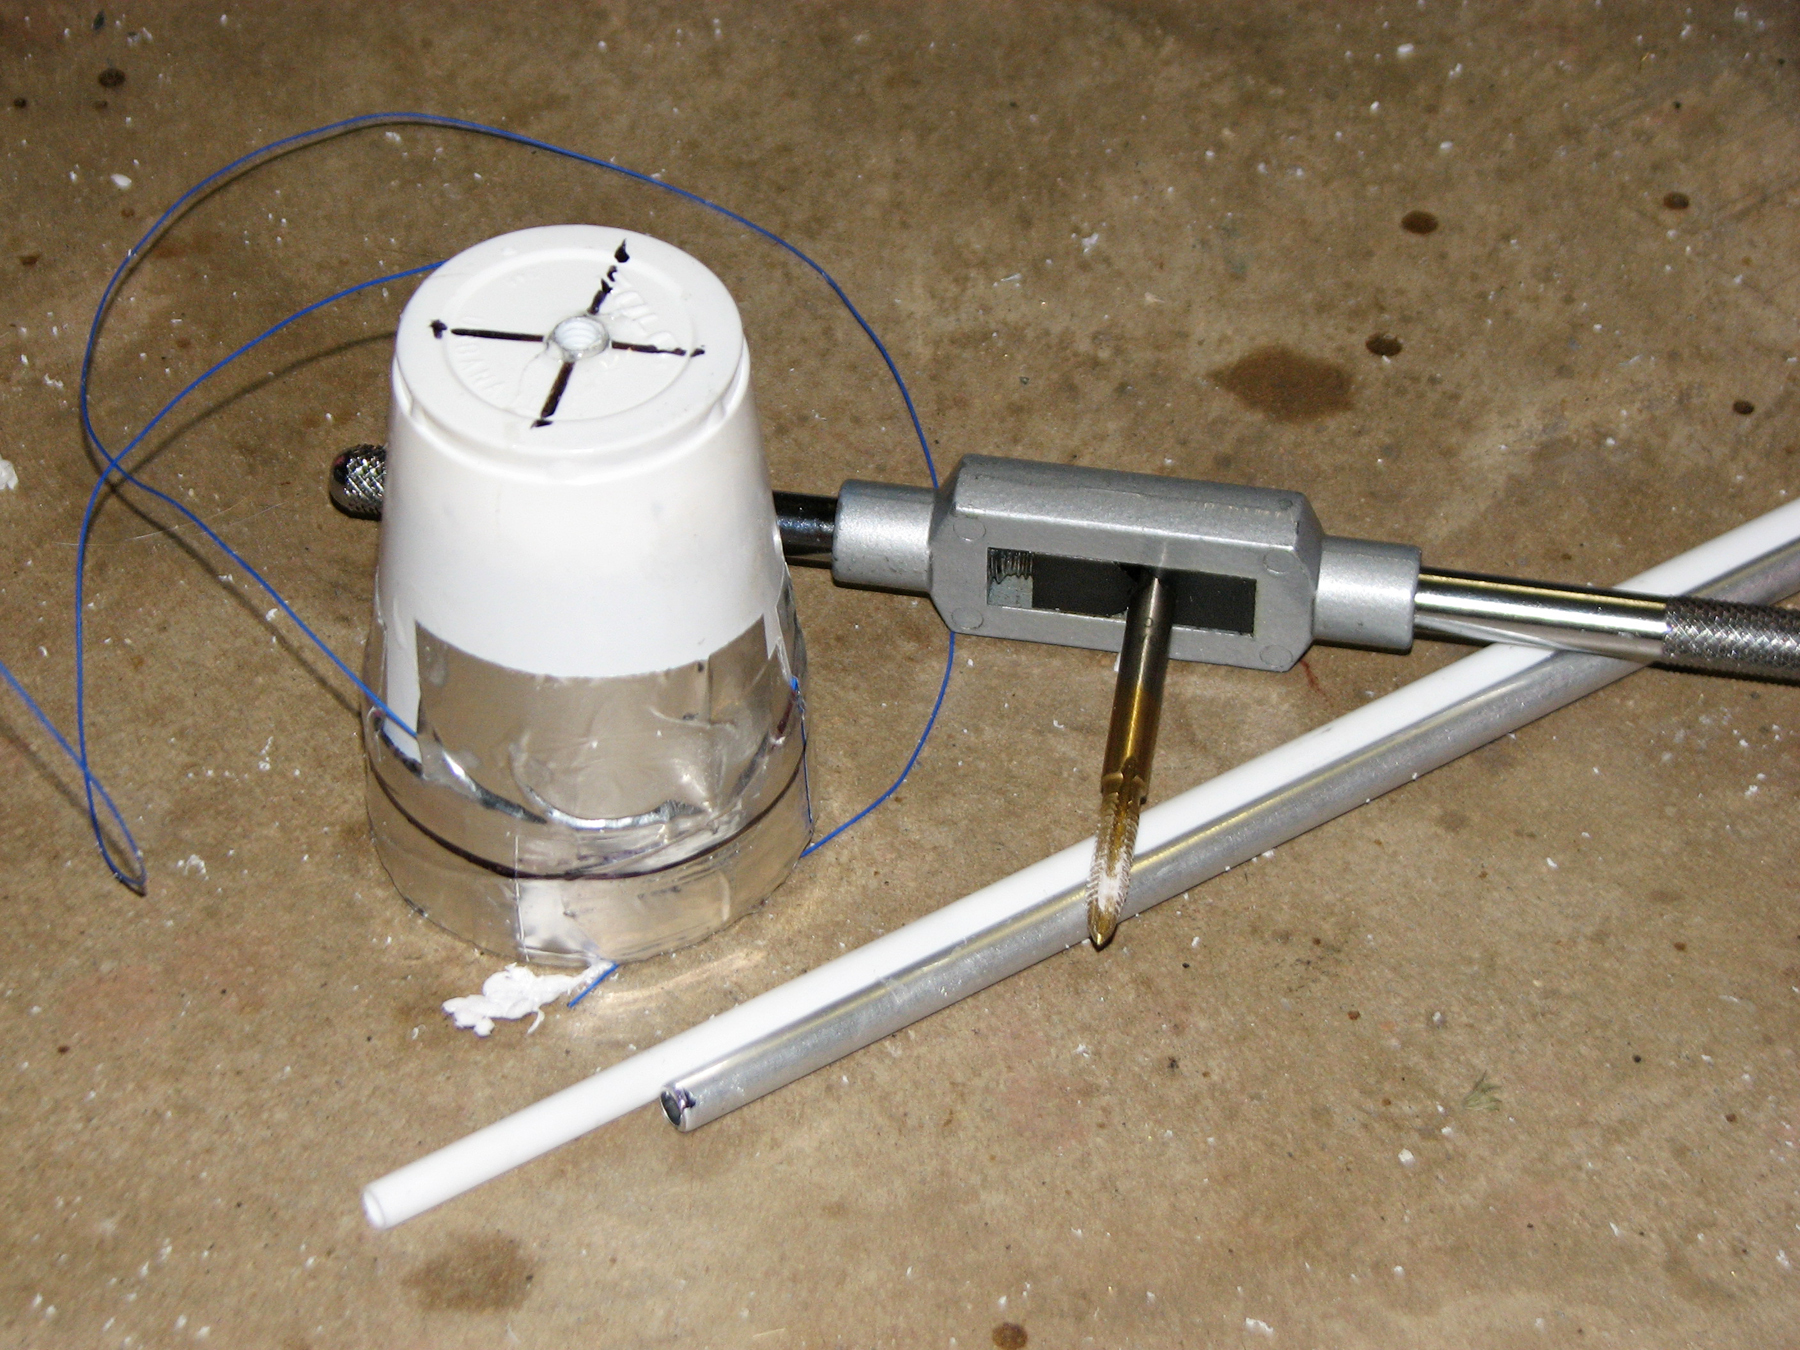
The plate’s mounting point is built from a plastic tube, tapped for a screw mount, nested inside a rigid metal tube. Cut the metal and plastic tubing to 3″ and epoxy them together. After the epoxy sets, tap the plastic tube for #10-24 threads

Mark the center-bottom of the cup and drill a ¼” hole. Epoxy the tapped mount into the hole so that it’s straight and nearly flush with the outside of the cup. Your driver assembly is complete.

Add the stop ring.

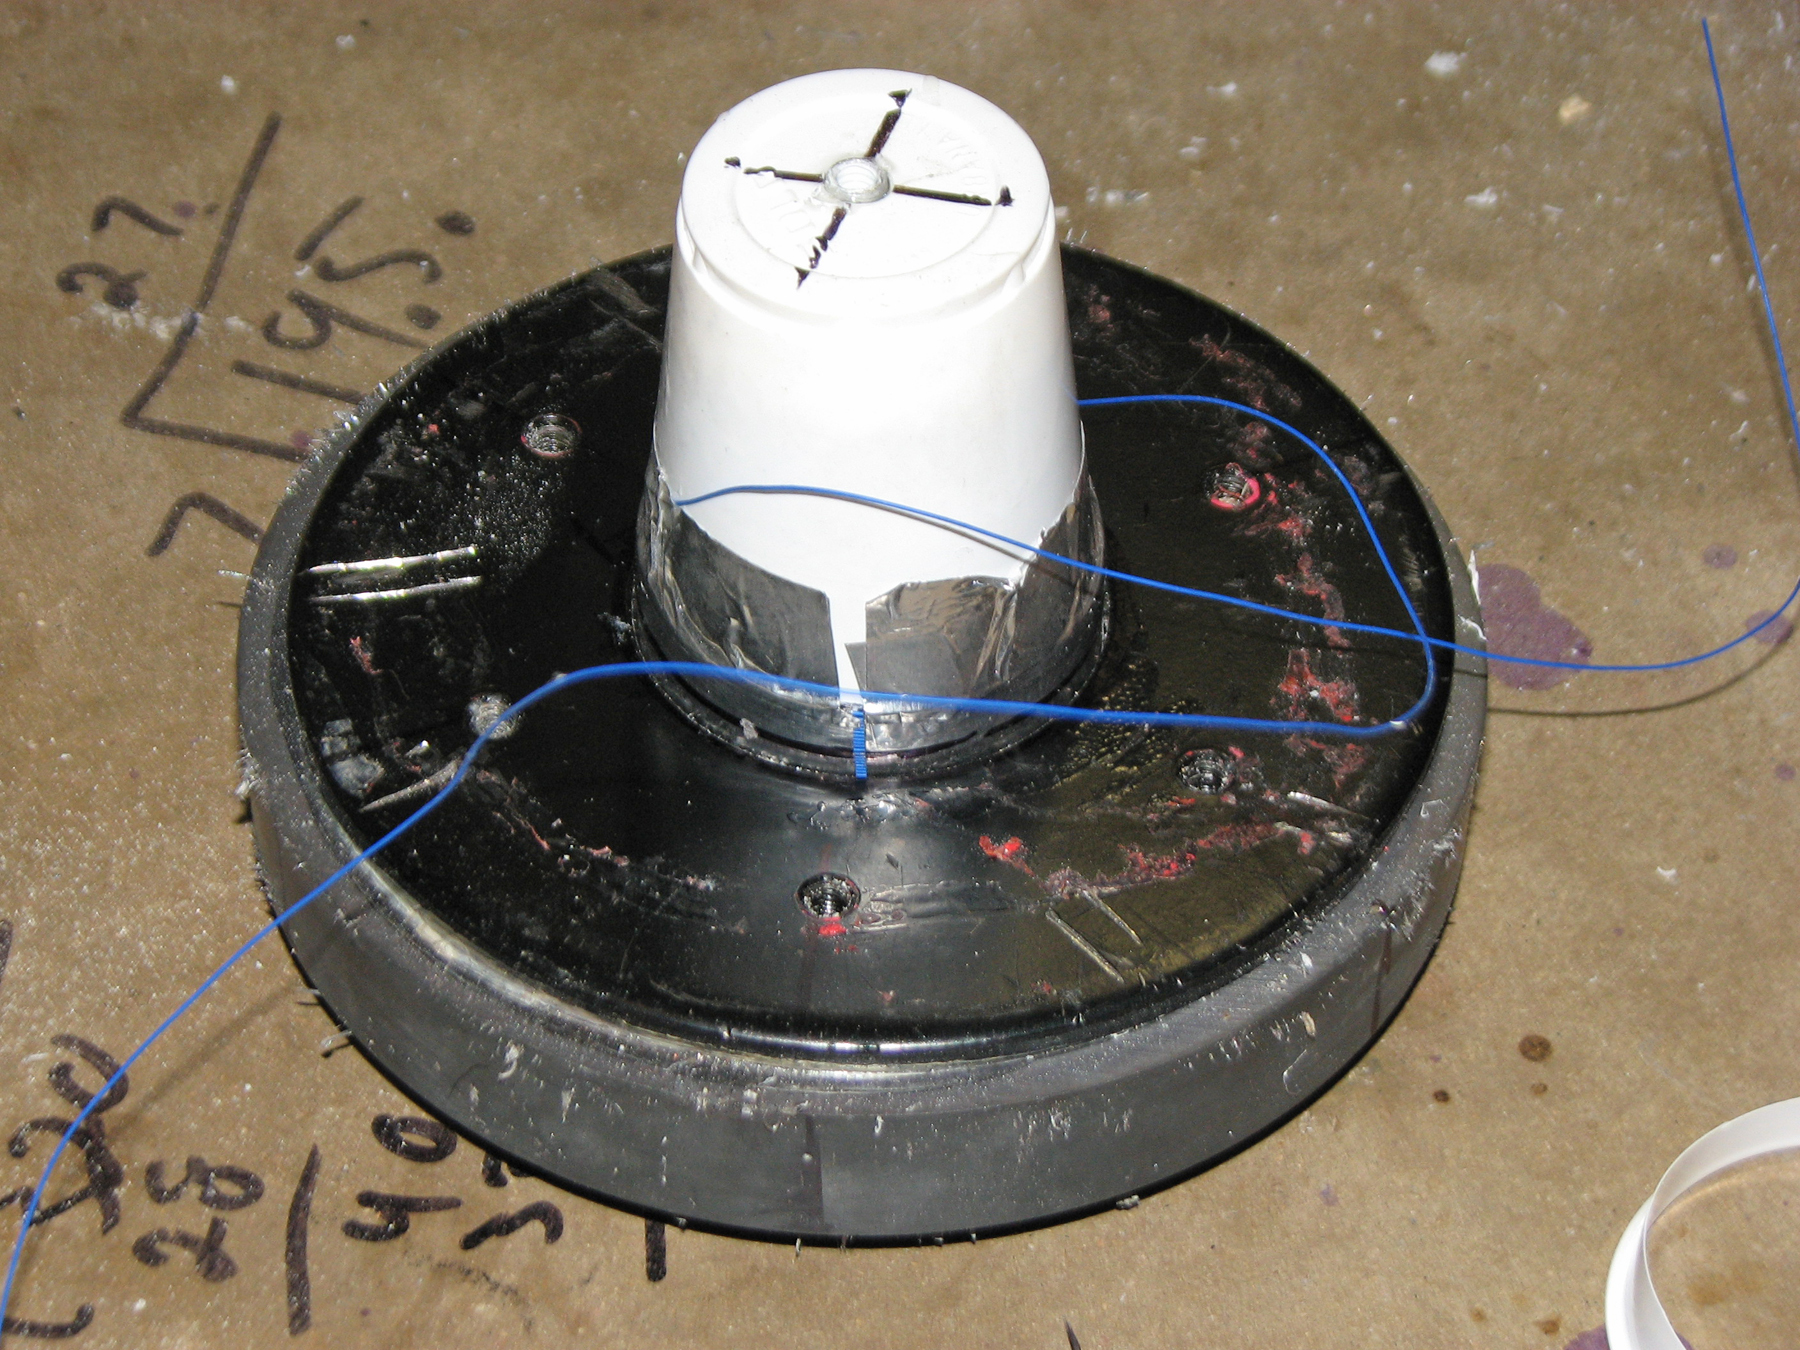
The stop ring around the voice coil holds the weight of the Chladni plate so that the coil doesn’t sink too far down into the magnet.

Test-fit the driver assembly into the speaker magnet. Find a reasonable position with most of the wire coil inside the magnet, and mark that position on the driver.

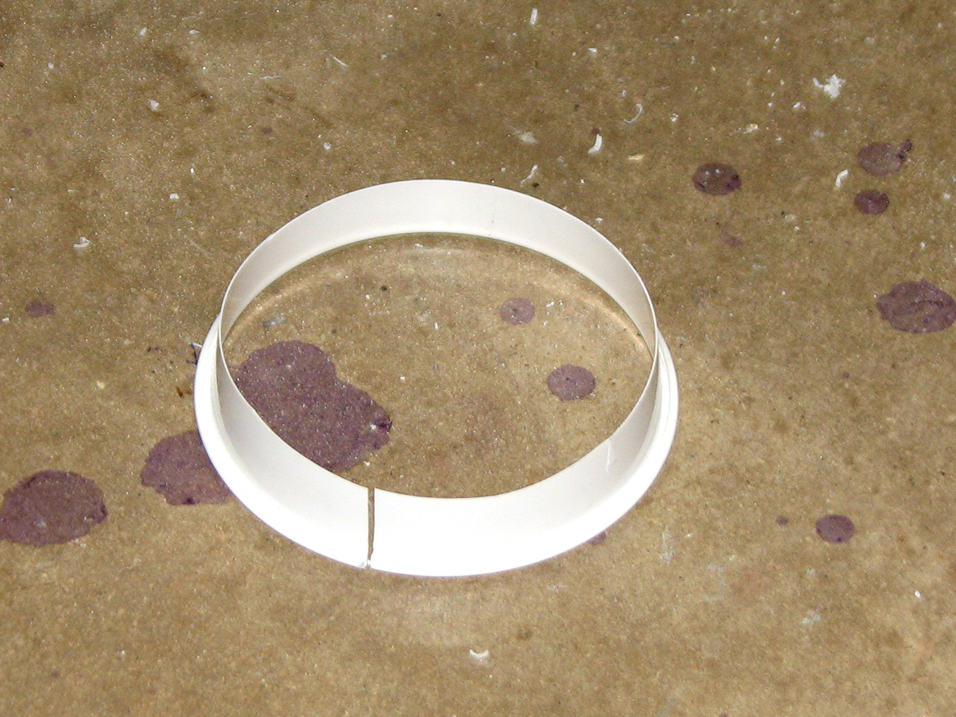
Make a plastic ring by cutting another plastic cup ¼” down from its rounded lip.

Fit the ring over the driver assembly with the cut edge pointing up toward the threaded tube, and the lip facing the magnet side and running along the marked line. Cut the ring as needed to fit, and epoxy it into place, holding it with small squares of tape as it cures.

Prepare the metal sheet(s).

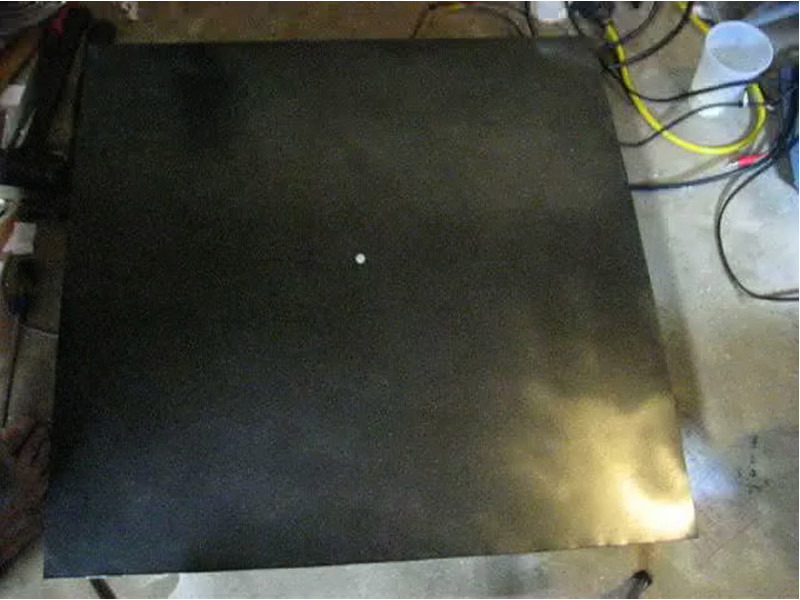
Take the metal sheet and cut a clean square about 24″ on a side. Lay a straightedge across each diagonal pair of corners and draw an X through the center with a thick marker. Use a knife to make a finely scribed X in the dark ink.

Use an awl or nail to dent the precise center of the X, then drill a ¼” (or so) hole through the plate.

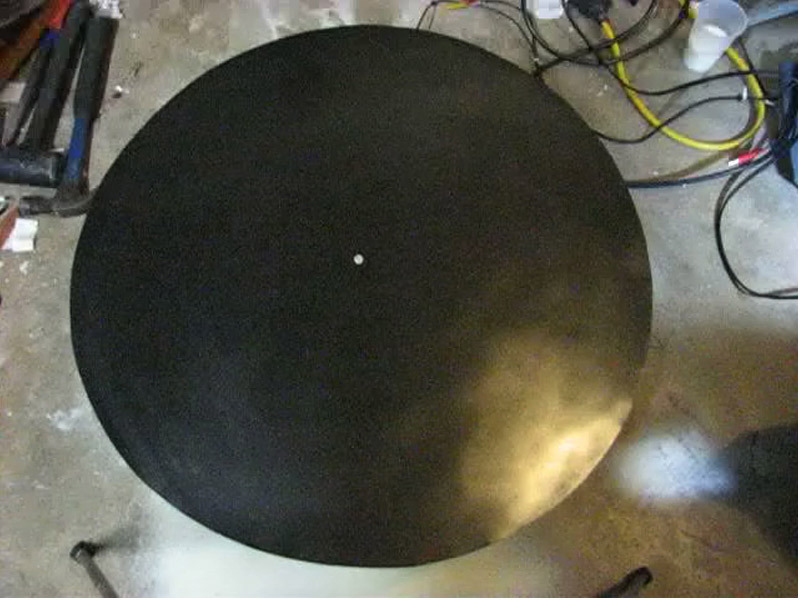
(Optional) If you have enough metal, you can mark and cut a disk, a violin shape, or any other shape.

(Optional) Paint the Chladni plate black, and then un-sticky the surface with “the poor man’s Teflon” by rubbing graphite powder into the dried paint.

To find the center of balance of a flat shape, hold any point along the perimeter with a plumb bob hanging down, mark along the plumb line, then rotate the shape and repeat at another perimeter point. Where the lines cross is the center of balance. You can also simply find where the shape balances flat on 1 fingertip.

Using a nylon #10-24 bolt, fasten the plate to the driver.

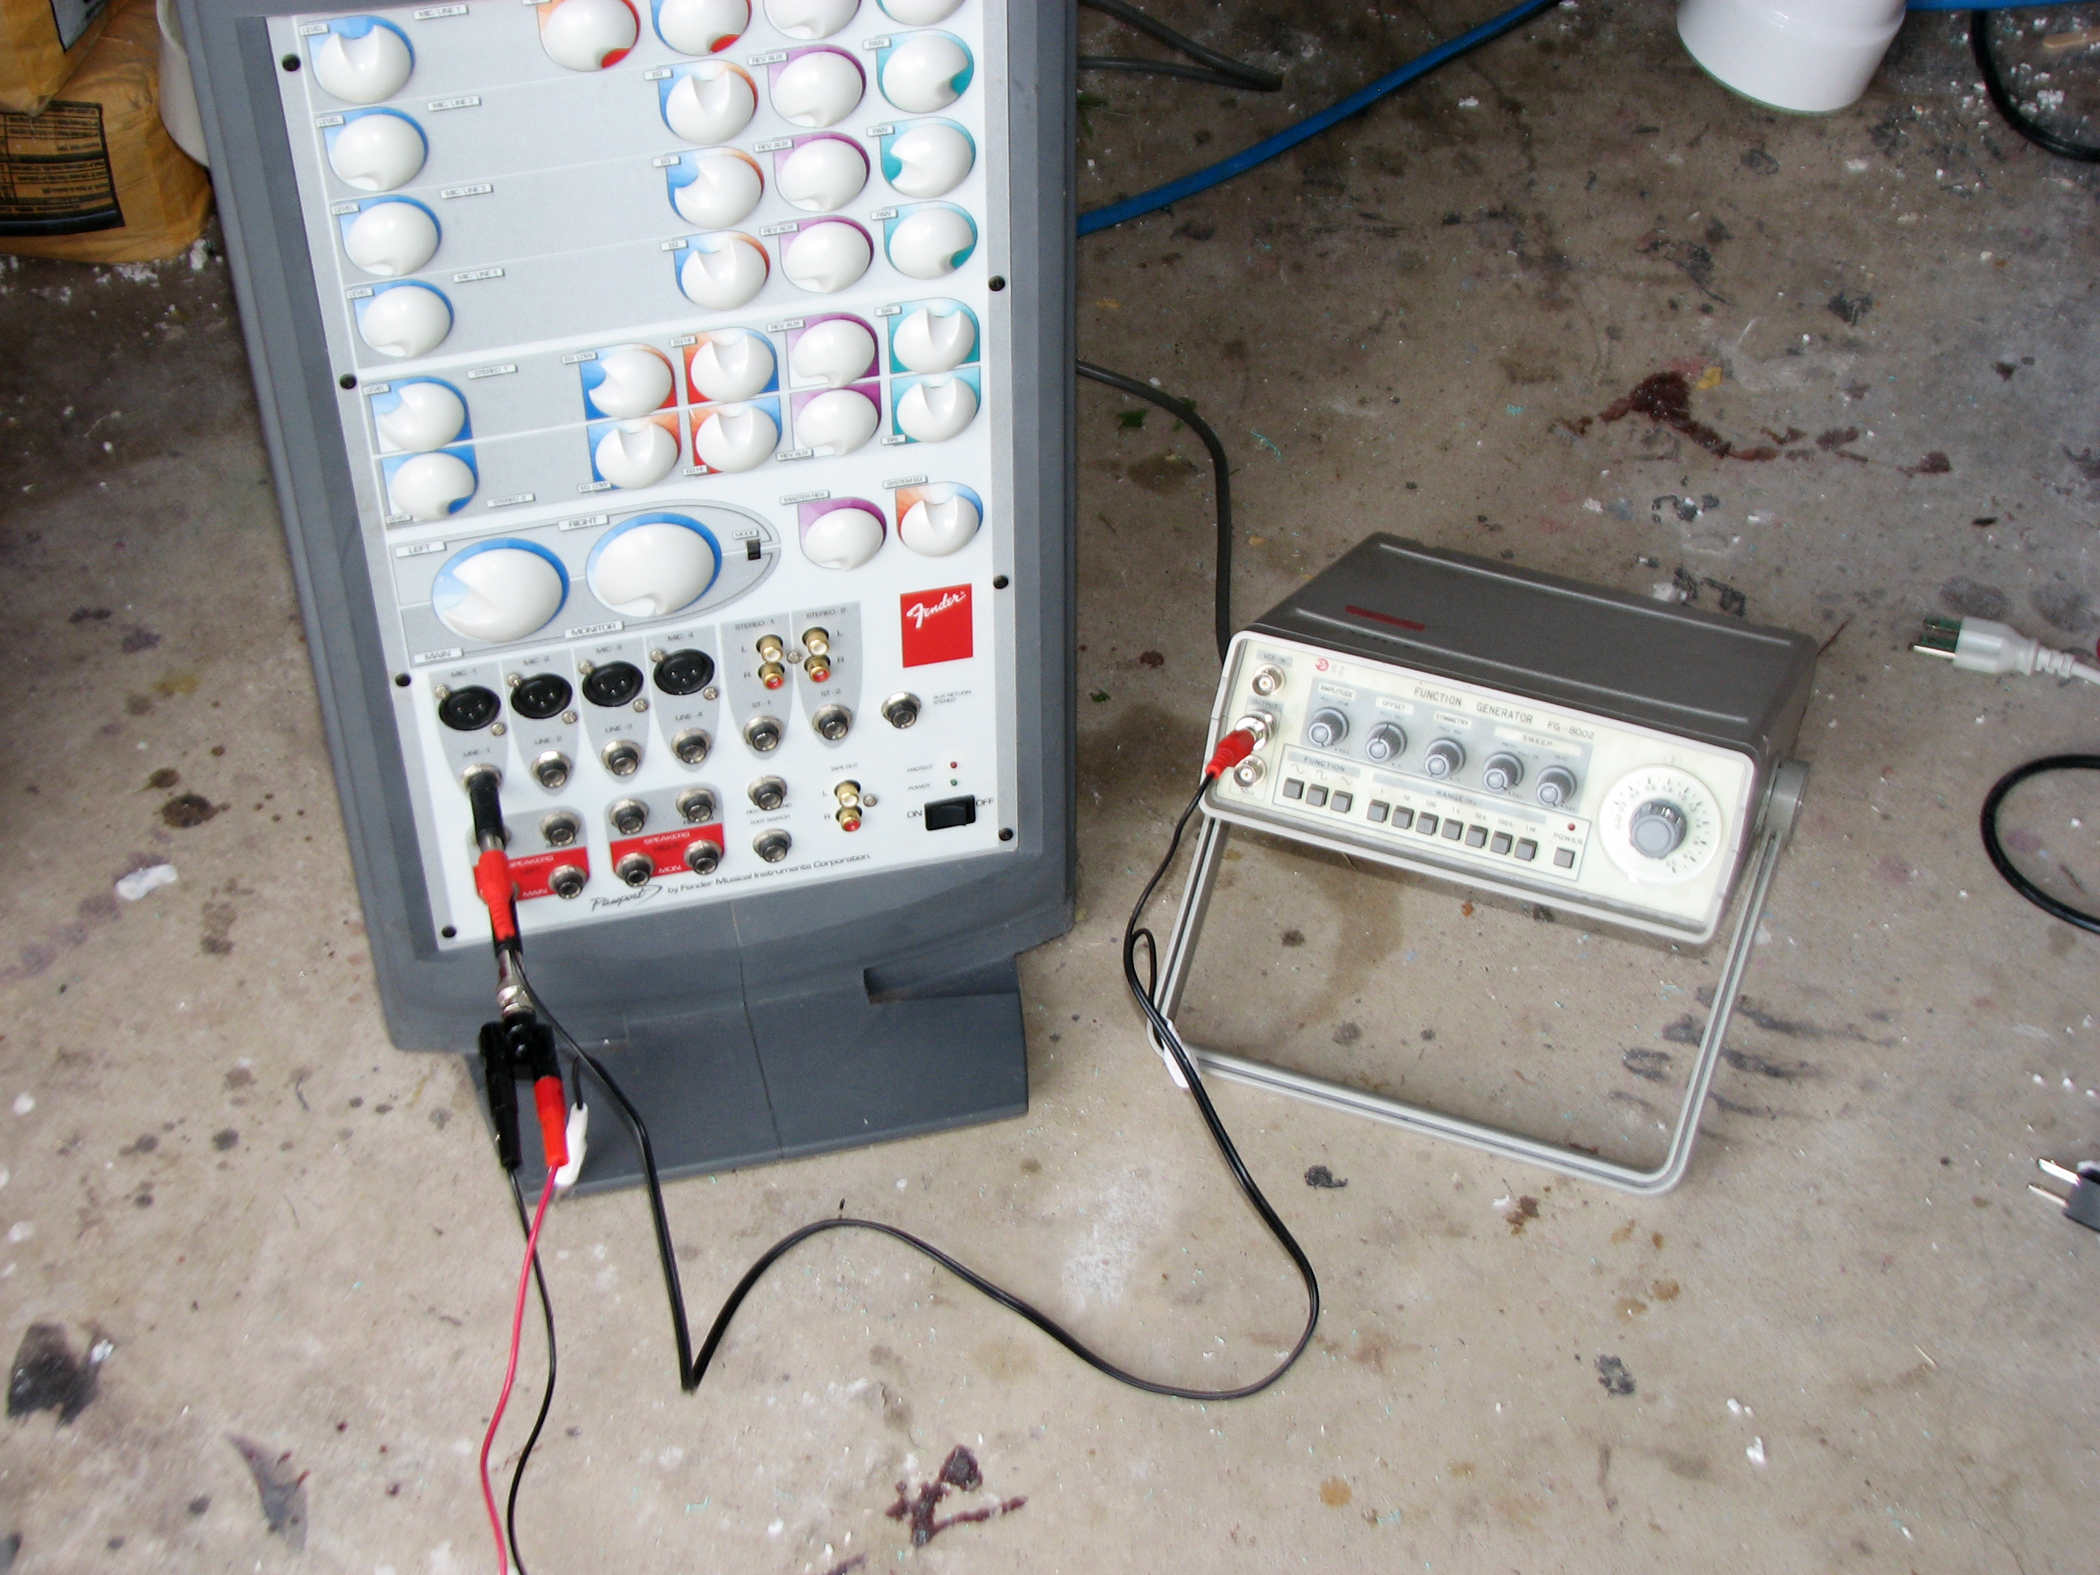
Connect your signal source to one of your amplifier’s inputs and the speaker wires to an output.

Finally, gently settle the driver into the magnet, down to the stop ring. That’s it!

Conclusion

Operating Instructions

1. Sprinkle some powder across the plate.

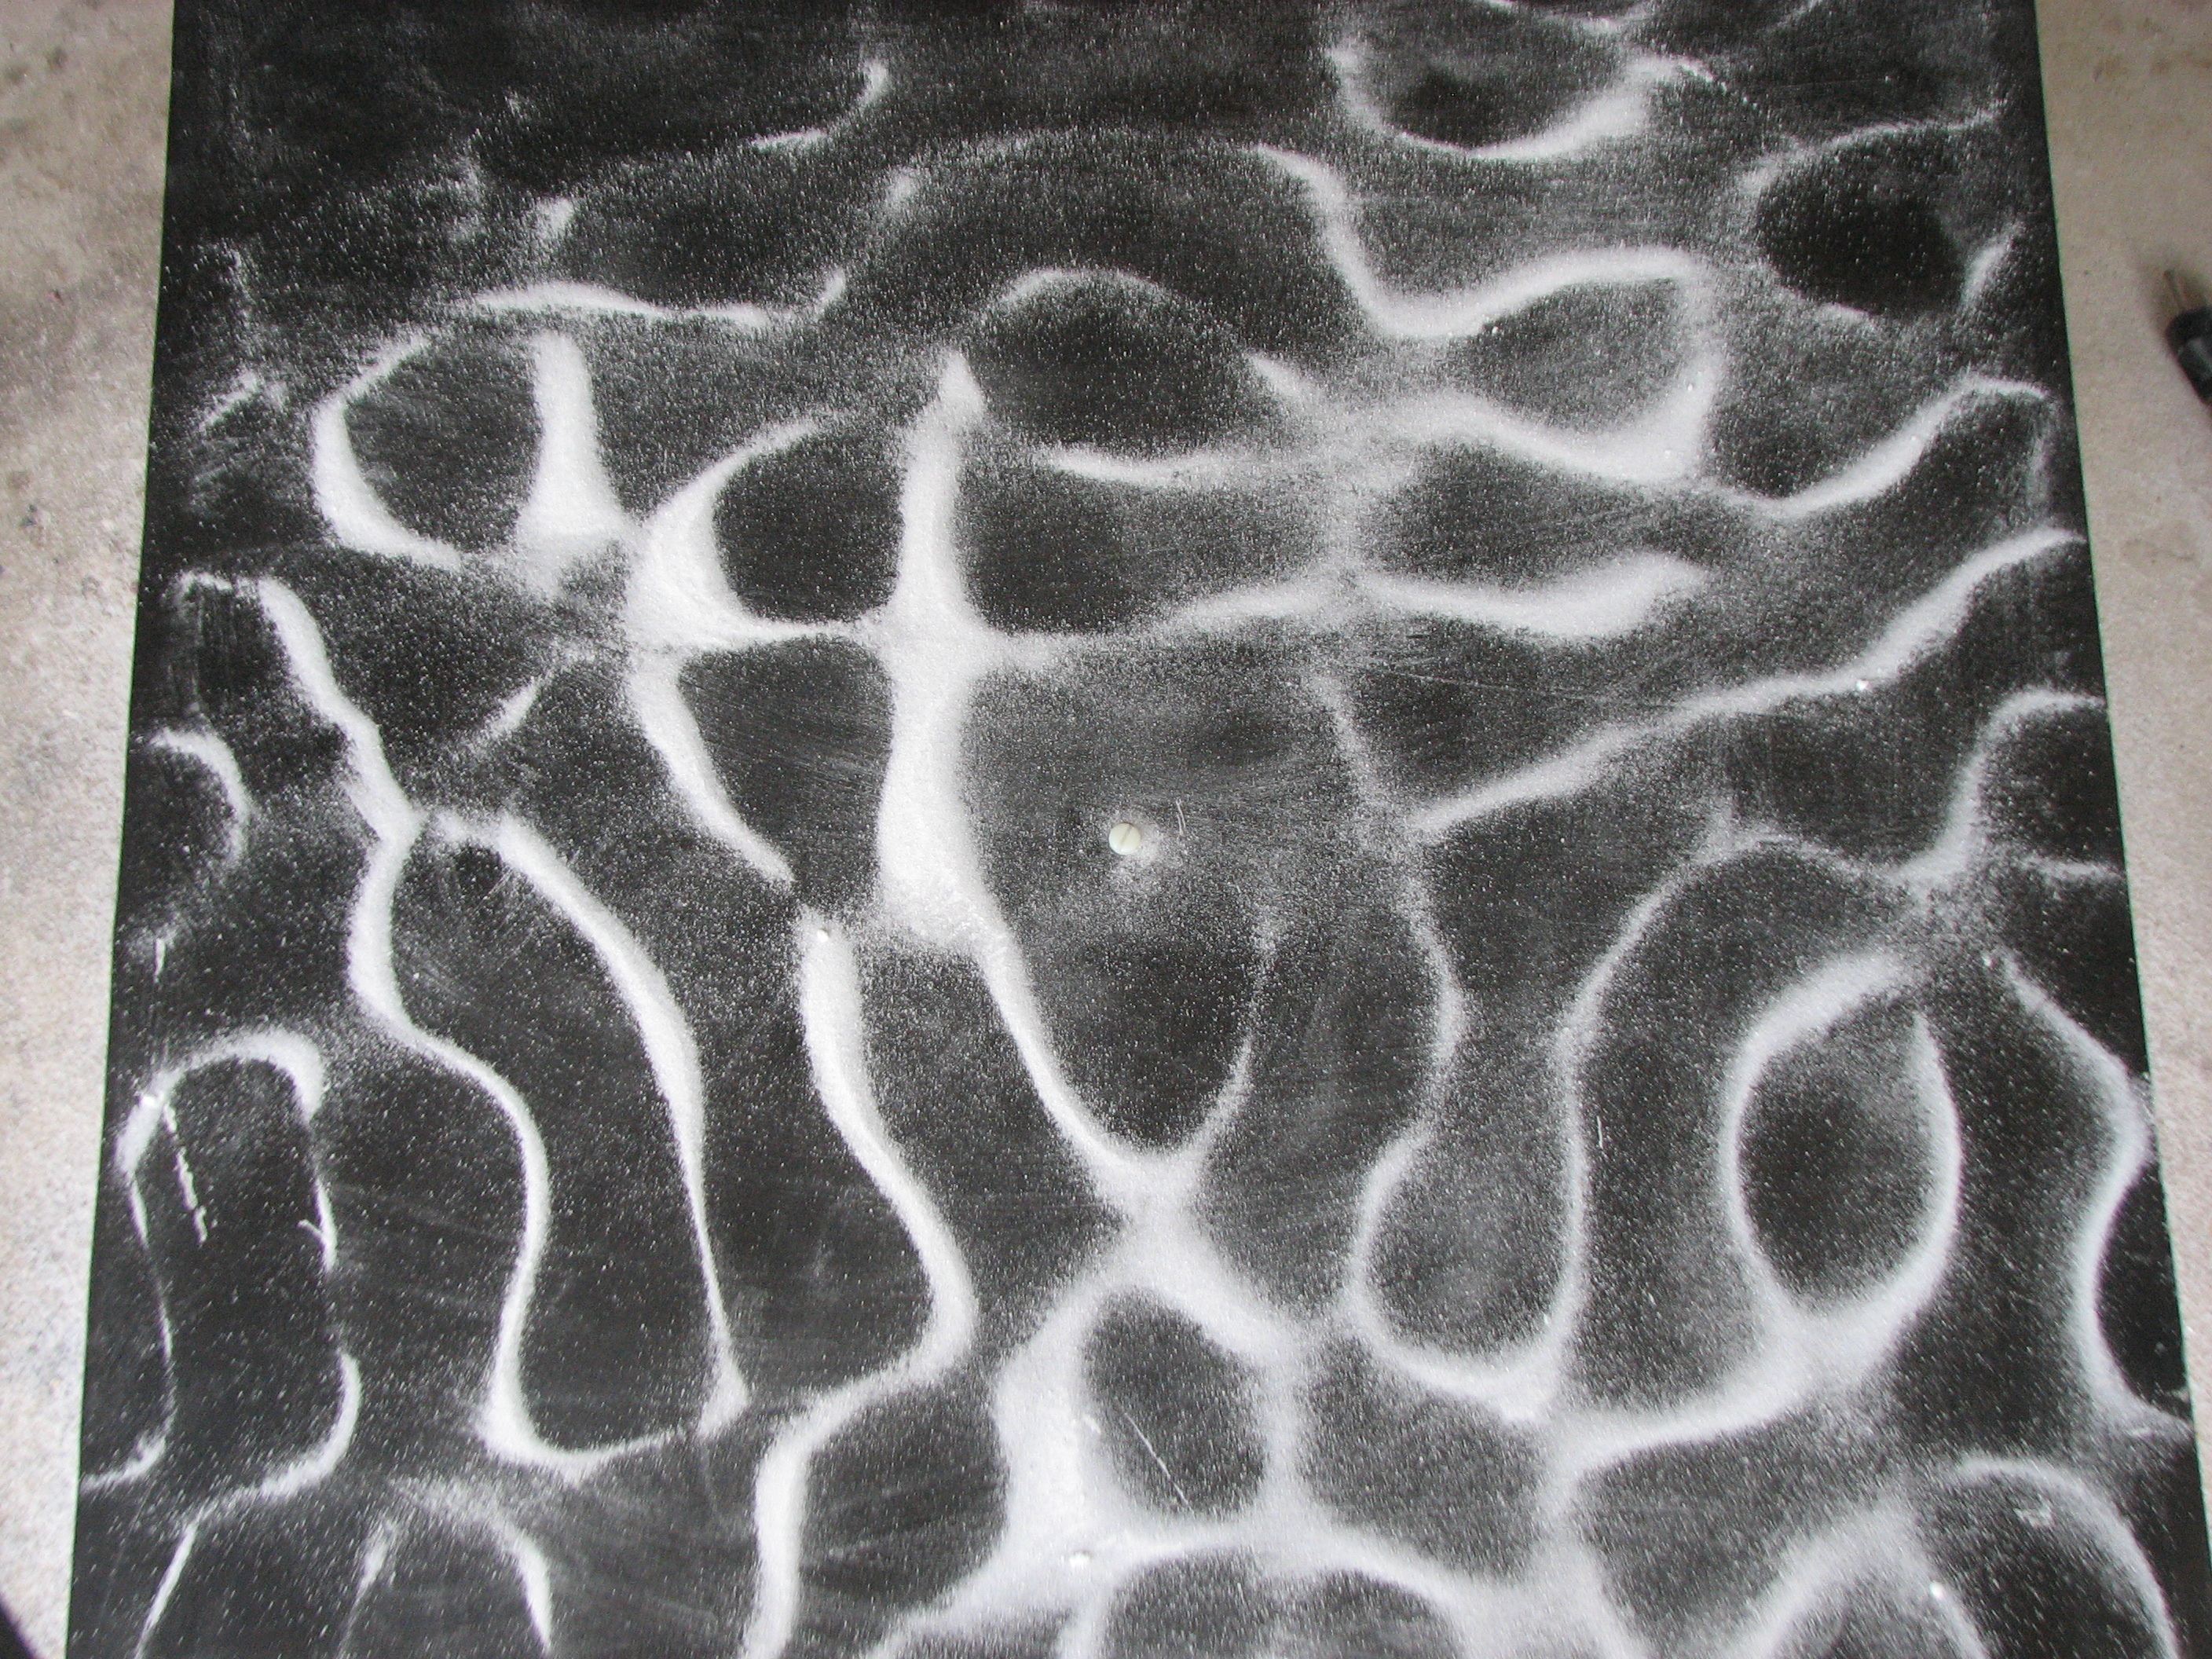
2. Starting at a signal of a few hundred hertz, slowly turn the amplifier power up until the powder starts to vibrate. Adjust the frequency and volume until patterns appear!

To reduce friction, I periodically rub graphite powder over the plate and brush off any excess. Then my other powder slides around on this slick surface like a cat in roller skates.

Clean patterns will appear for only those frequencies that resonate with the plate. On smaller plates only very high frequencies will show a stable pattern of nodes and antinodes; on larger plates, lower frequencies will resonate as well. On a large plate with a high frequency, you’ll see a detailed pattern across the plate.

On a round plate, you’ll mostly get concentric circles, with the number of circles indicating the ratio of the driver frequency to the plate’s natural fundamental frequency. In such cases, the driver is playing a harmonic (or multiple) of the lowest frequency that the plate produces naturally when you strike it. With some frequencies, you’ll see a serpentine pattern on the round plate.

On a square plate, or a plate in the shape of a violin or other complex shape, the resonances are more complex and interesting.

If you want a permanent display of your vibrational patterns, photography is the way to go. Although if you have an extremely effective filter mask and a high tolerance for a horrible mess, I would think that laser printer toner would make a nice pattern, and then, using a heat gun from below, you could fuse it to the metal for a permanent display. I haven’t tried this, however. Also note that laser toner is extremely bad for your lungs, laundry, and household harmony.

Keep Your Powder Dry

Any fine powder will work, but the finer the powder, the more sensitive it will be to vibrations, enabling it to work at lower volumes. If you’re using a coarse powder, you may need to turn up the volume quite a bit before it bounces into place.

If the powder is sticky or overly fine, it may not want to bounce at all, but instead may stick to the plate and ignore even the most abusive volume levels.

Some powders, such as salt or sugar, will absorb moisture from the air and melt (especially here in Texas), making a terrible mess. Gelatin and graphite powder are both very fine, but tend to stick to the plate over time. Fine white sand should work nicely, with minimal mess.

The traditional superfine substance of choice is Lycopodium powder, which is the spore of a particular fern. This powder is used by magicians and pyrotechnicians as a flash powder, and it can be found at chemical supply houses.

This project first appeared in MAKE Volume 16, page 122.