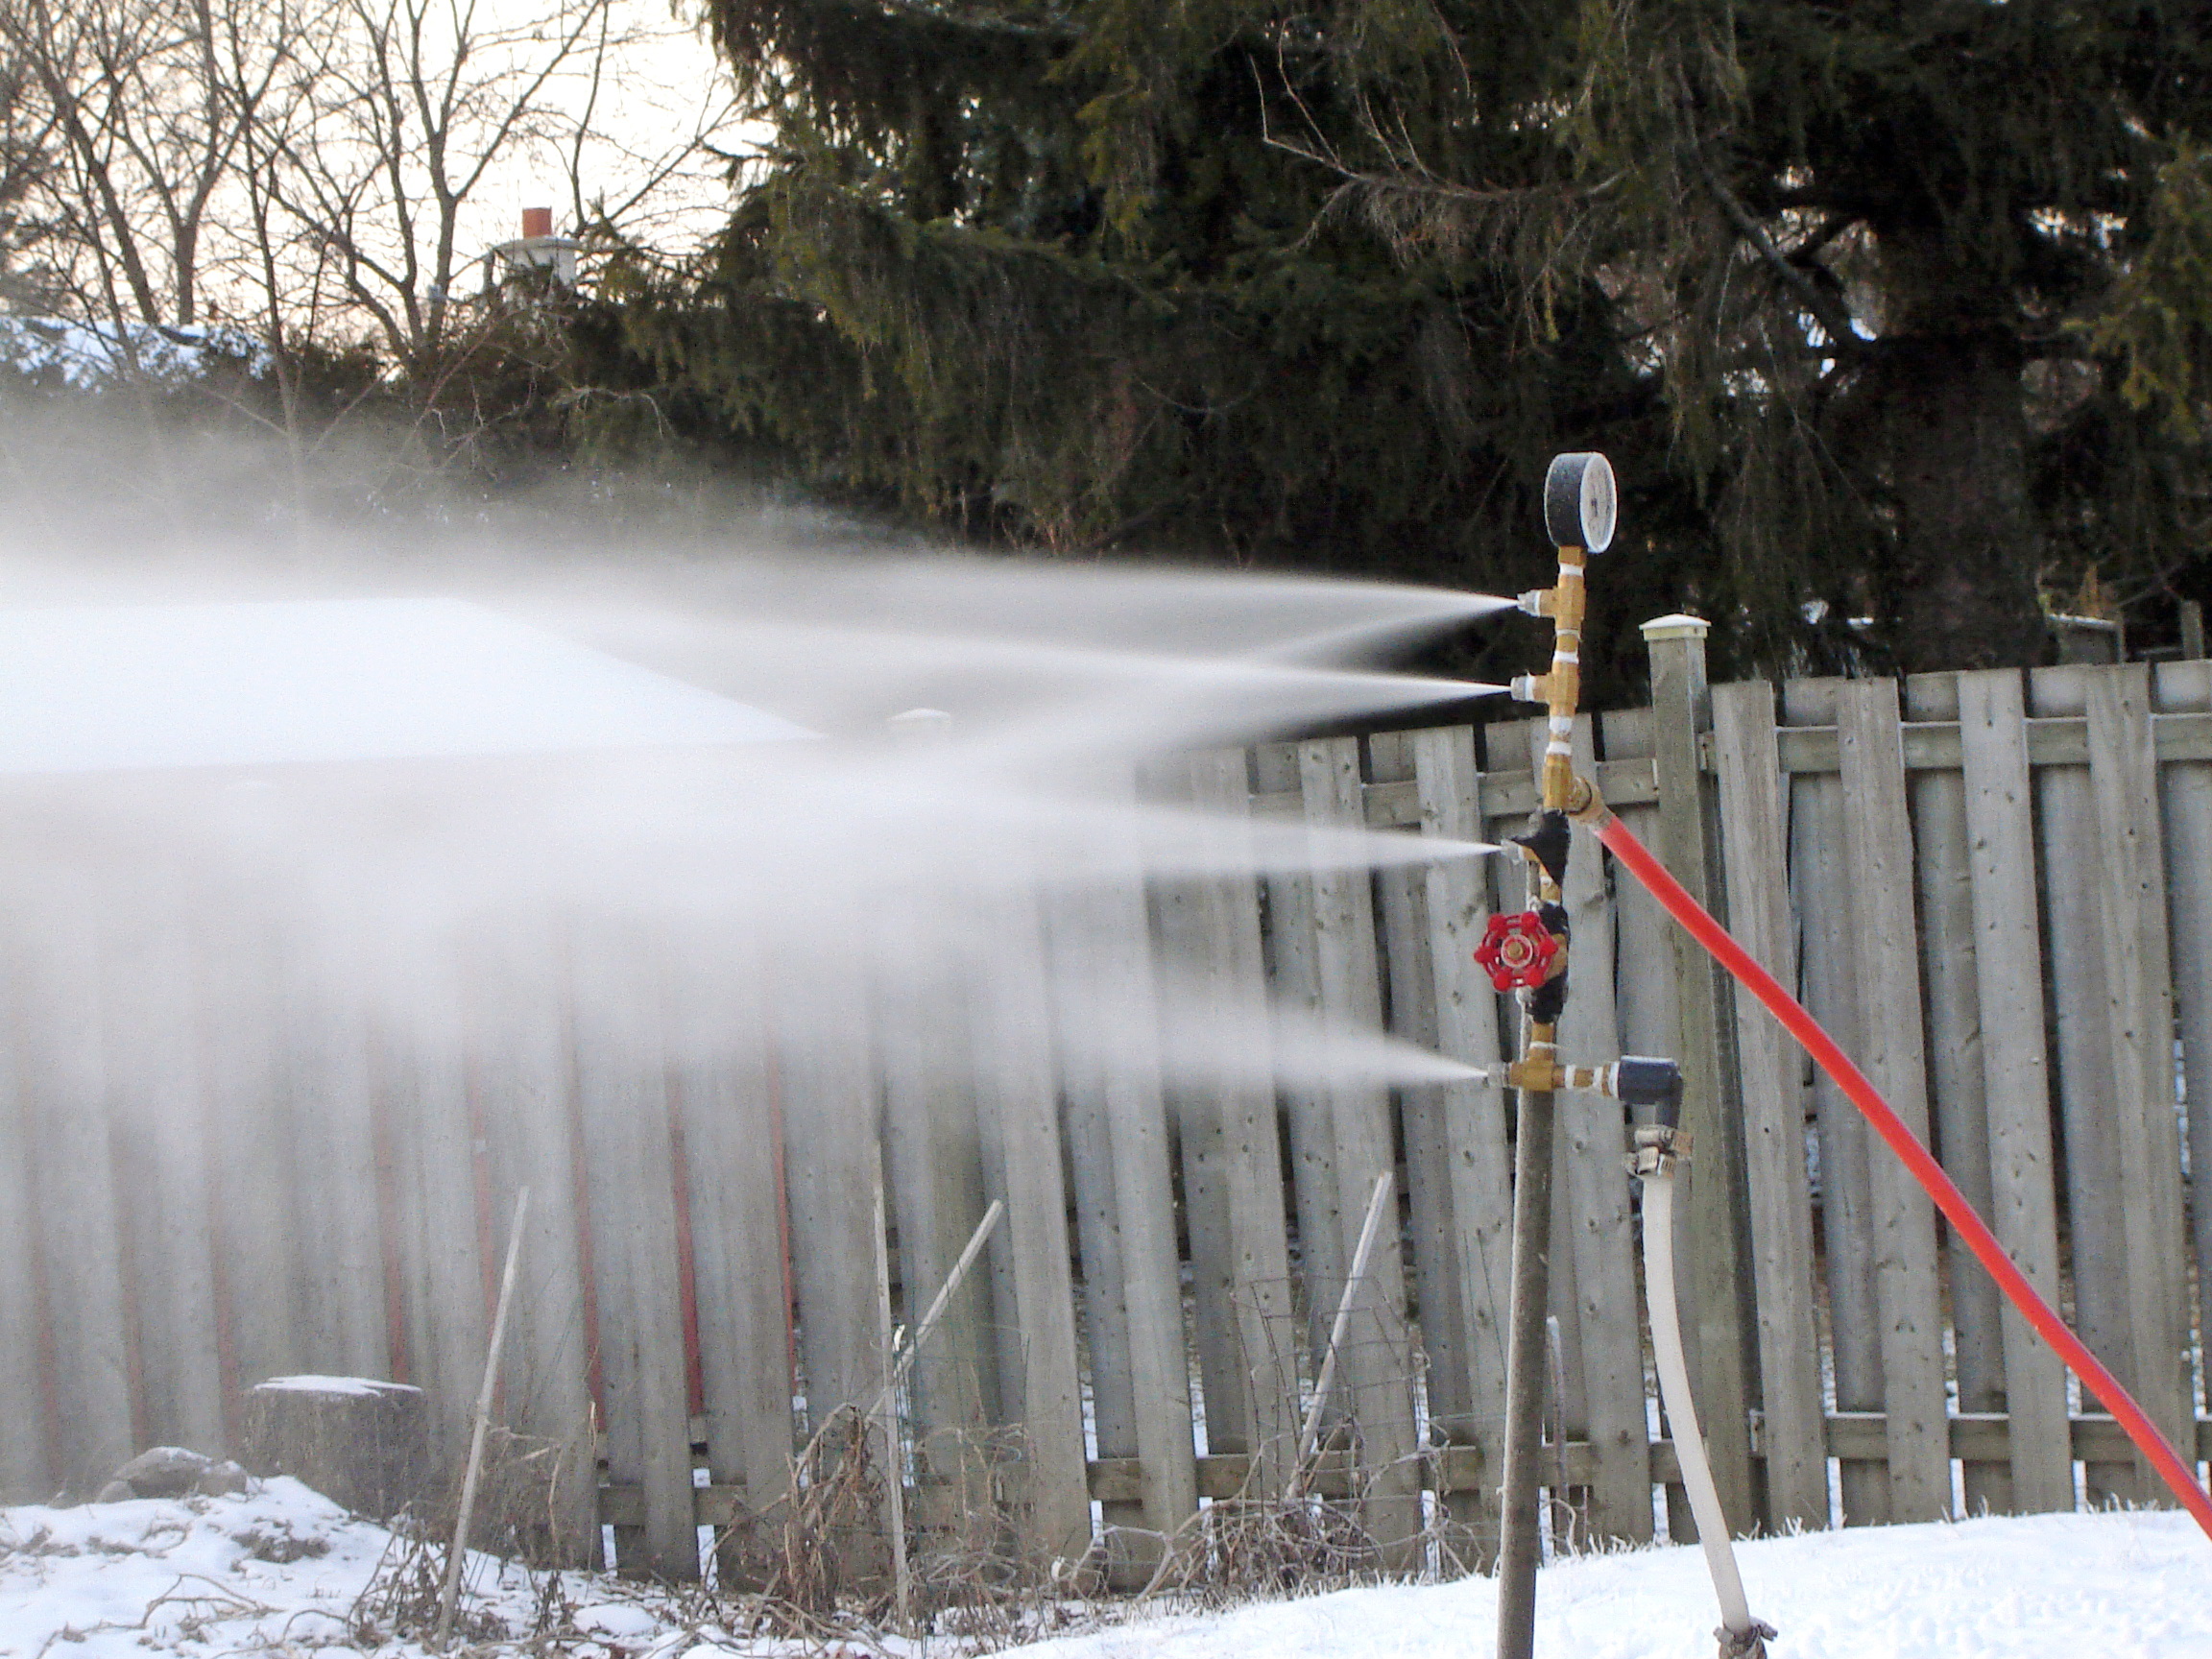
So it doesn’t snow enough where you live? Fear not — if it gets cold, you can cover that front lawn in white, fluffy snow with your own homemade snow gun. All you need are a few items from your local hardware store, some quality spray nozzles, and access to a pressure washer and an air compressor.

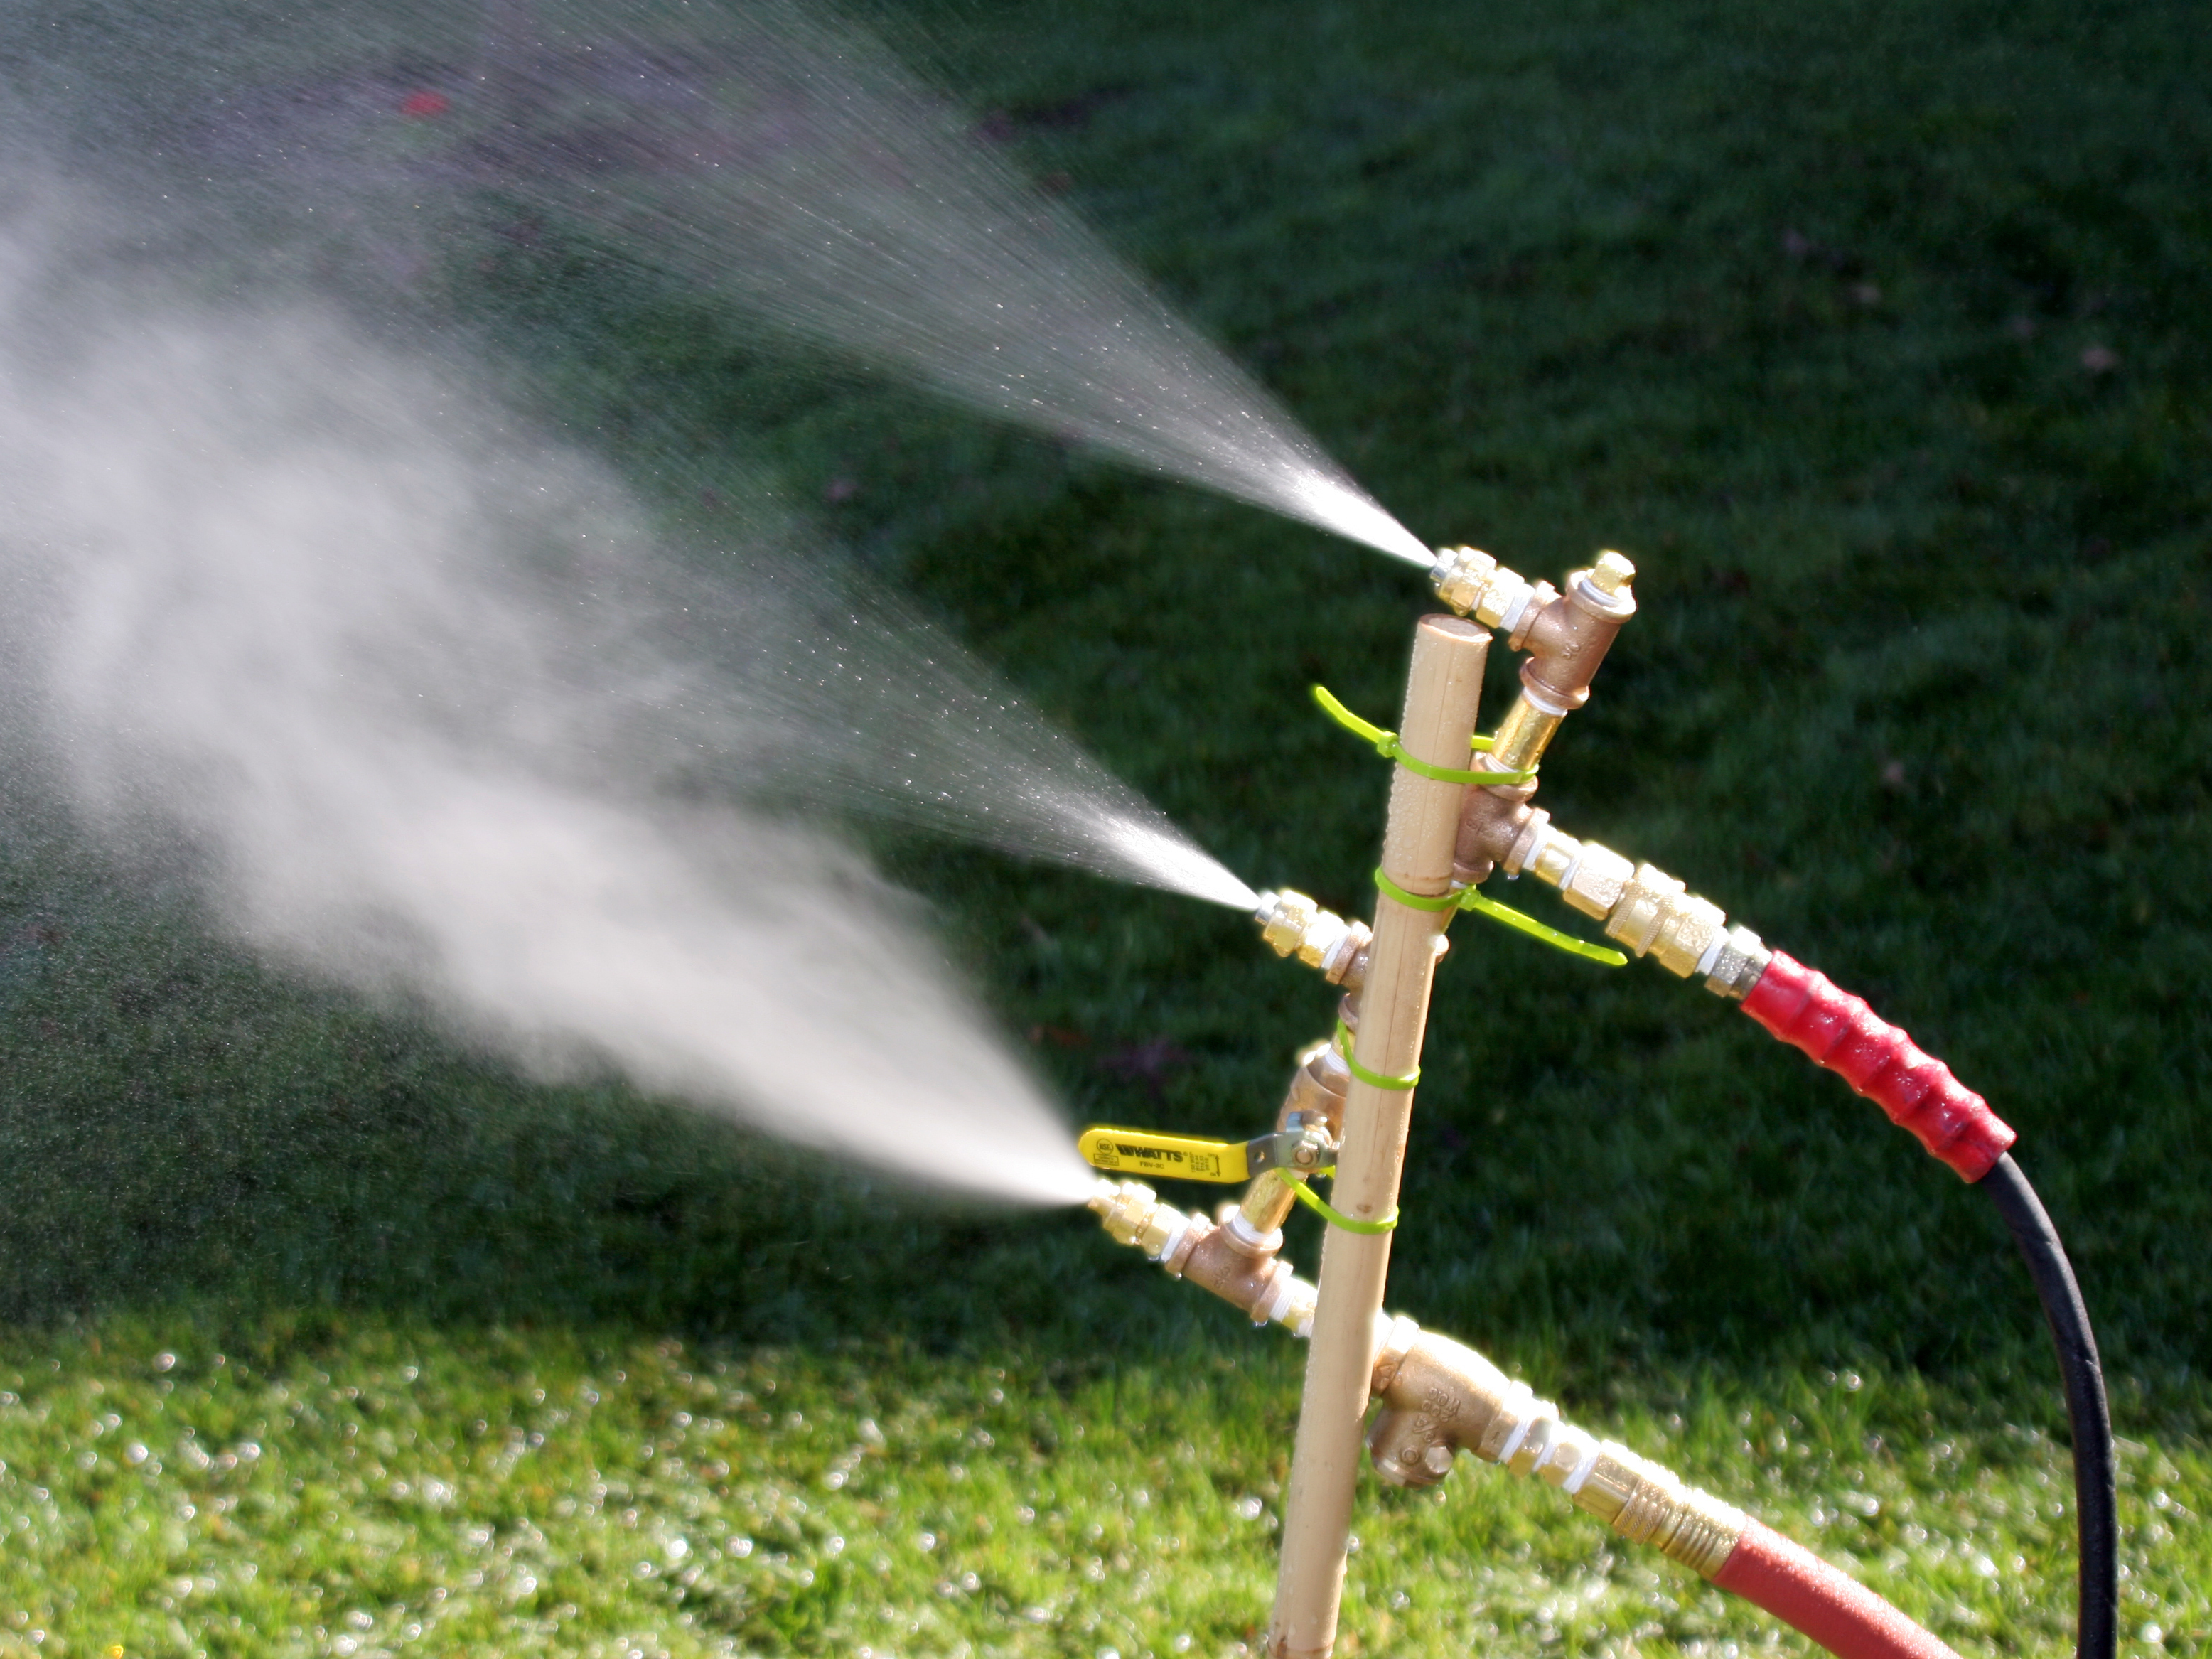
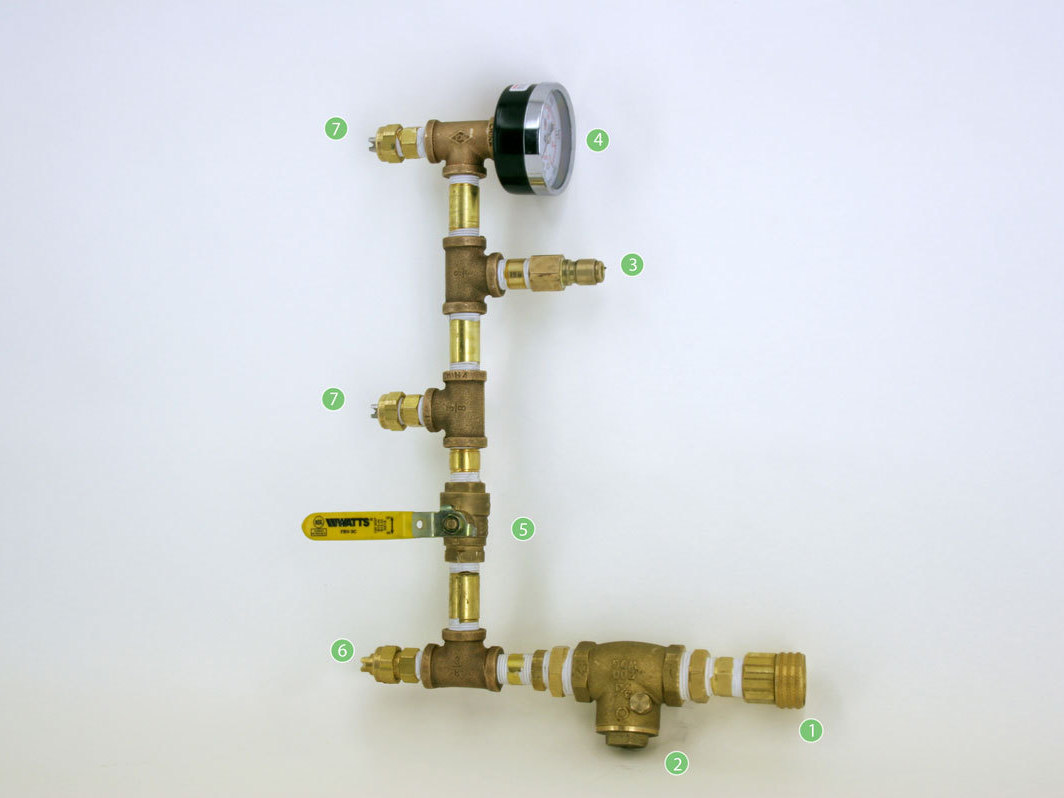
This snow gun is based on an internal-mixing “combo” design I found at http://snowguns.com. It mixes pressurized air and water internally and sprays them out through 2 types of nozzles that work together cleverly. Just wrap teflon plumber’s tape on all the pipe threads, then twist it together tightly as you see it in the diagram.

To understand how it works, remember high school chemistry: the smaller a particle is, the more surface area it has relative to its volume. Generally, that makes it easier to freeze. This is the job of the nucleation nozzle; it breaks the water into very small particles, making it possible for them to “nucleate,” or freeze quickly around their own impurities, thus generating a spray of superfine ice crystals.

This “ice mist” then crosses the spray from the 2 bulk nozzles, which supply the bulk of the water for our snowmaking. Droplets from the bulk spray freeze to the nucleated ice crystals, creating fluffy snow.

Project Steps

Get some nozzle knowledge.

Nozzles are the most important purchase for your snow gun. To make an effective snow gun you have to match the bulk nozzles to the nucleation nozzles, and match both to the characteristics of your compressor and pressure washer.

A good brand is TeeJet; they make spray nozzles for agricultural use and these work great for snow guns. TeeJet nozzles are numbered by their output; on their face is a 4 or 5 digit number whose first 2–3 digits represent spray angle, and whose last 2 represent flow at 40 pounds per square inch (psi), measured in gallons per hour (gph). For example, nozzle 8005 translates to an 80° spray angle and 0.5gph flow at 40psi.

The trick to matching your bulk nozzles to your nucleation nozzles is that the nucleation spray must engulf the bulk spray, or else the bulk spray will have wet edges (spraying non-snow, just water). But you don’t want the nuc spray overly wide, or you’ll lose efficiency.

Here are some good angles to use: 40° bulk and 65° nucleation, or 50° bulk and 80° nuc. (I used 65°/80° here because that’s what was in stock.)

The photo shows a list of nozzle volumes (gpm) at various pressures (psi).

Choose your pipe and consider the pressure.

This snow gun uses 3/8″ ID pipe made for home use. I used a garden hose connection for the air line, because quick-disconnect fittings are more prone to freeze-ups, but the water line is high-pressure hose so you’ll need to use a quick-disconnect or a specific threaded fitting there.

Pipe material is another concern. Typical galvanized steel pipe is rated for 150psi–300psi; it’s possible to run it close to 600psi, but anything over 700psi and the chances of pipe bursts are greater. Brass is better, with a pressure rating from 125psi–400psi. Stainless steel is the safest, rated for 3,000psi, but I don’t think people want to spend $15 per 3/8″ tee fitting.

It’s a good idea to have a pressure gauge that reads to 1,000psi, to control how much pressure is going into the gun. I run my brass gun at 450psi–700psi, but keep in mind, higher pressure will wear more on your nozzles, pipe, and pump, and you exceed the ratings at your own risk.

The ball valve is in place to adjust the water pressure going to the nucleation nozzle, and this takes some playing around with to get it right. If the water pressure’s too high, you’ll get a misty fog and puny snow production. If it’s too low, you’ll get big droplets that won’t freeze before reaching the bulk spray, and you’ll be making very wet snow.

Find a compressor and pressure washer.

The snow gun runs on 40psi–70psi from the air compressor. It is highly recommended that you use an oil-lubricated compressor; this will allow hours of operation without any trouble. A good compressor should be able to output 6cfm at 40psi.

A good pressure washer will feed about 2 gallons per minute (gpm) at 450psi.

Make the assembly.

The air line uses a garden hose fitting (1) to reduce freeze-ups, and a check valve (2) to protect the compressor. The water line’s fitting (3) depends on your high-pressure hose.

The gauge (4) displays overall pressure. The ball valve (5) lets pressurized water mix with air for the nucleation nozzle (6), which must be at least 4″ from the bulk water nozzles (7).

Snowmaking 101.

To make snow, you don’t necessarily need temperatures below 32°F — you just need them below freezing on the wet bulb temperature chart in the files section, which takes into account the relative humidity of your location. For example, at 95% humidity you need temperatures 27°F or colder, but at 10% humidity you can start making snow at just 39°F.

First, close the ball valve, so you don’t flood your compressor. Turn on the water supply — but not the pressure washer yet — and make sure water’s coming out of the bulk nozzles. Make sure there’s no ice in your pressure washer — ice could destroy the unit or hurt someone — then turn on the pressure washer.

Turn on the air compressor, letting the pressure reach 40psi or more. Now start to open the ball valve just a little, so you get a superfine mist from the nucleation nozzle. Check the compressor and make sure the air pressure is above 60psi. You should be making snow!

To check your snow’s quality, put your coat sleeve in front of the spray; the snow should bounce right off. Check the gun periodically, making sure your nucleation nozzle isn’t freezing up; if it is, open the ball valve a bit more.

Elevating the gun gives the snow more time to freeze before hitting the ground; you can use a ladder or make a stand out of wood or PVC pipe.

Conclusion

Output and Precautions

So I’m sure you’re wondering, “How much snow can I actually make with this thing?” The answer depends on how much water you’re flowing, and this depends on the water pressure and air pressure. The more water you’re able to flow through the gun, the more snow you’ll have piling up. Expect 2"–5" per hour, at 2gpm flow. Some advice to keep in mind:

  1. Don’t shoot snow against the wind. You’ll get freeze-ups. Go with the wind to make life easier.
  1. Install a check valve between your compressor and the snow gun; this will prevent flooding of your compressor.
  1. Air compressors are loud, so if you plan to make snow overnight or in the early morning, be considerate of neighbors.
  1. Your snow gun will hiss like a gas leak, so inform your neighbors that it’s nothing to be afraid of.
  1. Wear plenty of warm clothing when you’re making snow, because it will be cold outside, and when you’re working with water and metal pipe it will seem a lot colder. Wear good waterproof gloves.
  1. Don’t leave your hose outside with water in it, or it will freeze and possibly split. Bring it inside. If it does freeze, throw it in a bathtub of warm water.
  1. Last but not least, have fun!

Special thanks to the contributors to snowguns.com, where much of this information came from. All images, except Step 4, courtesy of James Moss of makesnow.com

This project first appeared in MAKE Volume 21, page 125.