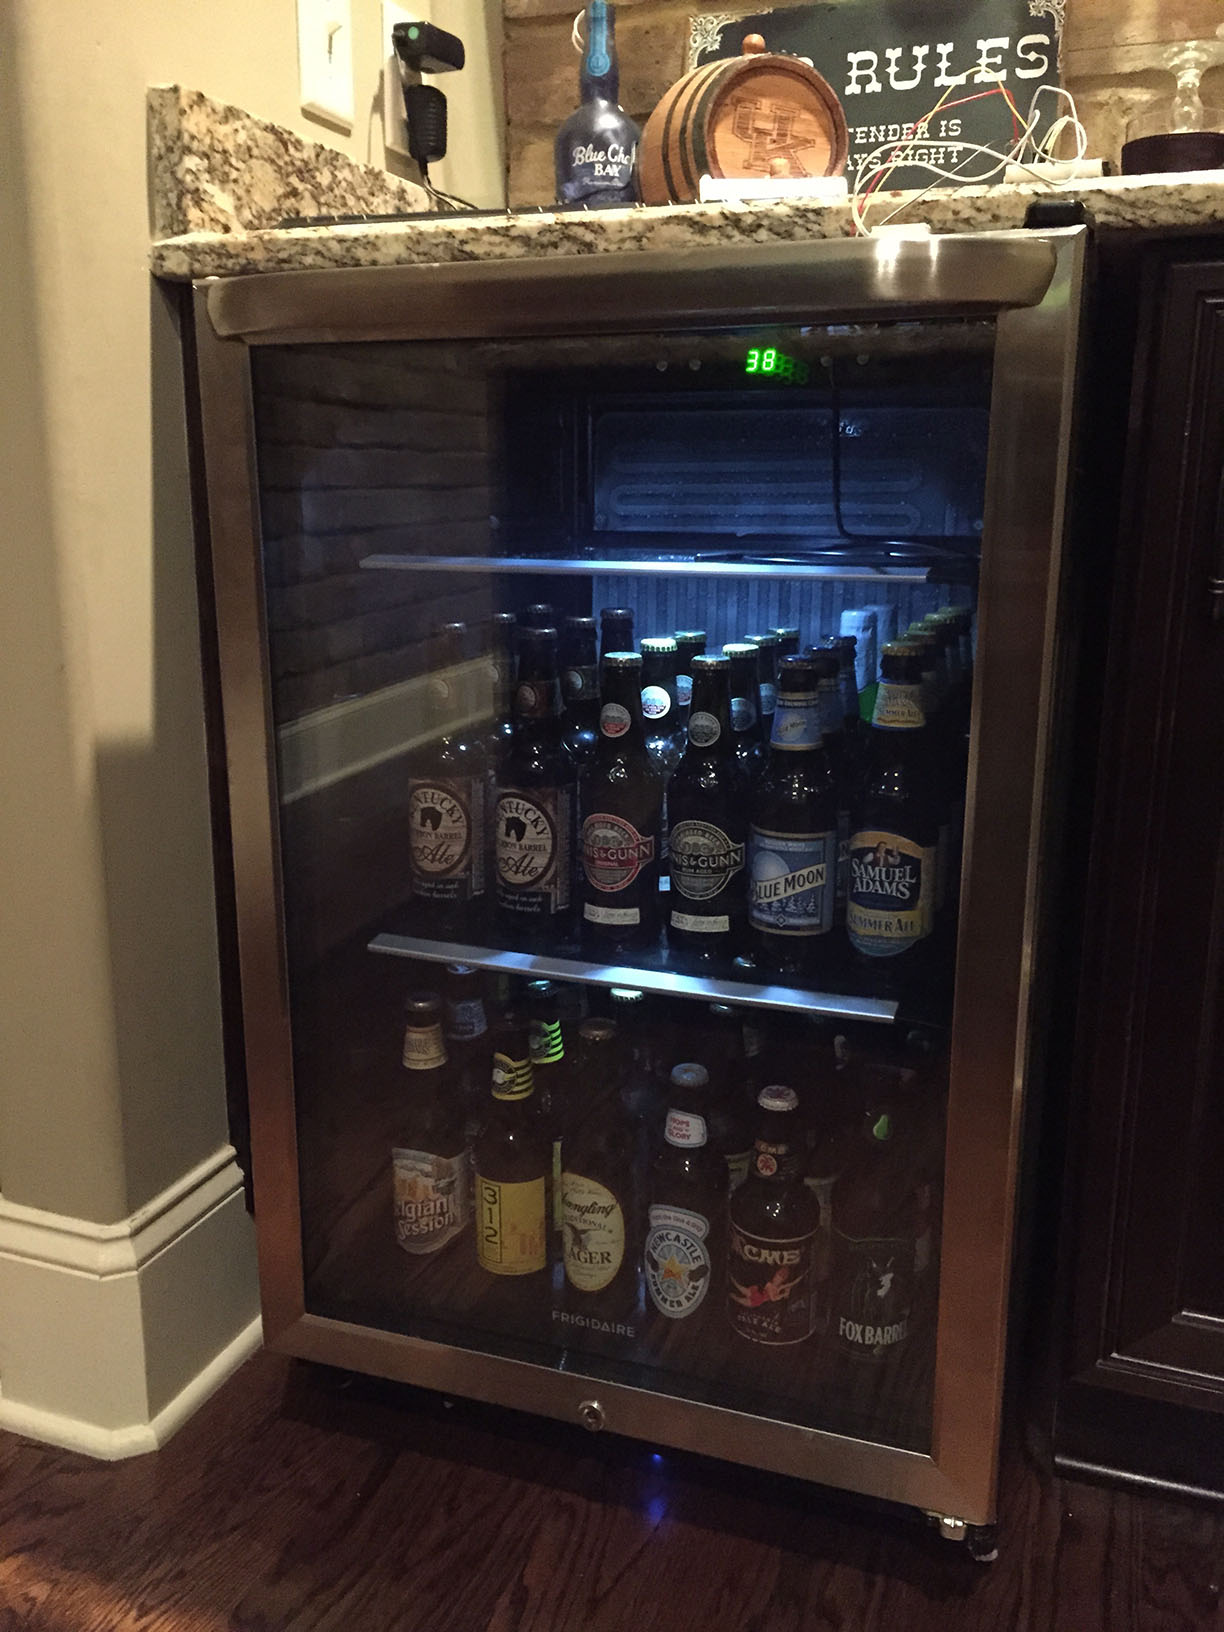
Beer Fridge of the Future

Read articles from the magazine right here on Make:. Don't have a subscription yet? Get one today.
Read articles from the magazine right here on Make:. Don’t have a subscription yet? Get one today.

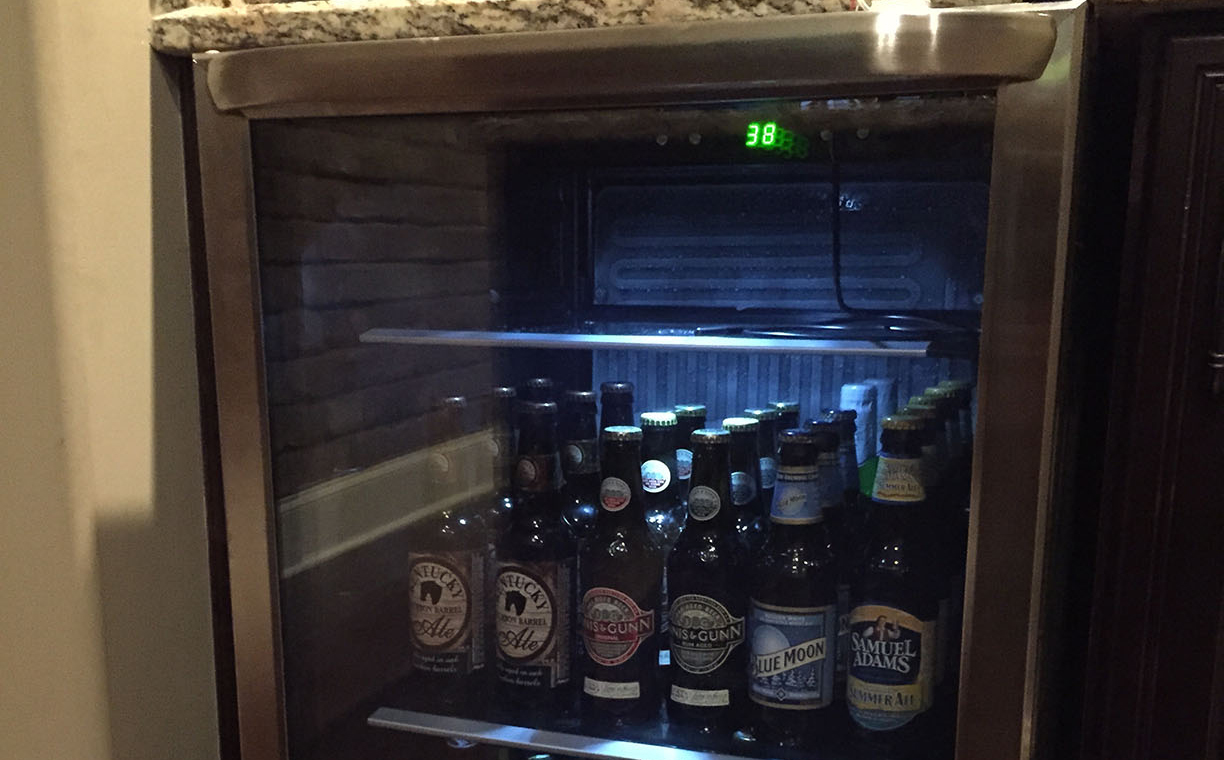
Are you tired of waiting for the refrigerator of the “future,” the one that companies have been teasing for years that auto-magically tells you what to get when you go to the store? Dust off that old Wii Balance Board, grab a Raspberry Pi, and build the future yourself.

There is no better place to start than with your beer (or wine) fridge. When you are finished, your fridge will tell you how many bottles it has in it, how many beers you drank, and even when you drank them.

The world of tomorrow has nothing on us.

To accomplish this, we need a reliable way to detect how many bottles are in our refrigerator. If we assume that only bottles of the same type are inside the refrigerator, then we can use a scale to weigh the refrigerator and all of its contents. Once we know the weight of the refrigerator and the weight of a bottle, simple math will tell us how many bottles are present.

Monitor your beer fridge using a Raspberry Pi computer and a Wii balance board.

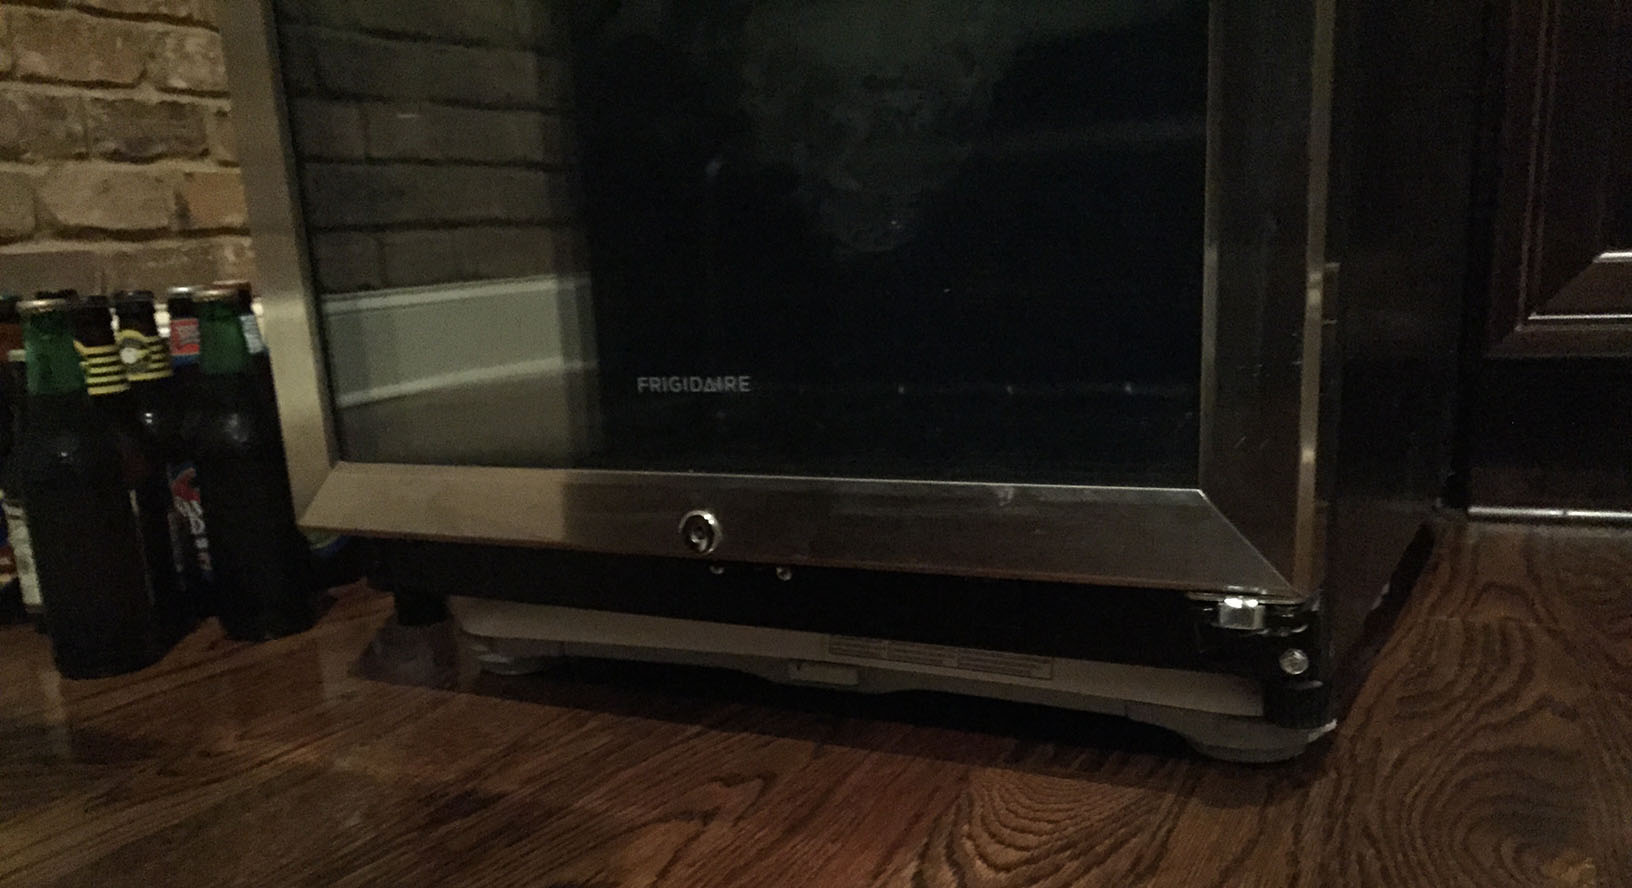
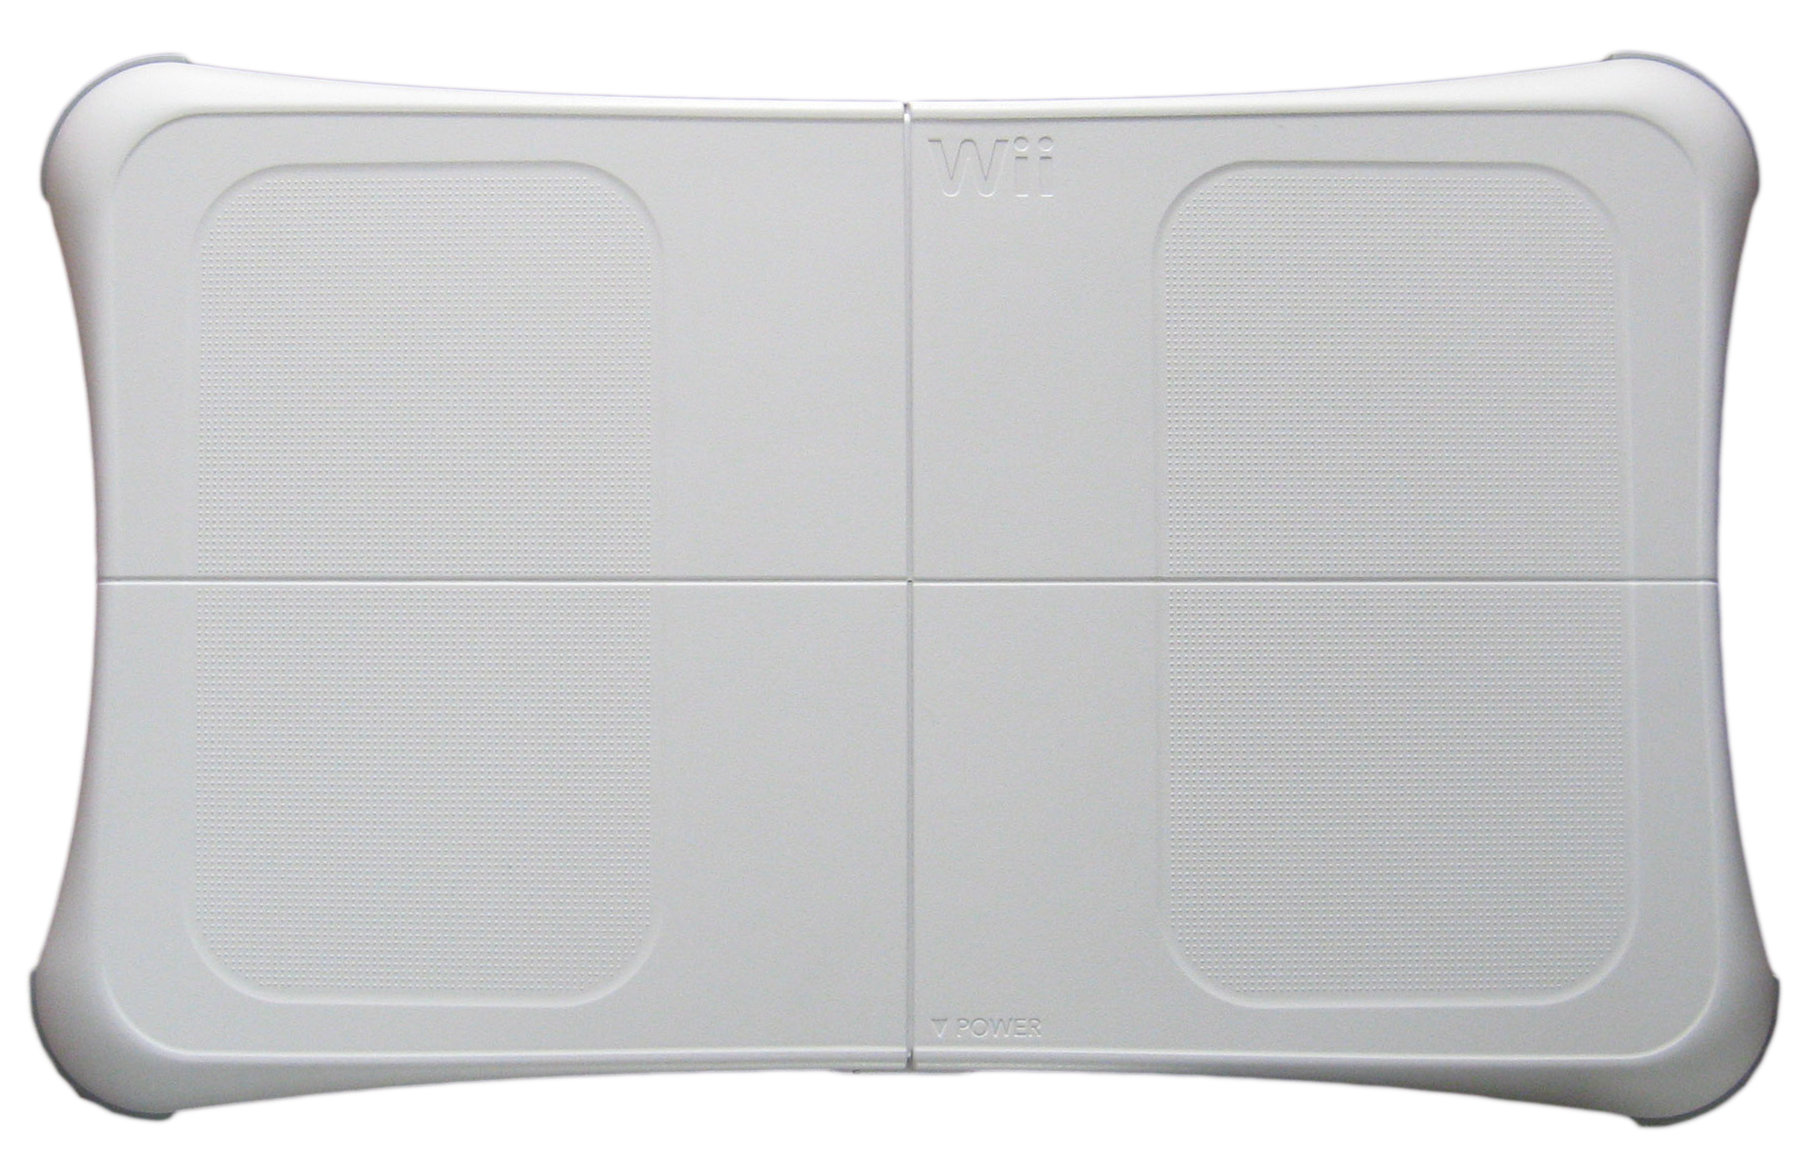
The Wii Balance Board is the perfect solution. It fits perfectly under a compact refrigerator (which has a weight limit of 330lbs.) and uses Bluetooth for all communications. We just need a Bluetooth adapter and a little Python magic to control it.

With just a few simple additions, your beer fridge just became the envy of all your friends. You can make your beer fridge even more awesome by adding a streaming temperature sensor to it and use the Raspberry Pi camera module to snap a picture every time someone opens your refrigerator (just in case you need to catch a beer thief).

What will the next generation of Make: look like? We’re inviting you to shape the future by investing in Make:. By becoming an investor, you help decide what’s next. The future of Make: is in your hands. Learn More.

Project Steps

Hacking the Wii Balance Board as a scale

Plug your Bluetooth adapter into your Pi and install the required libraries at your Pi’s command line terminal:
$ sudo apt-get install python-bluetooth bluez python-gobject

You can see the address of your bluetooth dongle with the “hcitool dev” command:
$ hcitool dev
Devices:
hci0 00:1A:7D:DA:71:13

We are now ready to connect and communicate with the Wii Balance Board. We will do this by using a modified version of Stavros Korokithakis’ Gr8W8Upd8M8.py script.

Copy the wiiboard_test.py script to a file on your Pi and run it.
$ sudo python wiiboard_test.py

You will see the following response:
Discovering board...
Press the red sync button on the board now

Remove the battery cover underneath the Board to locate the red sync button and press it. You will see something similar to the following:
Found Wiiboard at address
00:23:CC:2E:E1:44

Trying to connect...

Connected to Wiiboard at address
00:23:CC:2E:E1:44

Wiiboard connected

ACK to data write received

84.9185297 lbs

84.8826412 lbs

84.9275927 lbs

Your Wii Balance Board is now a scale. Press CTRL+C to stop the script.

Wii Balance Board tweaks

We need two simple tweaks to the Wii Balance Board before we permanently place it under our refrigerator. First, we need an AC power adapter instead of powering the Board with four AA batteries. Replace the batteries with the Wii Fit Rechargeable Battery Pack, and plug the AC adapter into a wall outlet.

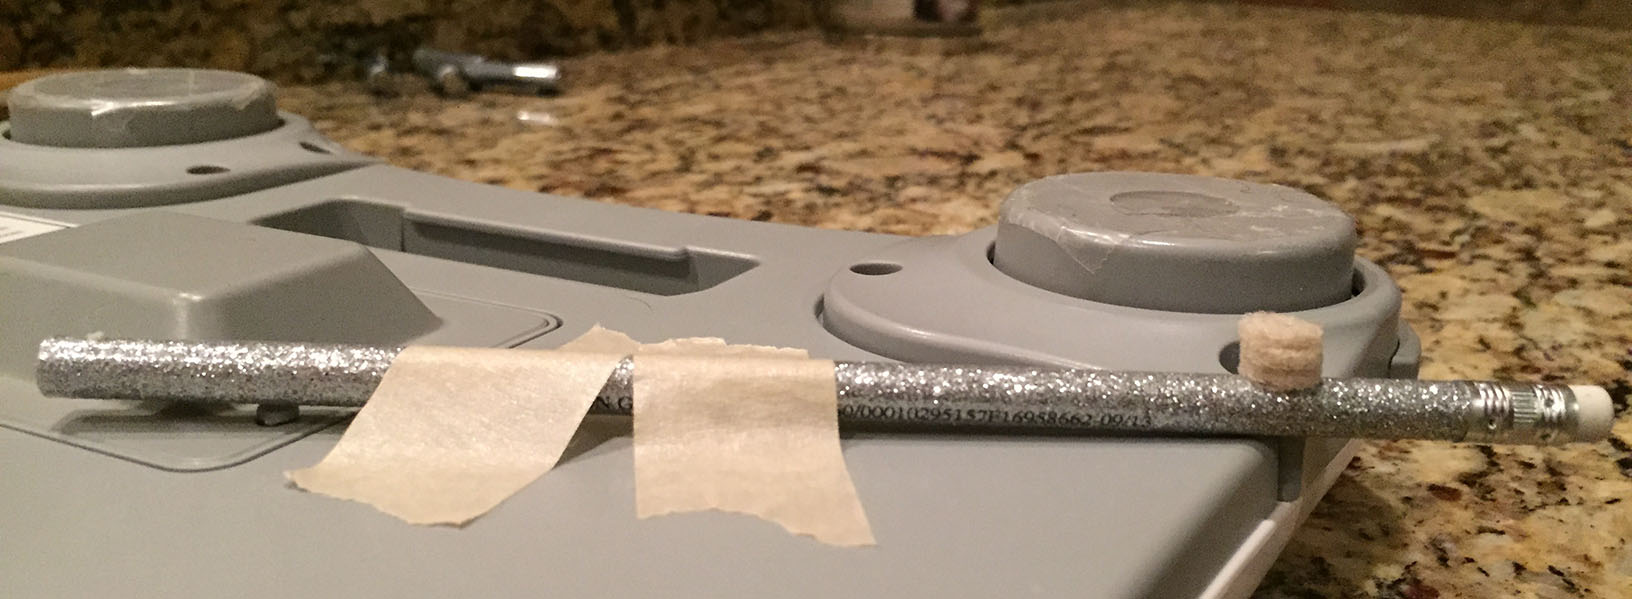
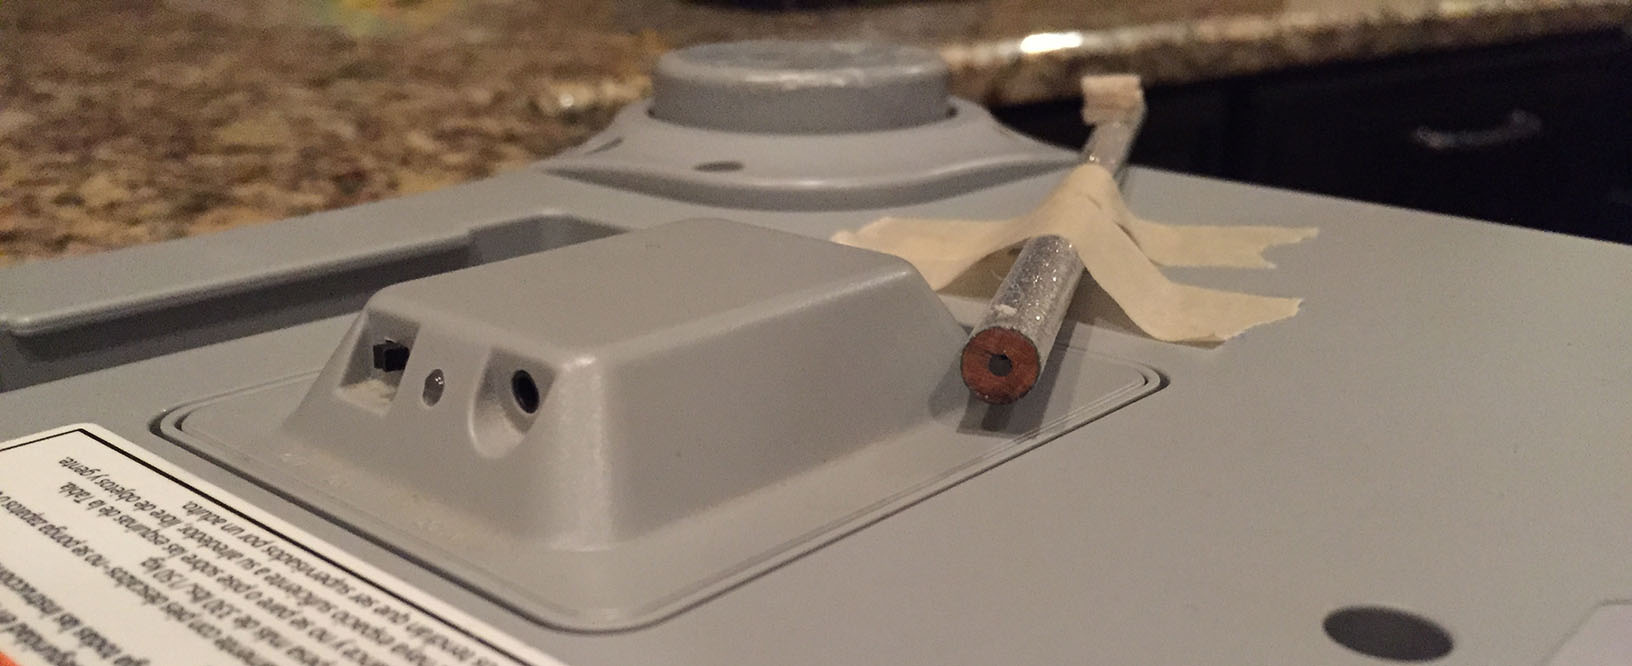
The second tweak is to create a hacky little lever that allows the sync button to be accessed without flipping over the Board. Every time we kick off our Python script, we will need to press that red sync button underneath the Board. This is a bit of a problem if we have a 100 lb. refrigerator sitting on top of it.

Tape a pencil (or something similar) that spans from the sync button to the outside front of the Board. Stack three ⅜” felt pads (or something similar) on the center (ish) of the pencil to create a stationary pivot.

Flip the Board over and you can press the sync button by simply pressing down on the lever. Hacky but effective.

Add a door sensor

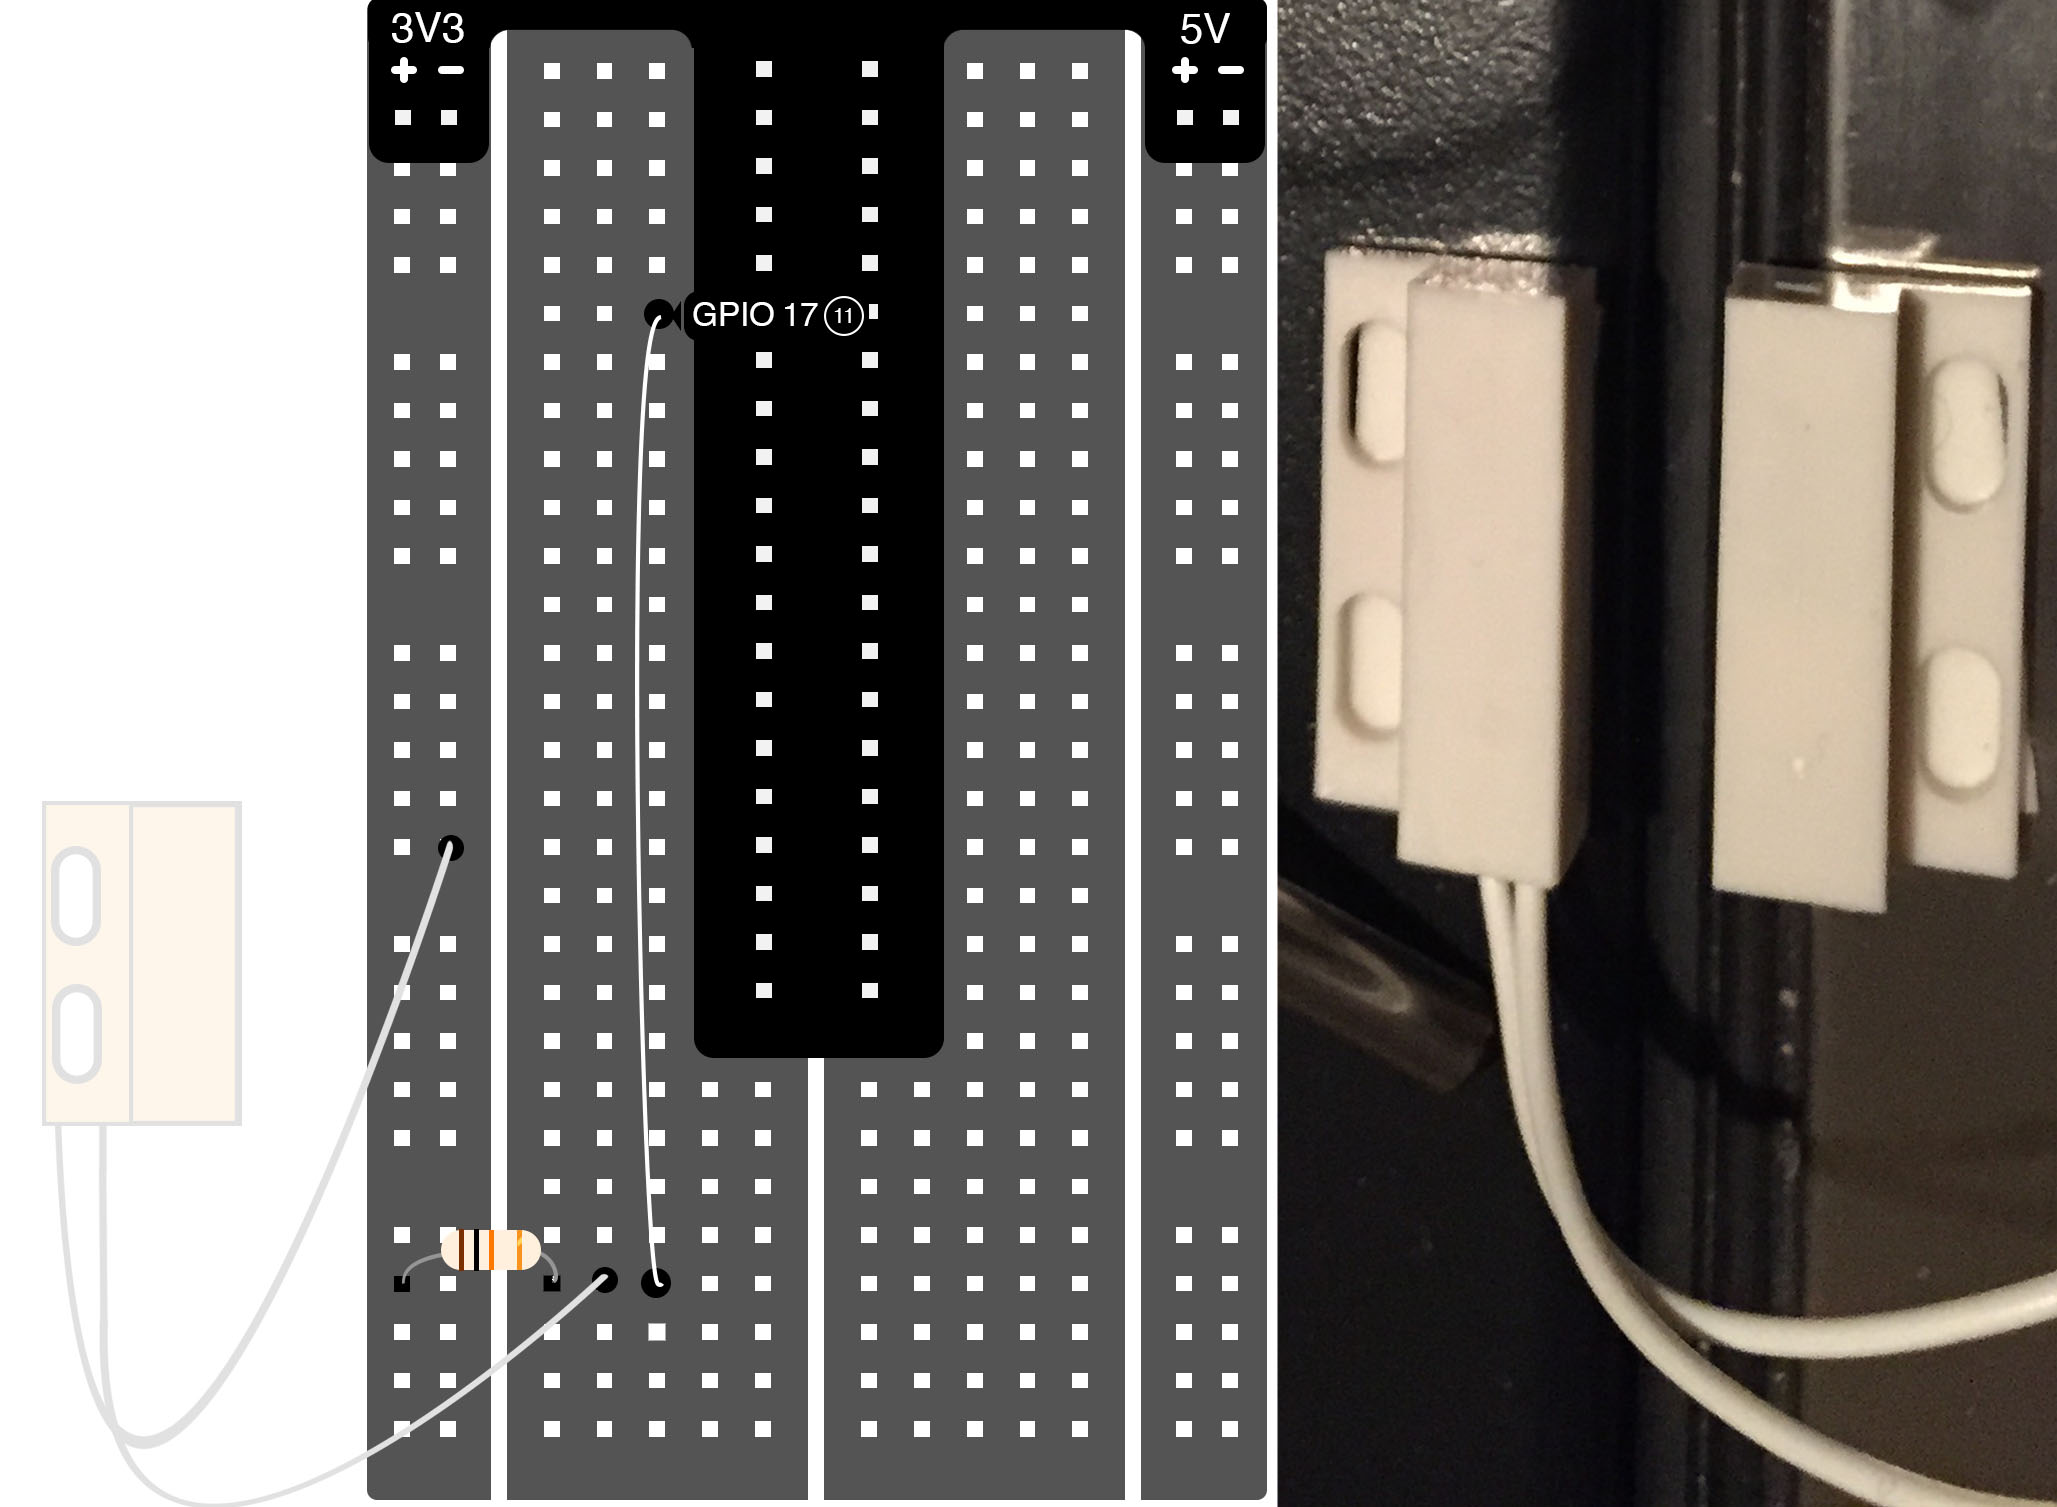
We need a door sensor to know when our refrigerator has been opened and a bottle possibly removed from it. This sensor will be used to trigger when to take all measurements and create all communications.

Wire up the simple door sensor circuit above to connect the sensor to GPIO pin 17 on the Pi.

Copy the switch_test.py script to a file on your Pi and run it.
$ sudo python switch_test.py

Open

Closed

Open

Closed

Once this script is running, touch the flat ends of the switch together and pull them apart. The script should write “Open” or “Closed” to the prompt each time you do this.

Use mounting tape to install the door sensor to the outside of your refrigerator.

An Internet of Things cloud data service

We want to stream all of our refrigerator data to a cloud service and have that service turn our data into a nice dashboard that we can access from our laptop or mobile device. Our data needs a destination. We will use Initial State as that destination.

Go to Initial State and create a new account.

Editor’s note: The following code example uses a common technique for controlling a Raspberry Pi from the web. However, we wouldn’t recommend using the same technique on a personal computer as it would be too easy to insert malicious code and have it piped with escalated permissions to the shell.

Install the Initial State Python module onto your Pi:
$ curl -sSL
https://get.initialstate.com/python -o - | sudo bash

When prompted to automatically get an example script, type y. This will create a test script that we can run to ensure that you can stream data to Initial State from our Pi.

Run this script ($ python is_example.py) and verify that a new data stream was created in your Initial State account in your web browser.

You will need your Initial State access key to create other data streams. Go to your Initial State account in your web browser, click on your username in the top right, then go to “my account”. Your access key is the long series of letters and numbers under “Streaming Access Keys”. You will need this key in Step 5.

Putting it all together

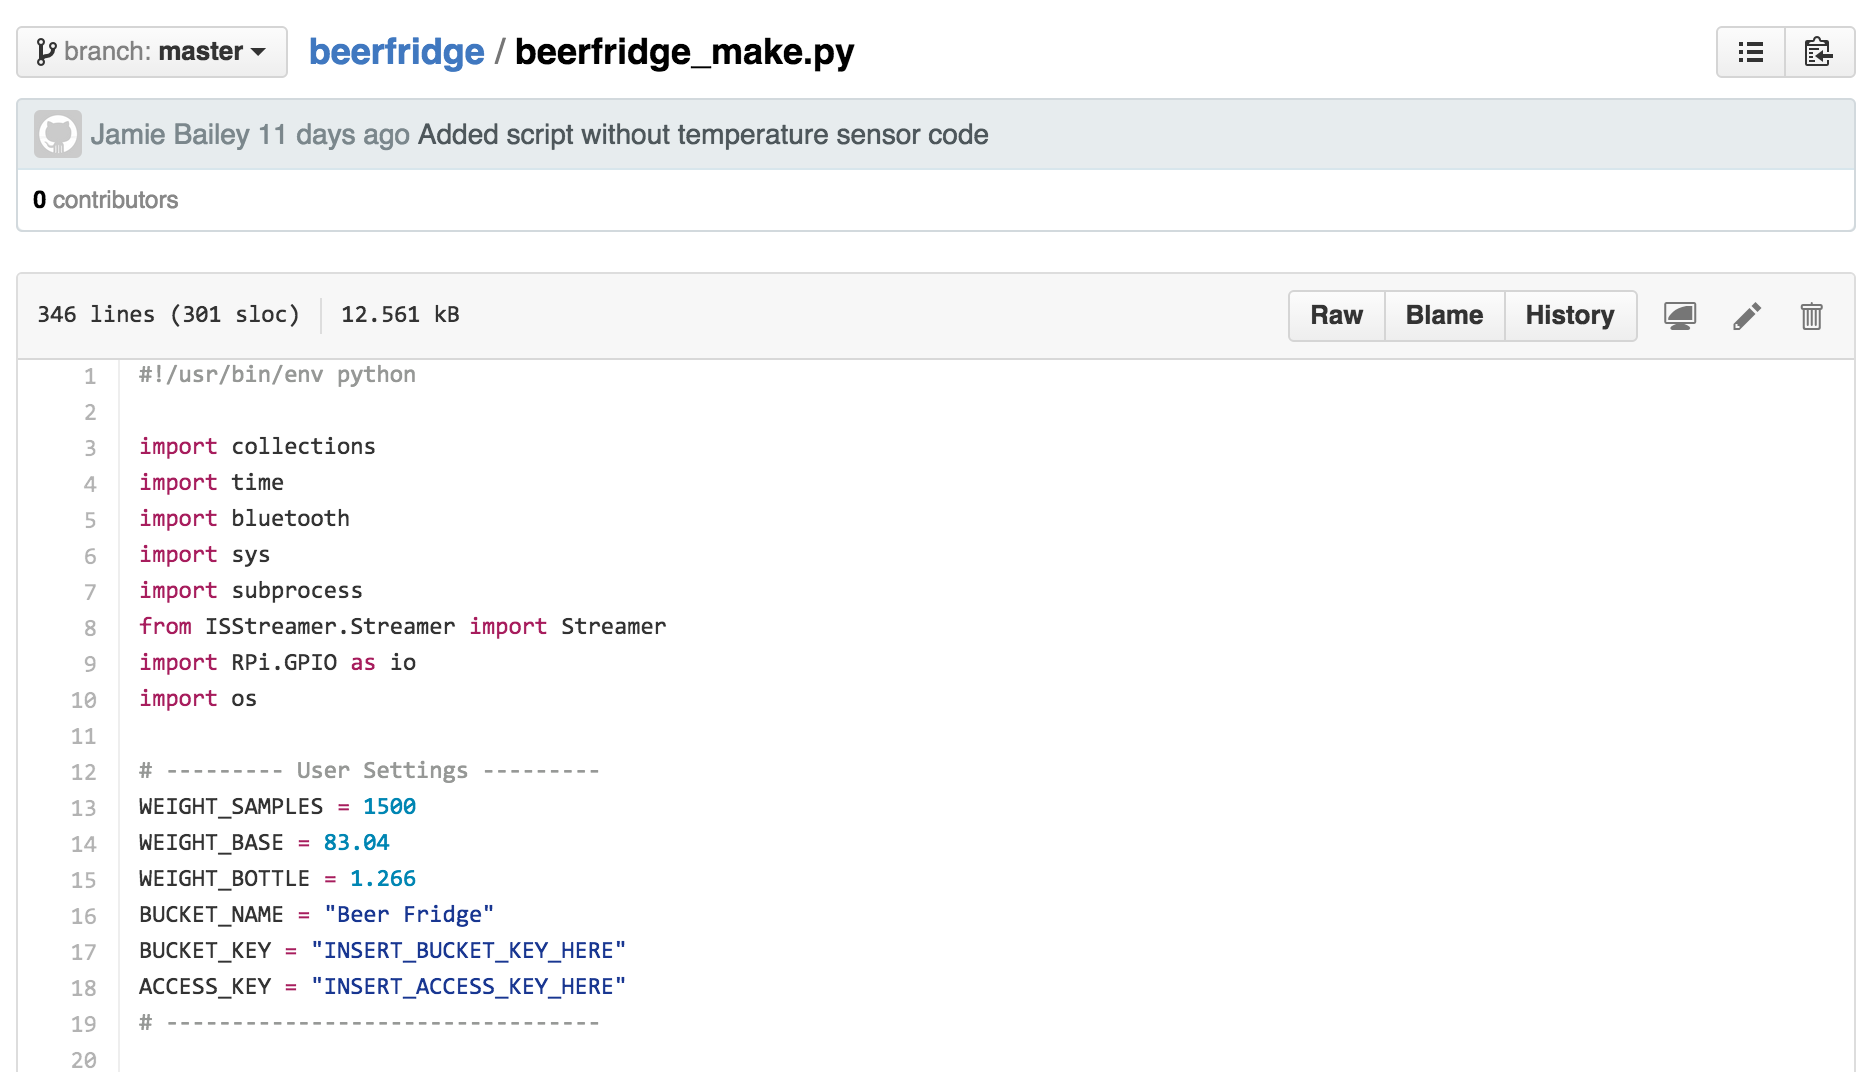
Copy the beerfridge_make.py script to a file on your Pi.

We need to set a few parameters before we run this script. Open up beerfridge_make.py in your favorite text editor. Near the top, there is a user settings section:
# --------- User Settings ---------

WEIGHT_SAMPLES = 1500

WEIGHT_BASE = 83.04

WEIGHT_BOTTLE = 1.266

BUCKET_NAME = "Beer Fridge"

BUCKET_KEY =
"INSERT_BUCKET_KEY_HERE"

ACCESS_KEY =
"INSERT_ACCESS_KEY_HERE"

# ---------------------------------

WEIGHT_SAMPLES sets how many weight measurements the Wii Balance Board takes and averages before computing how many bottles are present.

WEIGHT_BASE specifies the weight of your empty refrigerator in pounds.

WEIGHT_BOTTLE specifies the average weight of a bottle in pounds.

BUCKET_NAME specifies the name of the data bucket that will show up in your Initial State account.

BUCKET_KEY should be set to a unique name. The BUCKET_KEY parameter allows you to append to an existing bucket or create a new bucket. Simply pick a name for this parameter (i.e. beerfridge1234).

ACCESS_KEY is your Initial State account key that you found in Step 4.

Your personal dashboard

Once everything is in place, run the final script:
$ sudo python
beerfridge_make.py

Every time you close your refrigerator door, the number of bottles present is calculated by weighing the fridge and its contents.

Go to your Initial State account and click on the new data bucket with the name corresponding to the BUCKET_NAME parameter (i.e. Beer Fridge). Click on Tiles to view your beer/wine fridge dashboard. Here you can quickly see how many bottles are present and how many have been removed.

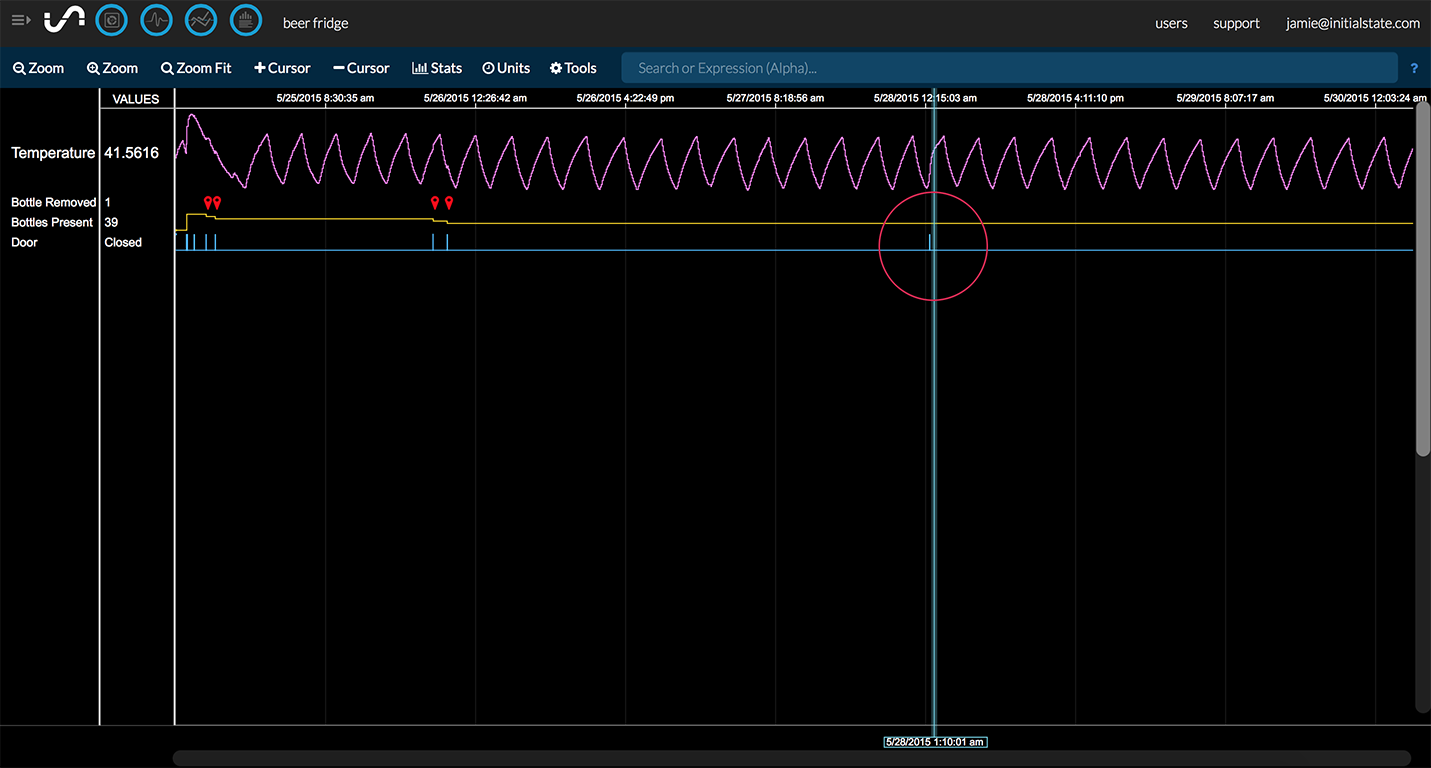
Switch to the Waves visualization to better see the history of your refrigerator data. With Waves you can take measurements and dig through your data to see when things happened: I can see that I drank two beers 91 minutes apart on May 25 at 7:57 pm and 9:28 pm. We also have dashboard support now for emoji symbols.

I can see that while I was out of town on May 28, my under 21 years of age nephew opened up my beer fridge at 1 a.m. only to realize that those new electronic gizmos sitting near the refrigerator might just be snooping on his beer thievery habits. He thought better of taking a beer and simply closed the door. Ha!