For more on microcontrollers and wearables, check out Make: Volume 43.  Don't have this issue? Get it in the Maker Shed.
For more on microcontrollers and wearables, check out Make: Volume 43.
Don’t have this issue? Get it in the Maker Shed.

The Crypto Currency Tracker monitors the value of three different digital currencies — Bitcoin, Litecoin, and Dogecoin — and compares them each against the United States dollar.

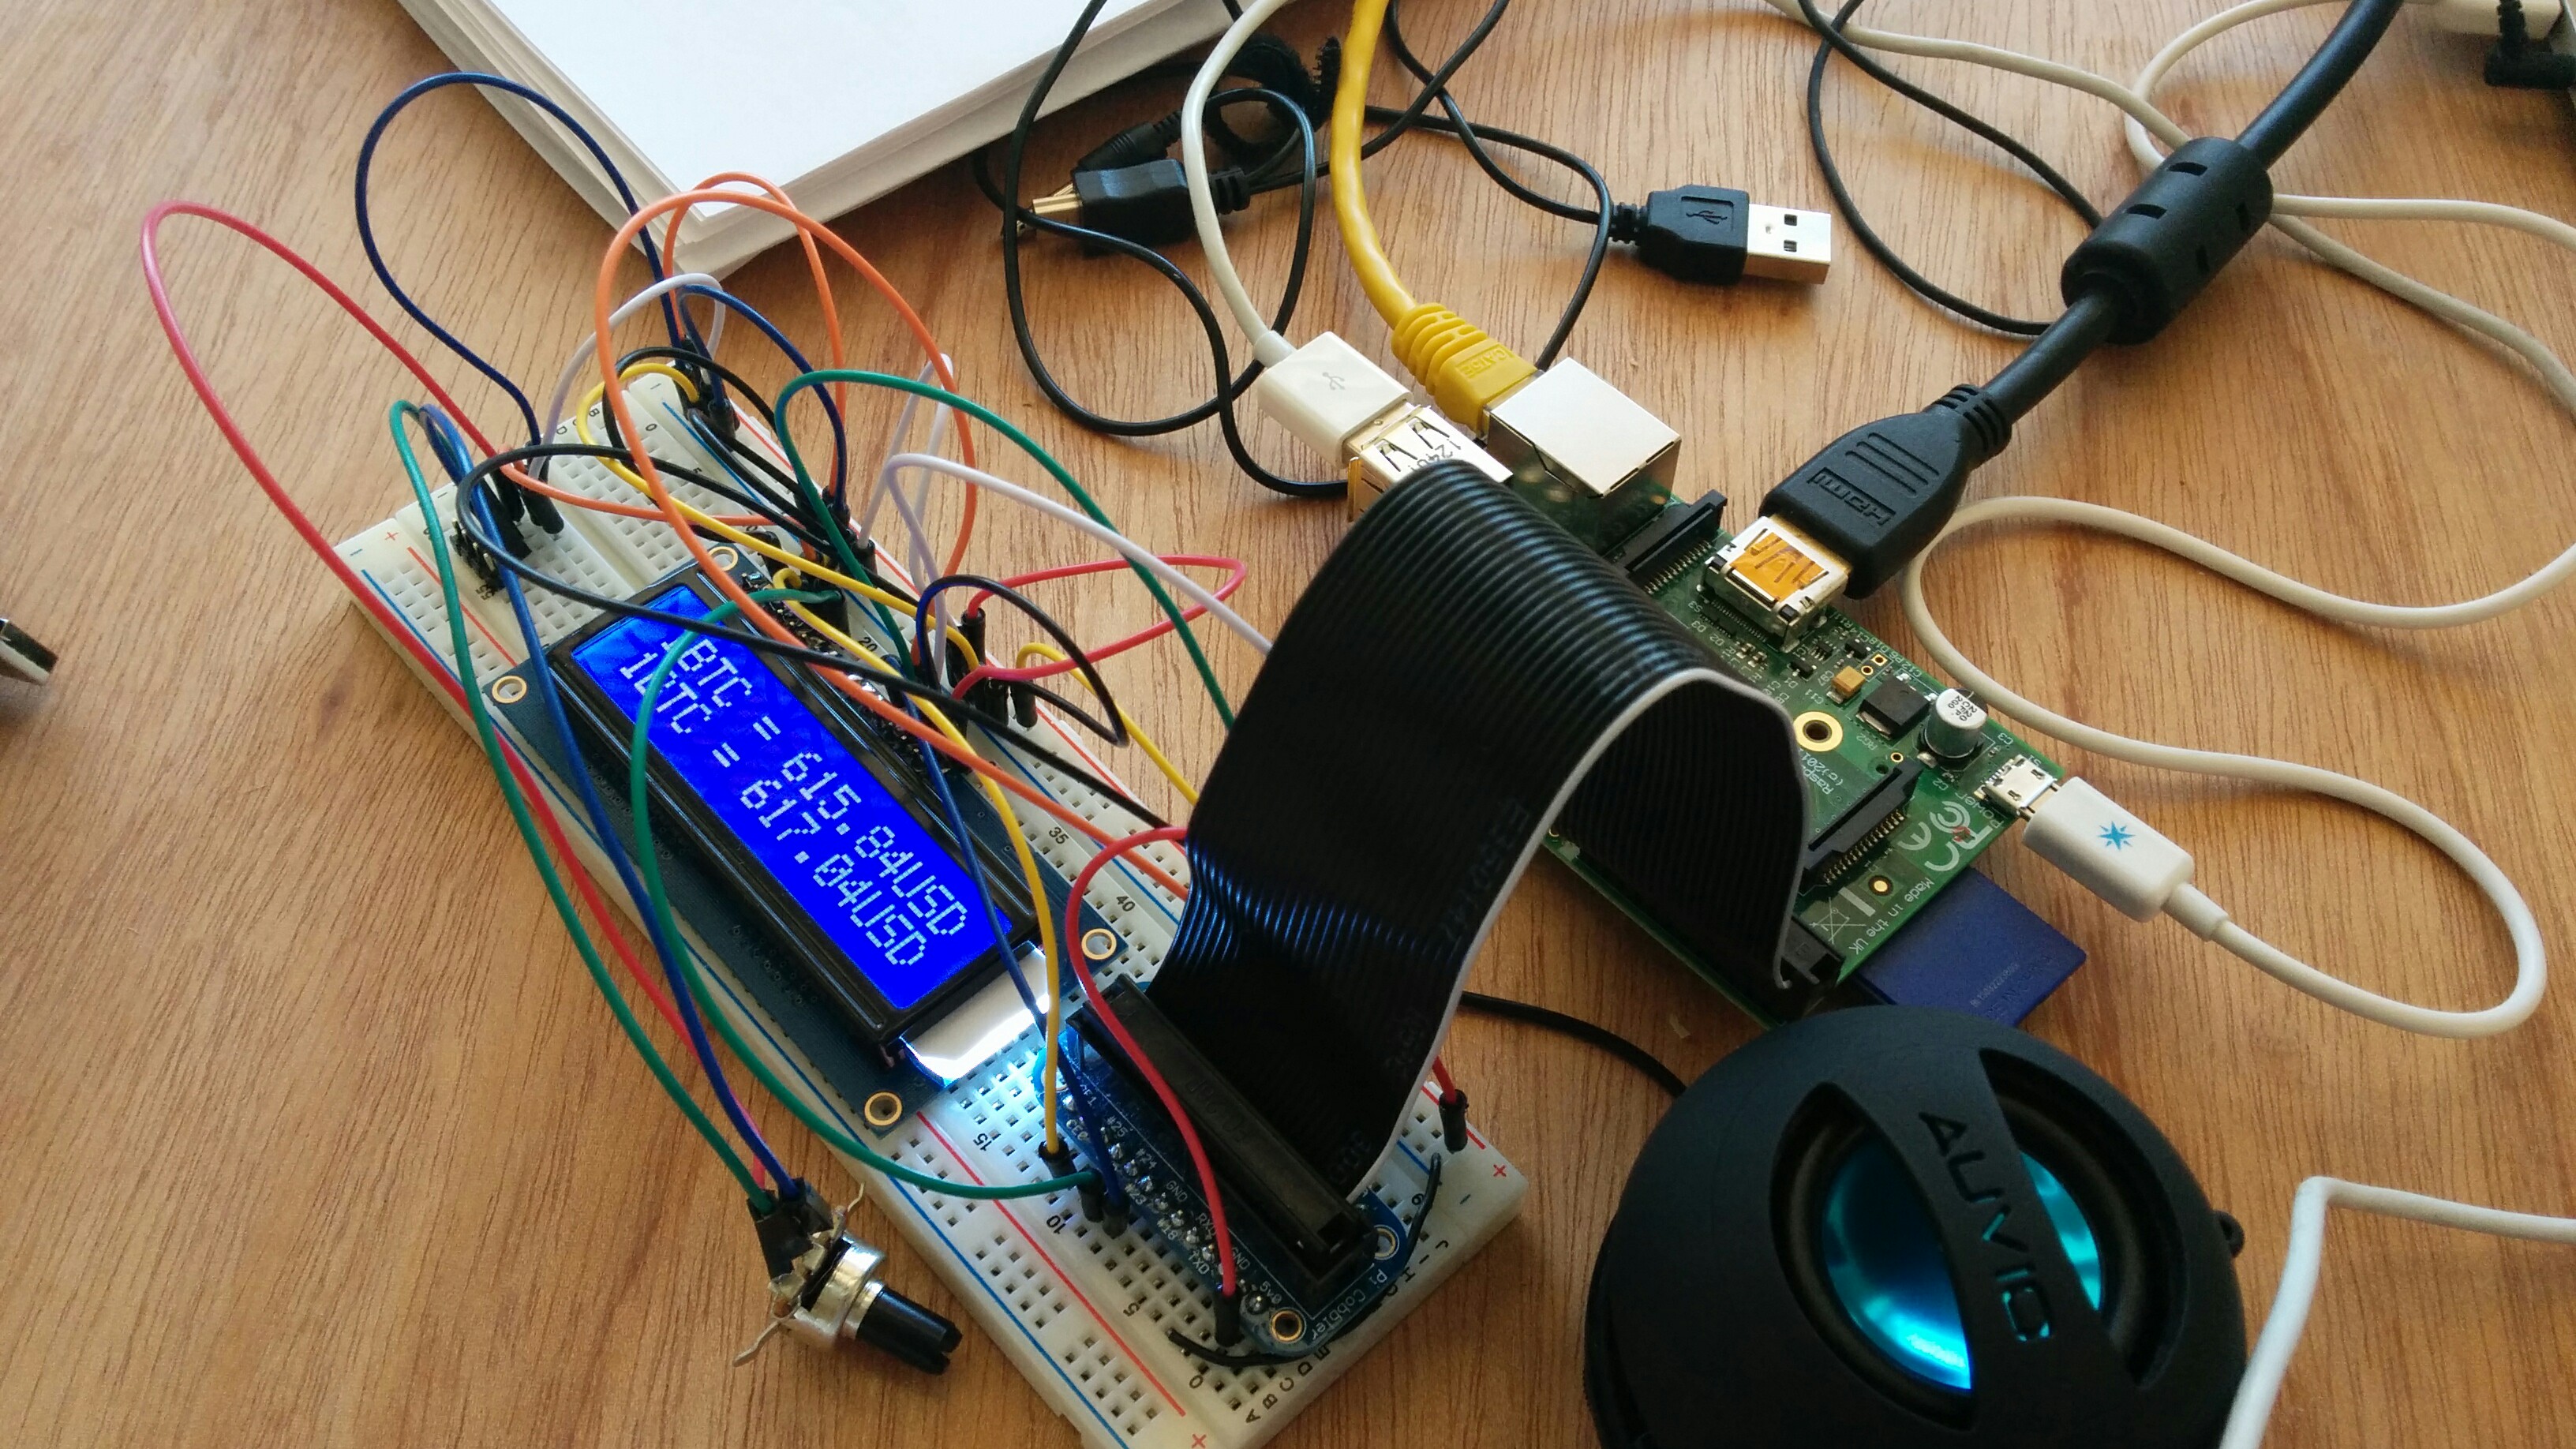
The hardware consists of a Raspberry Pi, a 16×2 Liquid Crystal Display (LCD), an SD card, Ethernet cabling, and a USB micro cable with wall wart for power. The tracker’s software is built on Raspbian Linux and uses existing Python libraries to control a Hitachi LCD controller combined with our tracker’s Python scripts, which make JavaScript Object Notation (JSON) requests for each respective digital currency market index.

Crypto Currency Tracker full layout

Not only does the code pull digital currency values from the internet, but it also stores the old value in a variable called,
self.last_price Retention of the last value is done to display it on the lower line of the 16×2 LCD; the top line is the current value.

The image below shows Bitcoin, or BTC, with a USD current value of 587.46 and a previous value of 587.22.


Custom tracker enclosure displaying Bitcoin to USD current and previous
Custom tracker enclosure displaying Bitcoin to USD current and previous values

Cryptocurrency Background

While the tracker works regardless of a user understanding of the markets it tracks, knowing a bit about cryptocurrencies is interesting and not terribly difficult — well, except for the mathematical proofs, but that’s way beyond the scope of this primer.

History

Cryptocurrencies have been around since 2009 with the emergence of a paper by Satoshi Nakamoto outlining the Bitcoin protocol (https://bitcoin.org/bitcoin.pdf). While mention of a cryptocurrency occurred in the late ’90s, there was no implementation until Bitcoin.

In 2011, following on the technological successes of Bitcoin and seeking to improve some observed shortcomings, Litecoin was created.

One feature of cryptocurrencies is a restriction on the number of coins that can exist, which of course is dissimilar from currencies run by central banks where there is no absolute restriction on the number of coins in the market. Litecoin’s maximum coin count is 84 million, whereas Bitcoin max is 21 million coins. This difference, along with a few other changes, allow for Litecoins to be more easily mined.
And then there is Dogecoin. Appearing first in late 2013, this meme-inspired digital currency, with a Shiba Inu dog as mascot and Comic Sans as its mandated typeface, puts fun first. Far surpassing both Bitcoin and Litecoin in the maximum coin limit, Dogecoin does not cap off until at least 100 billion units! This shear count combine with Doge riding a rocket gives purchase to the popular Dogecoin slogan, “To the Moon!

YouTube player

How are bitcoins created?

As the Bitcon Frequently Asked Questions succinctly explains:

New Bitcoins are generated by a competitive and decentralized process called “mining”. This process involves that individuals are rewarded by the network for their services. Bitcoin miners are processing transactions and securing the network using specialized hardware and are collecting new Bitcoins in exchange.

The Bitcoin protocol is designed in such a way that new Bitcoins are created at a fixed rate. This makes Bitcoin mining a very competitive business. When more miners join the network, it becomes increasingly difficult to make a profit and miners must seek efficiency to cut their operating costs. No central authority or developer has any power to control or manipulate the system to increase their profits. Every Bitcoin node in the world will reject anything that does not comply with the rules it expects the system to follow.

Bitcoins are created at a decreasing and predictable rate. The number of new Bitcoins created each year is automatically halved over time until Bitcoin issuance halts completely with a total of 21 million Bitcoins in existence. At this point, Bitcoin miners will probably be supported exclusively by numerous small transaction fees.
https://bitcoin.org/en/faq#how-are-bitcoins-created

Additional Cryptocurrency Information

For more information on any of the digital currencies, check out bitcoin.org, https://litecoin.org, and http://dogecoin.com.

An especially helpful resource is https://bitcoin.org/en/vocabulary, covering most of the basic vocabulary necessary for discussing cryptocurrencies.

Project Steps

Insert the Main Components

Insert the Pi Cobbler, 16×2 LCD, and a 10K potentiometer into separate rows of a large breadboard.

The 10K potentiometer is used to adjust the contrast on the LCD.

Note: Ensure the notch in the Pi Cobbler’s shroud is facing away from you.

Wire the Potentiometer

Connect a red wire from the left potentiometer pin to the power rail.

Connect a yellow wire form the middle potentiometer pin, the wiper, to pin 3 on the LCD.

Connect a black wire from the right potentiometer pin to the ground rail.

Wire the 16x2 LCD (1 of 3)

Connect a black wire from the LCD pin 1 to the ground rail. Double-check the orientation of the LCD and wiring before you proceed. It’s a lot easier to catch a wiring mistake now, than after all the wiring is done.

Connect a red wire from the LCD pin 2 to the power rail.

Connect a yellow wire from the LCD pin 4 to the Cobbler’s pin 25.

Connect a black wire from the LCD pin 5 to the ground rail.

Connect a green wire from the LCD pin 6 to the Cobbler’s pin 24.

Wire the 16x2 LCD (2 of 3)

[protected-iframe id=”7f87207423357adf961809dda13655c6-30206320-52394698″ info=”7f87207423357adf961809dda13655c6″ width=”120″ height=”150]

Connect a blue wire from the LCD pin 11 to the Cobbler’s pin 23.

Note: Double-check that the blue wire is in pin 11. There should be four empty rows on the breadboard between this wire and the green wire from Step 3.

Connect a green wire from the LCD pin 12 to the Cobbler’s pin 17.

Connect an orange wire from the LCD pin 13 to the Cobbler’s pin 21.

Connect a white wire from the LCD pin 14 to the Cobbler’s pin 22.

Wire the 16x2 LCD (3 of 3)

Connect a red wire from the LCD pin 15 to the power rail.

Connect a black wire from the LCD pin 16 to the ground rail.

Connect a red wire from the power rail to the Cobbler’s 5V0 pin.

Connect a black wire from the ground rail to the Cobbler’s GND pin.

Connect Cables and SD Card

Connect the ribbon cable to the Pi. The white stripe on the cable indicates pin one and is installed near the edge of the board.

Insert an SD card that is flashed with Raspbian Linux.

Finally, connect an Ethernet cable, HDMI cable, keyboard, and a USB micro cable with wall wart to power the Pi.

Note: If you need flashing help, check out the guides on the Pi Foundation site: http://www.raspberrypi.org/documentation/installation/installing-images/README.md.

Connecting to the Pi

Login as the pi user and enter the default password: raspberry.

Write down the IP address shown during the system boot-up. The second image shows the IP address highlighted: 10.11.12.80.

Once the IP address is determined, installation and configuration of packages can take place over SSH.

Windows users may want to download http://www.putty.org/


OSX and Linux users will find SSH available in terminal session.

Note: Rasbian assigns IP addresses dynamically using DHCP. Unless there are a lot of clients on a network, the dynamically assigned address typically remains associated with the same box, but it’s not guaranteed. One possible way to improve the project is to assign either a static IP address or a zeroconfig solution such as avahi.

Install the Python Environment

Connect to the Pi either directly with a keyboard, monitor, and Ethernet, or use SSH. Log into the Pi and from the command line type and execute:

sudo apt-get install python-dev

sudo apt-get install python-setuptools

Running easy_install

One of the tools accompanying python-setuptools is easy_install, which facilitates downloading, building, installing, and managing python modules.

sudo easy_install -U distribute

NOTE: If sudo easy_install -U distribute has already been run, the command errors out (image 2). This error is not a problem and is safe to ignore.

Install Git

Install git to clone repositories for the software:

sudo apt-get install git

Install pip and rpi.gpio

Install pip, a package manager for Python:

sudo apt-get install python-pip

Install rpi.gpio using pip:

sudo pip install rpi.gpio

Install the Crypto Currency Tracking Software

Clone the Crypto Currency Tracking software repository:

git clone https://github.com/Make-Magazine/wp14-raspberry-pi-crypto-currency-tracker.git

Change directories to what was just cloned:

cd ~/wp14-raspberry-pi-crypto-currency-tracker

Setup the 16×2 LCD library:

git submodule init

git submodule update –recursive

Run the tracking software as root:

sudo ./crypto_currency_monitor