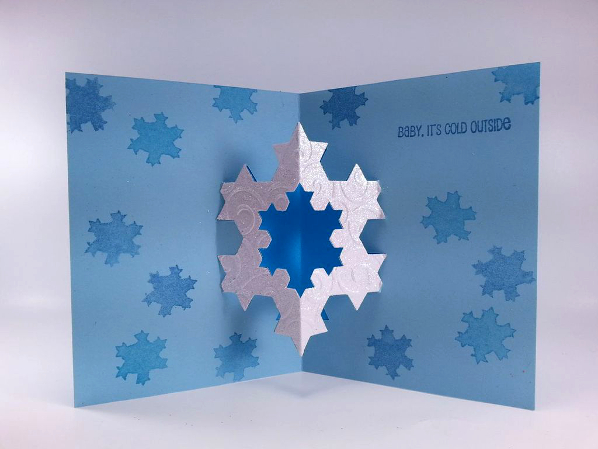
I love fractals. So what better way to celebrate winter than creating a fun card based on the famous Koch snowflake (also know as the Koch star or island). First described by Helge von Koch in 1904, the “self-symmetrical” geometric shape is based on an equilateral triangle. It’s a shape that can have infinite perimeter, but finite area. Cool right?

This project uses the Koch snowflake as a pop-up element in a standard card, useful for birthdays and other occasions (like World Math Day on March 1). It requires simple, common materials and doesn’t take much time to complete. It’s a great math project for kids too!

Completed Koch Snowflake card
Completed Koch snowflake card

Project Steps

Materials

Gather your materials and tools.

Make a Template

You’ll need a template of a Koch snowflake to make this card. You can use Google to find and download an image, or you can make your own. Whichever option you choose, print on cardstock to create a sturdy template.

To make your own, create an equilateral triangle on triangle graph paper. You can find the paper online. I had to resize mine (at 70%) to get the appropriate scale. You want an initial triangle as close to 3 1/2″ in height as possible.

Start with a triangle 9 segments long on each side. Then remove 1/3 from the center of one side of the triangle and replace it with a new, smaller equilateral triangle. You repeat this process on each side of your large triangle, then repeat it on each side of each new triangle, and so on.

Cut out your Koch snowflake with sharp scissors to create your template.

Create Basic Card

Using your base cardstock, cut a piece that is 8 1/2″ x 5 1/2″. Fold this in half to create a 4 1/4″ x 5 1/2″ card. Use the bone folder to crease the center fold. Open and lay flat.

Line up the snowflake along the center line, so that two of the snowflakes points are on the center line and the crease will bisect the snowflake symmetrically. Trace the snowflake onto the card base.

Draw a straight line approximately 1/4″ from the tip of each of the 4 points not on the center line. You will not cut along these lines. They will attach the snowflake to the card’s base.

Use a craft knife to carefully cut along the outline. When done, turn the card over, so that the pencil lines are on the back. Fold the center of the snowflake in the opposite direction of the card base. Use the bone folder to carefully crease the snowflake where it meets the card.

Take care that the remaining snowflake points aren’t bent as the card is being closed or opened. If needed, use your craft knife to trim away a bit of the card base to make room for their movement.

You now have the basic card pop-up completed. Time to add some bling!

Create Snowflake Cover

In all likelihood, your Koch snowflake isn’t perfect. That’s ok. Make a cover to distract the eye, while also making the card more decorative!

Simply trace your template onto a contrasting cardstock. I used a shiny, glittery cardstock in blue. Cut out the snowflake, score, and fold down the center. Glue into place using the glue stick.

To add more texture, try patterned paper, glitter or embossing.

Create the Front of the Card

Cut a contrasting piece of paper to 8 1/2″ x 5 1/2″. Fold this in half to create a 4 1/4″ x 5 1/2″ card. Use the bone folder to crease the center fold.

Use the glue stick to carefully glue the pop-up base of the card into the second piece. Line up the center creases and trim the outer edges as needed. Decorate the inside and outside of the card.

On the inside of my example card, I stamped a design with another Koch snowflake. You can create a custom stamp by creating a smaller snowflake template, using the same method as before, but with more reduced triangle graph paper. Trace this onto craft foam, and use the craft knife to cut out the shape. Attach to an acrylic block with re-positionable, double sided tape. Stamp with ink.

You can also use that smaller Koch snowflake template to cut out the center of your pop-up snowflake, adding detail and interest to your card.

Take the Easy Way Out

Perhaps making a template is just too much for you, or maybe you’re just short on time. You can download my PDFs, print to cardstock and cut out the cards really quickly.

Or, you can download my files for digital paper cutters and really make short work of these cards!