


Transporting delicate electronic or photographic equipment is easy to do. Just embed it in squishy polyurethane foam inside a rigid case.
The problem is achieving this without spending too much money.
The first step is to figure out how big a case you need. Lay out your equipment as suggested in Figure A, allowing at least ¾” between each piece and around the edges. Make a note of the minimum area that will hold everything. Next measure the tallest piece of equipment and add at least 1½”. This tells you the minimum internal height of the case.

Now that you have your measurements, you can check an online vendor to find a case that’s the right size or slightly larger. Pelican brand cases are my favorite. They are almost indestructible and are available in a great variety of sizes and colors, such as the samples in Figure B. The chart on the Pelican website shows all the exterior and interior dimensions. Make a note of model numbers that are suitable for your purposes.


New Pelicans are expensive, but because they are so robust, you can feel fairly confident about buying them secondhand. Search eBay for the model numbers that you want, and don’t be put off if a case looks grungy. Used cases often have an accumulation of stickers on the outside, but you can remove them with a paint scraper while applying a heat gun or hair dryer. Any remaining residue should yield to a solvent such as Xylol, but wear latex or nitrile gloves, work with good ventilation, and don’t leave the solvent on the case for too long. If it dulls the finish, you can restore the appearance by scrubbing it with a fine wire brush and then polishing it.
If there are dividers inside a used case, you can discard them. I think it’s better to use polyurethane foam that fits your equipment precisely. Foam is available for this purpose in “pick-and-pluck” form, meaning that it is partially cut into small square-shaped pieces that you pull out to make room for your gear. Personally, however, I prefer to buy a large generic piece of foam and custom-cut it myself. A fabric store such as JoAnn sells suitable foam that is intended for chair cushions.

You’ll need three pieces: two relatively thin slabs to go inside the lid and the base, and a thicker block to go between them. Figure C shows a typical end view. To figure the thickness of the top and bottom pieces, take the internal height of the case, subtract the height of your largest piece of equipment, divide by 2, then add ½” to each piece so that they’ll grip the equipment when the case is closed.
Cutting foam is more difficult than you might think. A wood saw will make a mess. A hacksaw is better, but hard to control. A kitchen knife tends to get stuck. A bread knife with fine serrations works quite well, but you’ll still face a challenge if you want a cut that is precisely vertical. An electric carving knife is the ideal tool for long, straight, deep cuts. Clamp the foam gently between a piece of plywood and your workbench, leaving a section sticking out that you want to remove. Wearing work gloves is a sensible precaution, and, of course, never turn any kind of blade toward you.
After cutting the middle piece of foam, you need to make holes in it for your equipment. Draw around each item with a marker, then cut ¼” inside the line, so that items will fit securely but can still be inserted and removed without too much effort. A hand-held coping saw is a cheap and simple way to cut curves, and my new book, Make: Tools will tell you how to use it, along with many other hand tools.

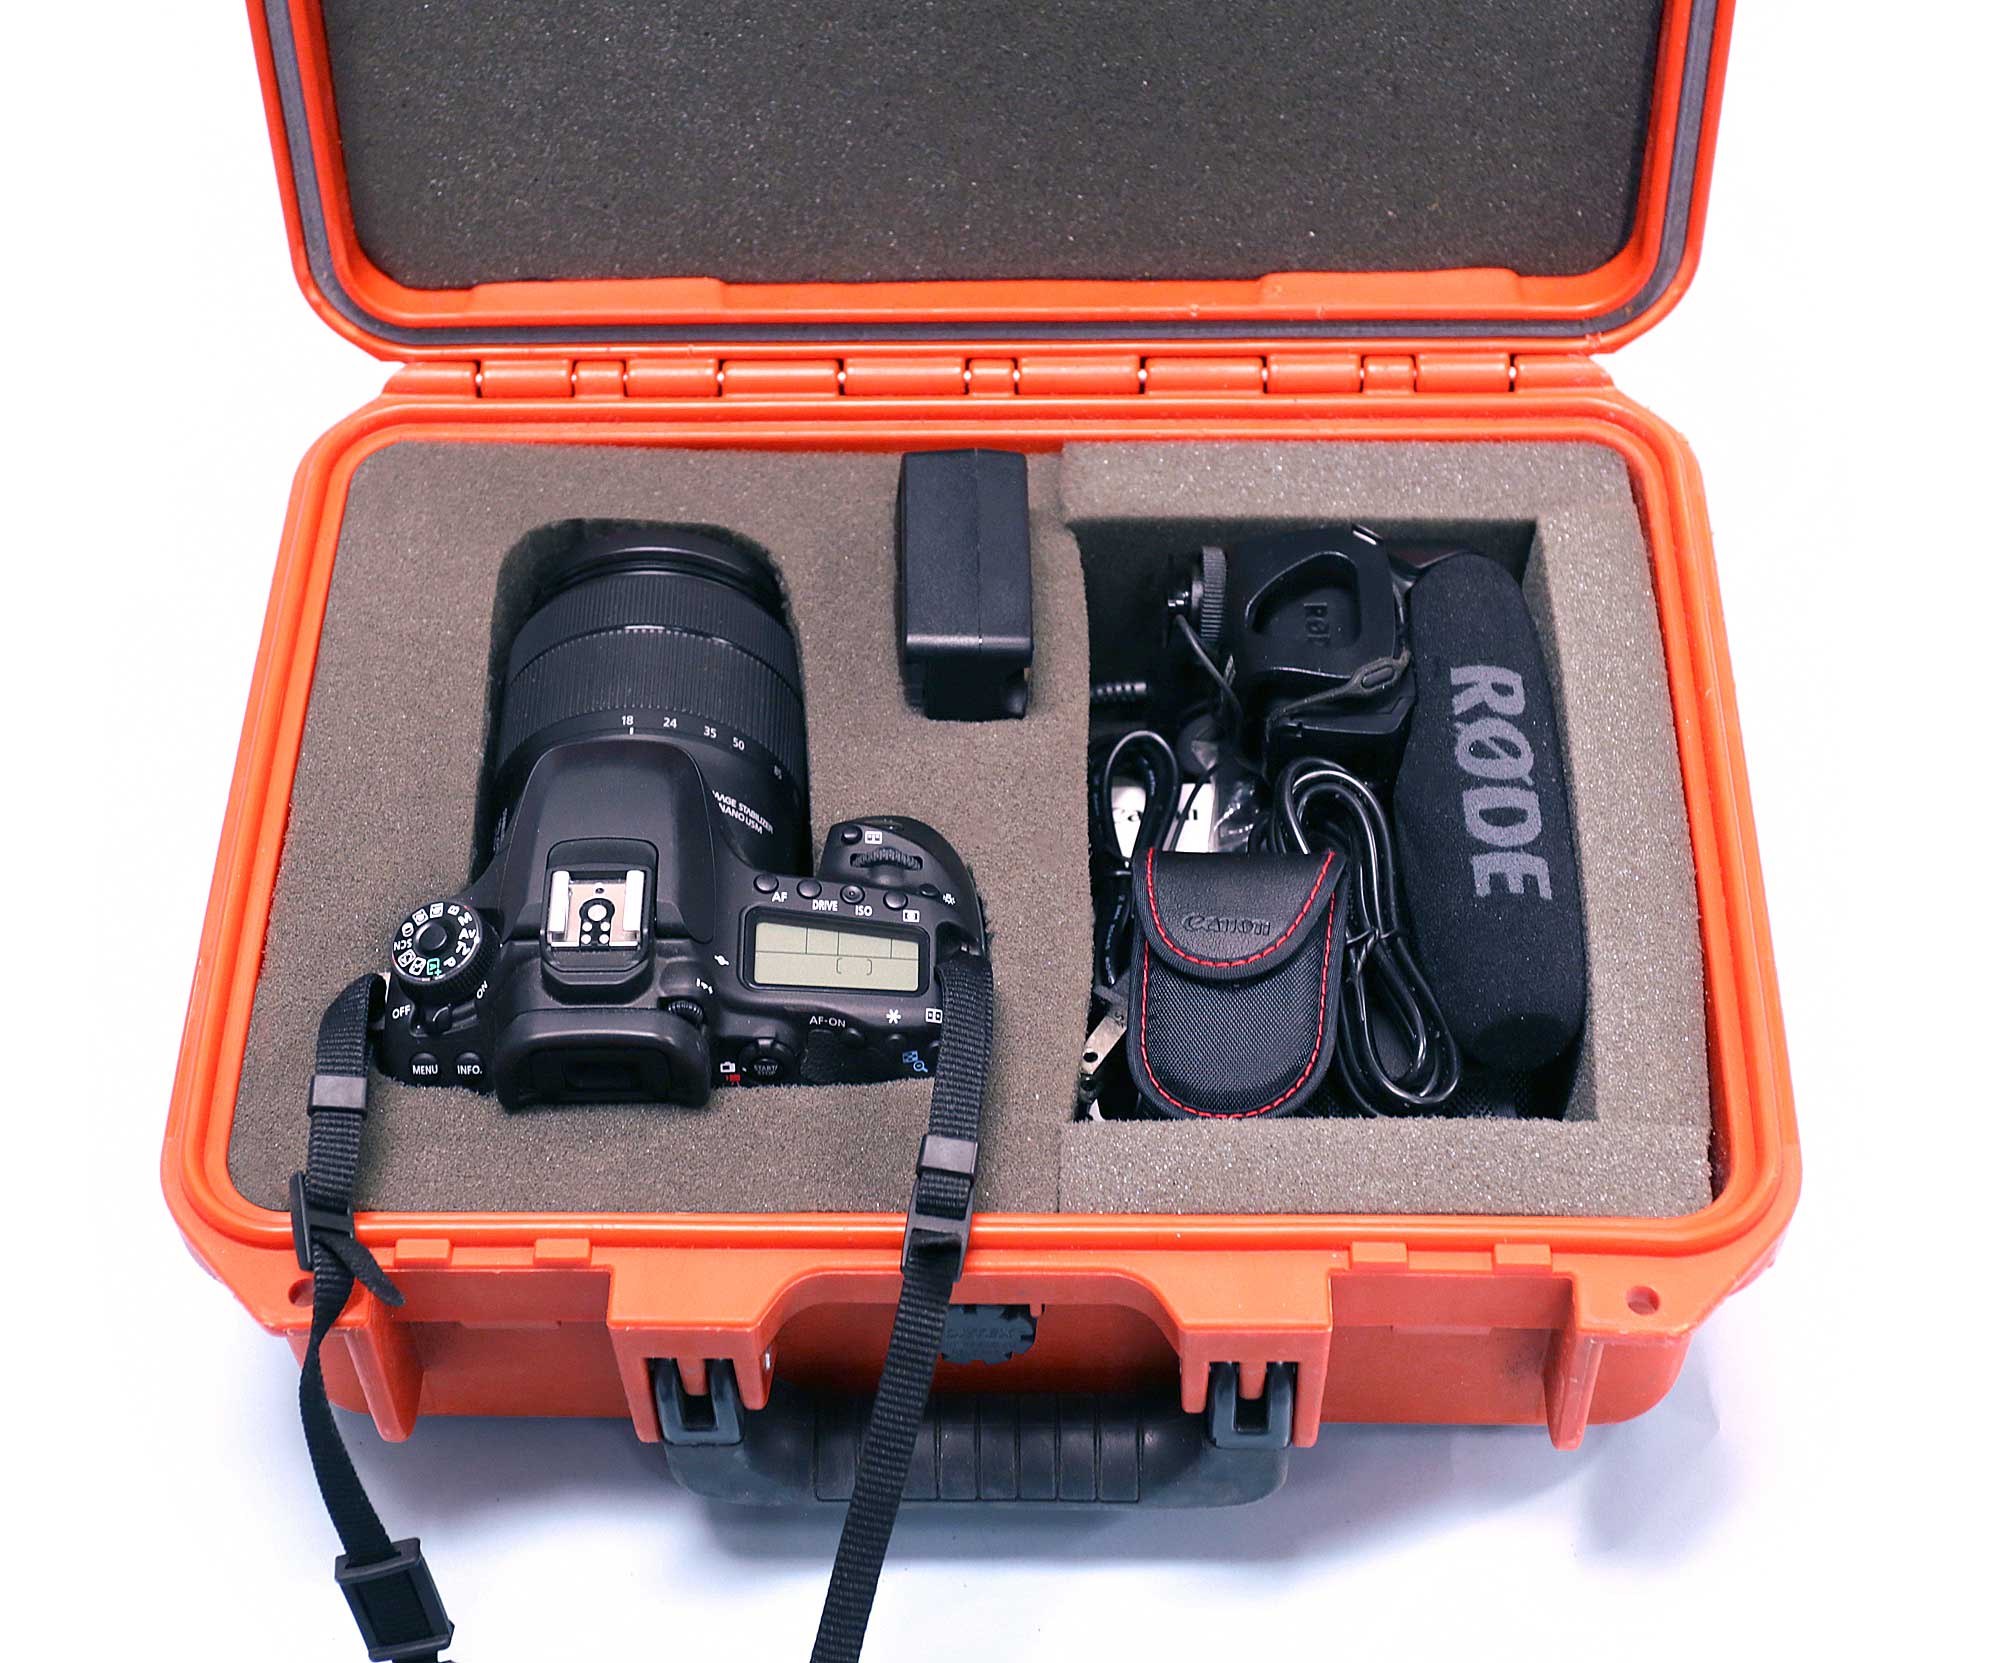
Figure D shows cutouts for a camera and battery charger. Figure E shows foam installed in a small case, and the main image on the facing page shows the case packed and ready to go.

If cutting foam to fit seems challenging, there’s a simpler option. You can cut simple blocks of foam and push-fit them together, as shown in Figures F and G. The advantage of this system is that you can shuffle the blocks around if you buy new equipment of different sizes.

Whichever system you use, you’ll have a feeling of freedom when your expensive gear is properly protected. You can dump the transport case into the back of a vehicle without worrying if it slides on the floor or gets buried under other items. You may even feel sufficiently confident to send it as checked baggage on an airline. Remember that although Pelican cases allow for use of padlocks, TSA regulations require you to use a special approved lock to allow for inspection en route.


