Photo by Hep Svadja
Photo by Hep Svadja
Read articles from the magazine right here on Make:. Don't have a subscription yet? Get one today.
Read articles from the magazine right here on Make:. Don’t have a subscription yet? Get one today.

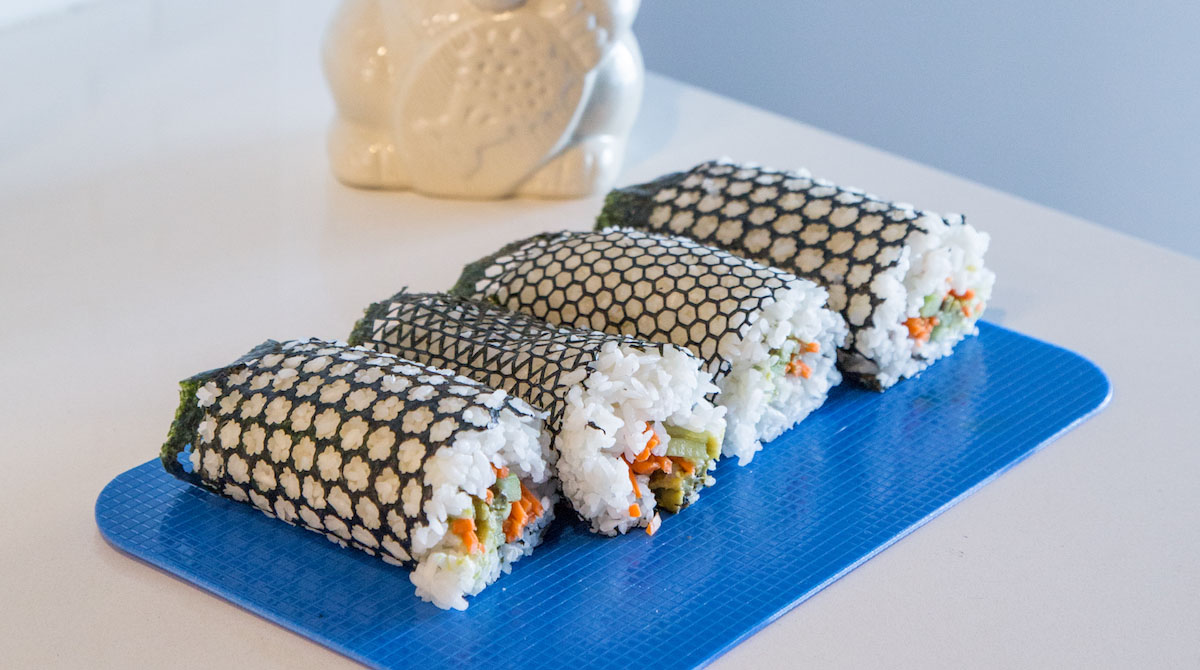
I first saw laser-cut sushi while reading Designboom and it really stuck in my mind. So beautiful!

So I figured out how to re-create the process. Since the laser cutter does all the work, I mostly just had to think about what design I’d like to generate in Adobe Illustrator. It did take a few tries to get the pattern centered properly, and to get the laser cutting right without burning the seaweed.

Project Steps

1. CREATING YOUR DESIGN

Your pattern could be anything, but it should be sized to fit your nori, and designed with repetition in mind, so you can copy/paste in your drawing program. I took inspiration from simple geometry and the Japanese sakura (cherry blossom) design.

seaweedgrid
Download the .ai file of this design.

I didn’t need to cut my nori sheets to size, before or after the process, but I left about a ¼” margin so I could hold the nori down with some weights during cutting.

2. LASER-CUTTING SEAWEED

Photo by Anthony Lam

Set your laser cutter’s power to a low setting. The cutter I used has settings from –100% to 100% power, so to be safe I set it at –50% to avoid any potential fires or charring of the nori.

I set the speed at “standard,” because if it were too slow it would possibly start burning. Test your laser cutter to find the right mix of speed and power.

TIP: Experiment with layering a sheet of paper above or below your nori to mitigate the laser’s powerful touch.

3. ROLLING SUSHI

LaserCutSeaweed-12

Experiment with different margins and patterns. Mine are decorative but not very strong; they’re suitable for maki rolls or inside-out rolls. But a pattern that leaves more of the nori intact could be strong enough to wrap and hold hand rolls. Happy rolling!