There aren’t many low-budget ways to customize one’s yo-yo. The most common ones are either painting or dyeing, but they’re limited: paint chips off with time, and dyeing is only for plastic yo-yos.

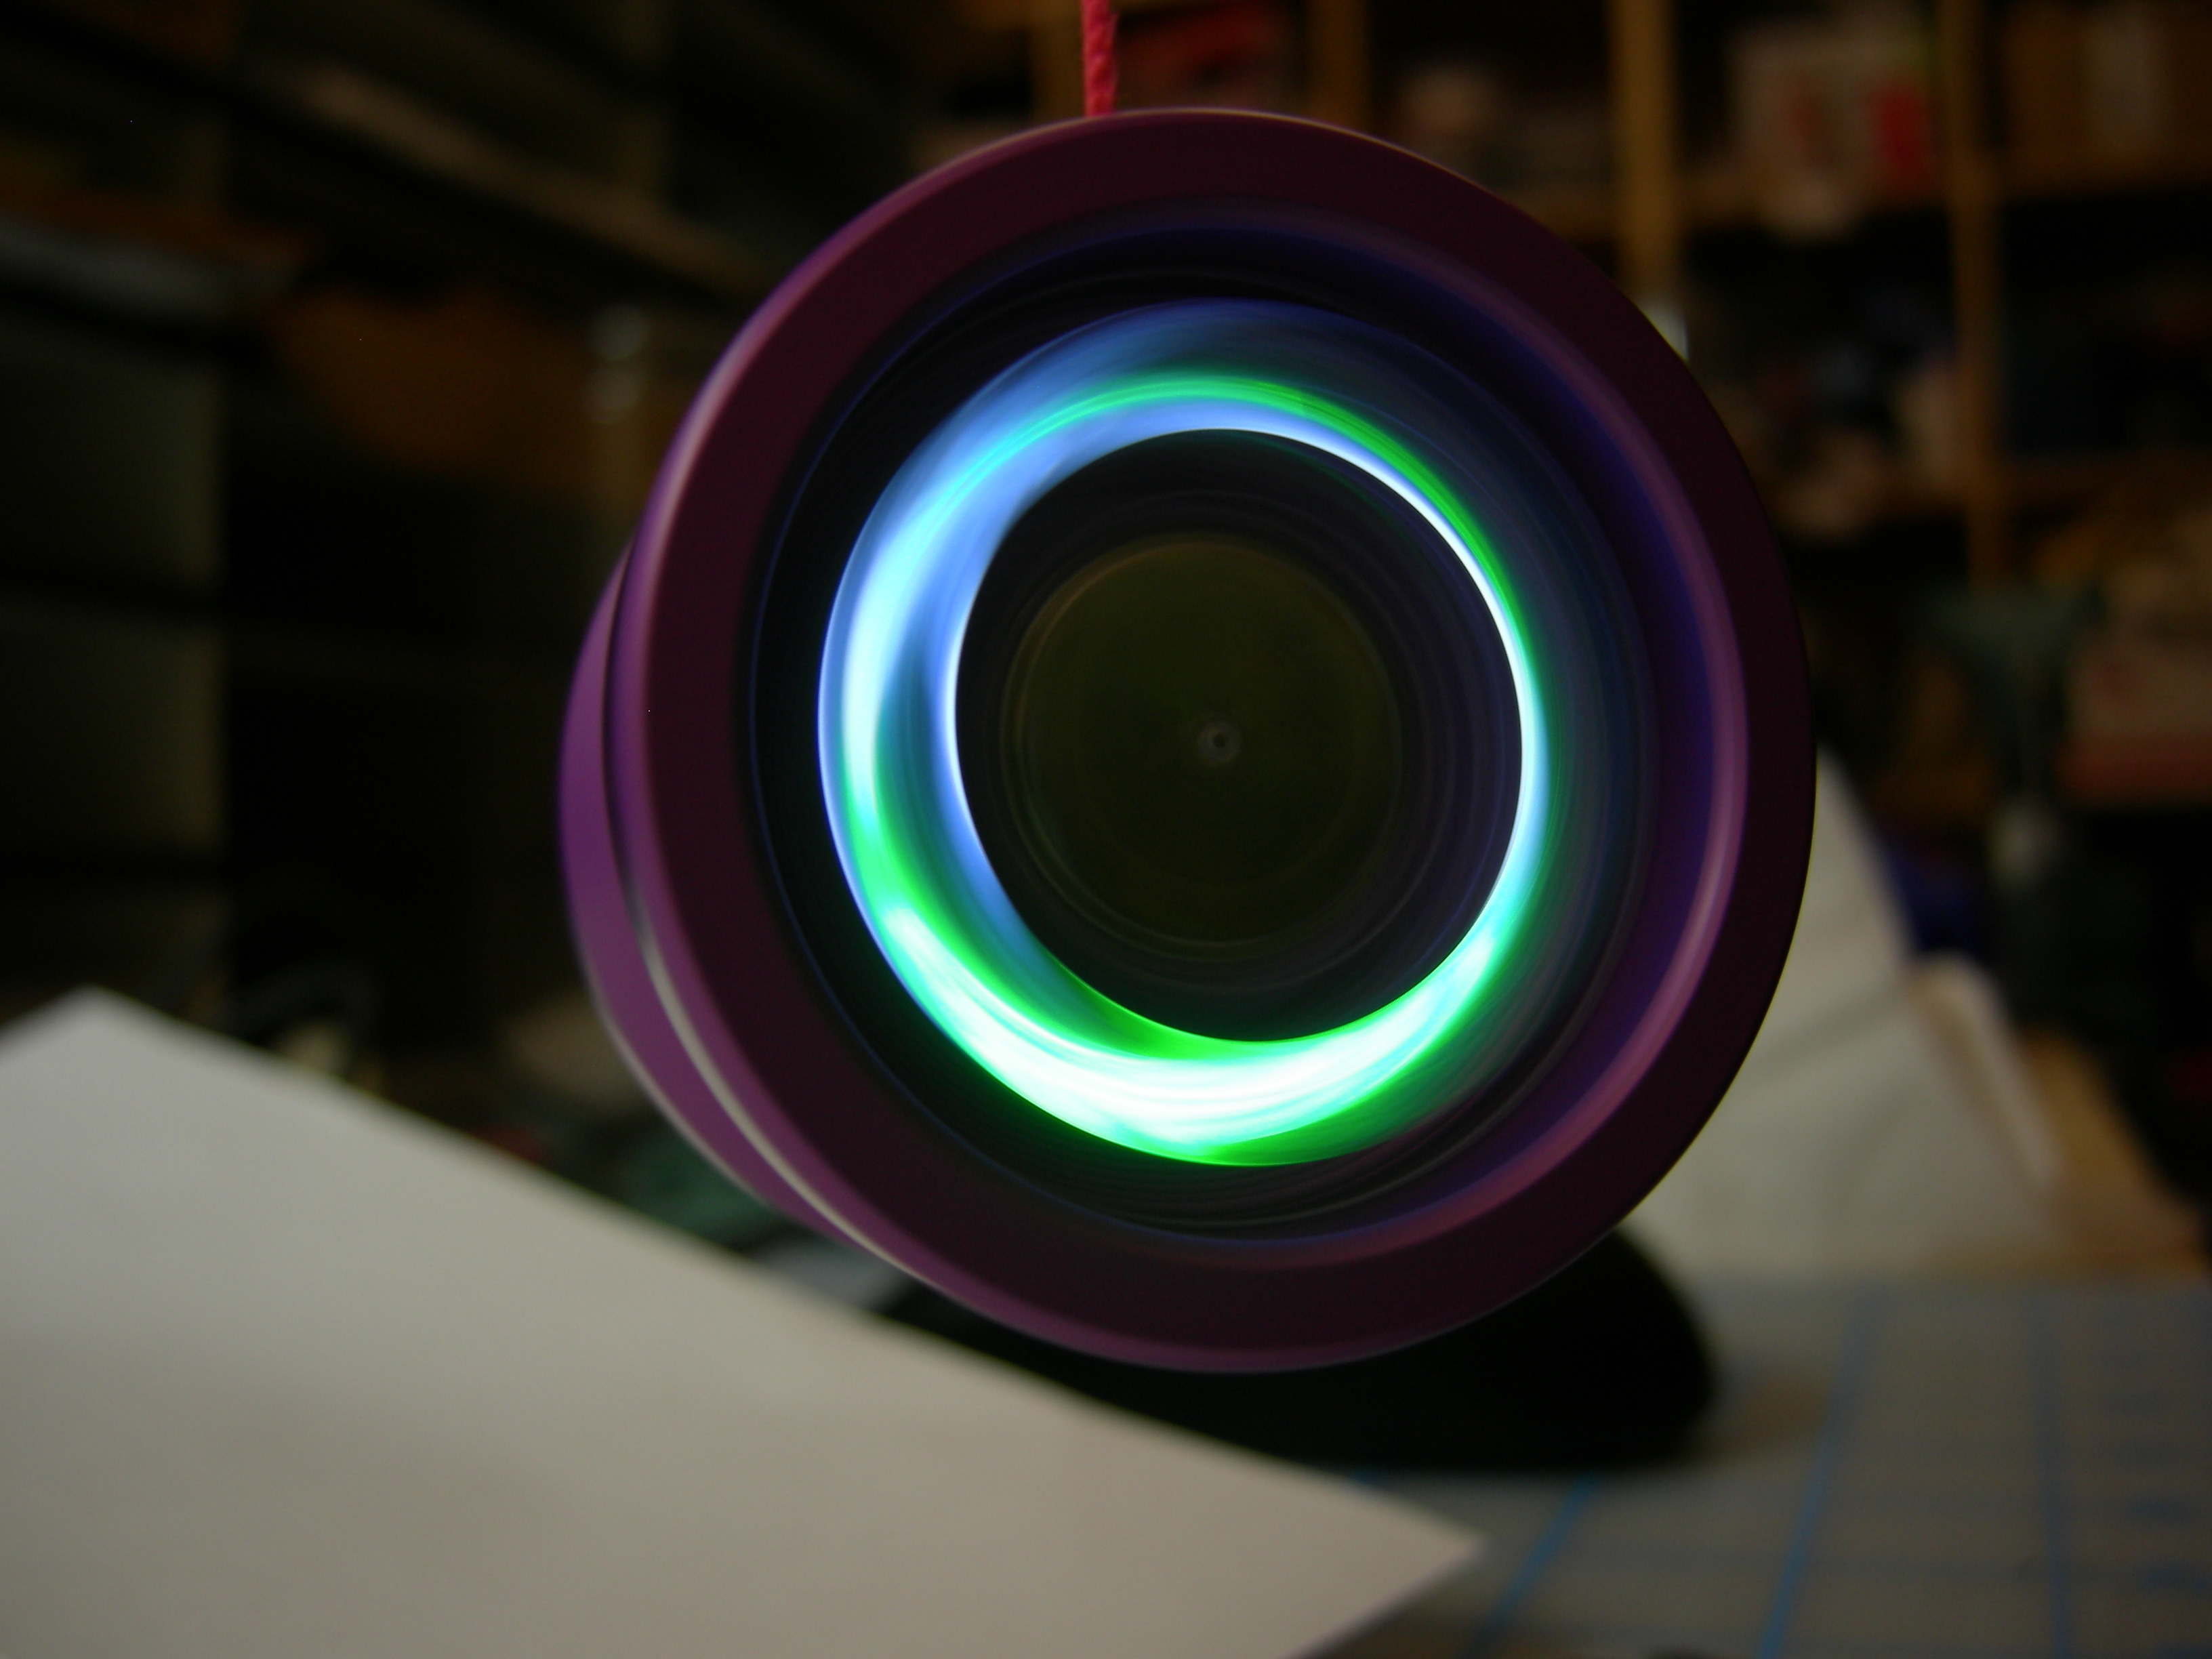
Being a yo-yo fanatic, I regularly visit the blog Yoyoskills.com for yo-yo news. There I recently read a post about spin-activated LED side caps that fit into the side of yo-yos. They are low-cost ($6) and look very cool; a perfect customizing add-on for any yo-yo. Unfortunately, they only come in one size, thus only fitting a few yo-yos. I thought it’d be a fun project to make my own set (and it was!). Here’s my guide to making your own. I used a One Drop Project yo-yo because it has a nice flat hub that leaves plenty of room for side caps, but you can use pretty much any yo-yo that’s got concave sides.

How It Works

Using the centrifugal force generated by the spinning of the yo-yo, the spring, acting as the switch, is pulled outward. It makes contact with the positive leads of the LEDs, thus completing the circuit, turning the LEDs on.

YouTube player

Project Steps

Prepare the side cap.

Measure the inner diameter of your yo-yo with a pair of calipers as shown.

Now divide the diameter by 2 to get the inner radius.

Slide the caliper to this number and set the compass cutter to align with the tips of the caliper.

Tighten the knob on the cutter to lock the cutter in place.

Cut out the cap.

Take your plastic sheet and use the compass cutter to cut out the side cap.

Test the cap to see if it will fit into the yo-yo.

Measure the diameter of your lithium battery, divide it by 2 to get the radius, and set the position of the compass cutter to it.

Lightly mark the circumference of the battery onto the cap. We will use this to center the battery later.

Loosen the compass cutter and set it so that the blade is between the circumference of the cap and battery mark.

Lock it back up and make two light marks across from each other. These are for positioning the LEDs.

Use a pen to mark the center points for drilling the holes for the LEDs.

Use a straight-edge and align it to the center point of the cap.

Drill out the #9 holes on your cap.

The #9 drill bit makes holes into which 5mm LEDs can be press-fitted.

Assemble the cap.

Insert LEDs into holes “bulb” first. Make sure the longer (positive) leads are both facing the same direction and the shorter (negative) leads as well.

Bend the negative leads to match the picture. Make sure they are in contact with each other.

Notice that the leads are passing through the area where the battery will sit.

Apply hot glue to the cap in two places as shown in the picture and press the negative side of your battery onto the glue, making sure the negative leads touch the negative side of the battery.

Make your spring.

First strip the enamel coating off your magnet wire by folding a piece of sand paper in half with the grit facing in and running about 3 inches of wire between the grit.

Sand the wire until you see the bare copper. Make sure not to sand too much or else the wire will break.

Then tightly wrap the wire around a small round tube such as the ink cartridge of a ball point pen, a small screwdriver, etc.

Wrap wire 5 times around and cut off the spring.

Bend the positive leads to match the picture. Make sure to have enough room for your spring.

Cut a piece of aluminum insulation tape and wrap it around both leads.

Tape your spring down with aluminum tape.

Adjust the spring to sit as close as possible to the positive leads but without touching them. Pliers come in handy.

Tape on a piece of double-sided tape onto the battery, stick it to your yo-yo and you’re done!

You’re done! Try out your yo-yo and see if the LEDs light up.

Troubleshooting

LEDs are not turning on when I throw my yo-yo.

Move the spring close to the positive leads. Check the polarity of the LEDs (+ to + and – to -).

LEDs stay on after use.

Move the spring slightly farther back, away from the positive leads.

Conclusion

Troubleshooting:

If the LEDs are not turning on when you throw your yo-yo, move the spring close to the positive leads. Also, check the polarity of the LEDs (+ to + and - to -).

If the LEDs stay on after use, move the spring slightly farther back, away from the positive leads.

This project first appeared in MAKE Volume 22, page 113.