spud gun opener

The potato cannon, a.k.a. the spud gun, is a popular and very entertaining amateur science project. It’s simple to make, and few devices offer such bang for the buck. You can use the Night Lighter both day and night, but when it’s dark, the clear PVC provides an excellent view of the interior ballistics. Also, the stun gun gives better performance than weaker sparks from piezoelectric or flint/steel igniters. It’s fun both to fire and simply to watch in action.

A basic spud gun can be built with plain, white PVC for less than $25. The Night Lighter costs more, but I scrounged leftovers from plastics suppliers and built mine for less than $50. After mastering basic gun construction, the intrepid potato cannoneer may want to design and assemble more complex and artistic devices.

Project Steps

Cut the pipes.

Note on PVC: Used mainly in the food-processing industry, transparent PVC is available from industrial plastic suppliers such as Harrington Plastics or Ryan Herco. You can also order it from http://www.mcmaster.com. Transparent PVC is generally expensive, but you might find reduced-price remnants at plastics suppliers or food-processing companies. Also be sure to use Schedule 40 grade for all PVC fittings.

Measure and mark a cutting line 14” from one end of the 3”-diameter PVC pipe. Use the hacksaw to cleanly and squarely cut the pipe. This will be the cannon’s combustion chamber. Then measure, mark, and cut a 36” length of the 2”-diameter PVC pipe. This will be the cannon’s barrel.

Taper the end of the gun.

Use a file or a drill and sanding attachment to taper one end of the long 2”-diameter pipe, so that it forms a sharp edge. A clean, sharp edge is important, since it should cut the perfect-sized potato plug projectile as you ram the potato into the muzzle of the gun.

Warning: When PVC gets hot, it releases poisonous chlorine gas. Perform this step in a well-ventilated area.

Drill holes for electrodes and attach them.

Four inches from one end of the 3”-diameter pipe, drill a slightly undersized hole for the ¼” bolt. Drill a second hole directly opposite the first hole, 4” from the end.

Screw in the 2”-long bolts, with nuts attached (2 per bolt), into the holes in the 3” pipe. The nuts go outside the barrel. The bolts should tap themselves into the softer plastic, but don’t over-tighten or you’ll strip the PVC. Position and adjust the nuts as needed so there is a 1/4” gap between the bolt ends inside the barrel.

The 3” pipe will contain the fuel and the spark, and act as the combustion chamber. This is the spark gap that will ignite the fuel, firing the cannon.

Solvent-weld the PVC.

Warning: To prevent leaks and weak spots where the parts are joined, the solvent welding must be done properly. Meanwhile, the primer and cement are toxic and flammable, so you need to work in a well-ventilated area, keep the chemicals away from open flames, and follow all safety precautions on the labels.

Inspect parts. Check the 3” pipe ends and 3”-to-2” reducing connector for cracks, dirt, and abrasion, and remove any plastic burrs with a knife. Don’t use damaged PVC pipe or fittings.

Weld parts. Following the procedure at right, solvent-weld the 3”-to-2” reducing connector to the end of the 3” pipe closest to the electrode bolts. Then join the unthreaded side of the female adapter to the other end of the 3” pipe, and attach the 2” barrel to the narrow end of the 3”-to-2” reducing connector.

Let the cannon dry for several hours in a well-ventilated area before using. You don’t want to fire it while the solvents are wet and flammable.

Screw the 3” PVC end plug into the back of the chamber after drying.

Wire the ignition.

Note: Depending on the make and model of the stun gun, you may need to modify these directions and connect the wires in other ways, such as with wire nuts or soldering.

Test-fit butt connectors. Using a sharp utility knife, remove excess insulation from each crimp-on butt connector. With the stun gun turned off, test-fit the trimmed ends of the connectors over the gun’s main electrodes. These are the twin electrodes that point forward, rather than toward each other, and we’re hooking these up to our ignition wires, in order to bring the spark into the combustion chamber.

Prepare ignition wires. Cut the wire into two, 1’ wires. These are the ignition wires. For each, attach a crimp-on spade to one end and the untrimmed end of a butt connector to the other end.

Attach ignition wires to stun gun electrodes by crimping on the modified butt connectors.

Cover the stun gun test leads (inboard electrodes) with wire nuts cut down to size, or other high-voltage insulators. Insulate all exposed metal areas of the ignition path on the stun gun and bolt electrodes, with electrical tape or silicone glue. It’s easy for electricity to find its way underneath any insulation gap at the base of the electrodes.

Note: Wire nuts need to be trimmed to fit onto the test electrodes.

Attach the igniter.

Attach the stun gun body to the rear of the chamber using 2 hose clamps. Do not over-tighten. Position the stun gun body at a 90° angle to the axis of the electrode bolts.

Attach ignition wires to electrode bolts, securing the spade connectors underneath the bolt head or between the nuts. You may have to bend the spades to widen them enough to fit around the bolt.

Cover bolt connections with globs of silicone sealant. To further insulate, wrap the whole ignition area with bubble wrap, and tape down. The stun gun operates at such high voltage that the wrap still may not completely prevent shocks. Avoid contacting electrodes when operating the cannon. Don’t be the path of least resistance!

Congratulations! Your Night Lighter 36 potato cannon is complete.

Conclusion

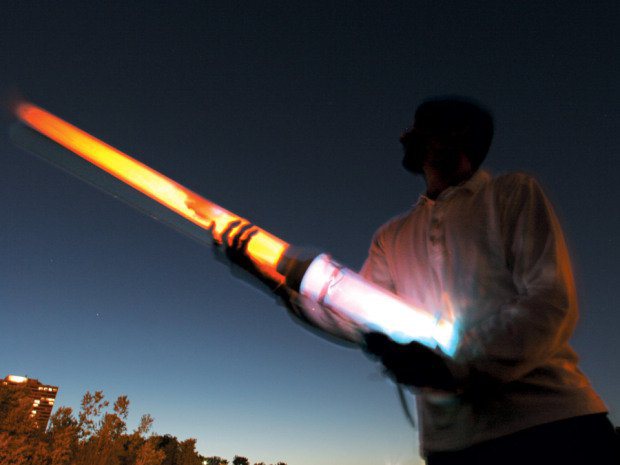
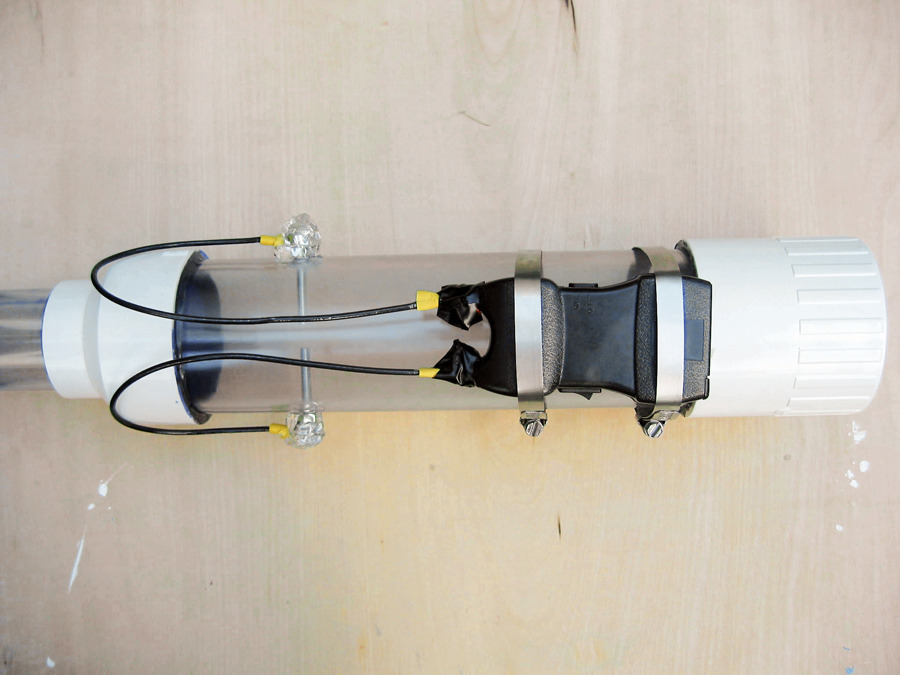
Firing the Night Lighter 36 Potato cannon

  1. Remove the end plug.
  2. Center and push a potato into the cannon, keeping your hand clear of the edge. You may want to wear a leather glove. The muzzle’s sharp edge will cut the potato into a plug that should fit snugly on all sides. Any gaps will reduce performance.
  3. Use the stick to push the potato plug 30 inches down into the barrel.
  4. Direct a stream of aerosol into the firing chamber. Unscented deodorant works well, but check the label to make sure your choice contains hydrocarbons such as alcohol, propane, butane, or isobutane. Start out with a one- to two-second burst, and determine the optimal amount by trial and error.
  5. Immediately replace the end plug and screw it in securely.
  6. Turn the stun gun on, and double-check that the firing area is clear.
  7. Press the stun gun’s ignition button. Enjoy your work. For a tracer, stick a glowstick into the spud.

If you have a misfire, and the projectile is not ejected, carefully remove the end cap, and ventilate the combustion chamber thoroughly.

Maintenance

Aerosol chemicals can gum up the inside of the cannon. Every few shots, clean it out with a rag and cleaner. The residue can also make the end plug hard to unscrew. If necessary, use pliers.

Safety and legality

During construction, don’t take shortcuts or substitute inferior materials. The vapors from PVC cement are flammable, so allow all joints to dry fully before exposing the gun to ignition sources.

When using the potato cannon, exercise extreme caution. Wear eye protection, and check the area in front of you before firing. Never look down the gun's barrel, or point it at anything you don’t want to hit. Excess fluid stays in the chamber and evaporates slowly, so you should always treat the gun as if it can fire. Check frequently for signs of wear, and never operate a damaged gun. Avoid contact with (or proximity to) the ignition path. Stun guns hurt.

PVC is more brittle in cold weather, so don’t use the cannon in temperatures below 60ºF.

Neither the author nor this magazine assumes liability for your spud gun or your actions.

Potato cannons may not be legal in your area (even if it is legal to tote a 12-gauge down Main Street). Check with local law enforcement regarding the rules in your area, and obey them. Also, check the laws regarding stun gun usage.

Editor's note: Author William Gurstelle uses PVC for his Night Lighter 36 and other designs, but some spud gunners believe this is unsafe, since PVC can shatter and is not recommended for piping compressed gases. They advise using materials made out of ABS (with ABS cement), which is more flexible than PVC, but not available in transparent.

Alternatively, you can use Schedule 80 transparent PVC, which is thicker and stronger than Schedule 40, but more expensive.

This project first appeared in MAKE Volume 03, page 108.