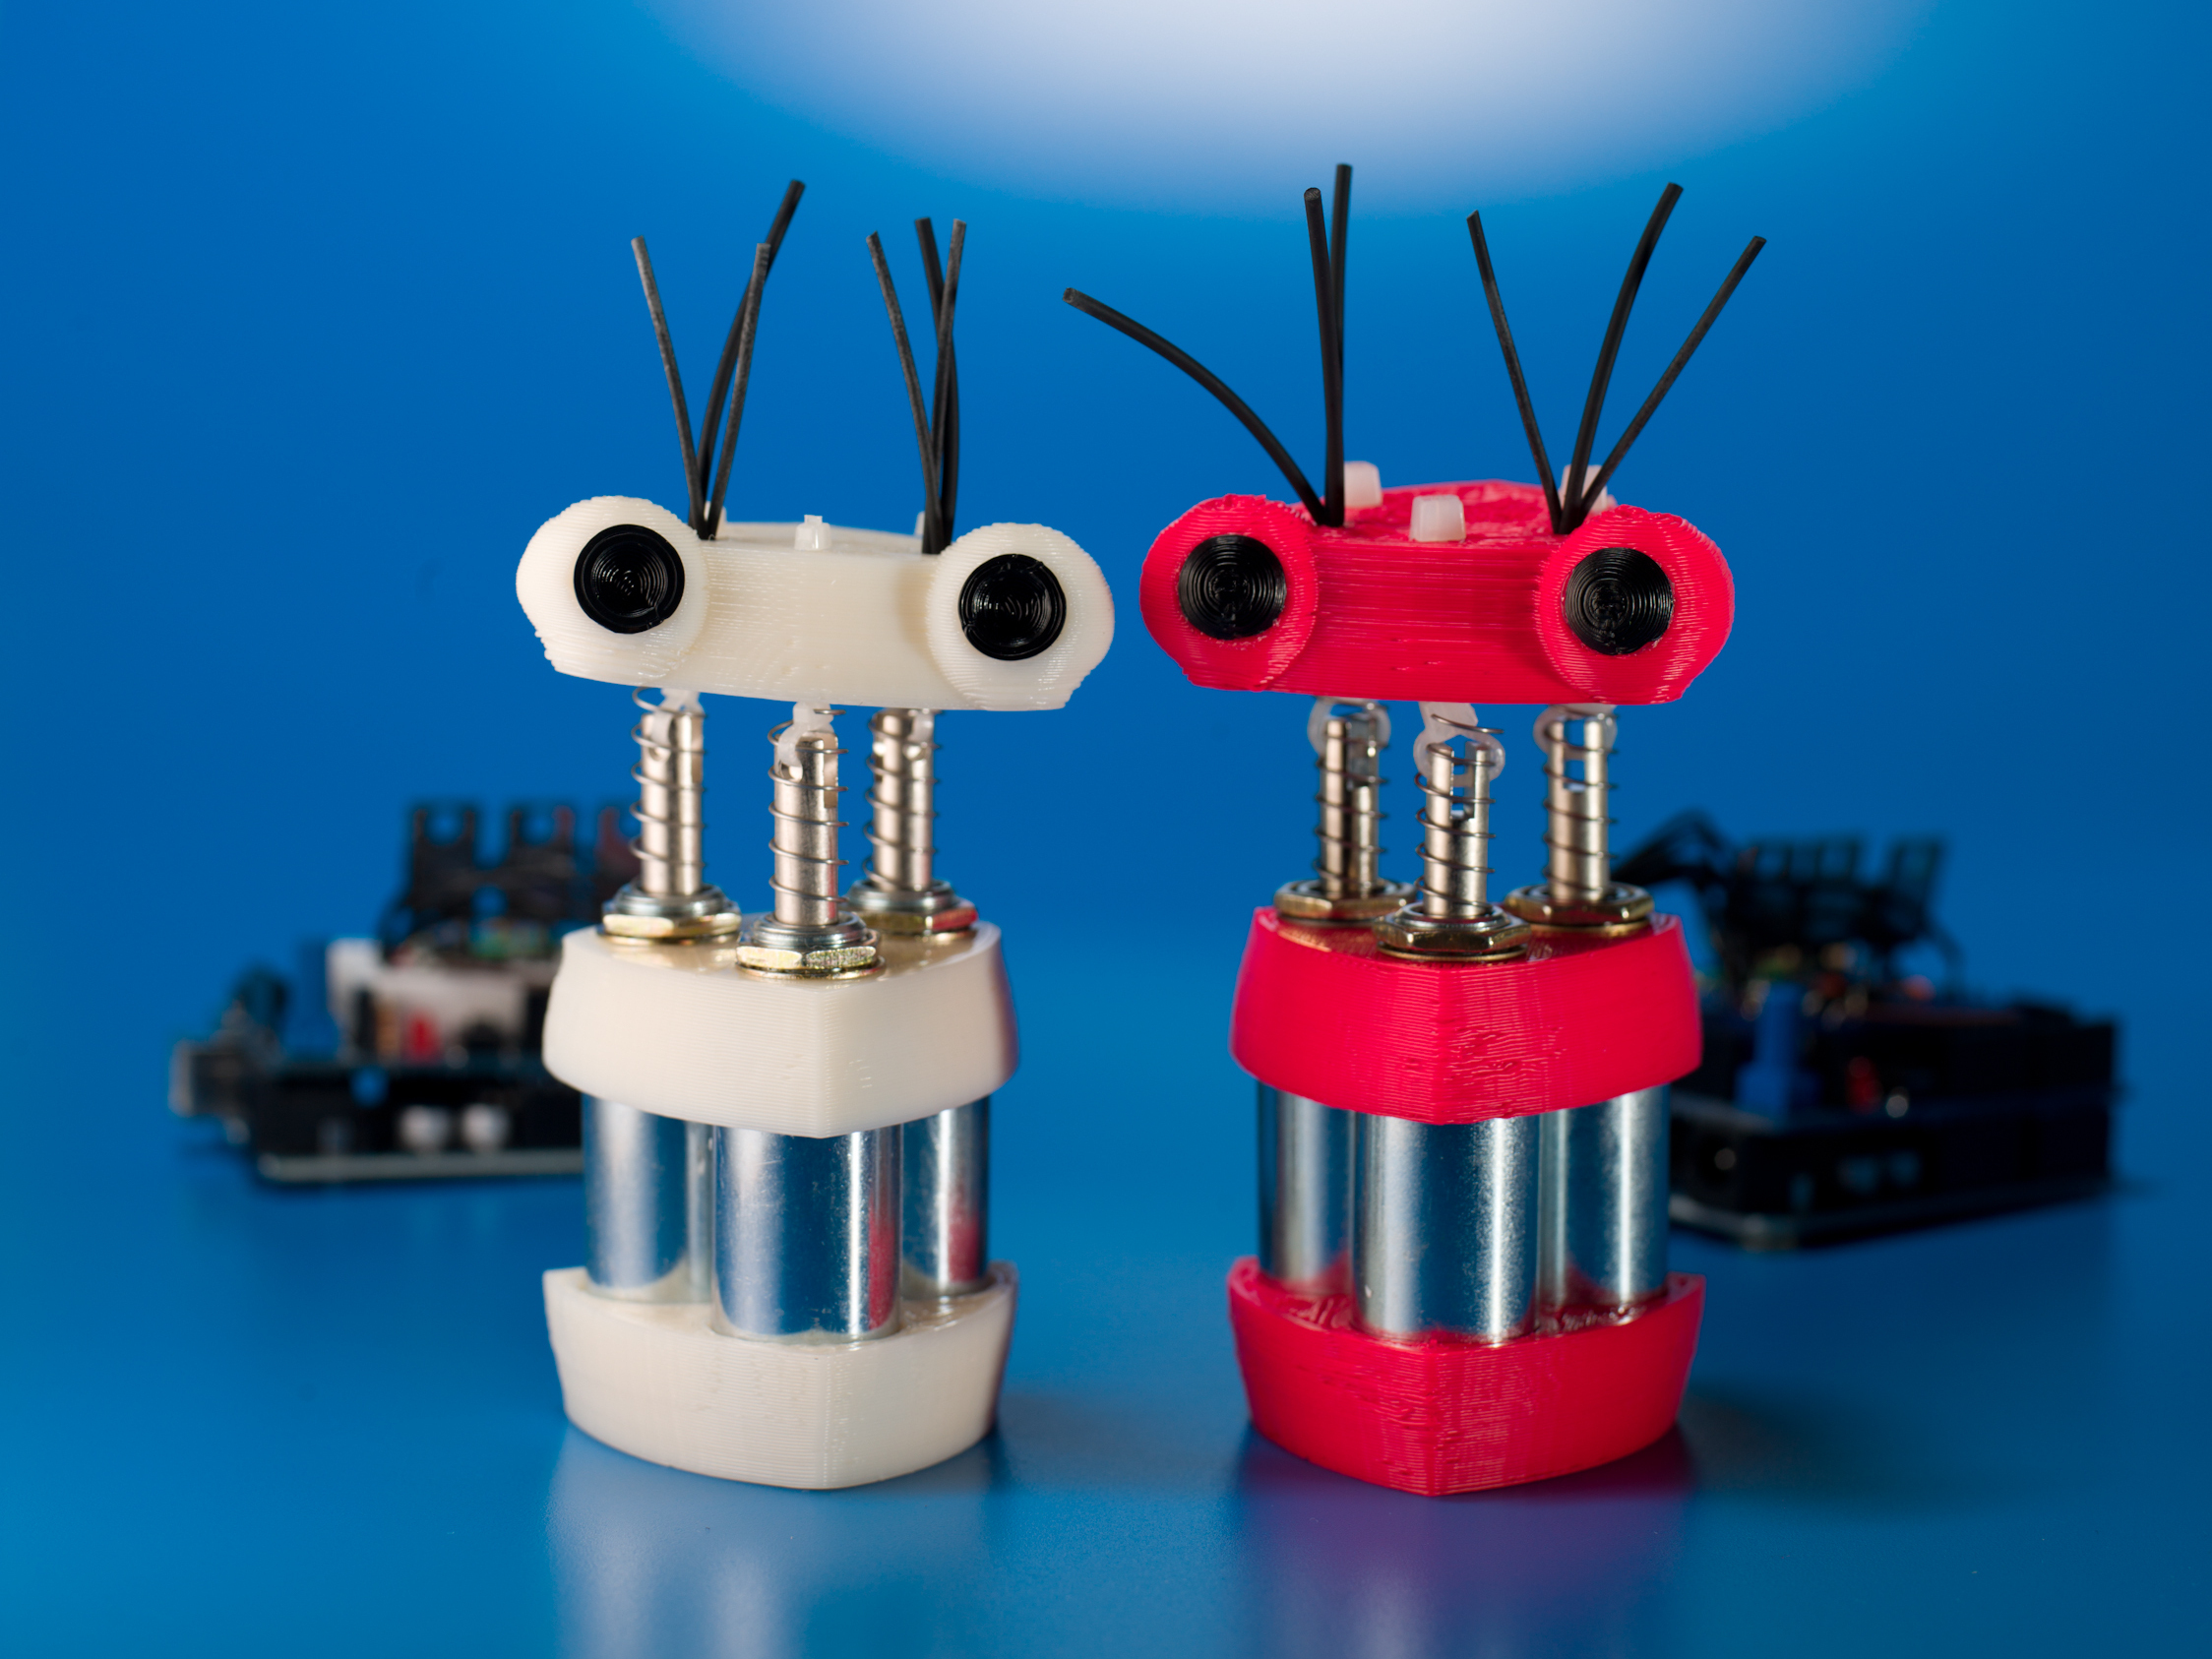
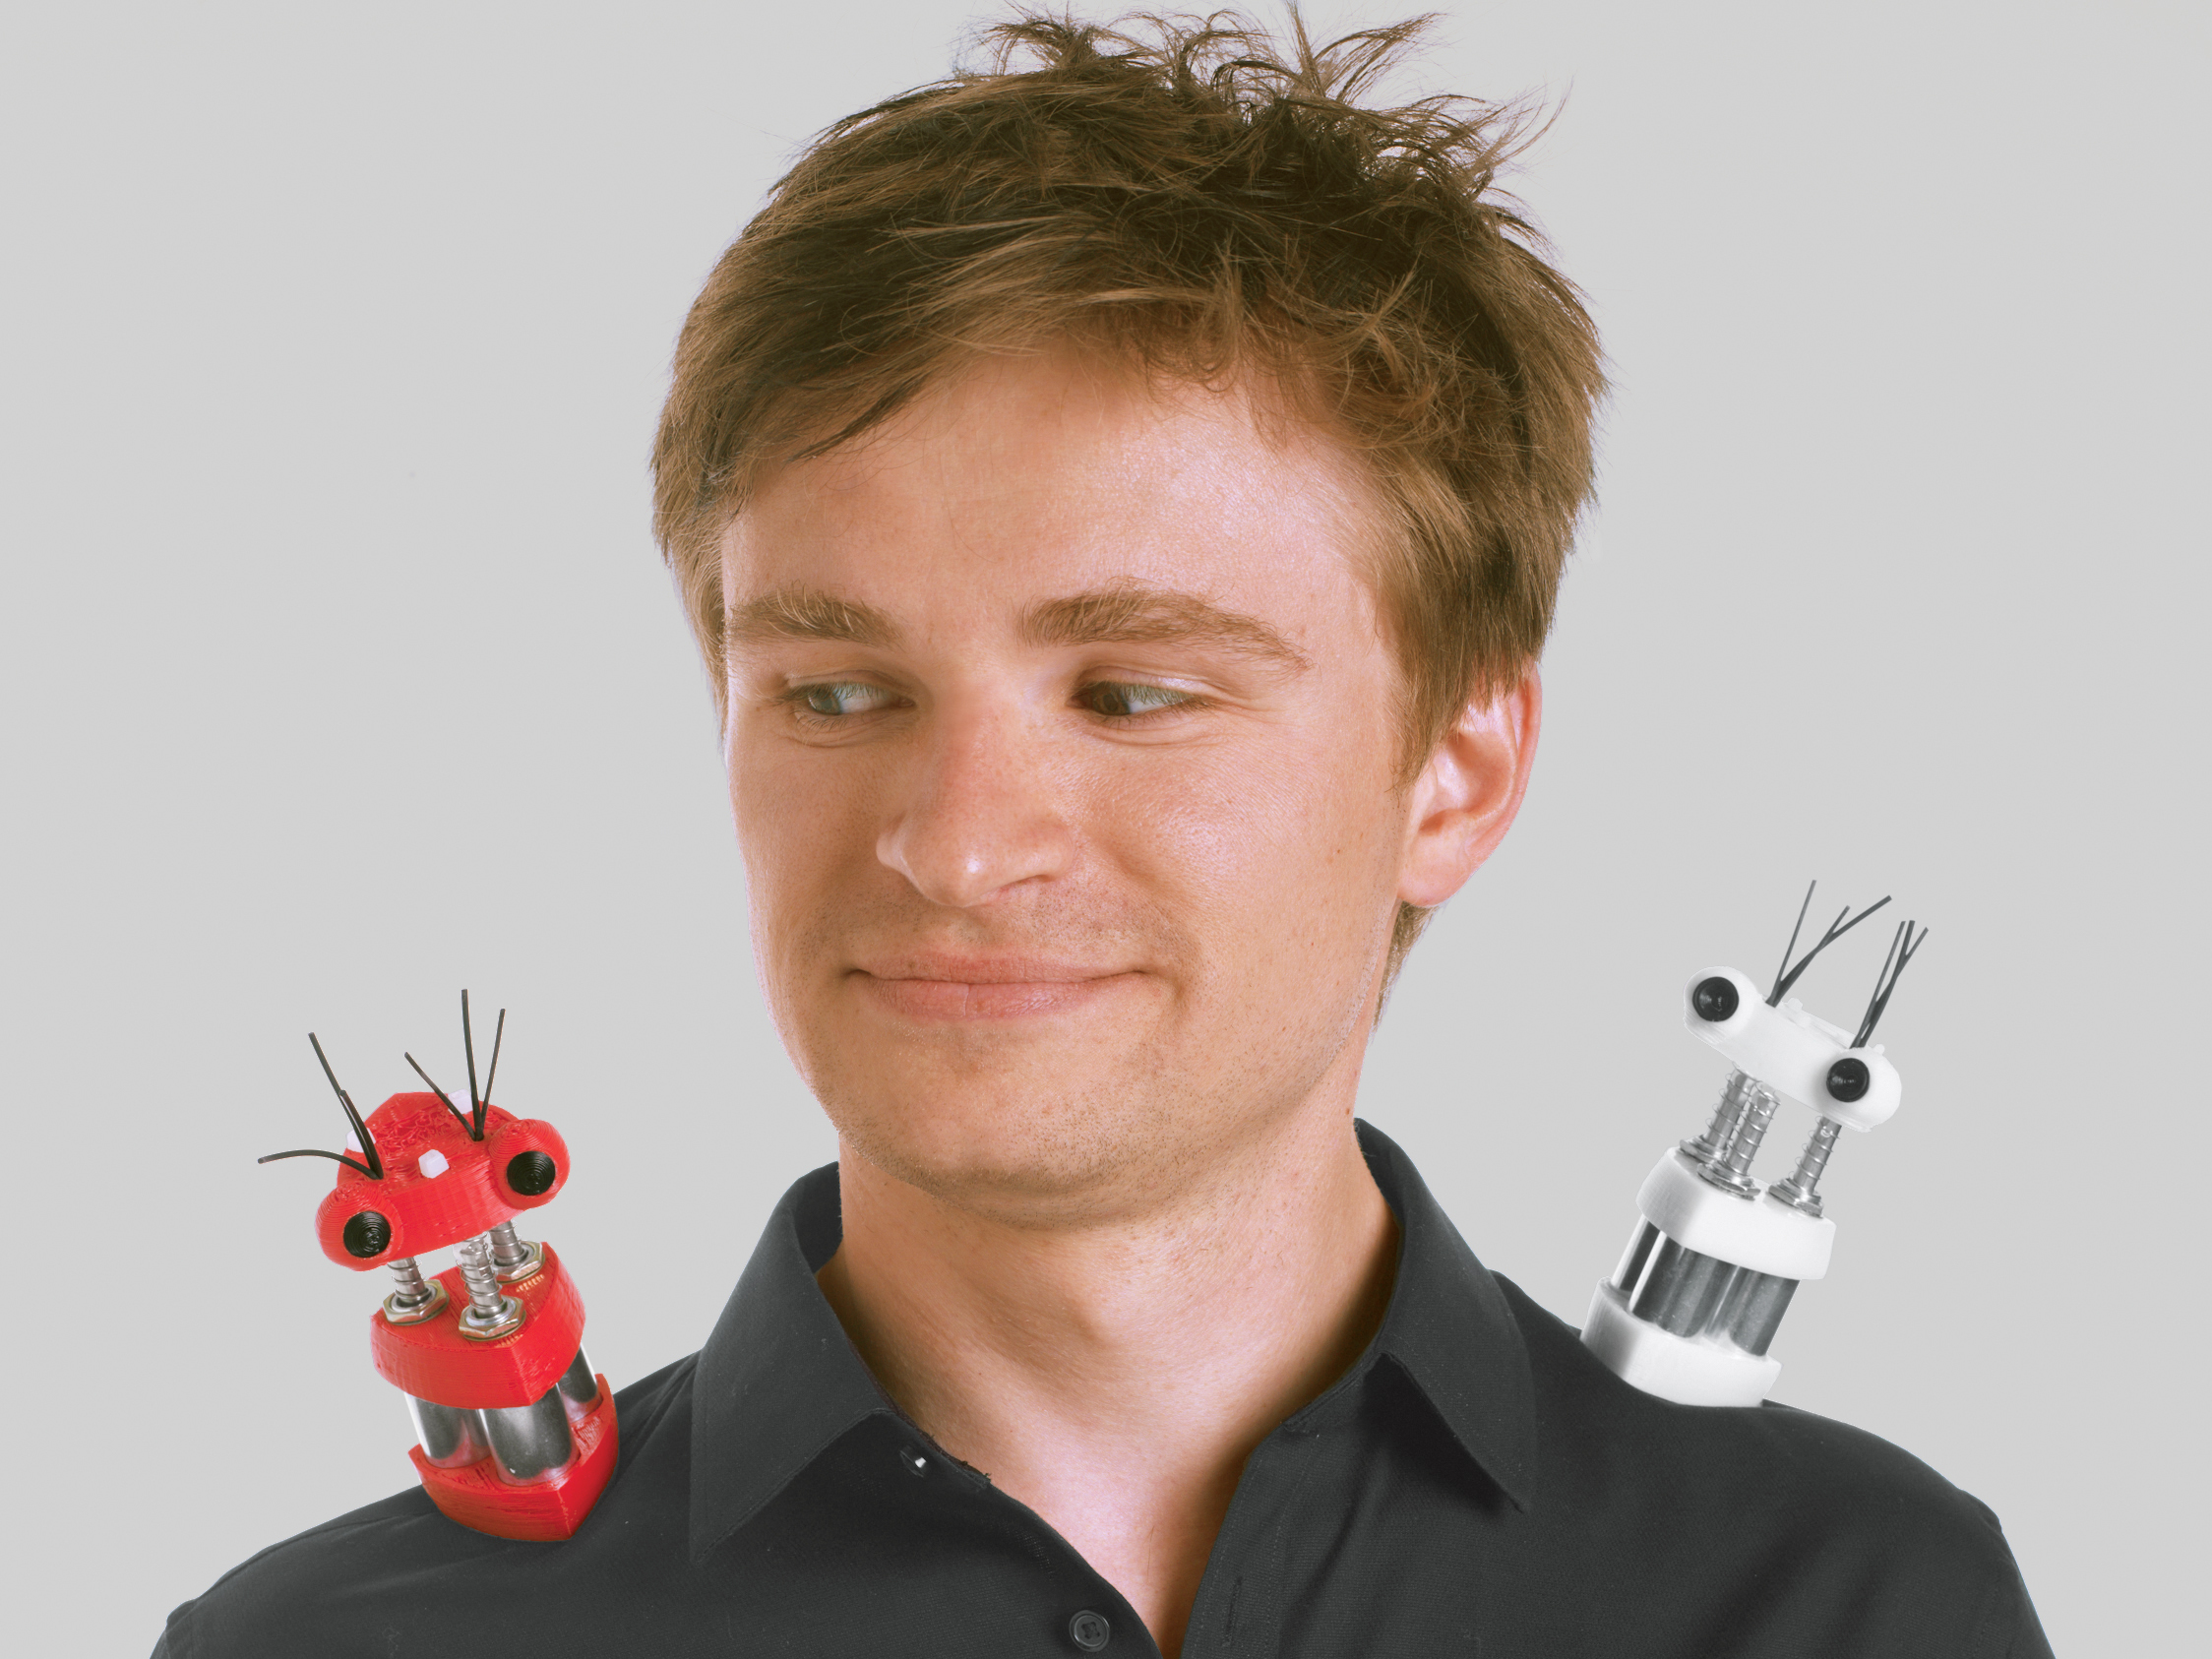
At BeatBots, we believe that dancing is one of the most worthwhile occupations a robot can have. We like making cute characters move in interesting ways, and as you’ll see, this doesn’t require expensive components or complicated programming. For Spazzi here, we decided to forego the rotational motors (servos and steppers) that many robots use. Instead, we went with solenoids, for movement that is fast, linear, and percussive.

We designed our popular teleoperated robot Keepon for research and the rigors of a child-filled playroom, so he’s made from high-end components and custom-machined metal parts. (A toy version, My Keepon, comes out later this year, and a portion of sales will subsidize the distribution of research robots to autism therapy practitioners.)

We designed Spazzi as a bouncy and easy to build robotic character that achieves the same adorable bounciness as Keepon through a simpler mechanism: solenoids and springs controlled by an Arduino microcontroller connected to a computer.

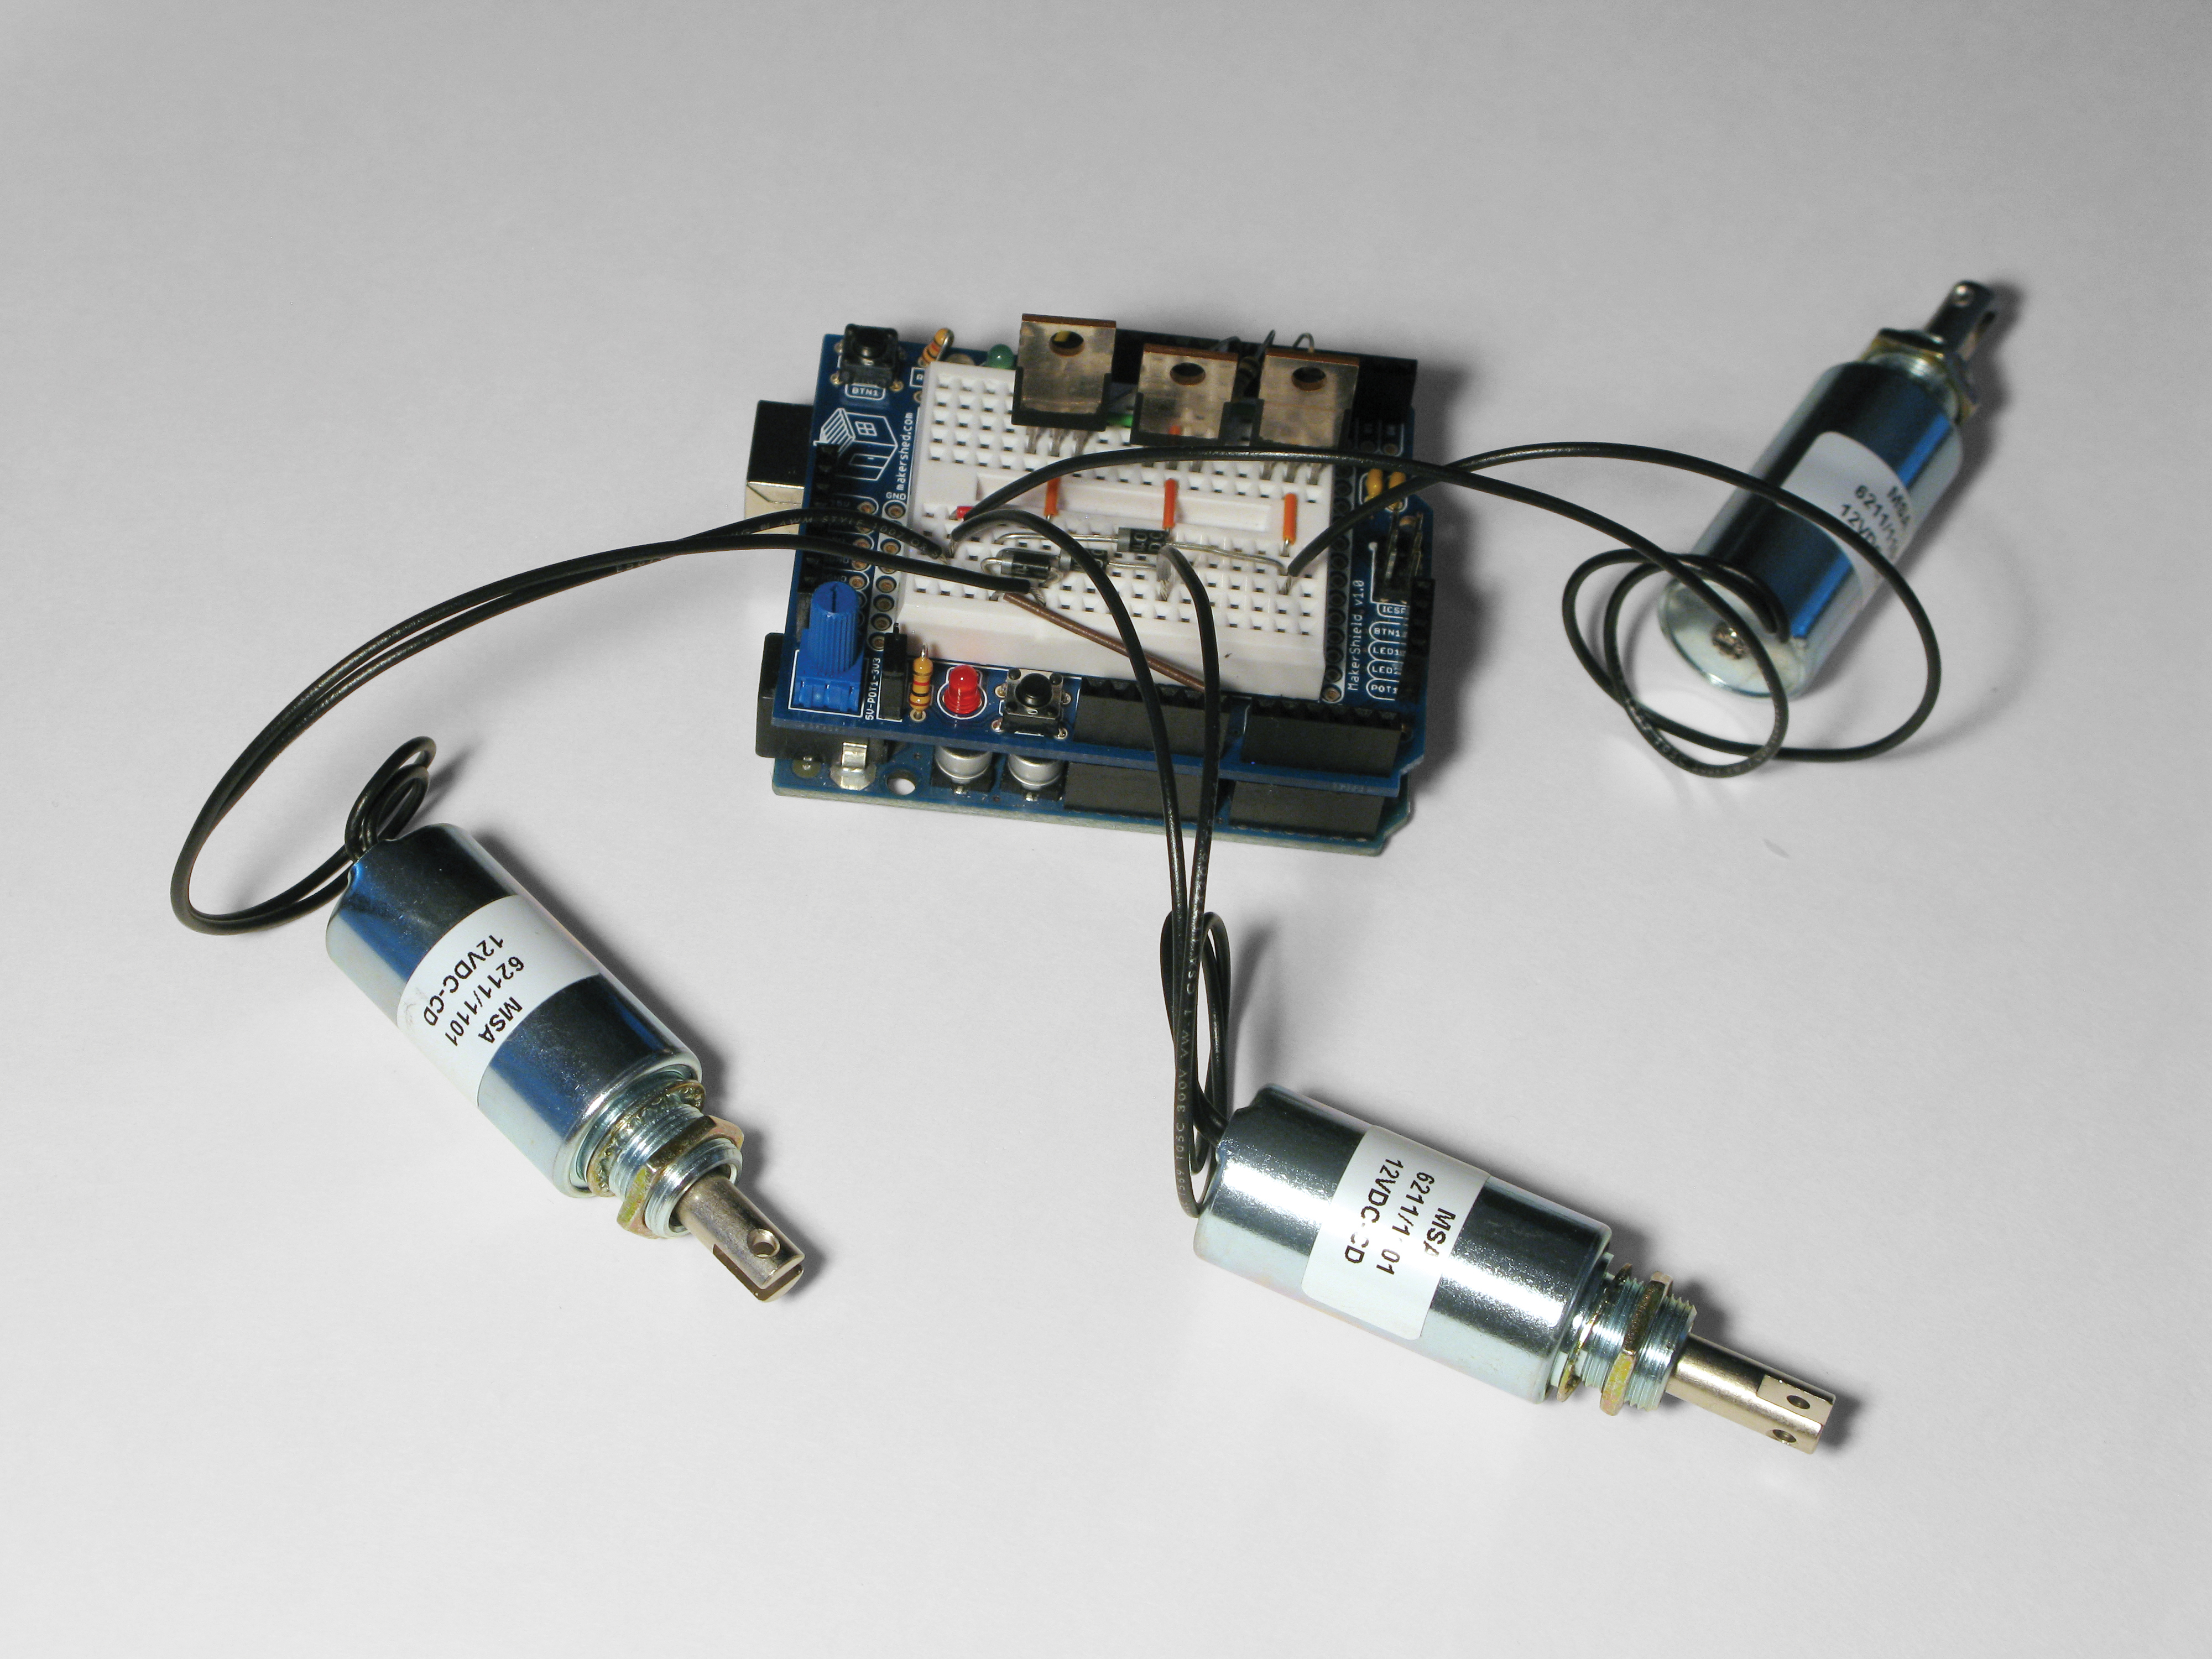
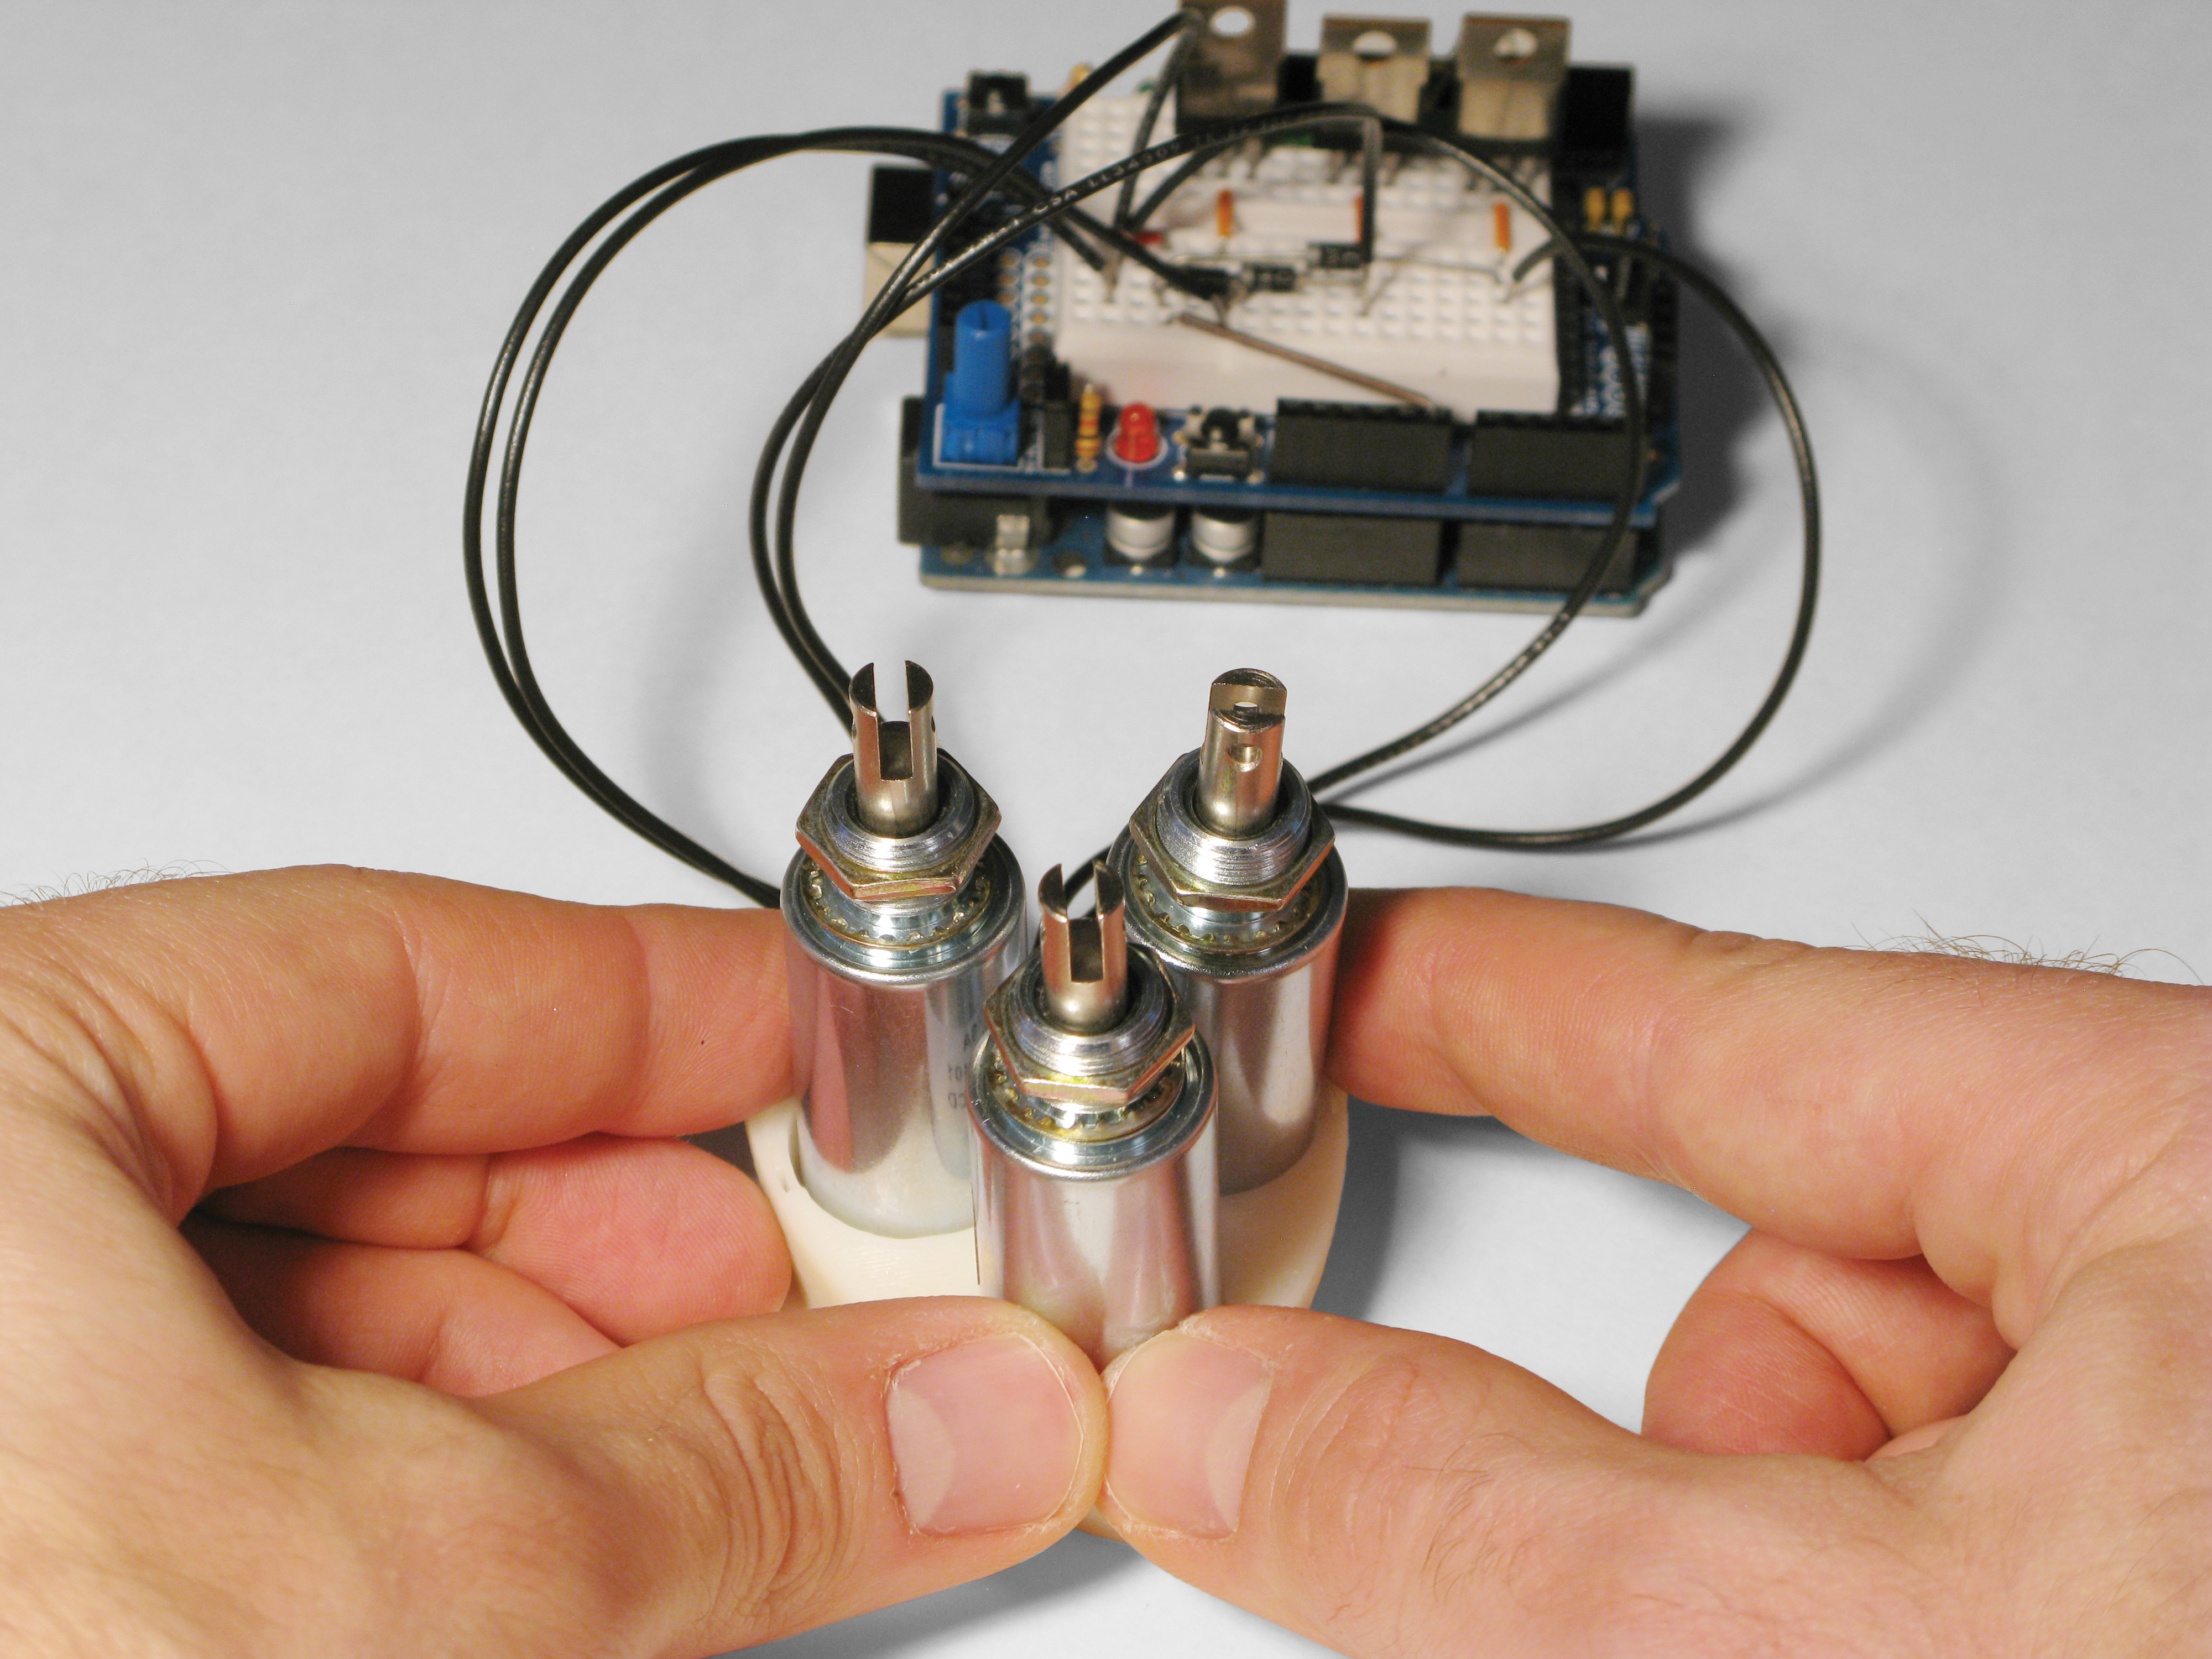
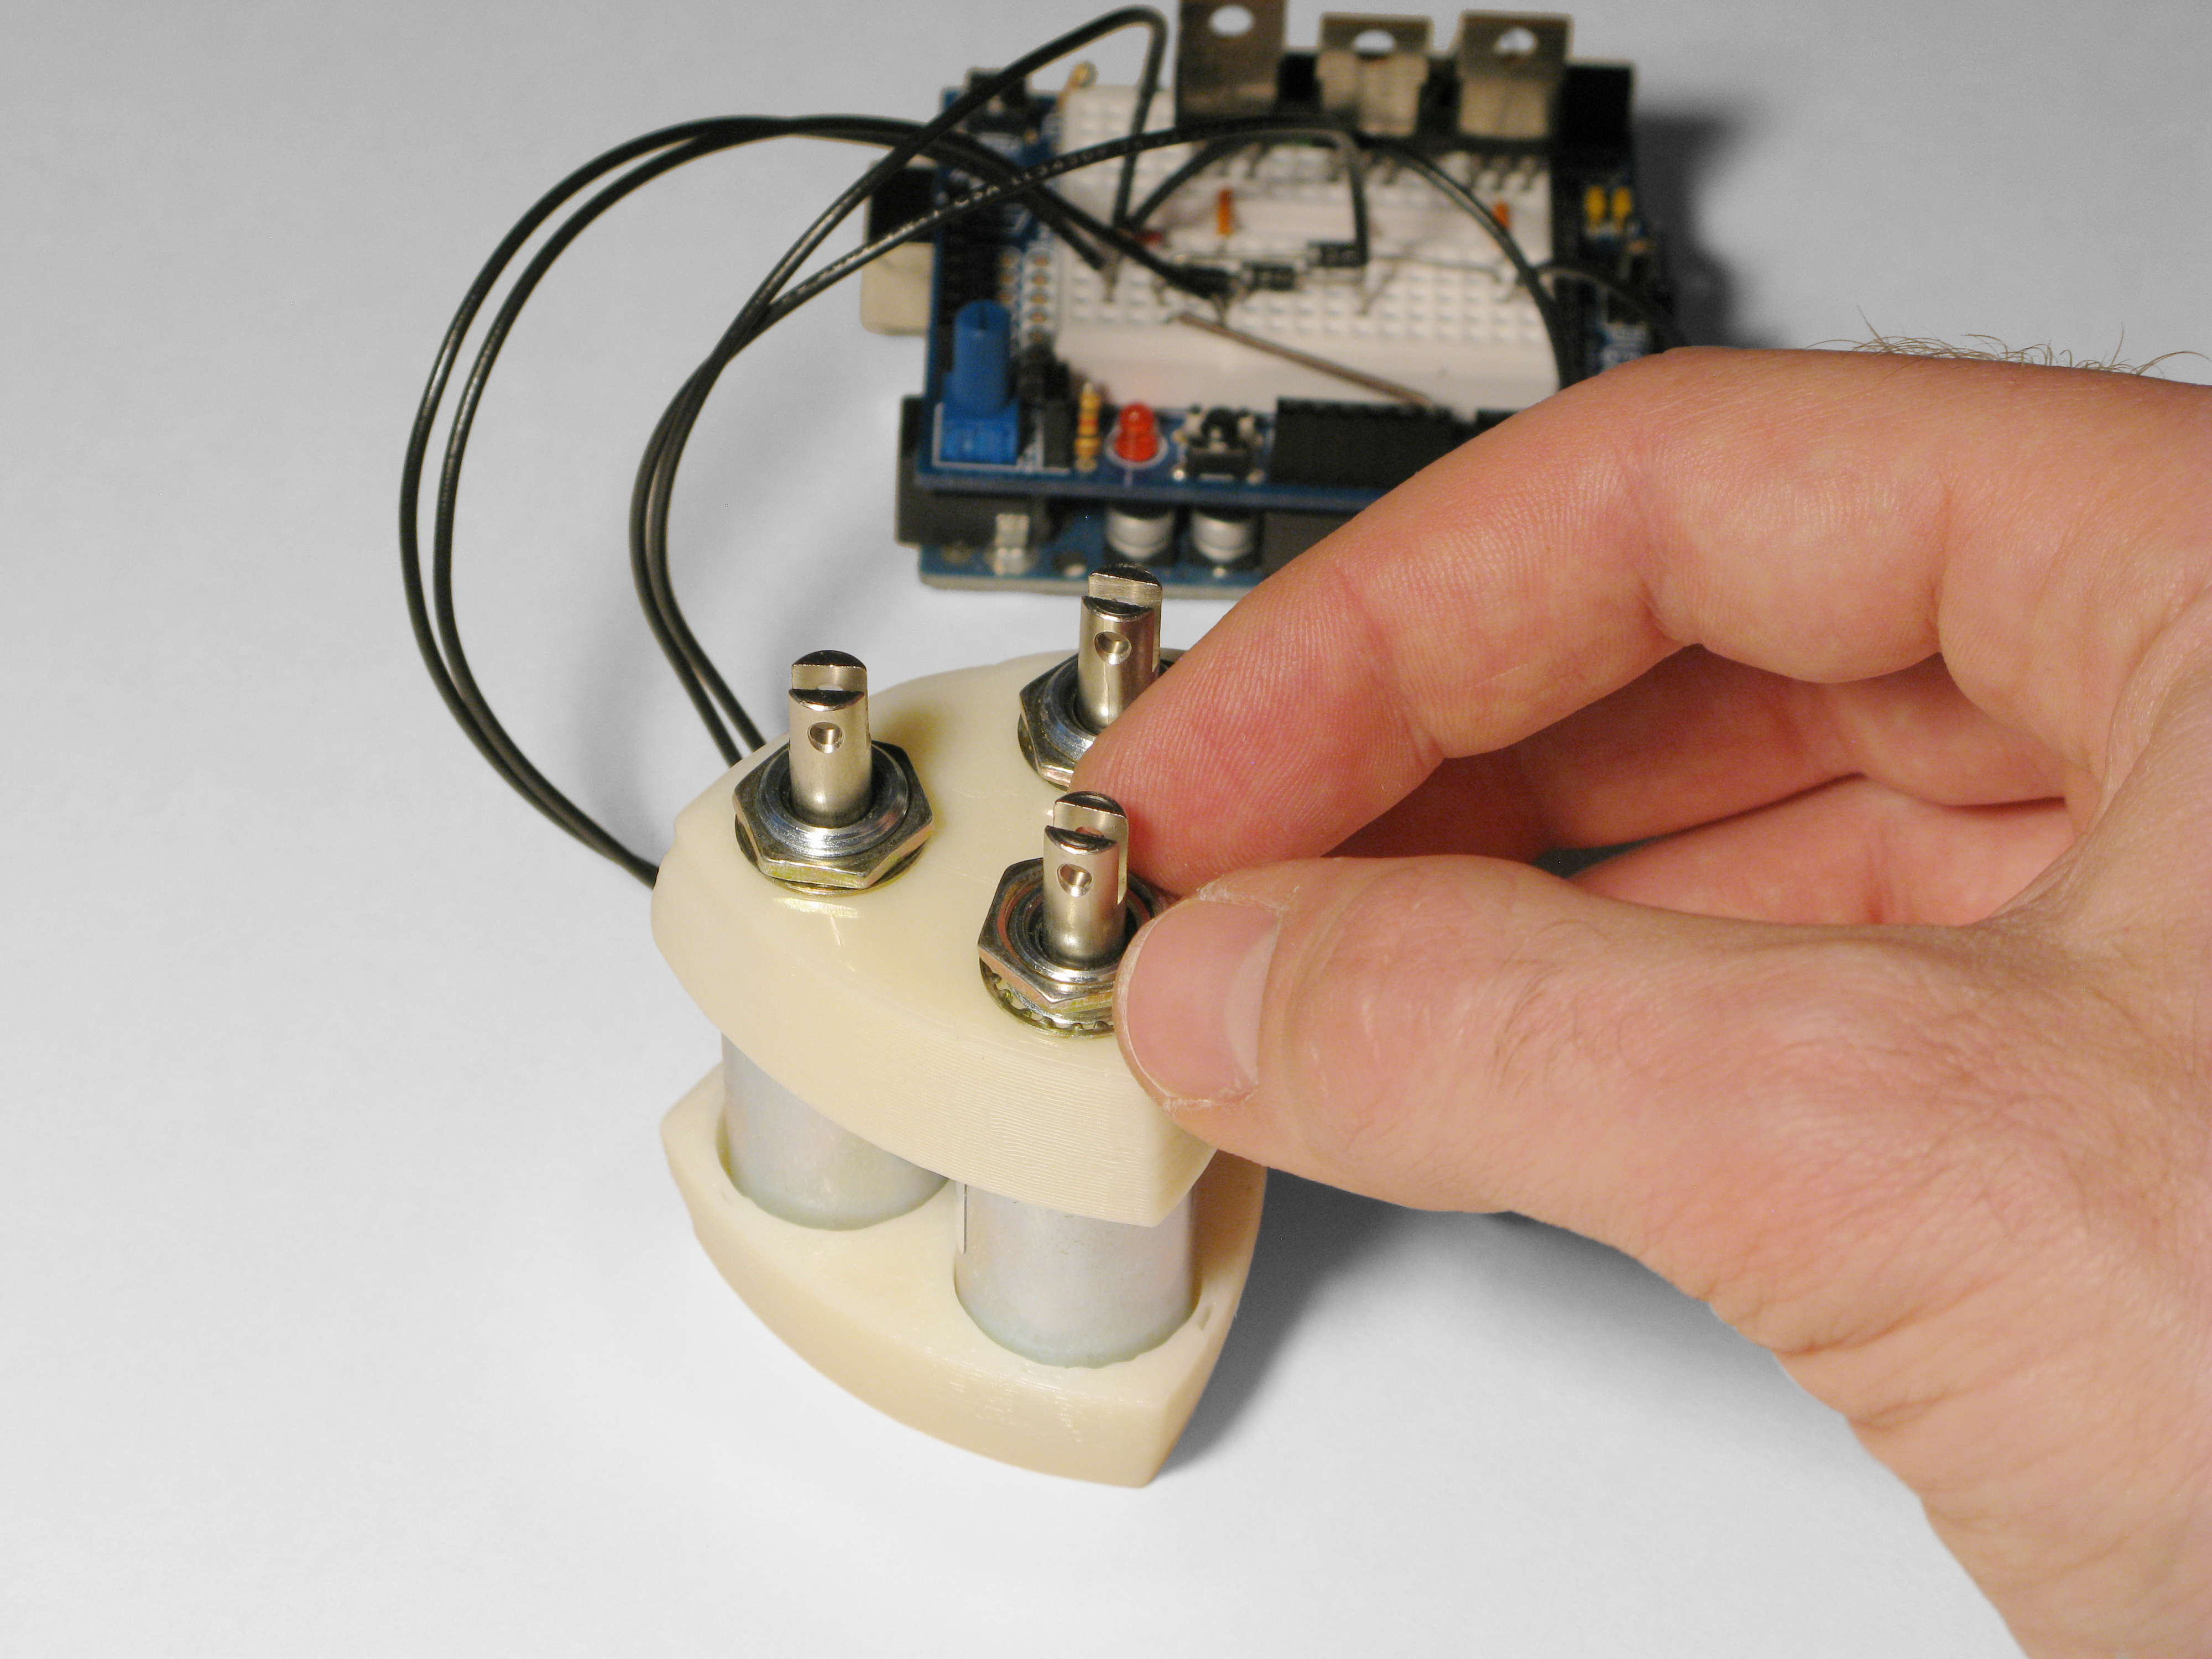
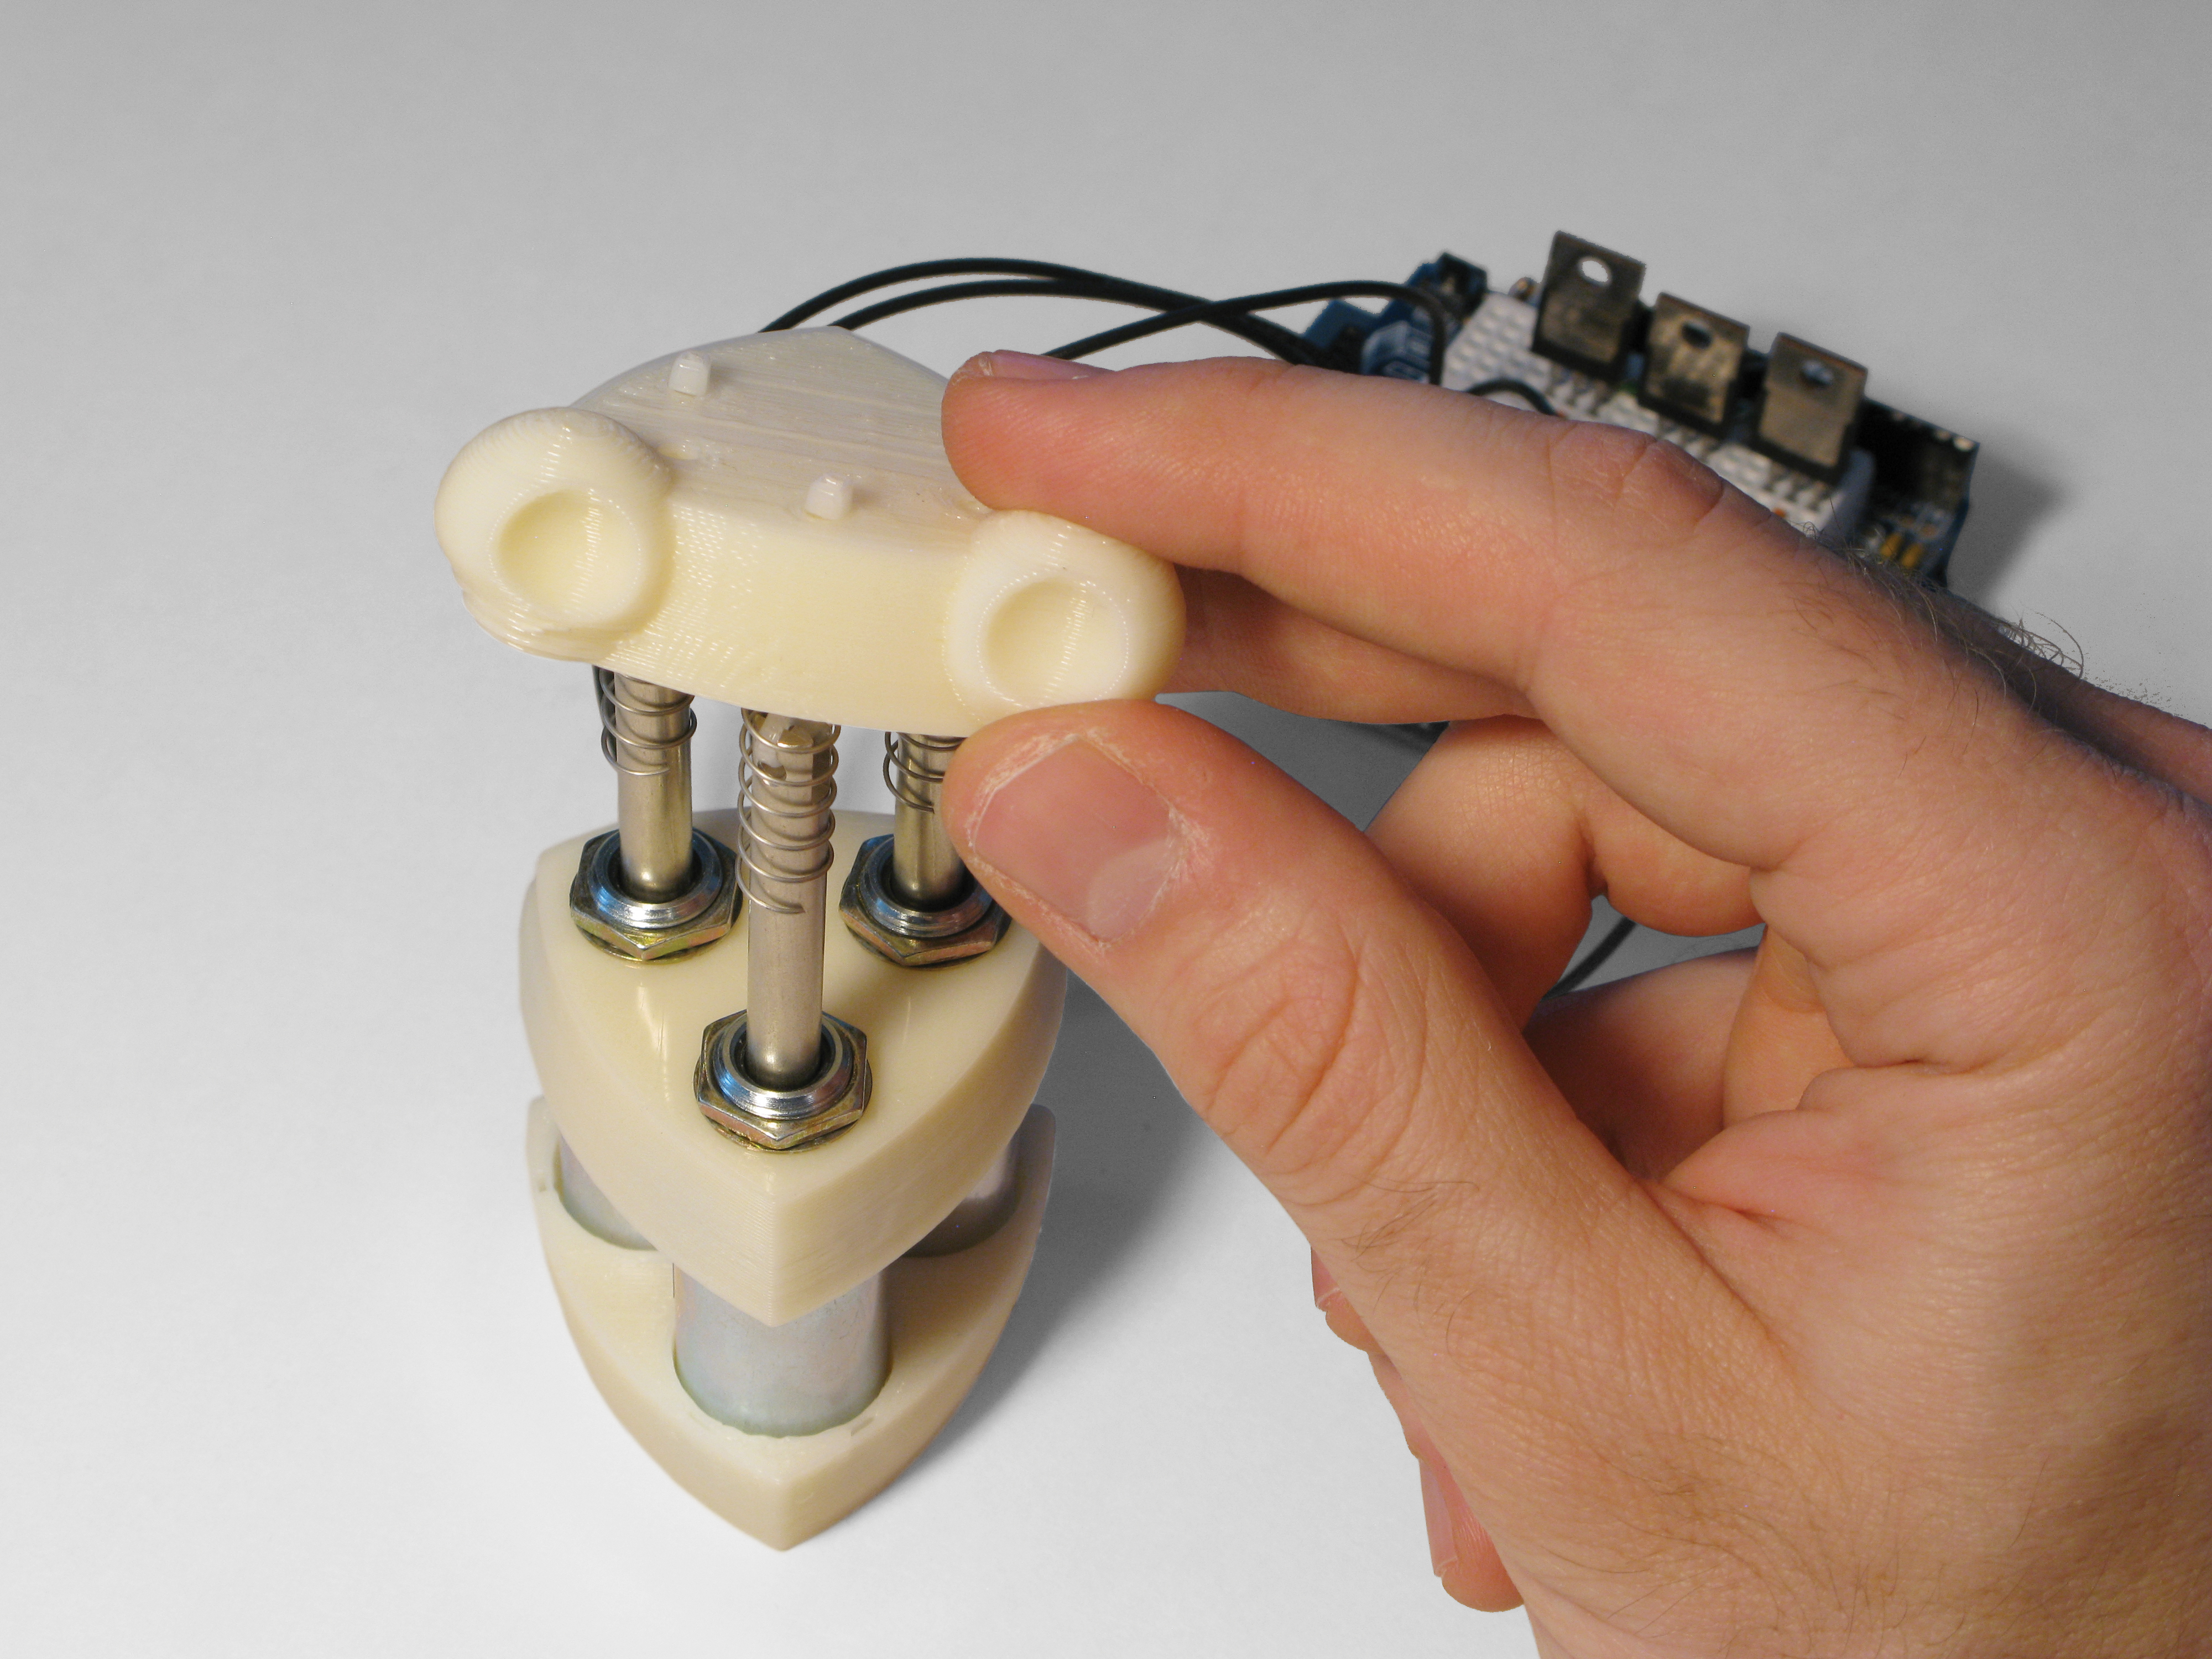
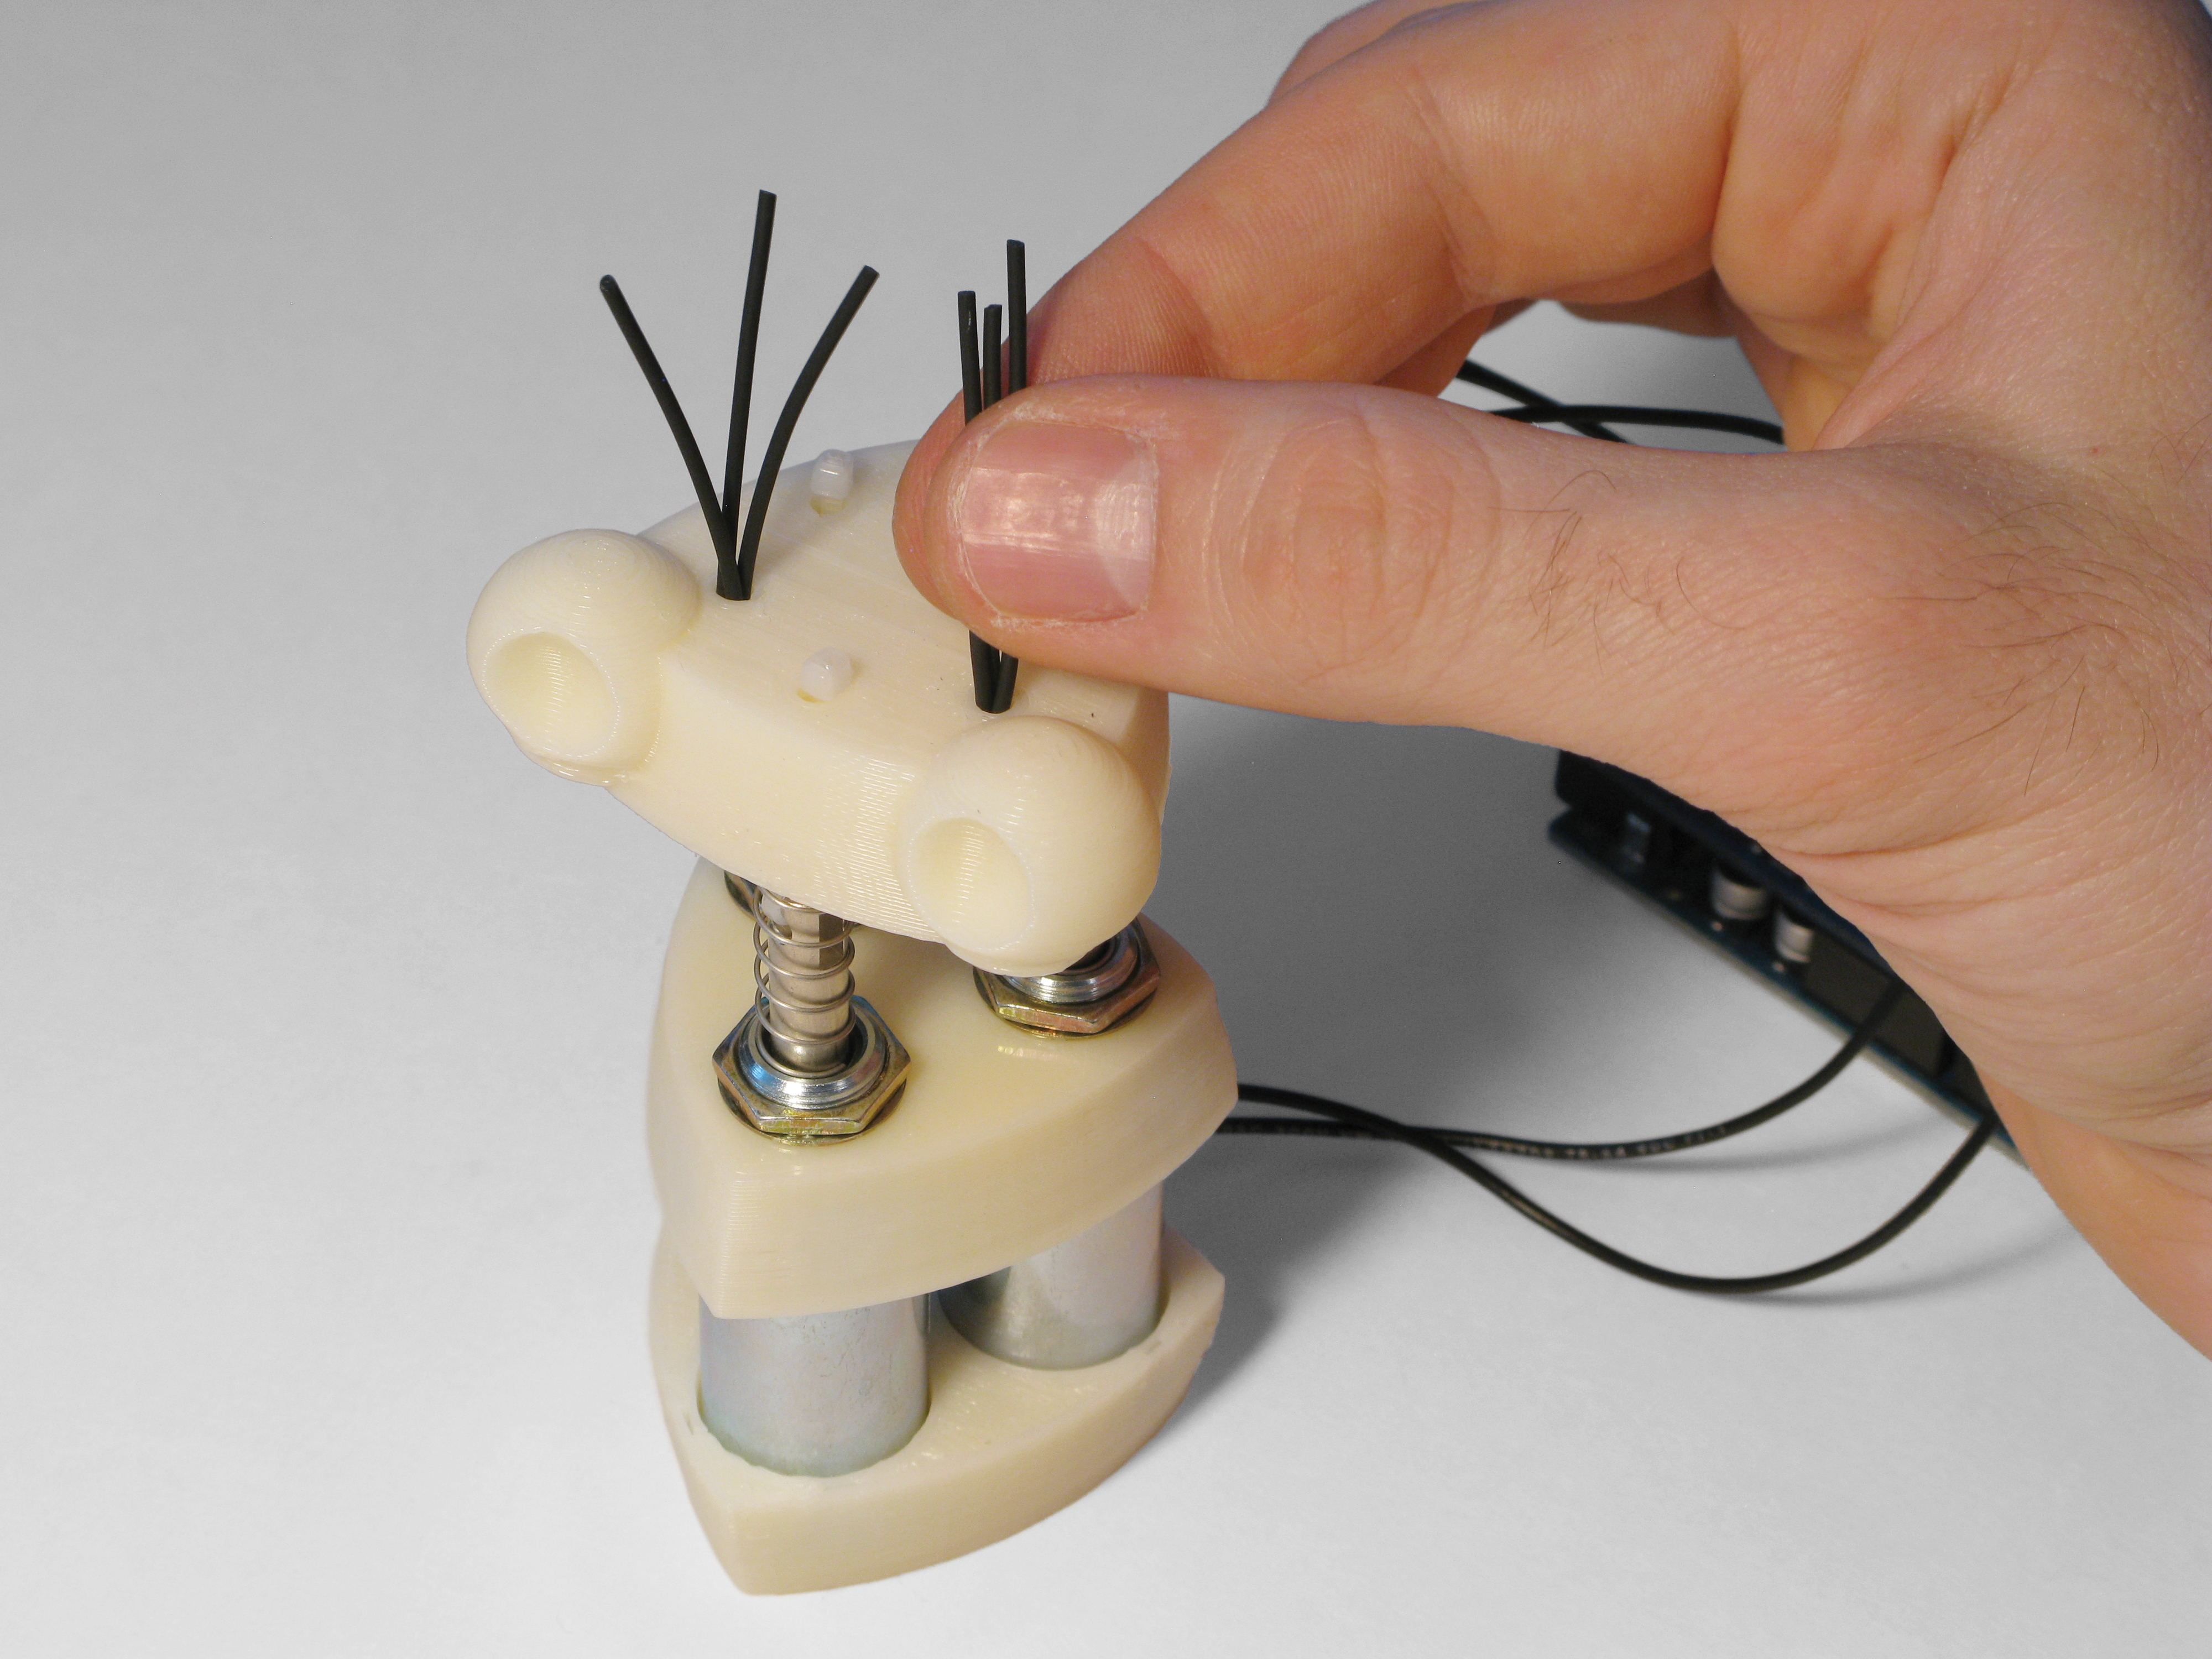
A solenoid is an electromagnet that pulls a rod (or “plunger”) inside its coil when current is passed through. Spazzi’s physical form is extremely simple; for his lower half, 3 solenoids stand parallel to form a triangle sandwiched between 2 plastic parts — a base and a waist. The plungers run up through the top of the waist and hold up the robot’s plastic head, extended by compression springs.

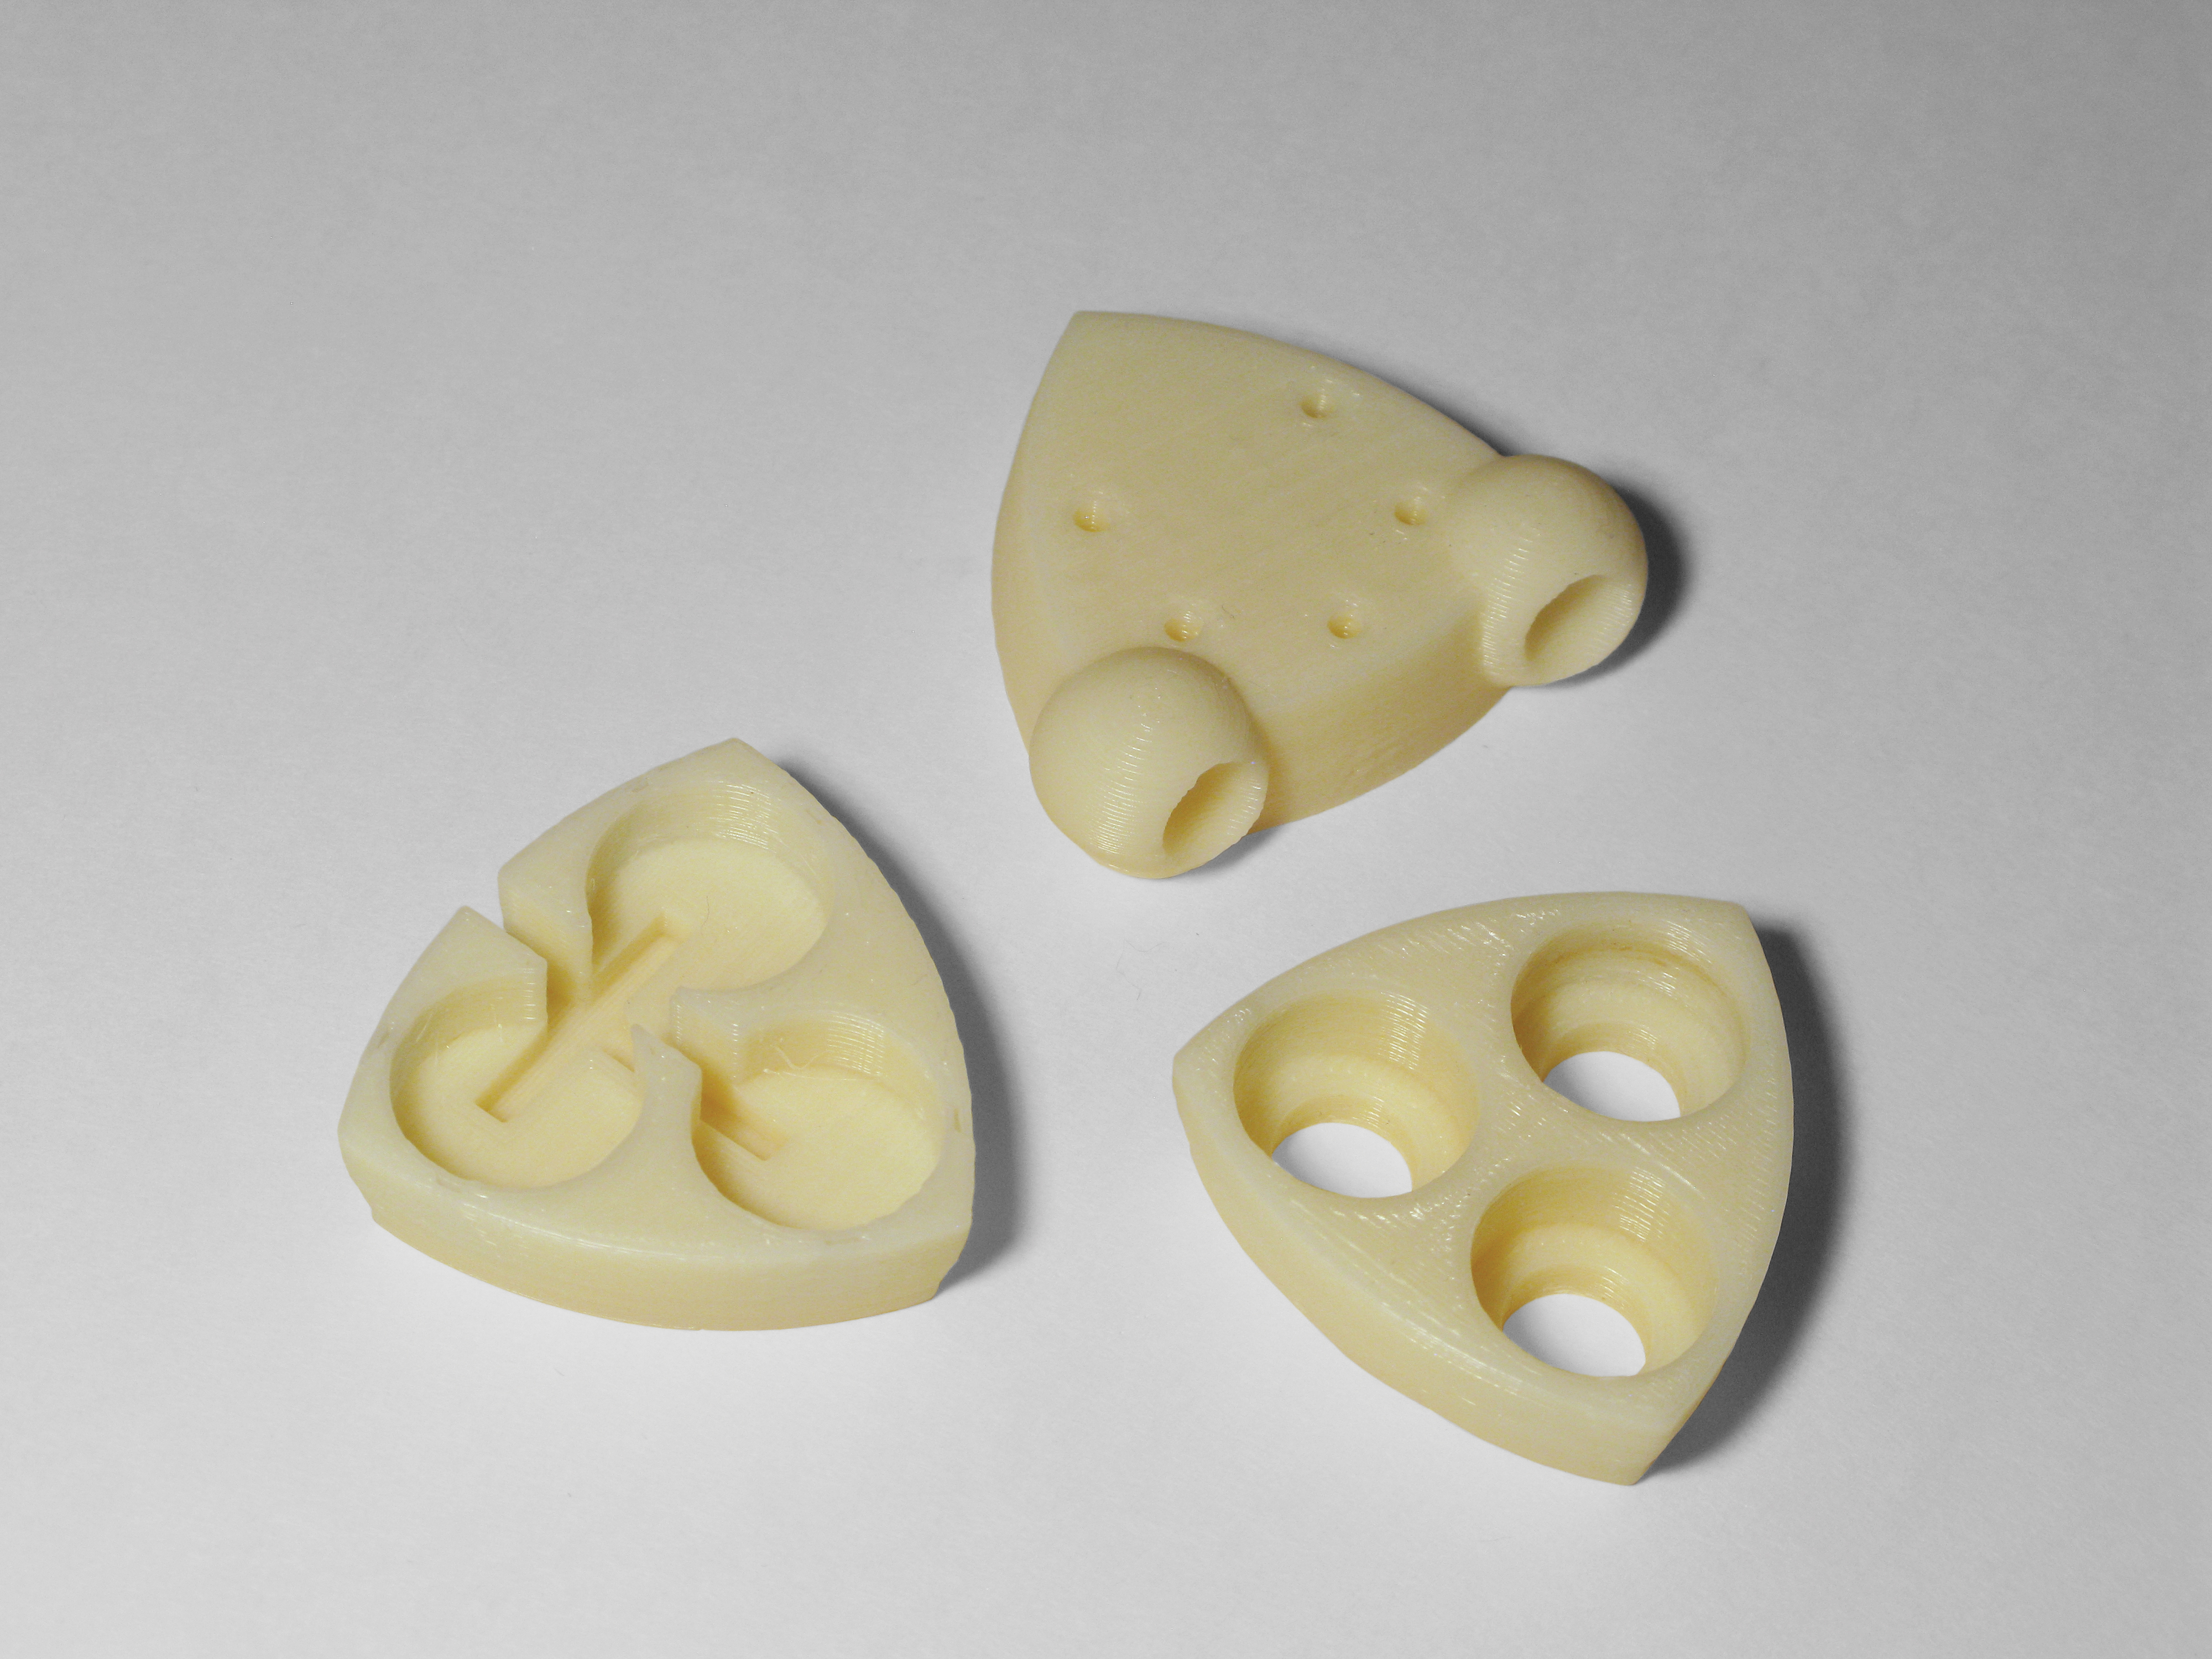
The 3 plastic body parts are based on the Reuleaux triangle — a shape with various interesting properties and uses (search online for more info). I made these parts on a 3D printer, but you could improvise your own body and head parts from any material, including cardboard. The core of the robot is just its assembly of solenoids and springs.

Solenoids are binary: assuming they can draw sufficient power, they are either fully compressed or fully extended. A transistor connected to a digital pin on the Arduino drives each solenoid by supplying 12V from the power supply when its pin is set HIGH. The front solenoid makes the head nod up and down, and the 2 rear solenoids make it lean back to the left or right.

With its 3 solenoids, Spazzi can move to just 8 different positions. But this limited repertoire produces surprisingly rich and varied movement when the activation and frequency of the solenoids are varied over time. This is performed by Max/MSP or Pure Data (PD) software on a computer, which sends on/off commands to the Arduino over a USB/serial port in response to music or other inputs.

Make Spazzi dance with the parts and code listed here, and then after that, you can choreograph his moves however you want!

See http://makeprojects.com/v/27 for recommended suppliers, prices, and other sourcing information.

Spazzi parts and code files (includes Spazzi.maxpat):

https://cdn.makezine.com/make/27/SpazziPa…

https://cdn.makezine.com/make/27/SpazziSo…

NOTE: To save time and money, pick up the MAKE Spazzi Electronics Bundle (item #MSSPZ from the Maker Shed and Jameco: http://www.makershed.com/spazzi, which includes: Arduino Uno microcontroller, MakerShield, mini breadboard, jumper wires, transistors, resistors, and diodes.

What will the next generation of Make: look like? We’re inviting you to shape the future by investing in Make:. By becoming an investor, you help decide what’s next. The future of Make: is in your hands. Learn More.

Project Steps

Assemble the MakerShield according to the instructions at https://makezine.com/go/makershield. Stick the mini breadboard to the center. Install the MakerShield on the Arduino Uno.

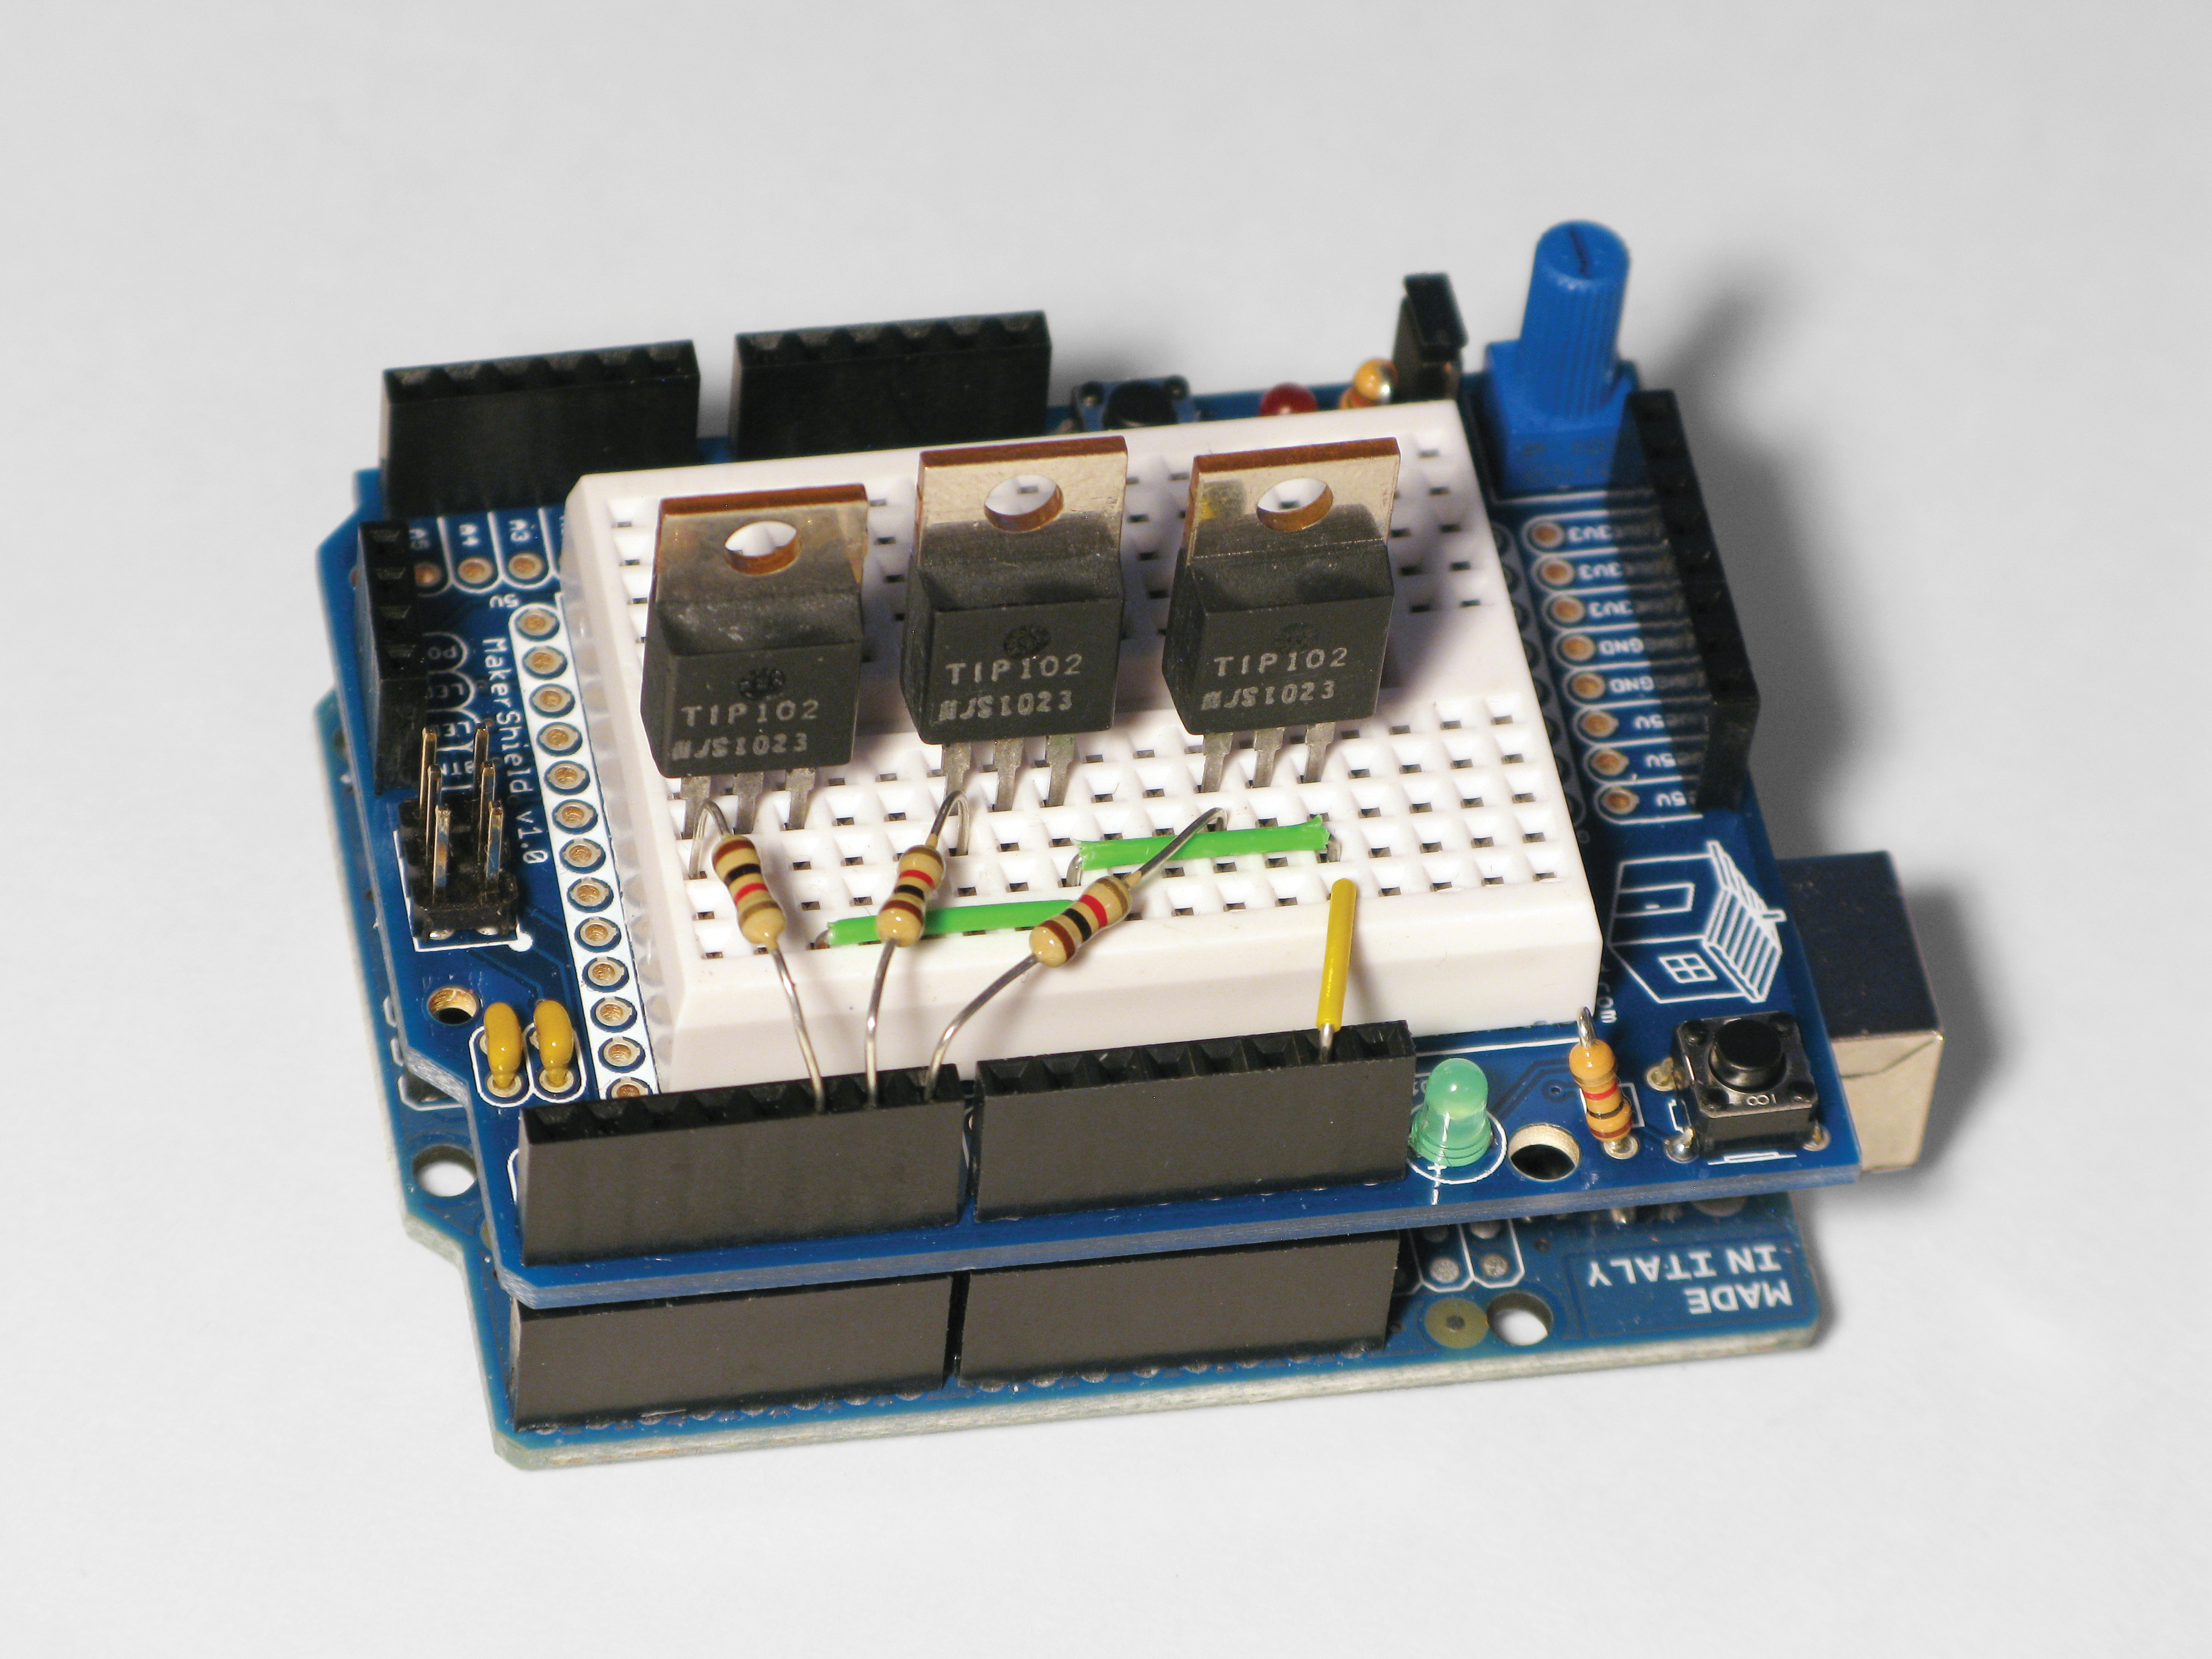
Insert the 3 transistors into the breadboard in a row, making sure that they don’t touch. Looking at the printed face, the leads from left to right are Base-Collector-Emitter.

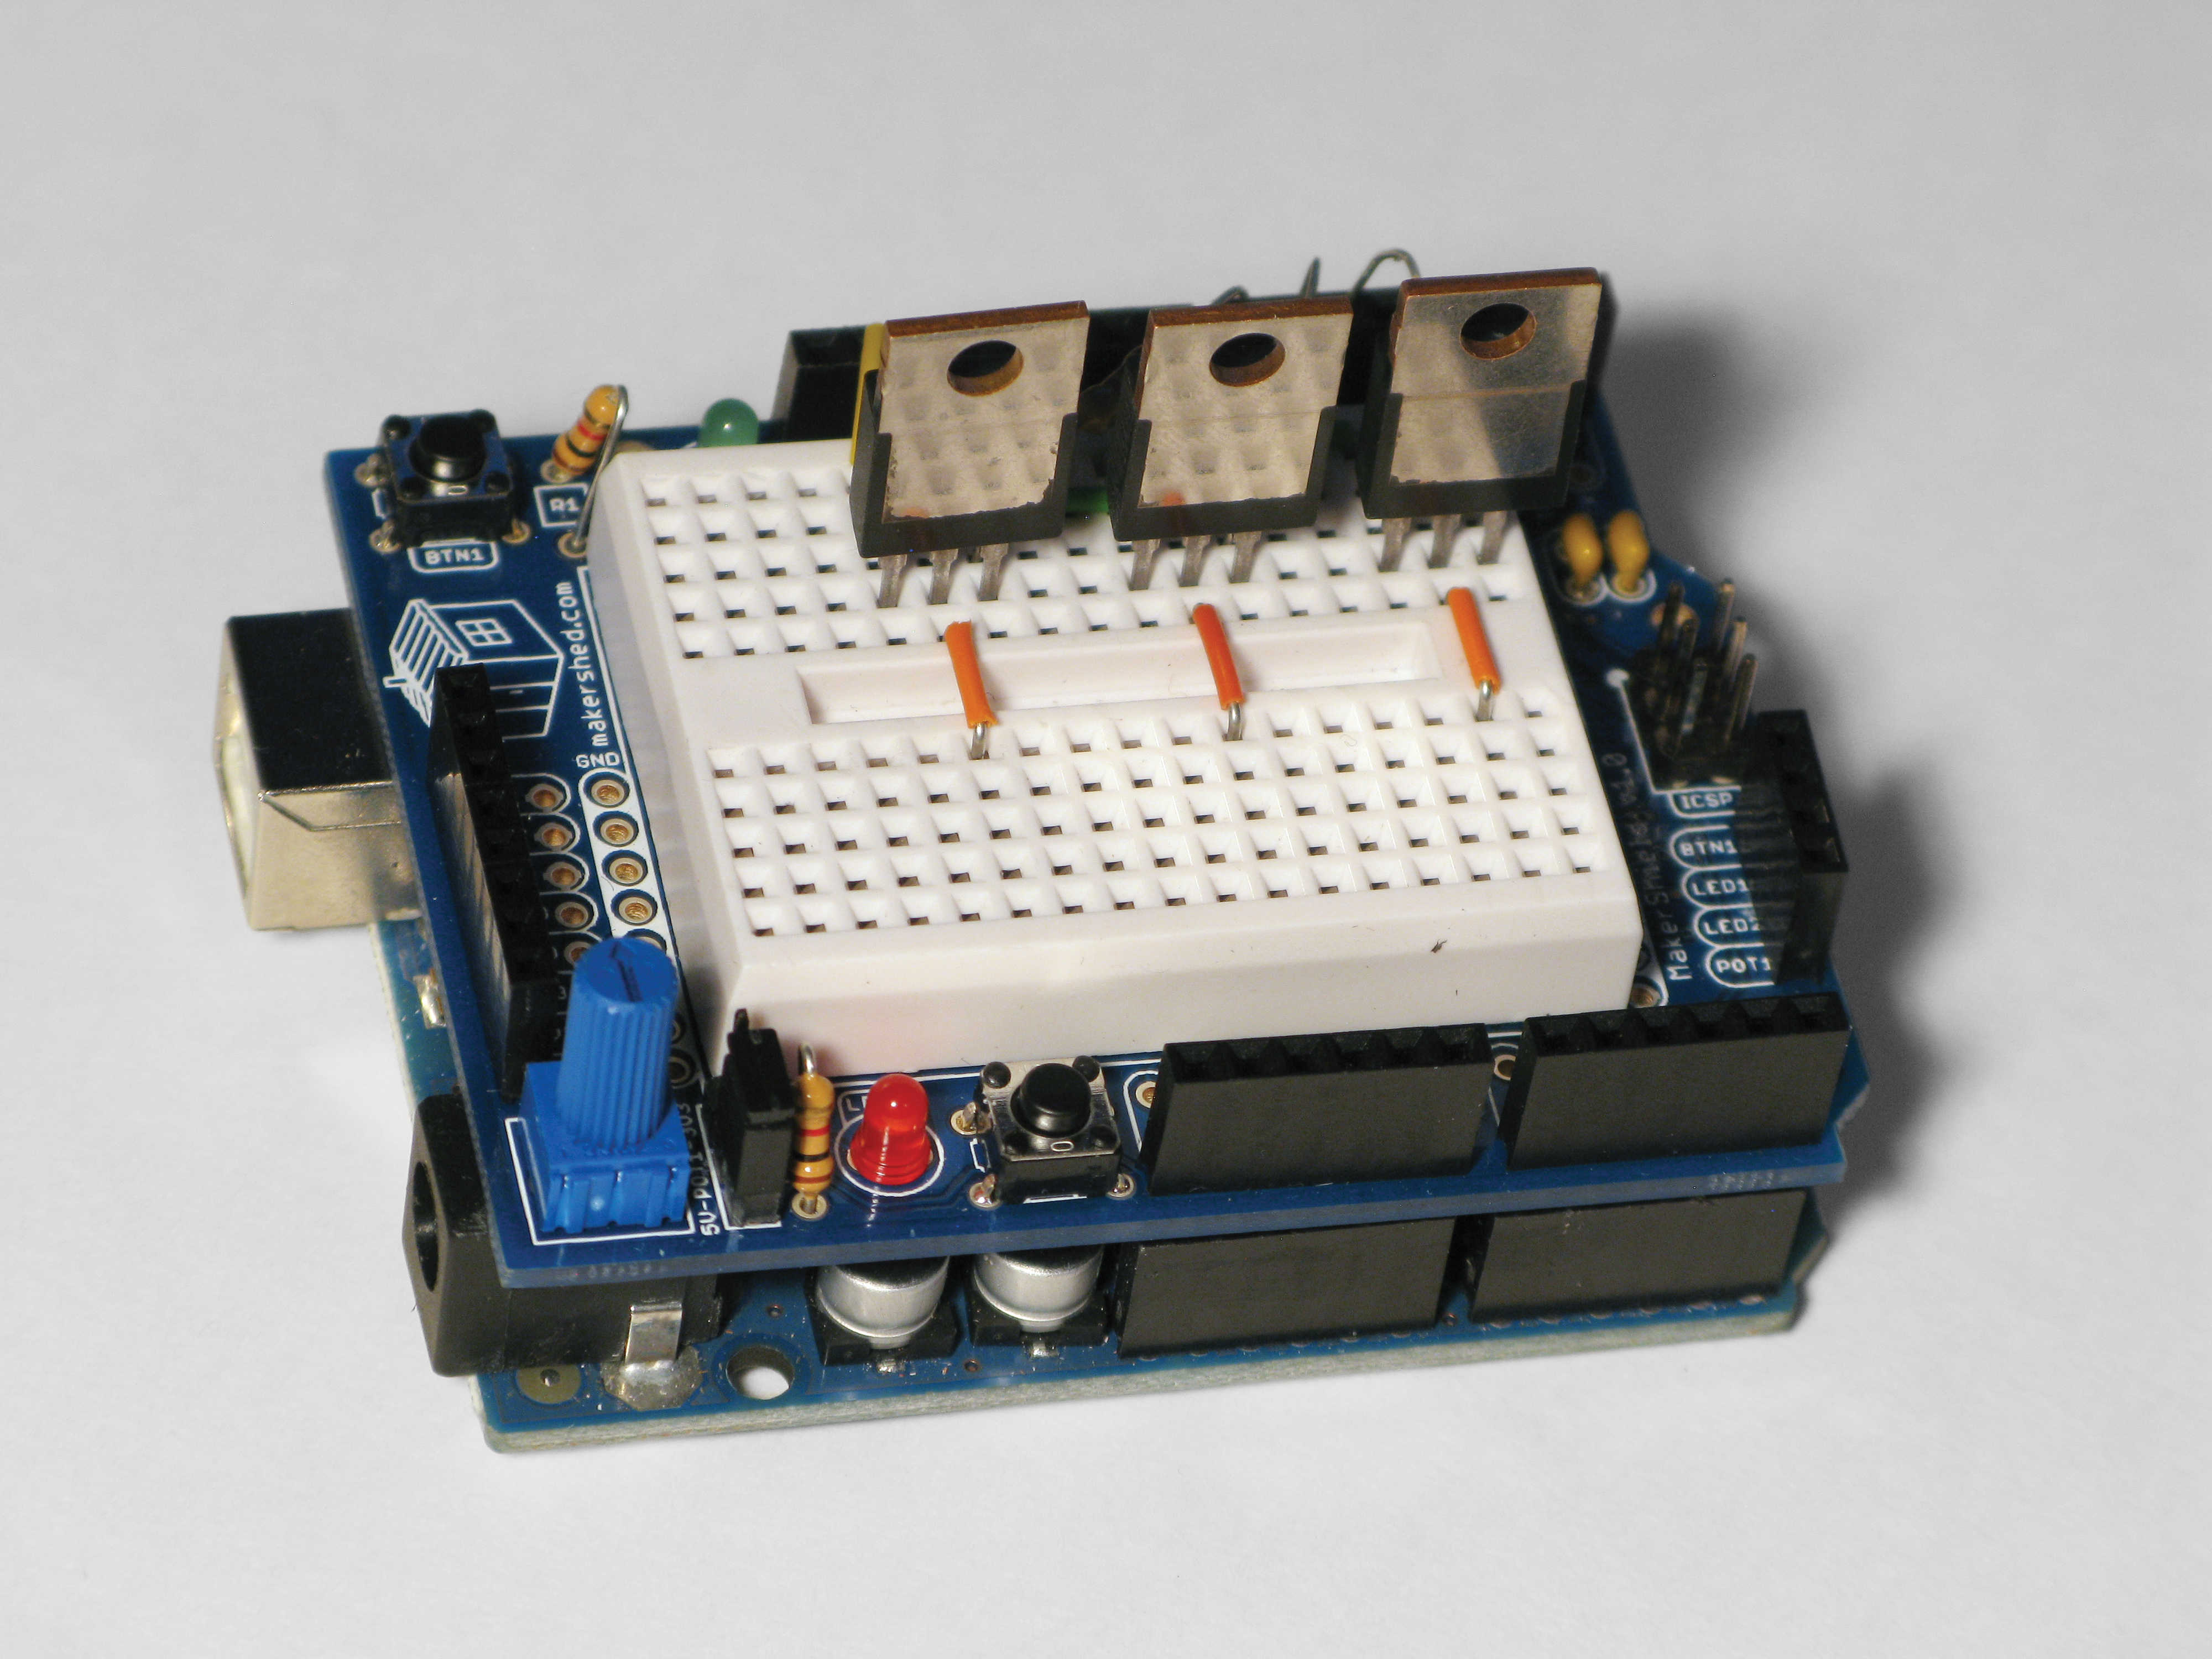
Using jumper wire, connect the 3 emitter leads to Ground on the Arduino/MakerShield. Connect one end of three 1K resistors to pins D5, D6, and D7, and the other ends to the base lead on a transistor.

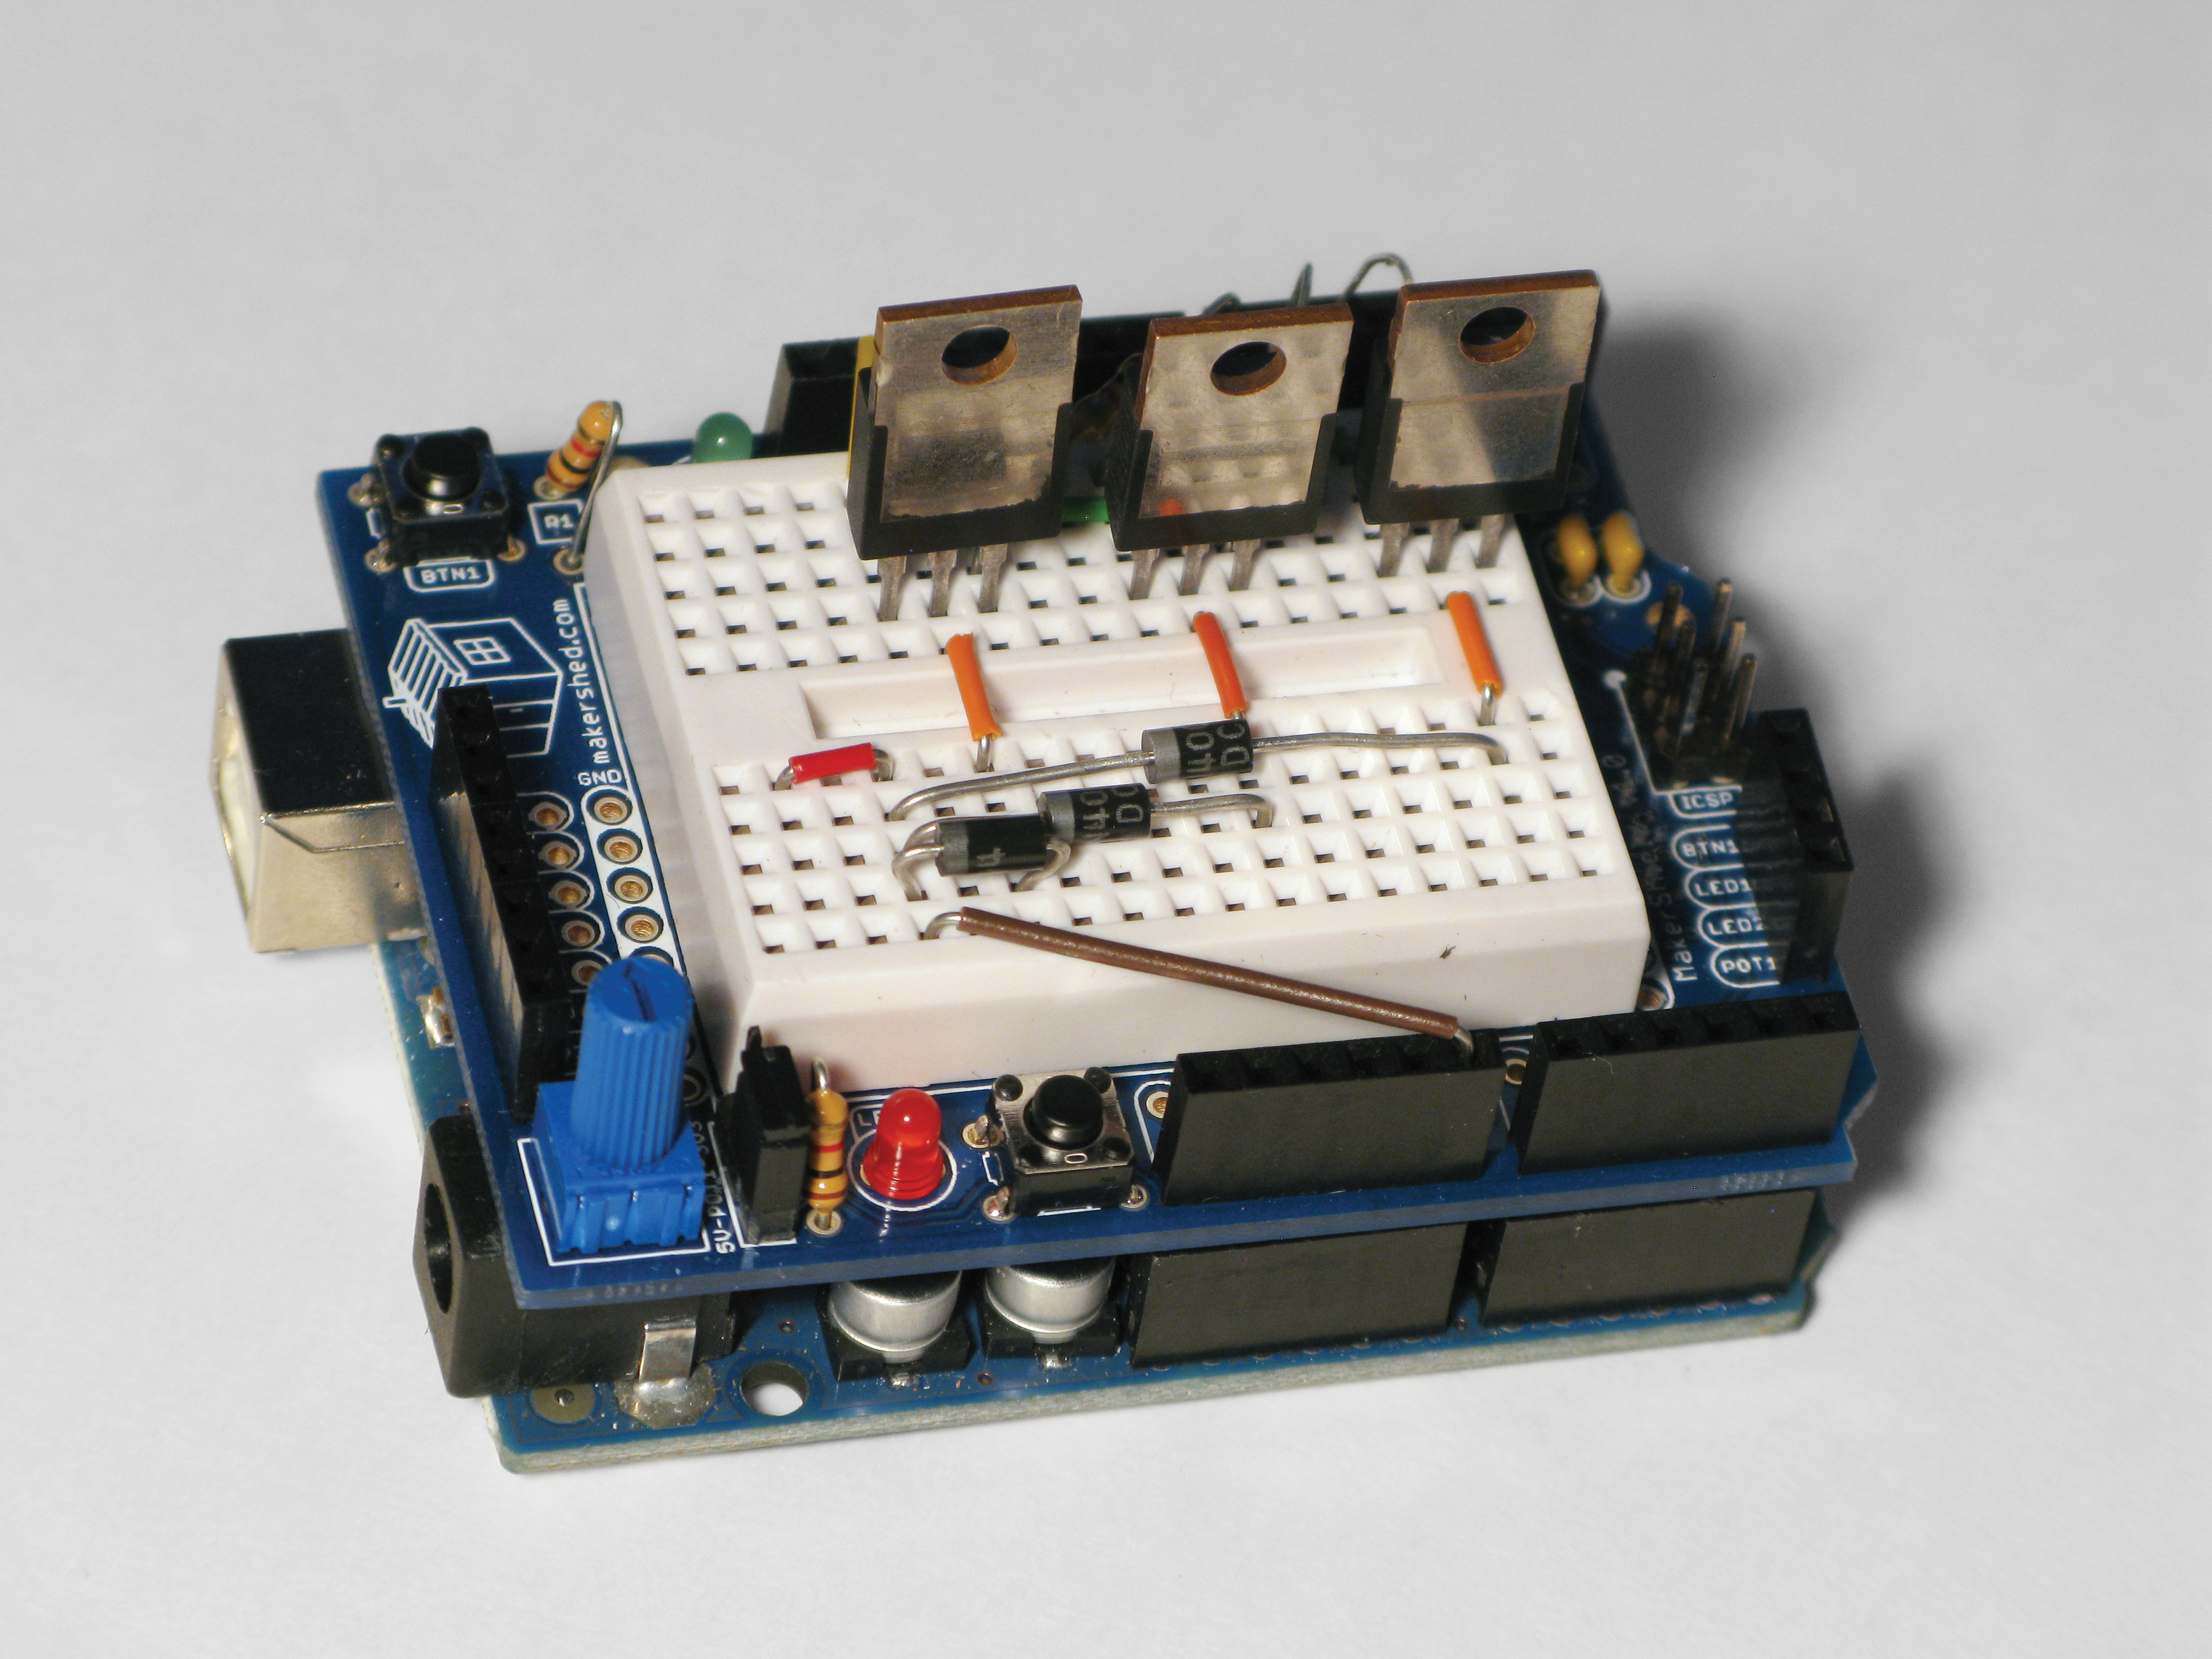
Jumper each transistor’s collector lead to its own rail on the other side of the breadboard. Insert the anode of each 1N4004 diode in one of the collector rails, and the cathode (marked with a band) into a new rail on the breadboard. Jumper the shared cathode rail to the Arduino’s V-in pin and to a new rail on the breadboard.

Connect one lead from each solenoid into a collector/anode rail. Connect the other leads into the new cathode rail.

Using a 3D printer, print the 3 body parts: base, waist, and head. Download parts files (zip file). These took about 45 minutes each on a Thing-O-Matic. If you don’t have access to a 3D printer, get creative! You can use found objects, wood, ShapeLock, or even cardboard.

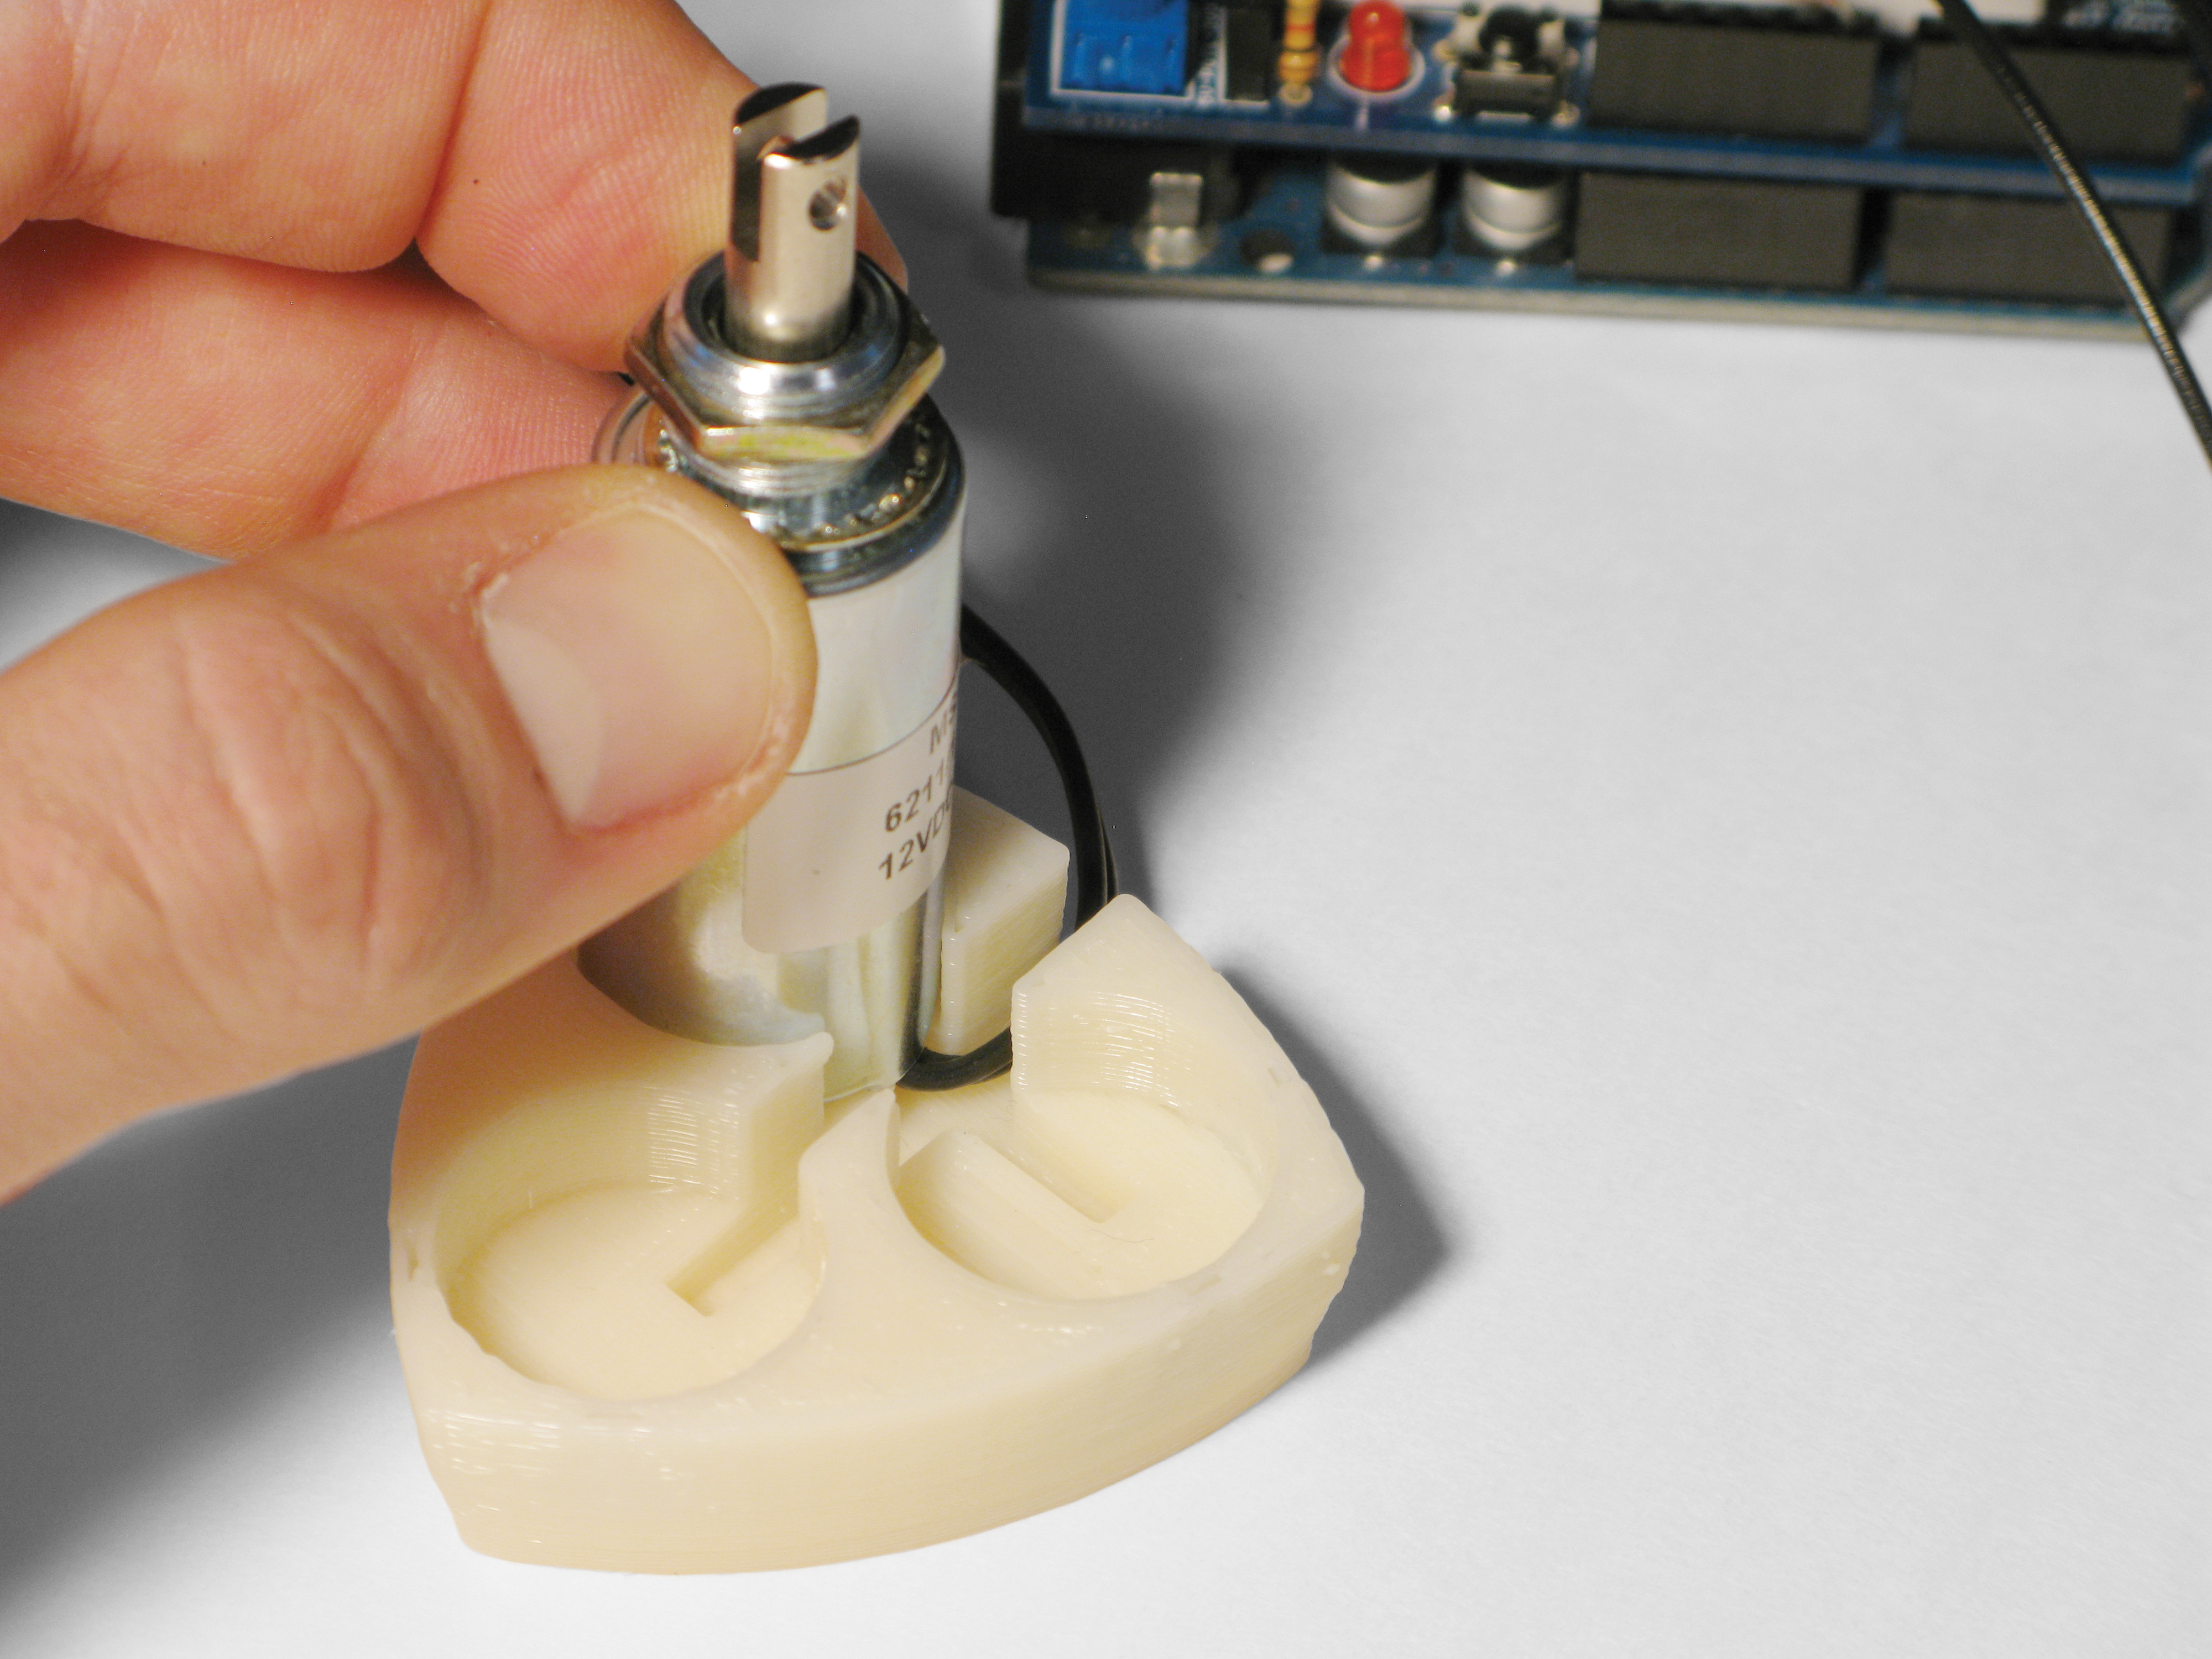
Insert the 2 rear solenoids into the base so that their leads run out through the channel. Insert the final solenoid in front, so that its leads run over the 2 rear solenoids’ leads and out the back.

Remove the nuts and washers from the solenoids and fit the waist part over them. Reinstall the washers and nuts.

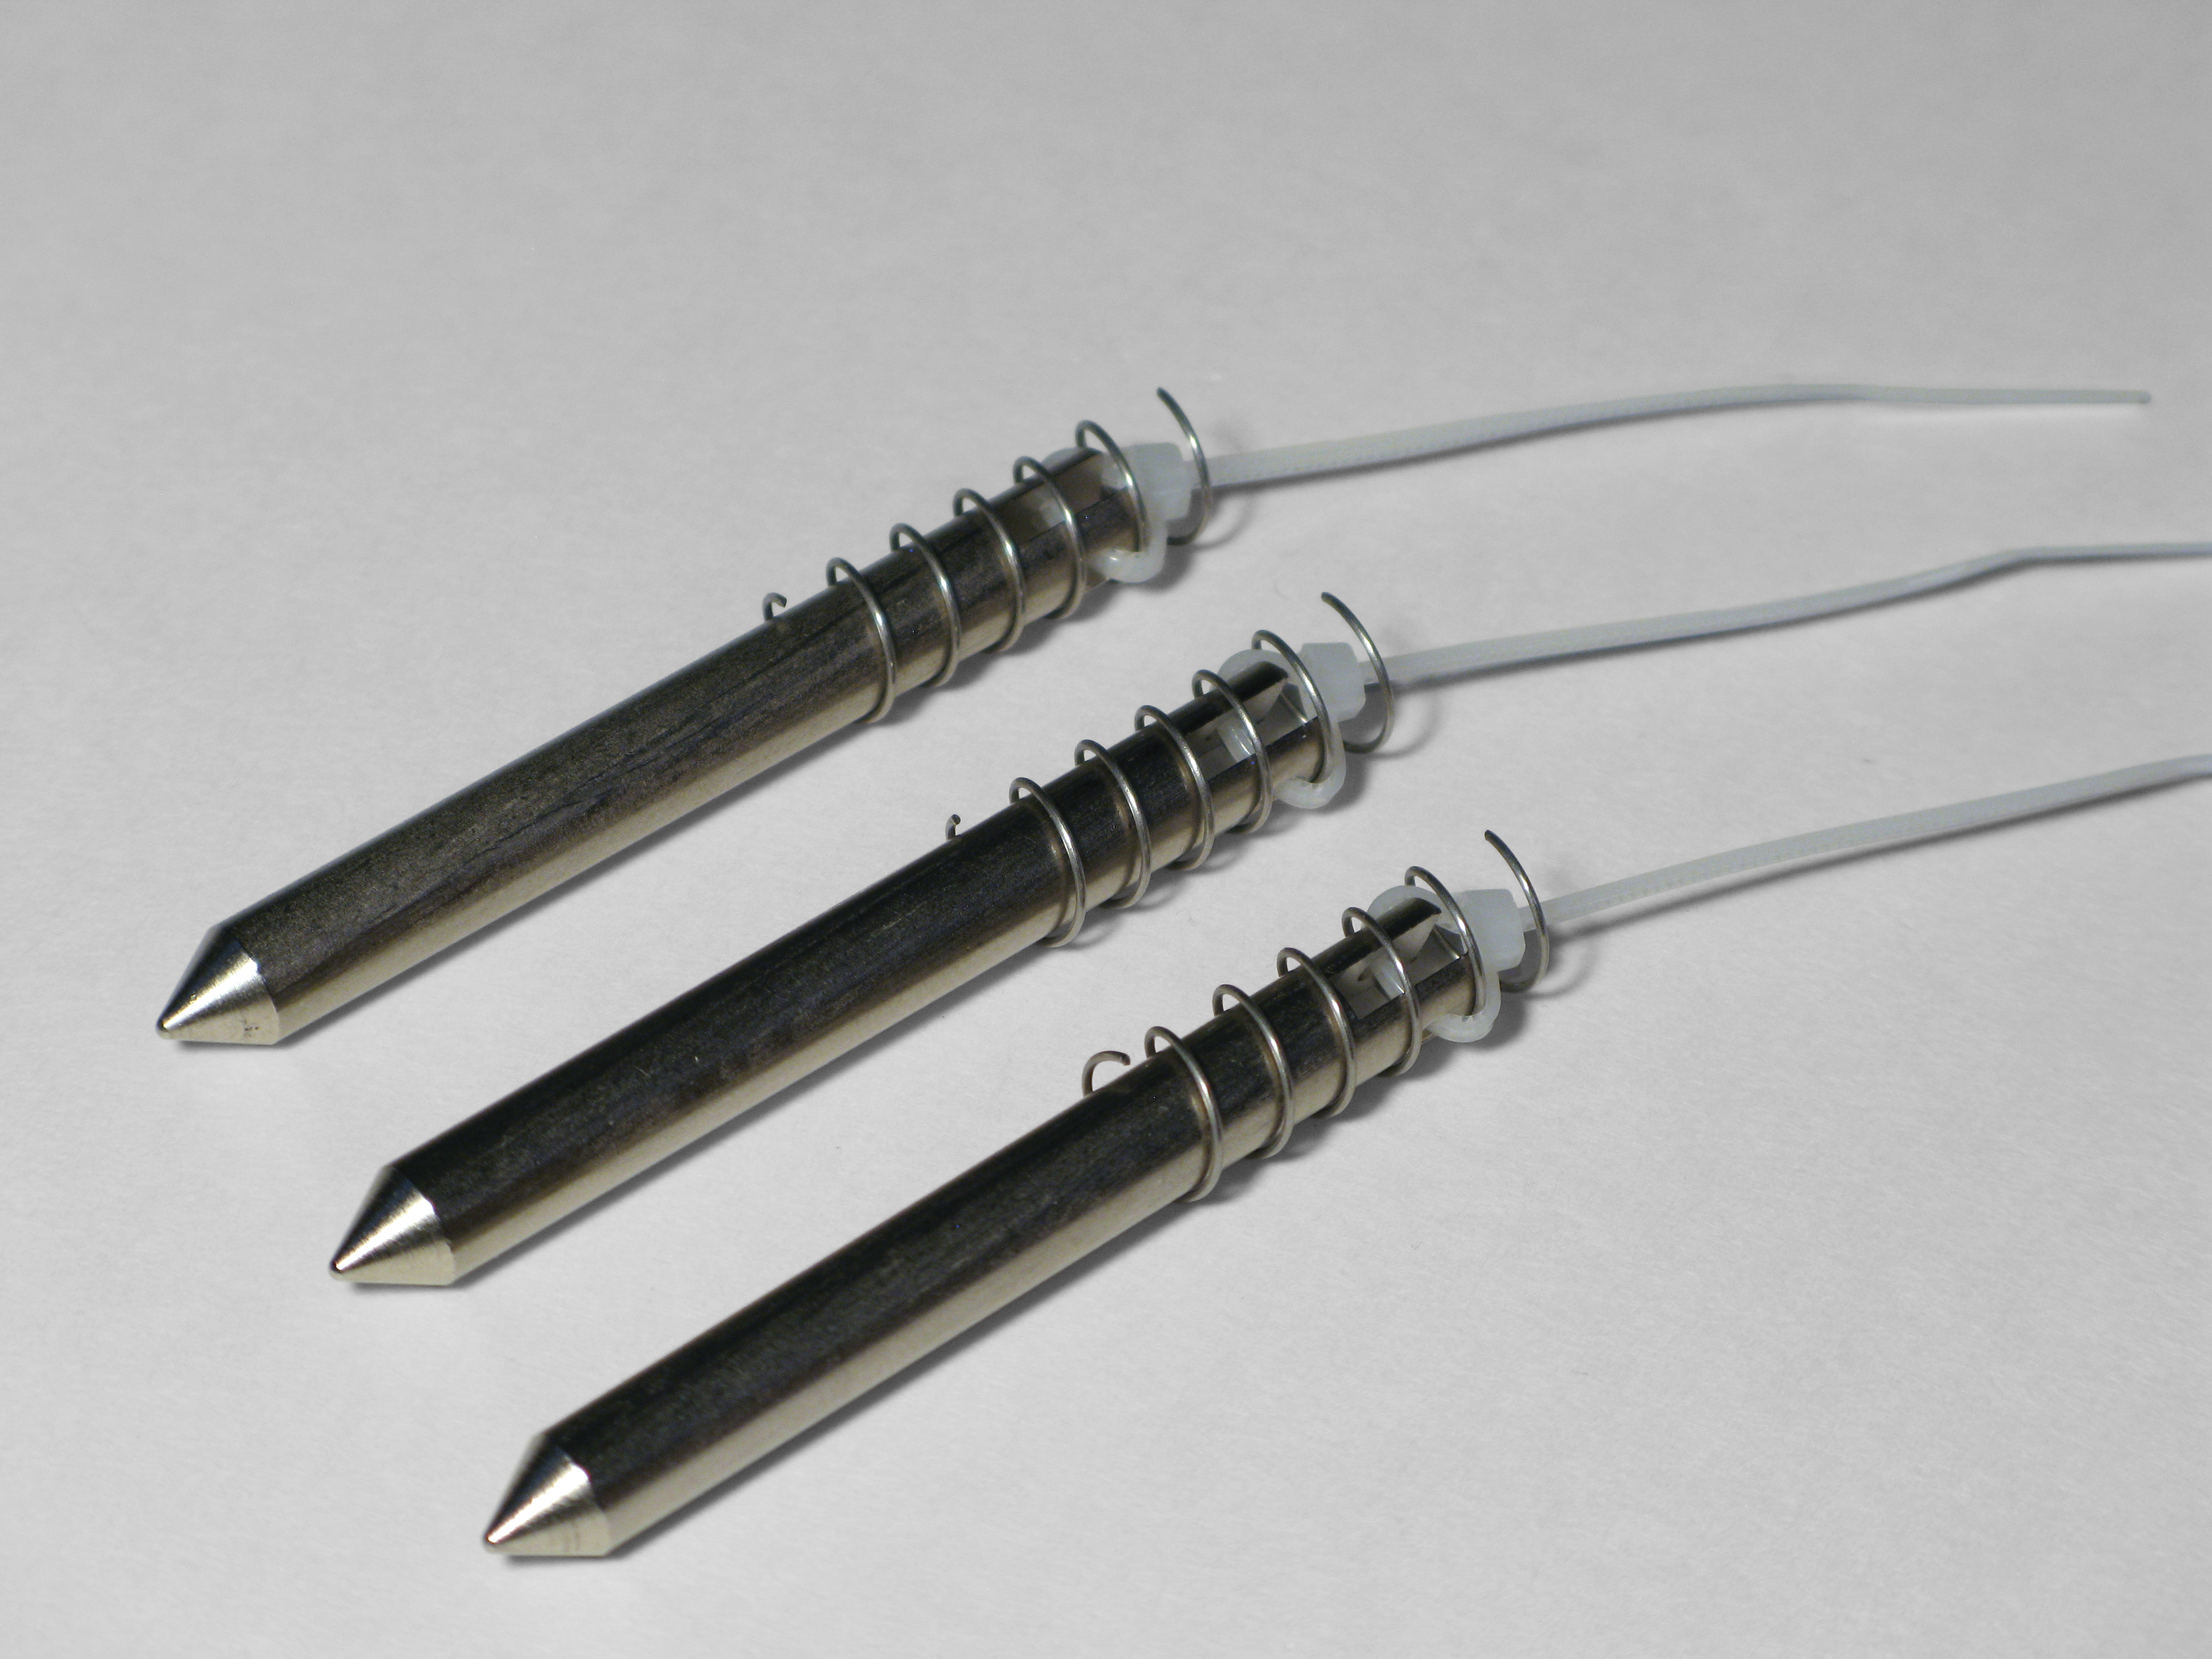
Remove the plungers from the solenoids and loosely tie a cable tie through the hole of each.

Cut three 22mm lengths of compression spring (approximately 6 coils each). With each plunger, thread the pointy end into a spring and rotate the spring until one turn passes under the cable tie at the back end of the plunger. Tighten the cable tie to hold this single turn of the spring snugly against the plunger.

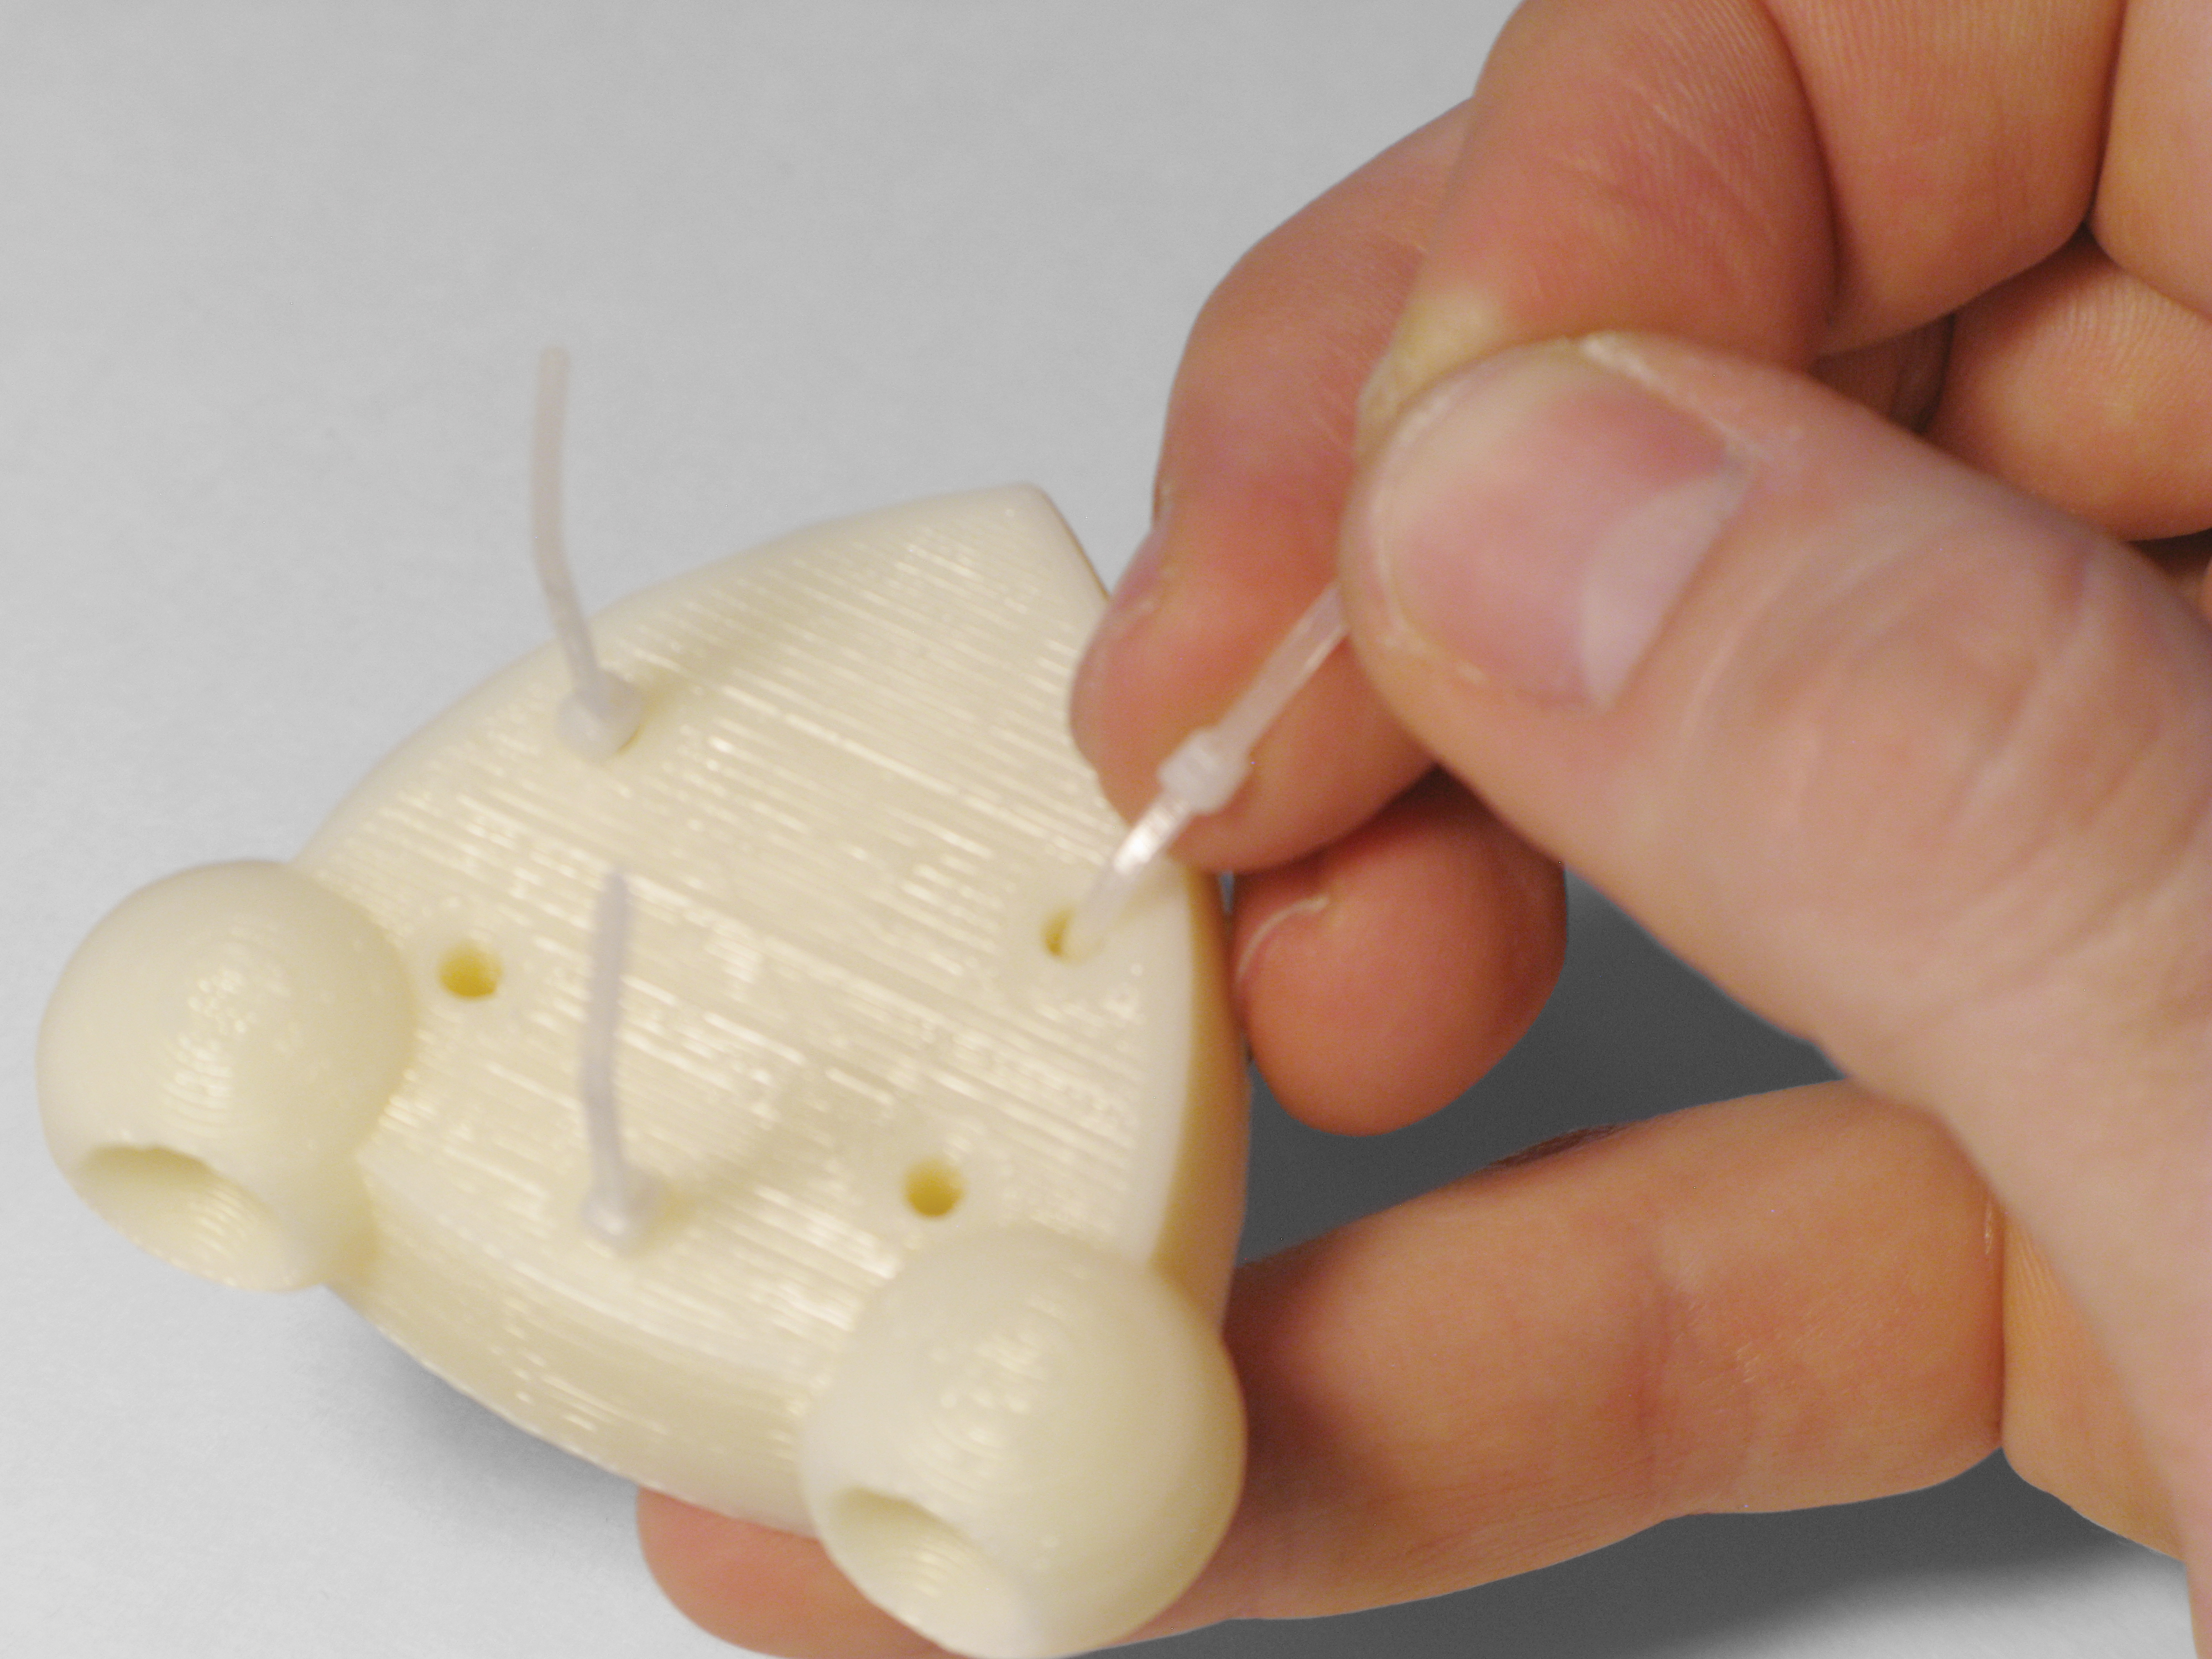
Feed the cable tie ends through the holes in the head part.

Cut the heads off 3 more cable ties and slide them over the cable tie ends in the robot’s head. Slide them down so there is no slack in the cable ties, but not too tight, and snip off the cable tie ends.

Attach the head assembly to the body so that the eyes are opposite the wires.

Cut six 40mm lengths of rubber cord. I chose this material because it looks similar to the wires in Spazzi’s “tail,” but you can use anything to make the decorative antennae.

Insert 3 lengths of rubber cord into each of the 2 holes atop the robot head. If they are too loose, cut a few millimeters of the discarded cable tie and wedge it in with the cord.

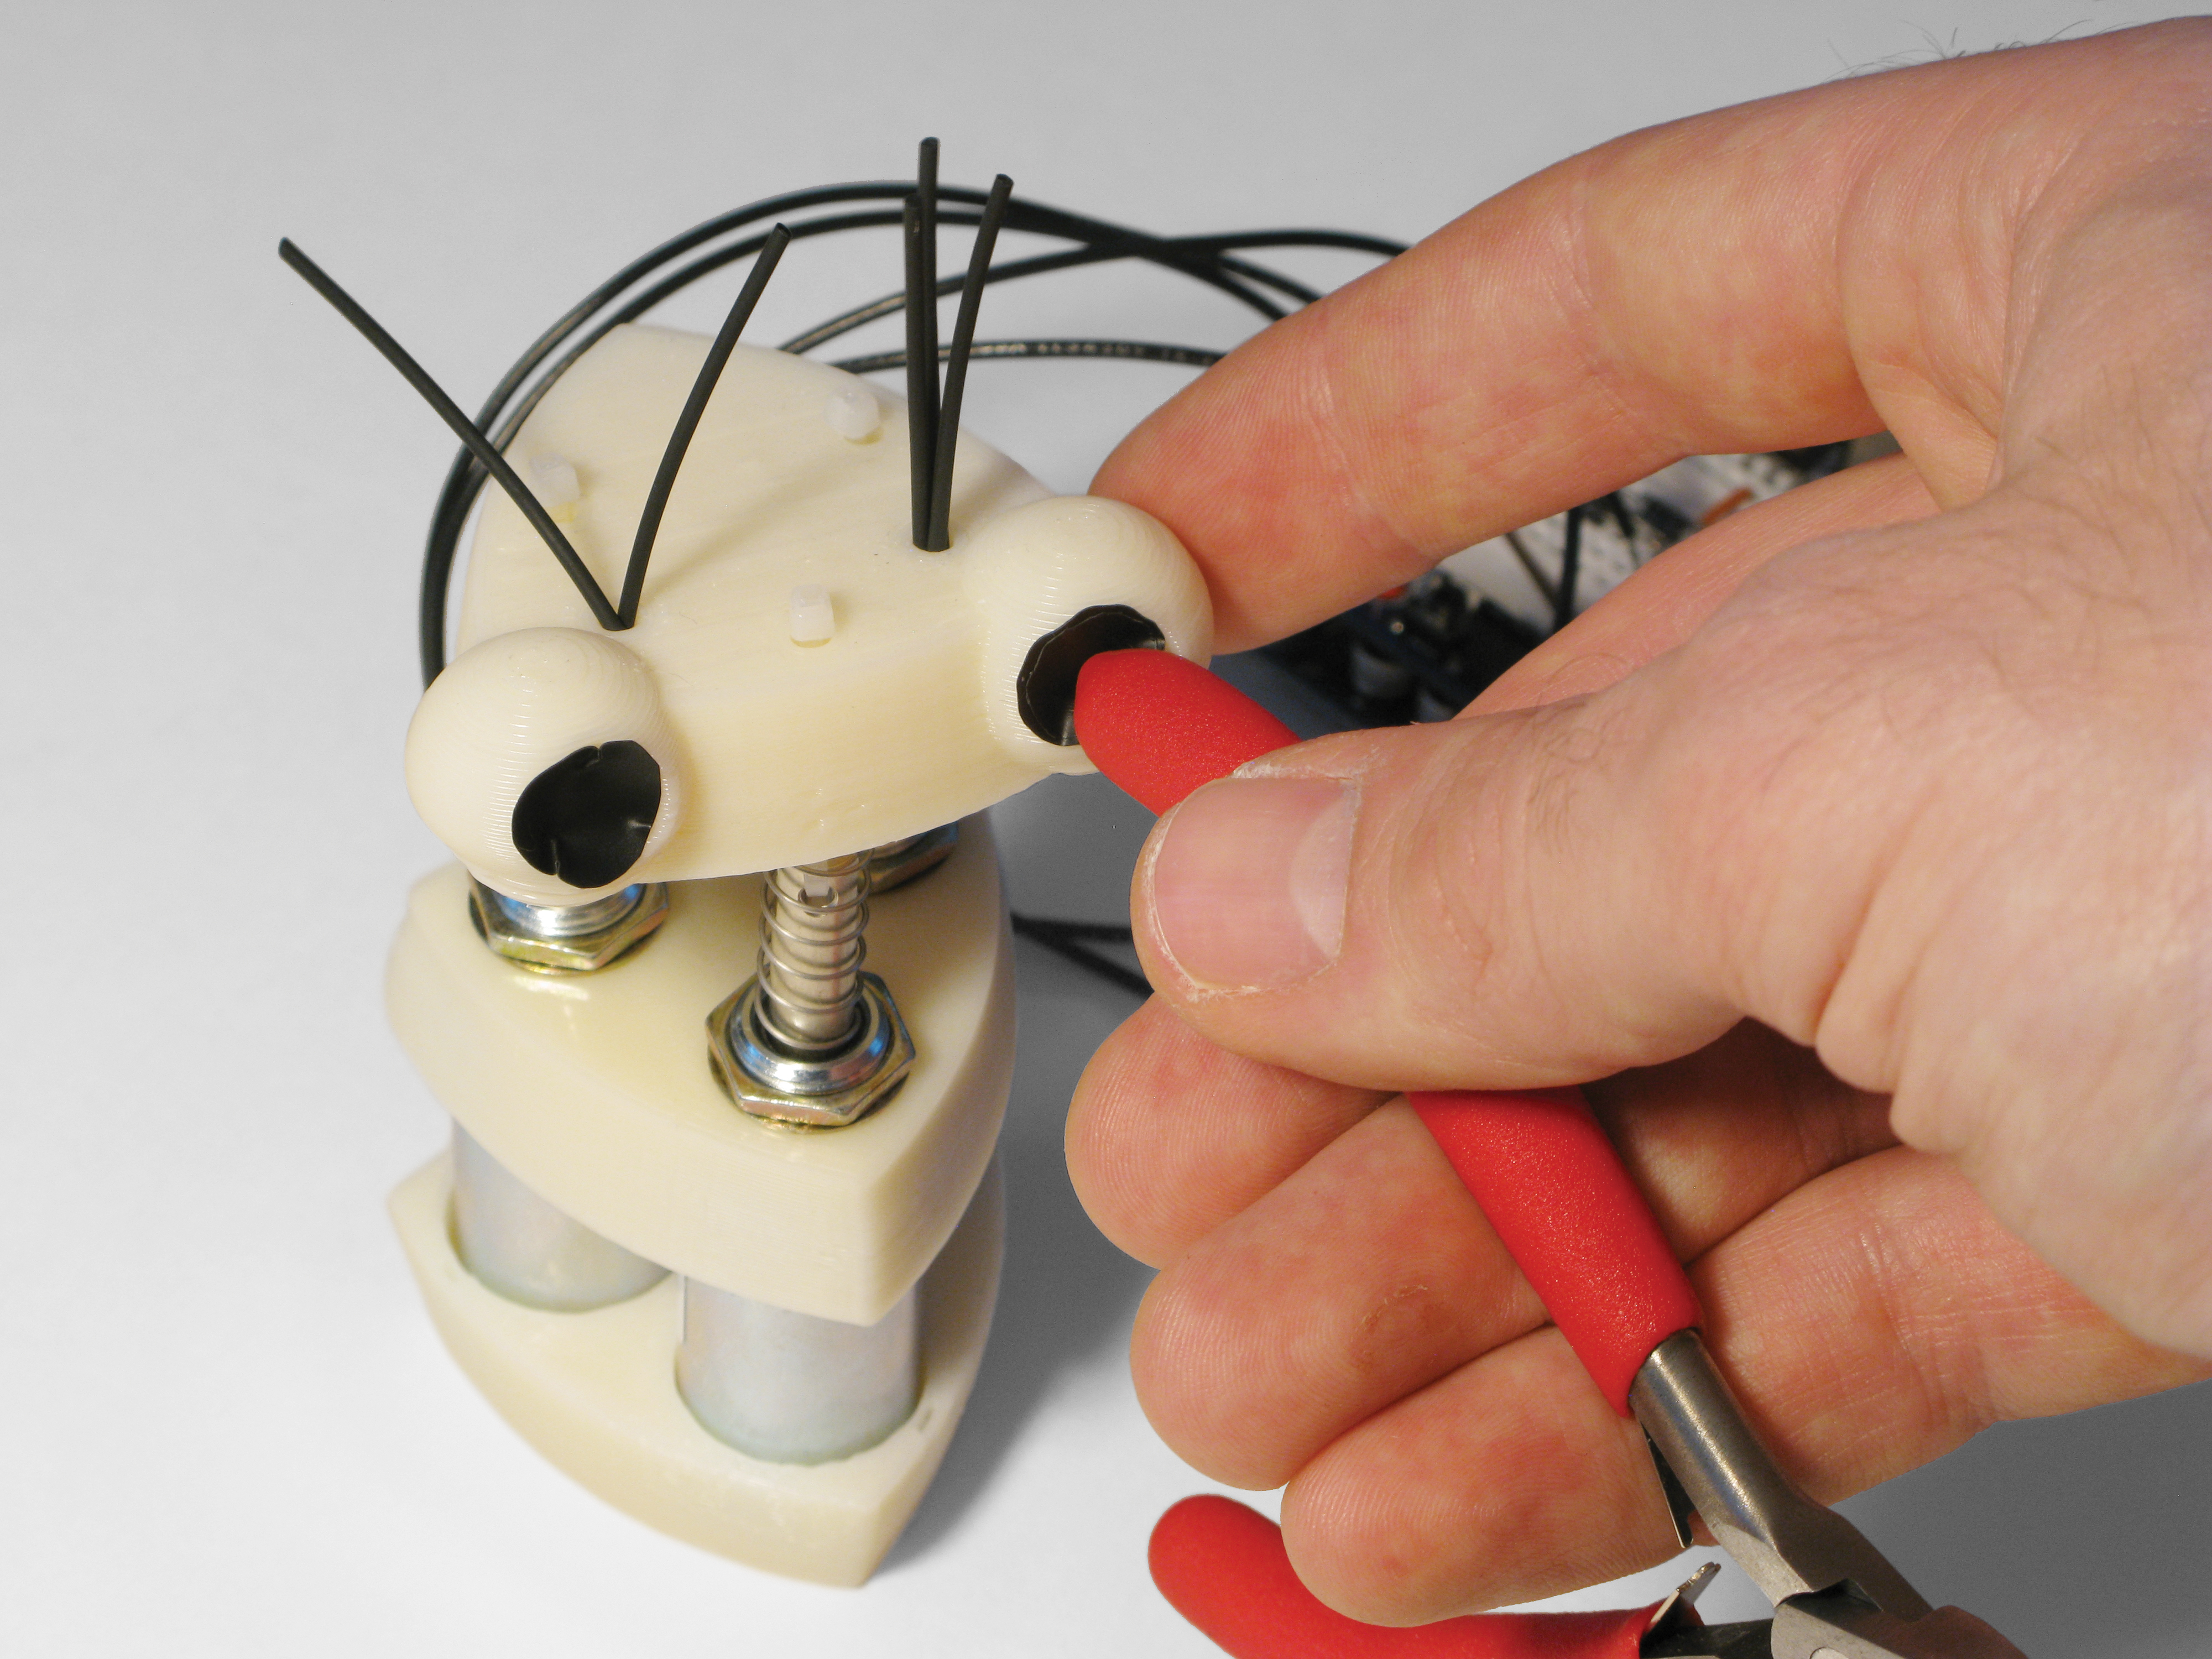
Using a 3D printer, print the supplied pupil models out of black ABS plastic and affix them to the eye sockets with hot glue. If you don’t have black ABS, you can also color the pupils using paint, marker, or circles cut from electrical tape.

Connect the 12V power supply to the Arduino, and connect the Arduino to a computer with a USB cable.

If you’re an experienced Arduino programmer, you can probably take it from here — setting pins D5, D6, and D7 to HIGH and LOW will activate and deactivate the solenoids.

Otherwise, upload the provided Spazzi.pde patch to the Arduino, then set the baud rate to 38,400 in the Serial Monitor. Entering the letters a, s, and d will activate the solenoids, while q, w, and e, respectively, will deactivate them. You can make Spazzi dance by using the keyboard like this; now you just need an application that sends these characters over the serial port!

Application

Upload the Spazzi Arduino code onto your Arduino.

We like using Max/MSP to control our robots. It’s a visual programming language in which data flows between objects — switches, mathematical operators, filters, etc. — over virtual patch cables. Download a trial version at http://cycling74.com or the free variant PD at http://puredata.info

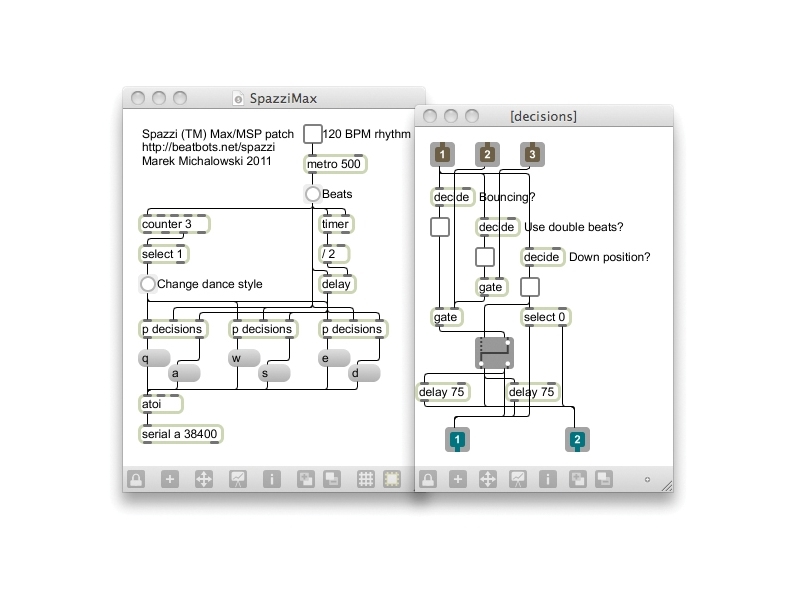
Download the demo patcher (the name of a Max/MSP document) Spazzi.maxpat (zip file) and open it in Max/ MSP. The serial object at the bottom opens your Arduino’s port. Click the 120 BPM rhythm checkbox (or set your own rhythm with the Beats button), and Spazzi will start dancing. His style will change every 4 beats, based on randomly deciding, for each solenoid, whether it is down or up; whether it’s bouncing; and whether it makes 1 or 2 bounces per beat. See a video at the URL above.

To make the robot dance to music, you can patch an audio stream through Olivier Pasquet’s op.beatitude~ object (http://opasquet.fr/dl/op.beatitude~.zip) or Tristan Jehan’s beat~ object (http://web.media.mit.edu/~tristan/maxmsp…) and feed the detected beats into your Spazzi patcher. To pipe your music into Max/MSP (or another application) from, say, iTunes, try Soundflower on Mac OS X (http://cycling74.com/products/soundflowe…) or Jack on Windows (http://jackaudio.org). Be creative — Max/MSP and PD are great environments for rolling your own signal-processing apps.

A more advanced challenge is to do the audio processing directly on the Arduino. You’ll be constrained by its more limited processing power, but wouldn’t it be great to liberate this robot from its tether to the computer?

Next step: Customize! Make Spazzi your own. Use other colors, different antennae and other appendages; even put him on a mobile base! And, most importantly, make videos — who knows, perhaps your dancing robot video will go viral!

Conclusion

Spazzi and its appearance are trademarks of BeatBots, but anyone is free to make the robot for personal or nonprofit use.

Dr. Marek Michalowski (http://marek.michalowski.me) is a roboticist living and working in San Francisco. He co-founded BeatBots (http://beatbots.net) with Dr. Hideki Kozima, designer of the robot Keepon. Marek's BeatBots page: http://beatbots.net/project/spazzi

This project first appeared in MAKE Volume 27, page 56.