YouTube player

As a musician I often need to learn new songs, and it can be difficult to hear individual instruments in recordings I want to study. I have often wished for an easy way to eliminate or reduce the vocals and isolate the instruments. Various hardware and software solutions exist but they tend to be expensive or inconvenient.  I wanted a cheap method that I could use anywhere, on any device with a 1/8″ stereo headphone jack.

Then, one night, I was fiddling with a pair of headphones with a defective plug. When moved a certain way, it gave exactly the vocals-canceling effect I had been looking for!

To understand what was happening, I did some research online, bought some components at RadioShack, and tested various wiring combinations. My son Nathan and I tested the final device.

In my research, I discovered that many songs are mixed down with vocals equally on both channels (Right and Left). This is called “Down the Center” because it gives an illusion that the vocals are coming from “center stage.”

Singalong Song Devocalizer Schematic

Now, when the ground (sleeve) on a tip-ring-shield (TRS) signal is disconnected, the hot wire from each signal (Left or Right) tries to use the opposing hot wire as its new ground. As a result, the signals are 180 degrees out of phase. Thus, anything that was mixed to both tracks gets cancelled out by destructive interference.  When this happens in a recording, anything mixed evenly to both right and left channels will magically disappear.

Many recordings are well-suited to create this effect. Depending on how a song is mixed, the instrument isolation effects using this technique can be quite remarkable. The device can also be set to send full right or left signal to both headphones for added isolation effects.

Sing-a-long Song Devocalizer

What will the next generation of Make: look like? We’re inviting you to shape the future by investing in Make:. By becoming an investor, you help decide what’s next. The future of Make: is in your hands. Learn More.

Project Steps

Prep the enclosure.

Measure and plan placement of the switches and audio jacks. Blue painter’s masking tape is handy for making easily seen and easily removed marks on the box’s surface.

Drill holes in the project box for the switches and jacks. Drill through the tape, then peel it off and throw it away.

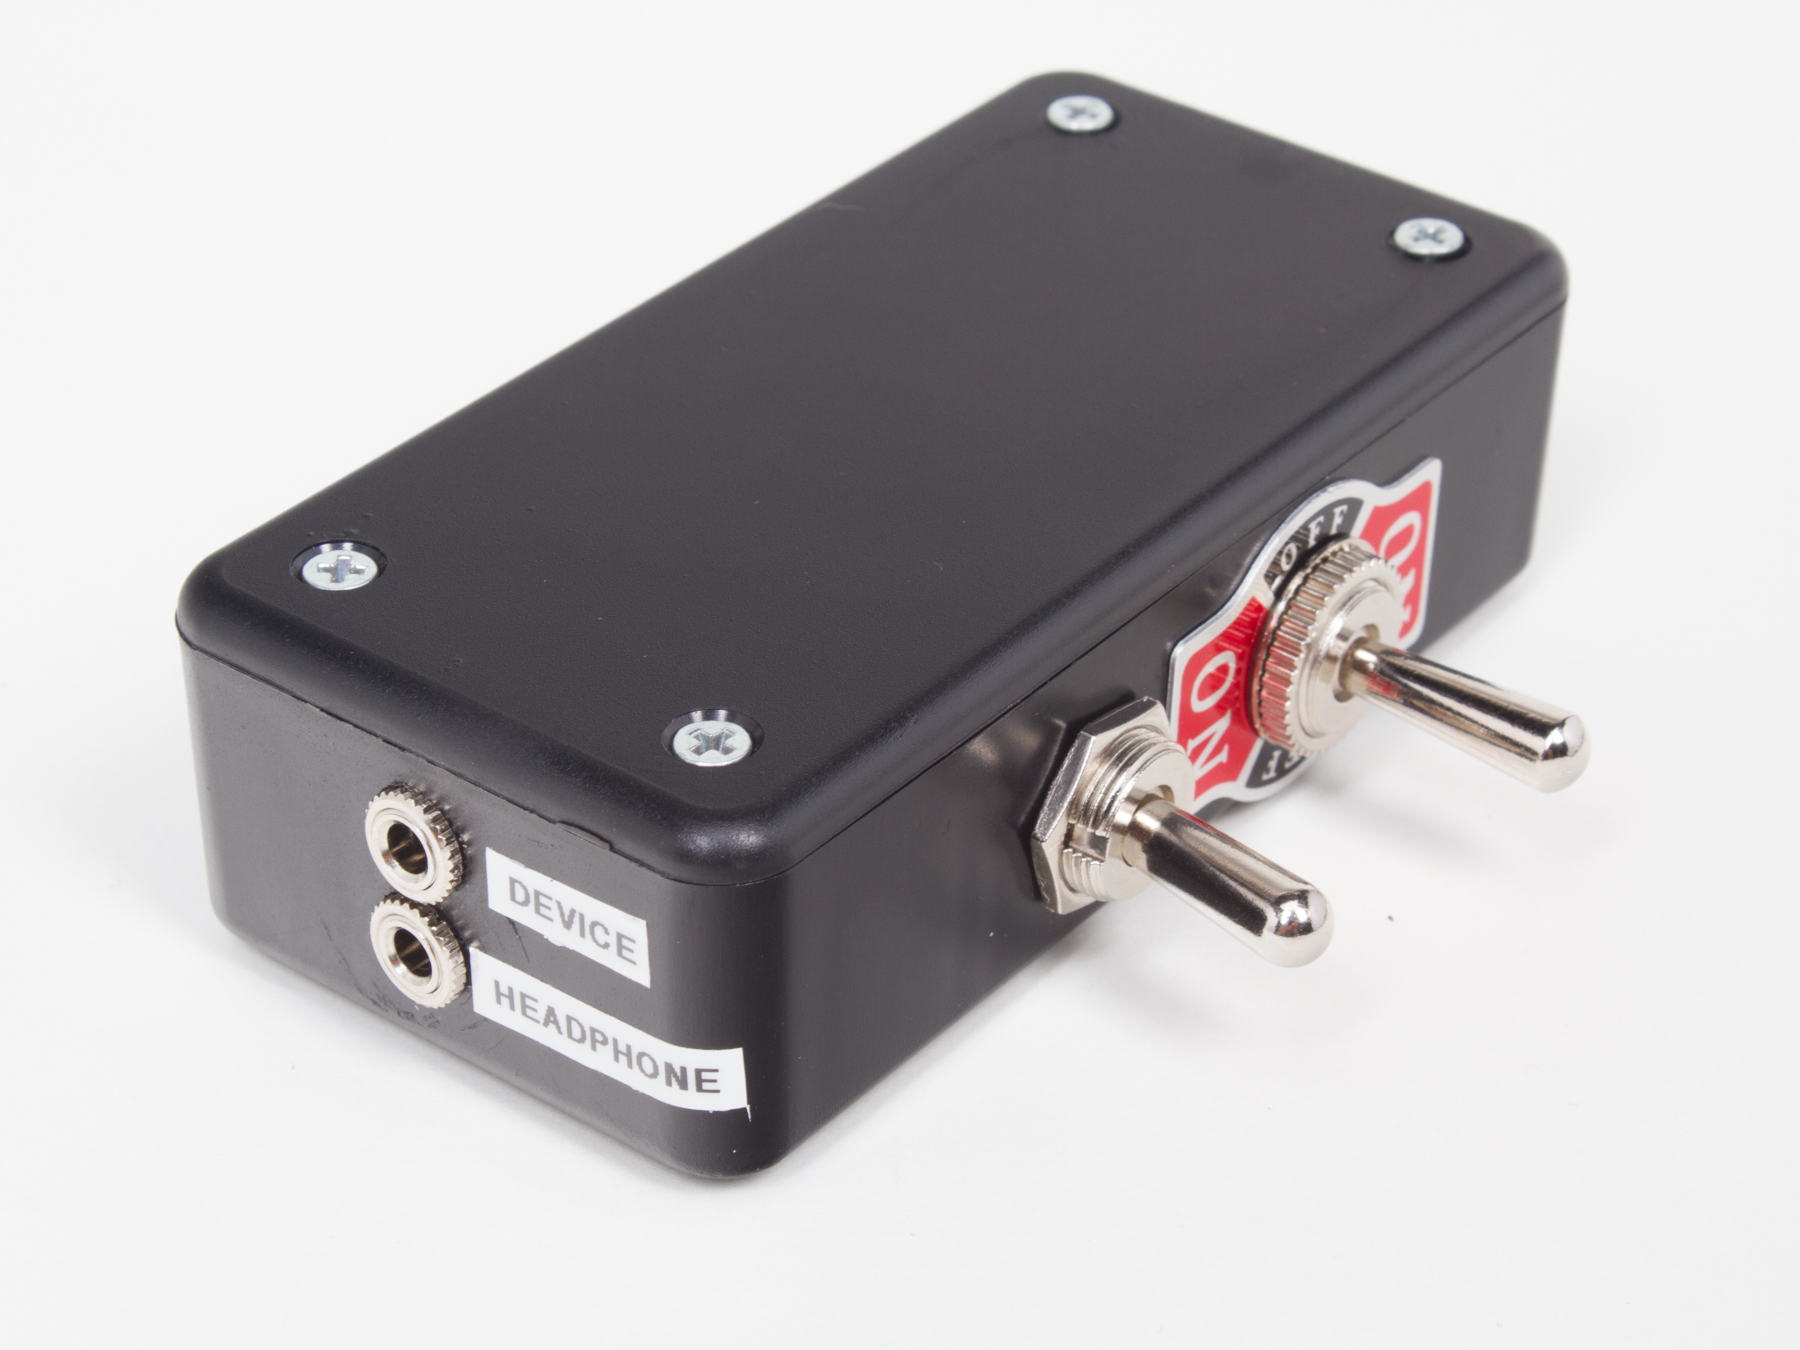
Mount the switches in the holes on the long side of the box, per the photos, using their bundled hardware. Soldering will be easier if you leave the jacks free for now.

Wire the DPDT center-off switch.

NOTE: We will only be using one side of the DPDT center-off switch, i.e. only using three of its six contacts.

Solder a jumper wire from the center pole of the DPDT center-off switch to the ground (sleeve) connection on the “device” jack.

Solder a second jumper wire from the nearby pole of the DPDT center-off switch to the center pole of the SPDT switch.

Solder a third jumper wire from the remaining pole of the DPDT center-off switch to the ground connection of the “headphone” jack.

Wire the SPDT switch.

Solder a jumper wire between the ring terminals of the two jacks, and another from one side of the SPDT switch to the ring connection of the “headphone” jack.

Solder a jumper wire between the tip terminals of the two jacks, and another from the remaining pole of the SPDT switch to the tip terminal on the “device” jack.

Carefully inspect and test these connections. Use the continuity testing function on your multimeter.

Try it out!

Using the hardware bundled with the parts, mount the jacks into the holes drilled in the short end of the box, per the photos, and close up the box.

Label the HEADPHONE and DEVICE jacks. This step is important; the device won’t work if these are mixed up!

Plug one end of the stereo cable into the DEVICE jack and the other end into an iPod or other device audio output. Plug your stereo headphones into the HEADPHONE jack and try it out!

Conclusion

In the “off” position, the center-off switch should cause the vocal canceling effect. Switching it to one side should give you a normal stereo signal; switching it to the other side activates the SPDT switch, allowing you to choose between full-right channel and full-left channel effects.

Pick an older song (1960s or so) for your first test run. Many of the older songs are mixed with center vocals and isolated instruments in each channel, which works particularly well. For example, in “Help!” by the Beatles, the vocals disappear nicely with the switch in center position.

In “Ticket to Ride,” you’ll hear a nice example of what I call “reverb ghosts.” In this case the original vocals disappear, but the reverb trails are left behind, giving a ghostly echo effect, like you are standing with the band playing the instruments but the vocalists are down the hall.

To demonstrate the channel separation feature, try “Magical Mystery Tour.” Use the SPDT switch to hear the beautifully isolated bass, brass and some vocals in the right-hand channel. The left-hand channel has the drums, the guitars and the remaining vocals. Also the piano part at the end of the song is mostly isolated on this side..

After trying many songs by different artists, my experience is that about 20% of songs have a fantastic vocal cancellation effect with instruments clearly isolated. You could use these tracks for Karaoke with no problem. In 50-60% of songs, the effect is less pronounced, but you can still hear instrument parts you’ve never heard before, which should be useful if you are an instrumentalist trying to learn one. About 15% of songs tried have minimal effects, not enough to make the effort worthwhile. Finally, some 5% of songs have a fascinating, totally unexpected digital audio sound that is difficult to describe. Large parts of these songs have a bizarre robotic sound that occurs where large “swaths” of instruments disappear, but some parts have been left behind.

So experiment! Have fun and let us know if you find any songs that have especially pronounced or weird effects!