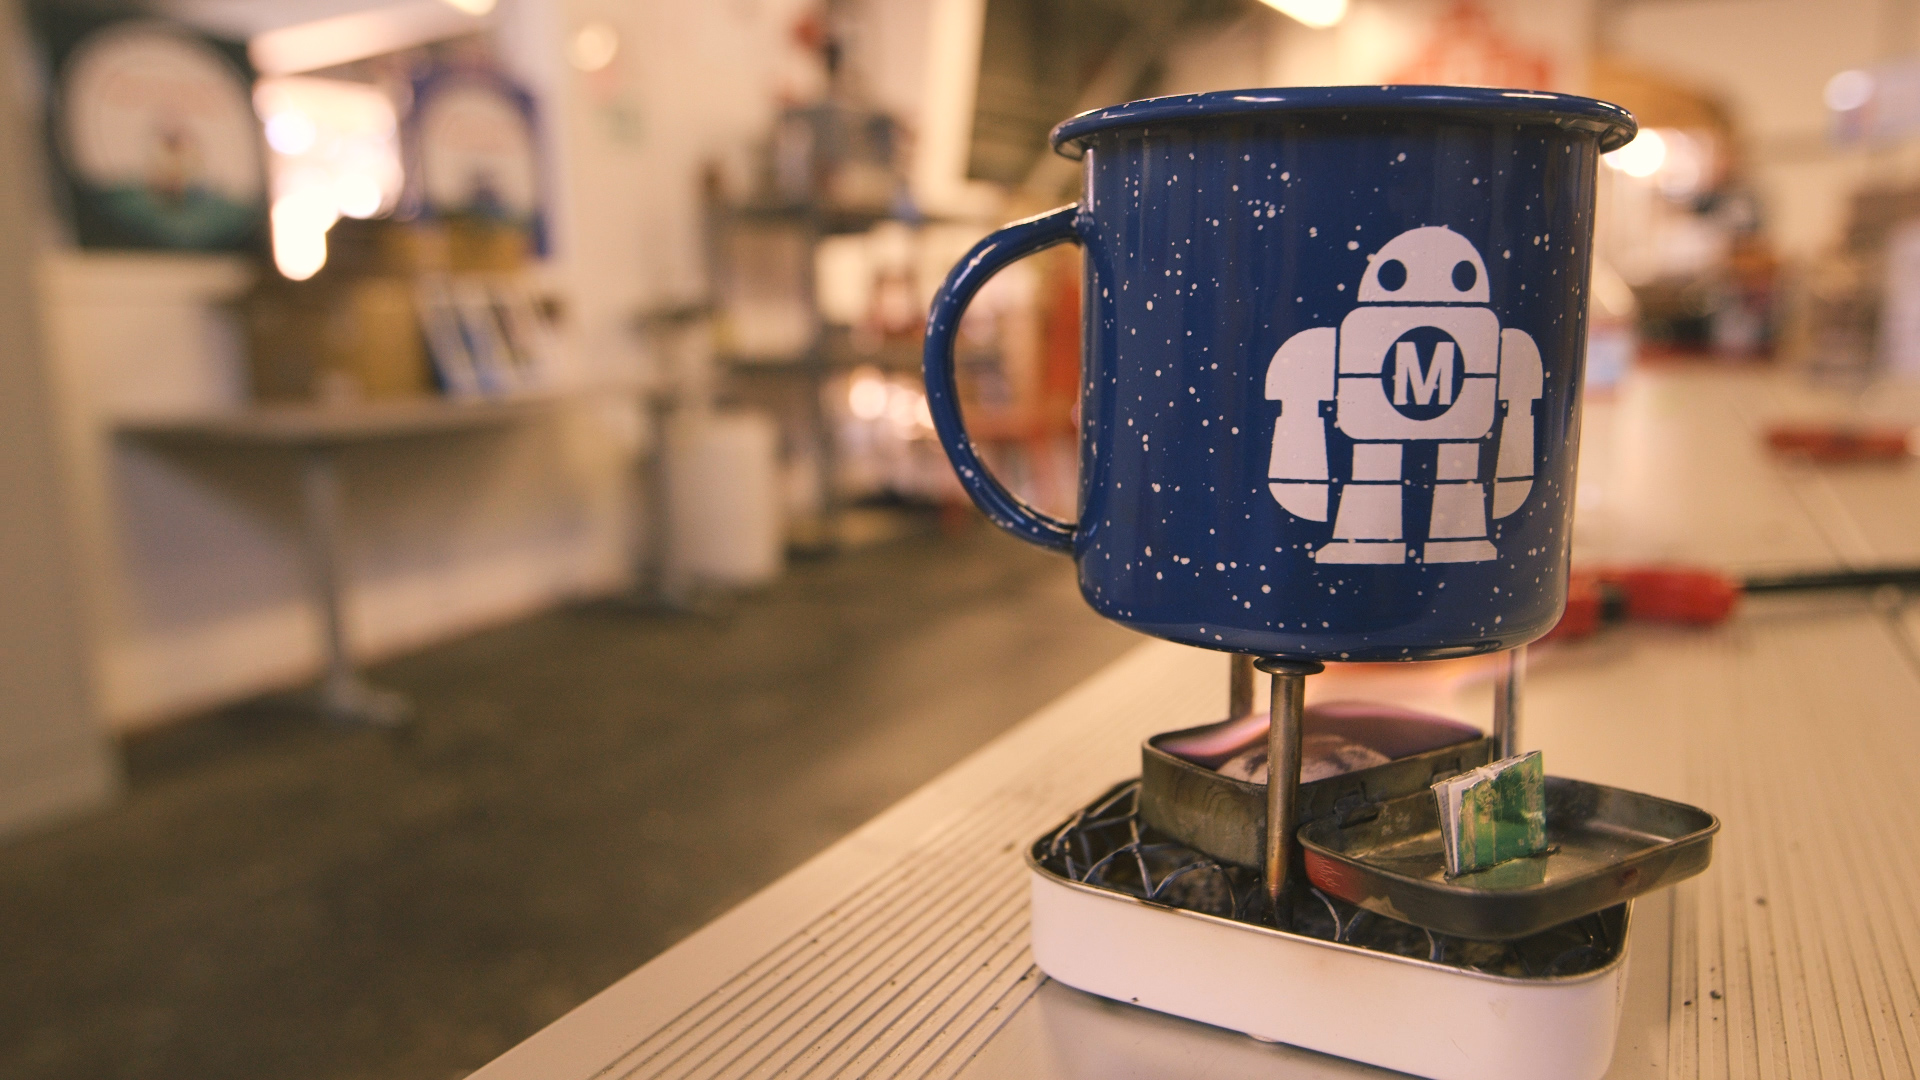
Metal Wick Camp Stove
Capillary Wick Denatured Alcohol Camp Stove

This mint tin backpacking stove can use a variety of fuels, from denatured alcohol and commercial solid fuel tabs to gathered sticks and wood. It provides lots of flexibility for less than 100 grams (3 1/4 oz). This type of stove is intended primarily for boiling 1-2 cups of water.

Editor’s Note: Please use proper care and take appropriate precautions when working with flammable fuel and and open flame. It is critical to follow the directions closely throughout the project, and pay special attention to the sealing process in Step #3.

What will the next generation of Make: look like? We’re inviting you to shape the future by investing in Make:. By becoming an investor, you help decide what’s next. The future of Make: is in your hands. Learn More.

Project Steps

Create pot stand

Chicago screws make a good pot stand. Three provide good stability. They need to be close enough together to support the cook pot, but wide enough apart to place the small mint tin inside.

Draw a circle around your pot onto the bottom of the tin. Drill 3 or 4 holes for your posts inside this circle. I chose 3, as it’s more stable. Your pot will sit on these posts, so if the edge of the pot is curved, you need the posts to fall inside of the curve so the pot doesn’t want to slide off.

Place short bolts, threaded the same as the Chicago screws (or the outside threaded screw parts of the Chicago screws, if the threads are long enough) and put on nuts to hold them in place. These are permanent; your Chicago screw posts get threaded on when you want to use the stove.

Add mesh fuel support

You can use any mesh you have handy. I happened to use a paint roller wire spreader screen. If you use this, you can pry the frame open with a straight screwdriver.

Cut the mesh into a 9.5cm x 13cm rectangle. Cut 2 cm squares out of each corner. Fold the four 2 cm tabs up at 90 degrees.

Place this fuel support into the tin and make sure that the pot supports can pass through the mesh. Tweak as needed. You may need to push the mesh holes around so the posts line up with the bolts.

Seal the small tin to hold liquid

The small mint tin needs its hinge holes sealed so liquid fuel doesn’t leak.

Cut a piece of soda can 1 cm x 4 cm. Put some J-B weld around the two hinge holes making sure not to get any into the hinge. The aluminum should slip up into the rolled edge at the top. Use binder clips to hold the bottom while the J-B Weld cures.

Make the mini alcohol stove

There are several ways to make the small tin alcohol stove. A hole in the lid with a fiberglass wicking pad is common.

A capillary action wick can also be made. This works by the fluid moving up a thin gap between two metal reeds and then evaporating. The evaporated fuel is what burns, not the liquid.

A fast burning, hot stove can be created by making an X shaped wick. The X shape allows full access of oxygen to both sides of the flame.

A slower burning stove can be created by a single long wick.

Both wicks are made out of a soda can.

These instructions will cover making the capillary wick.

Slotting the small tin for the wick

Using a rotary tool, cut a slot in the lid of the small mint tin. The slot should run roughly 2 cm long by 2 mm wide. It may be easier to use 2-3 cut off wheels at the same time to get the desired cut thickness.

Make a Soda Can metal wick

Cut off the top and bottom of a soda can and split it in a straight line from top to bottom. Cut a strip 1.8 cm wide. Cut another strip about 6.5 cm wide and set aside for use later as a wind shield.

Fold the 1.8 cm soda can strip so you have 2 sections the width of the hole in the tin and a zig zag section this long as well. The zig zag secton is easily folded using a pair of needle nose pliers or the edge of a table.

Cut the zig zag portion off so it can fold into the center of the 3 sections. This is the metal wick. The zig zag in the middle keeps the 2 reeds far enough apart that liquid denatured alcohol can’t boil in the small gap and spit little balls of burning fuel.

Insert the metal wick into the small tin

Slip this metal wick into the slot in the mint tin. It needs to go all the way to the bottom. About 2 mm will stick up above the top of the tin.

This is short enough that the small tin stove can be stored inside the big tin. Some heat is absorbed by the wick and transfers down the metal which evaporates the fuel, and burns.

Cardboard lighting Wick

To make lighting the stove easier, slip a 2-3mm strip of thin single layer cardboard from a soda box down the metal wick at the center. Cut it off just a little above the metal wick. This will soak alcohol up and be easier to light . It will not burn away because oxygen can’t get to it.

Using the denatured alcohol stove

CAUTION: Denatured alcohol burns with a pale blue flame that can be difficult to see. Be especially careful in bright sunlight where the flame is nearly invisible.

Only use alcohol as the liquid fuel. Other liquid fuels will burn too hot for this stove.

Do not try to move the stove while it is burning.

Fill the stove half full with denatured alcohol, isopropyl alchohol, or HEET alcohol fuel treatment.

Some trial and error will help you find the right amount of fuel to get a 5-6 minute burn time and boil the amount of water you are trying to heat.

Light the cardboard wick. The stove will burn low for a while until the metal wick is heated up enough to start vaporizing the fuel. Then the entire wick will light up with a nice even flame.

You can blow the stove out with a quick, hard puff of air.

Using the solid fuel stove

You can burn solid fuel tablets in this stove as well. Some fuels may burn better on the open grate, while others may burn better in a tray. You can experiment to see which way your fuel prefers and give better results.

Using the wood burning stove

You can burn small sticks on this stove as well. This mode requires the most attention, but is the cheapest using readily available dry sticks.

Keep feeding the fire as it burns, being careful not to bump the posts and knock the pot off the stand.

Using the windscreen

Step 6 had you cut a piece of soda can to use as a windscreen. Fold it around the big mint tin for storage. Gentle folds, not sharp creases, are best.

You can wrap the aluminum around the big tin and it will tuck in nicely around the hinges. You can open and close the lid to provide even more wind protection if needed.

The alcohol stove is the most likely to need this windscreen when first starting. Be careful when using the windscreen, as it will trap more heat around the stove and can cause vapors to seep out around the edges of the tin and ignite. Just blow the stove out, give it time to cool off, and re-light.

Packing up

Wait for the stove and parts to cool, they may be very hot.

Unscrew the posts, leaving the bolts and nuts in the big tin. Pull out the mesh, flip over and re-insert into the tin. Place the alcohol stove in the big tin. Place the posts in the tin. You can also add some of your solid fuel. Close the big tin and wrap the soda can windscreen around it. I like using a hair elastic to keep everything together.

The alcohol is kept in a separate container (such as in the travel sized bottle shown).

You can slip the multi-fuel backpacking stove into a pocket or drop it into your cook kit.