Last year, at the annual Pinewood Derby race for our local Cub Scout pack, we used a Matchbox radar gun (see MAKE, Volume 10, page 148) to measure the top speeds of several cars. We learned that they reached 10mph–11mph at the bottom of the slope. Armed with this knowledge, along with some Lexan plastic, a fan, and a precise digital scale, it was time to build a wind tunnel for this year’s event.

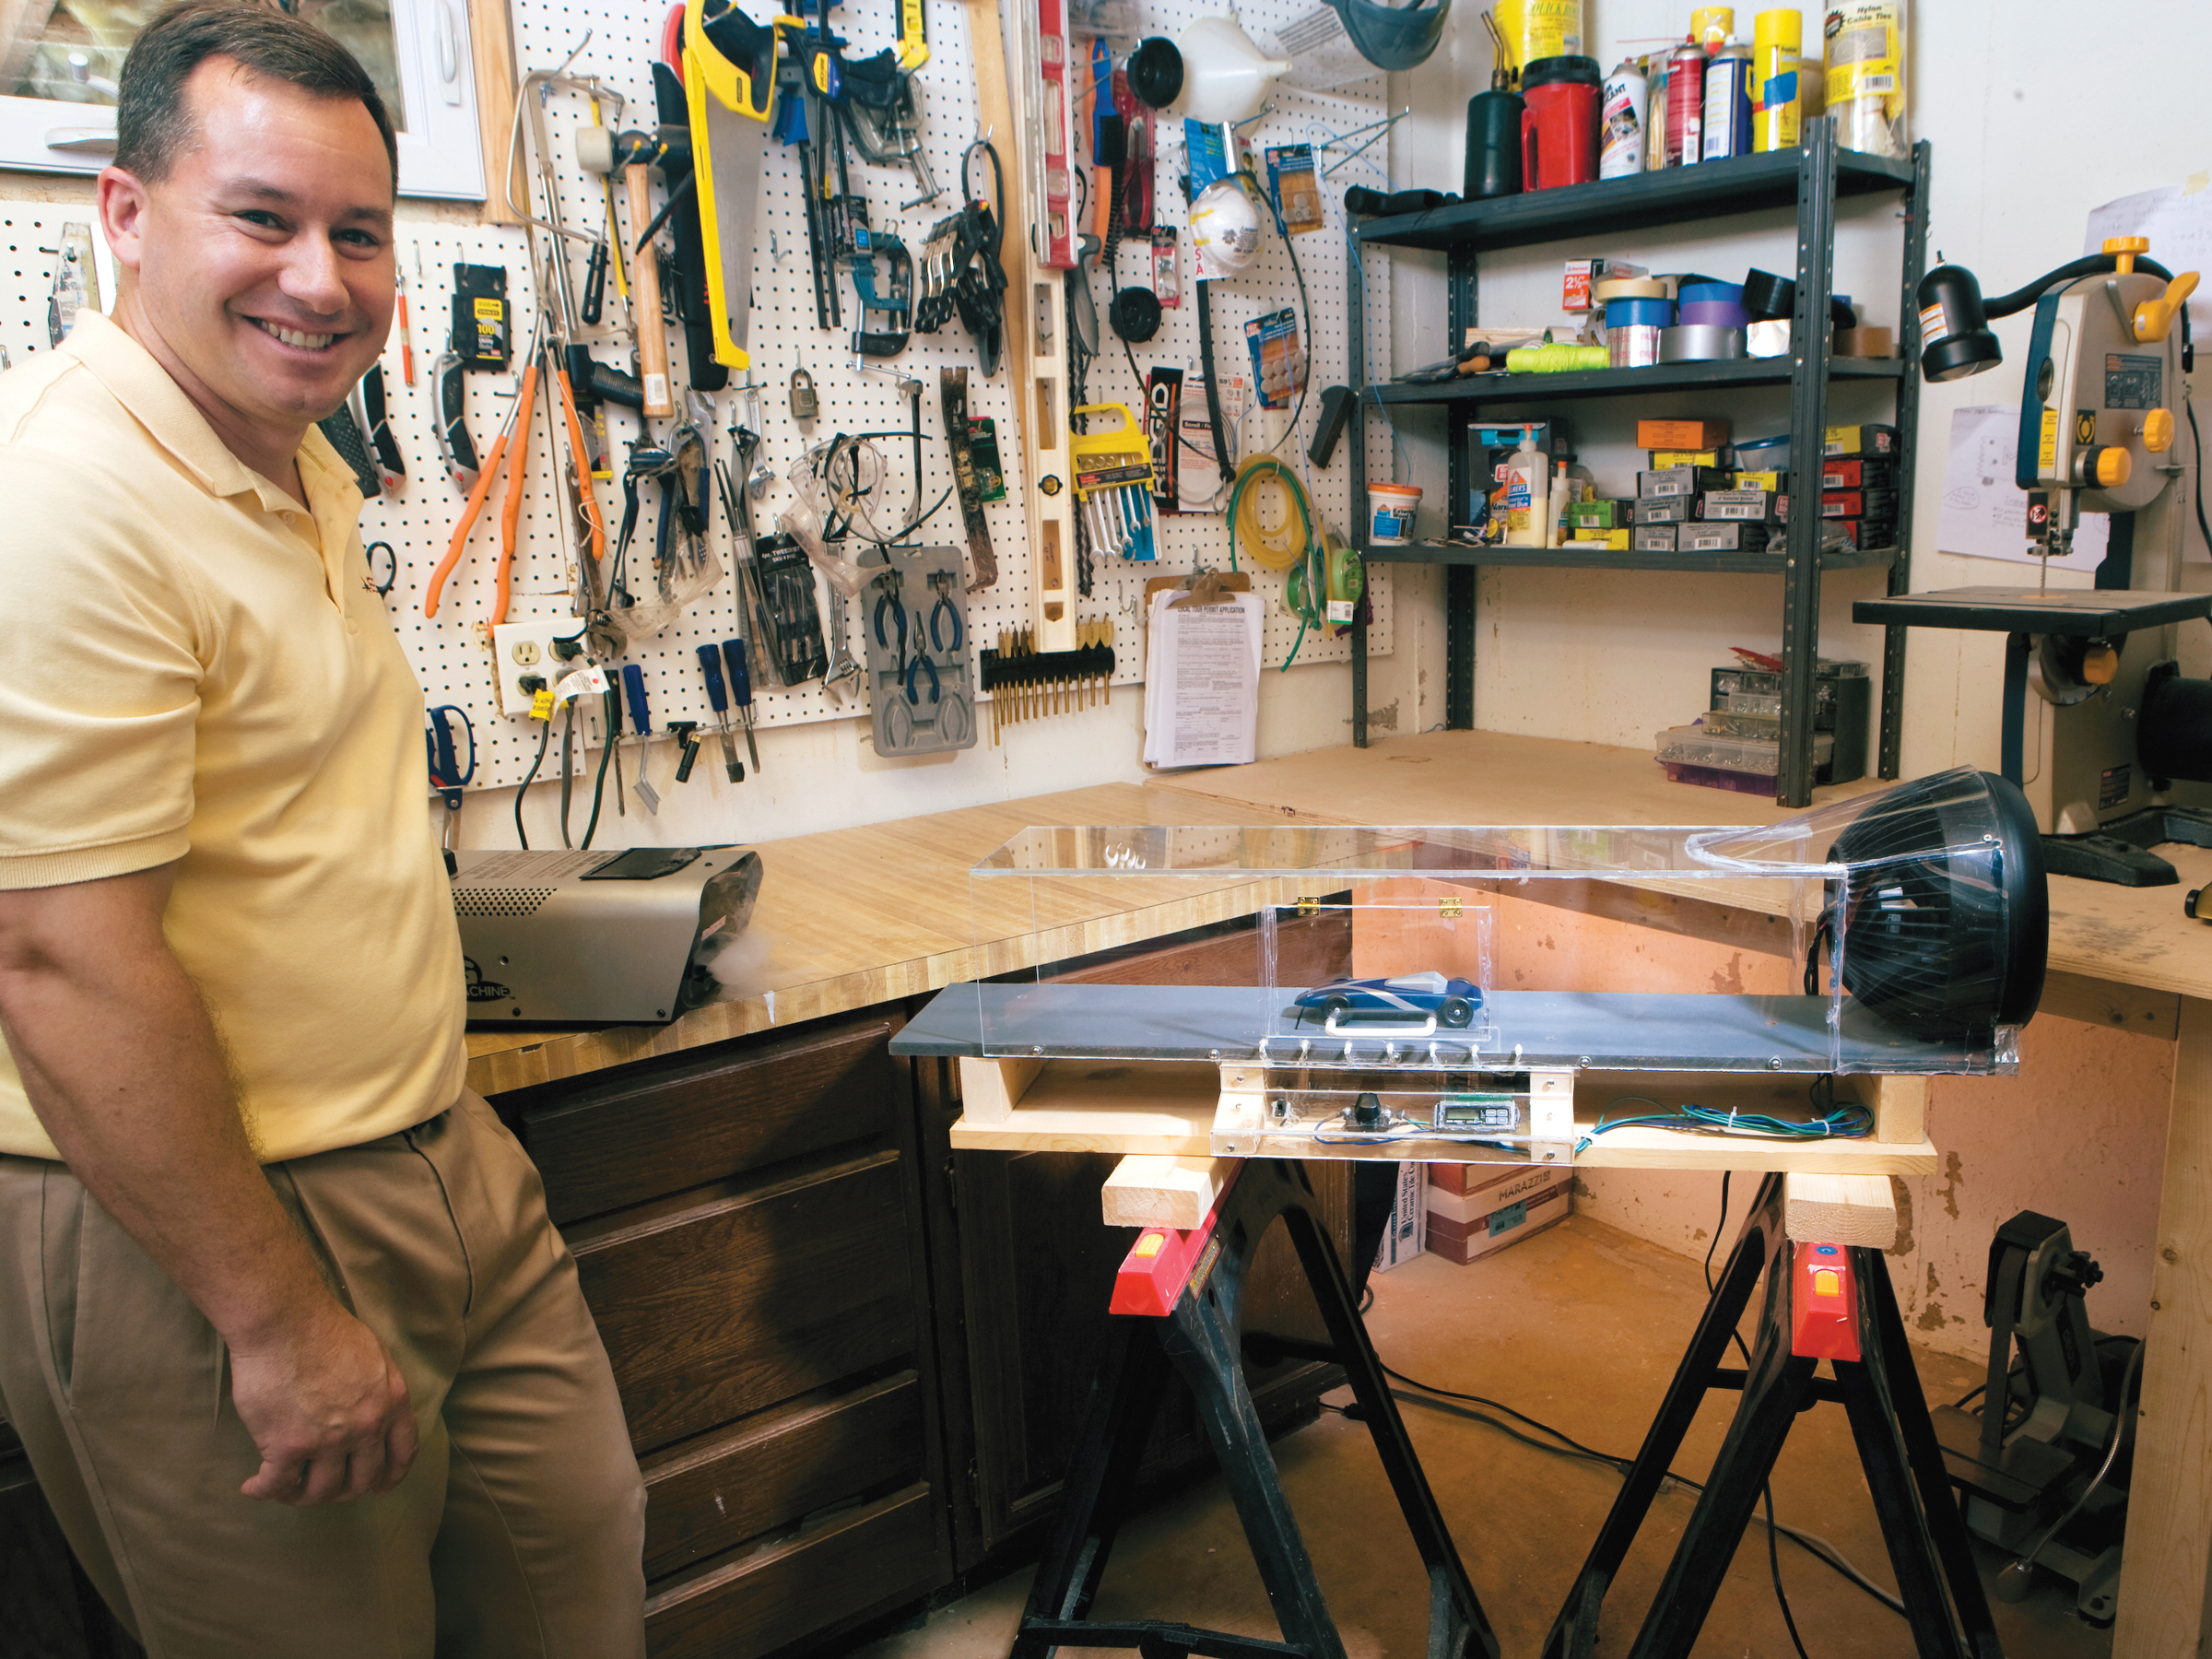
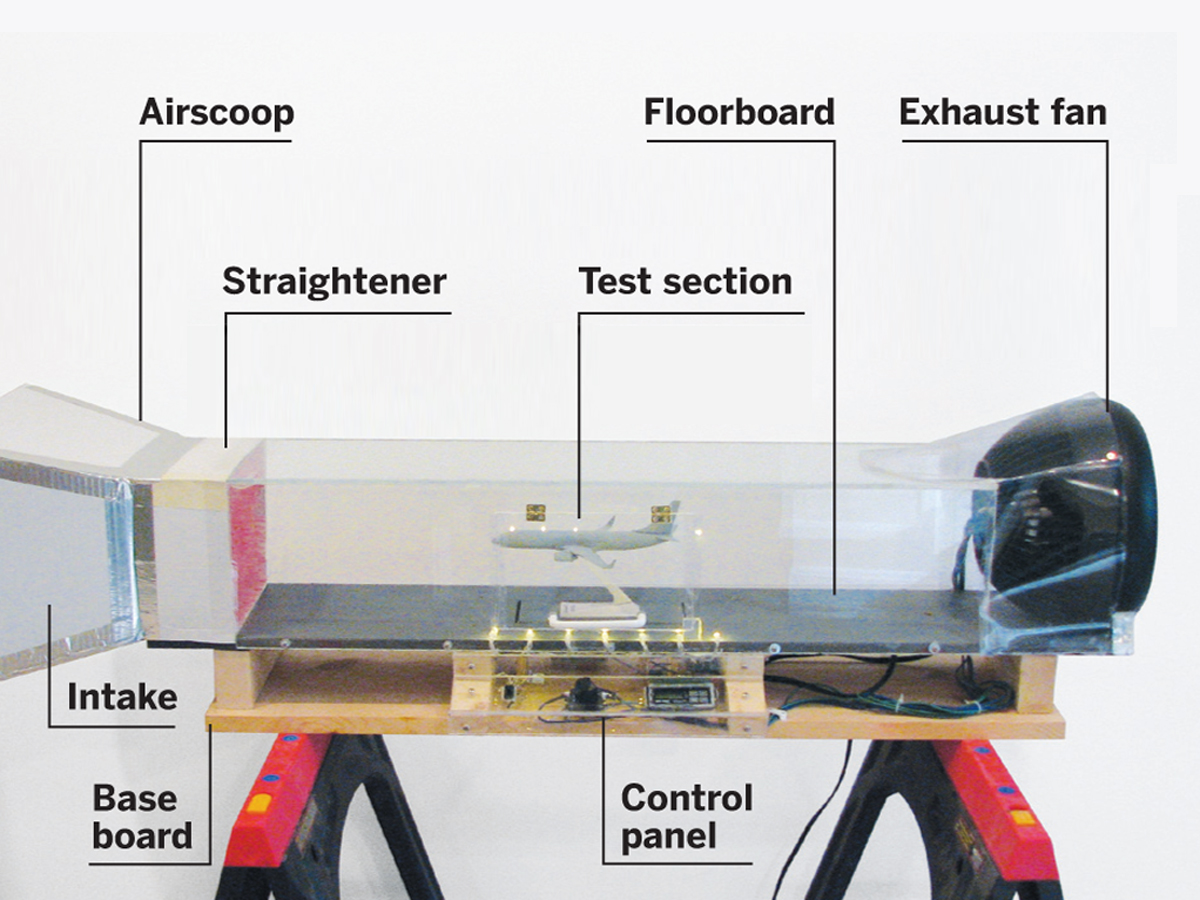
I wanted to keep all the elements of the tunnel visible, so the Scouts could have fun seeing and learning how it worked. It’s a simple, open-loop type of tunnel powered by a household fan at the exhaust end (having the fan blow air into the tunnel would generate too much turbulence).

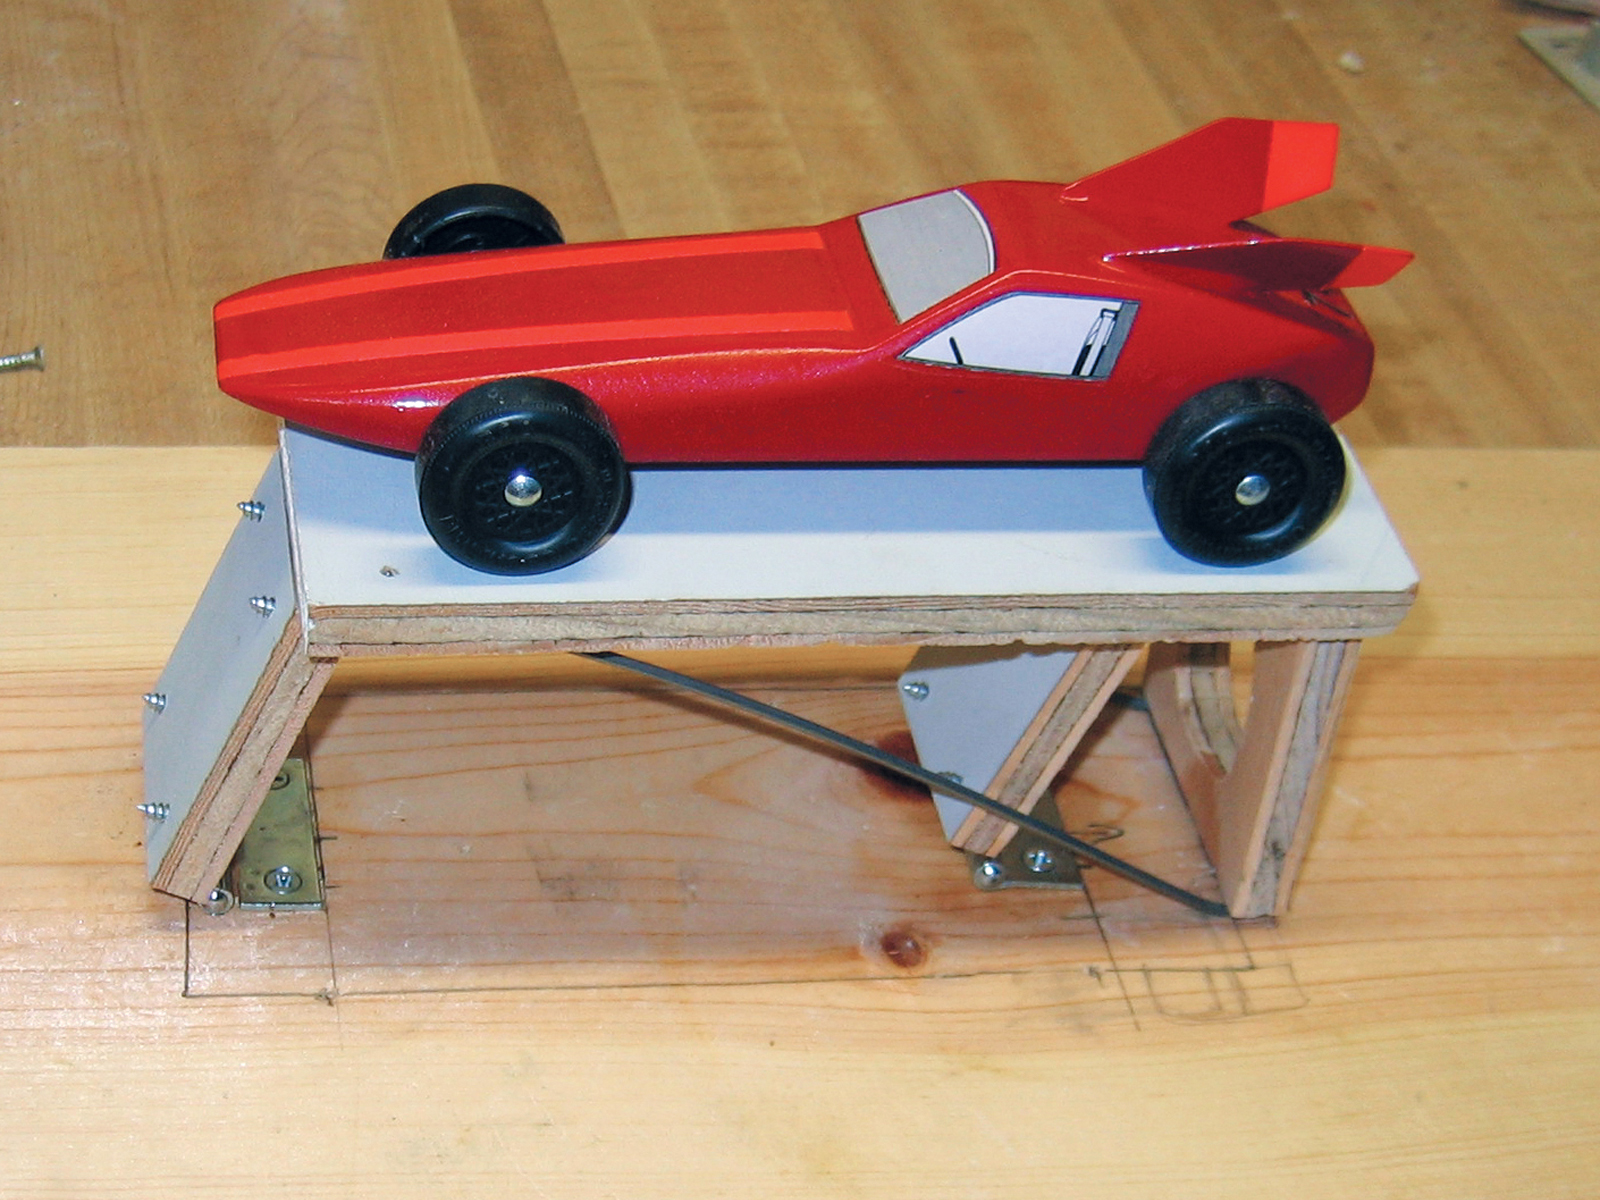
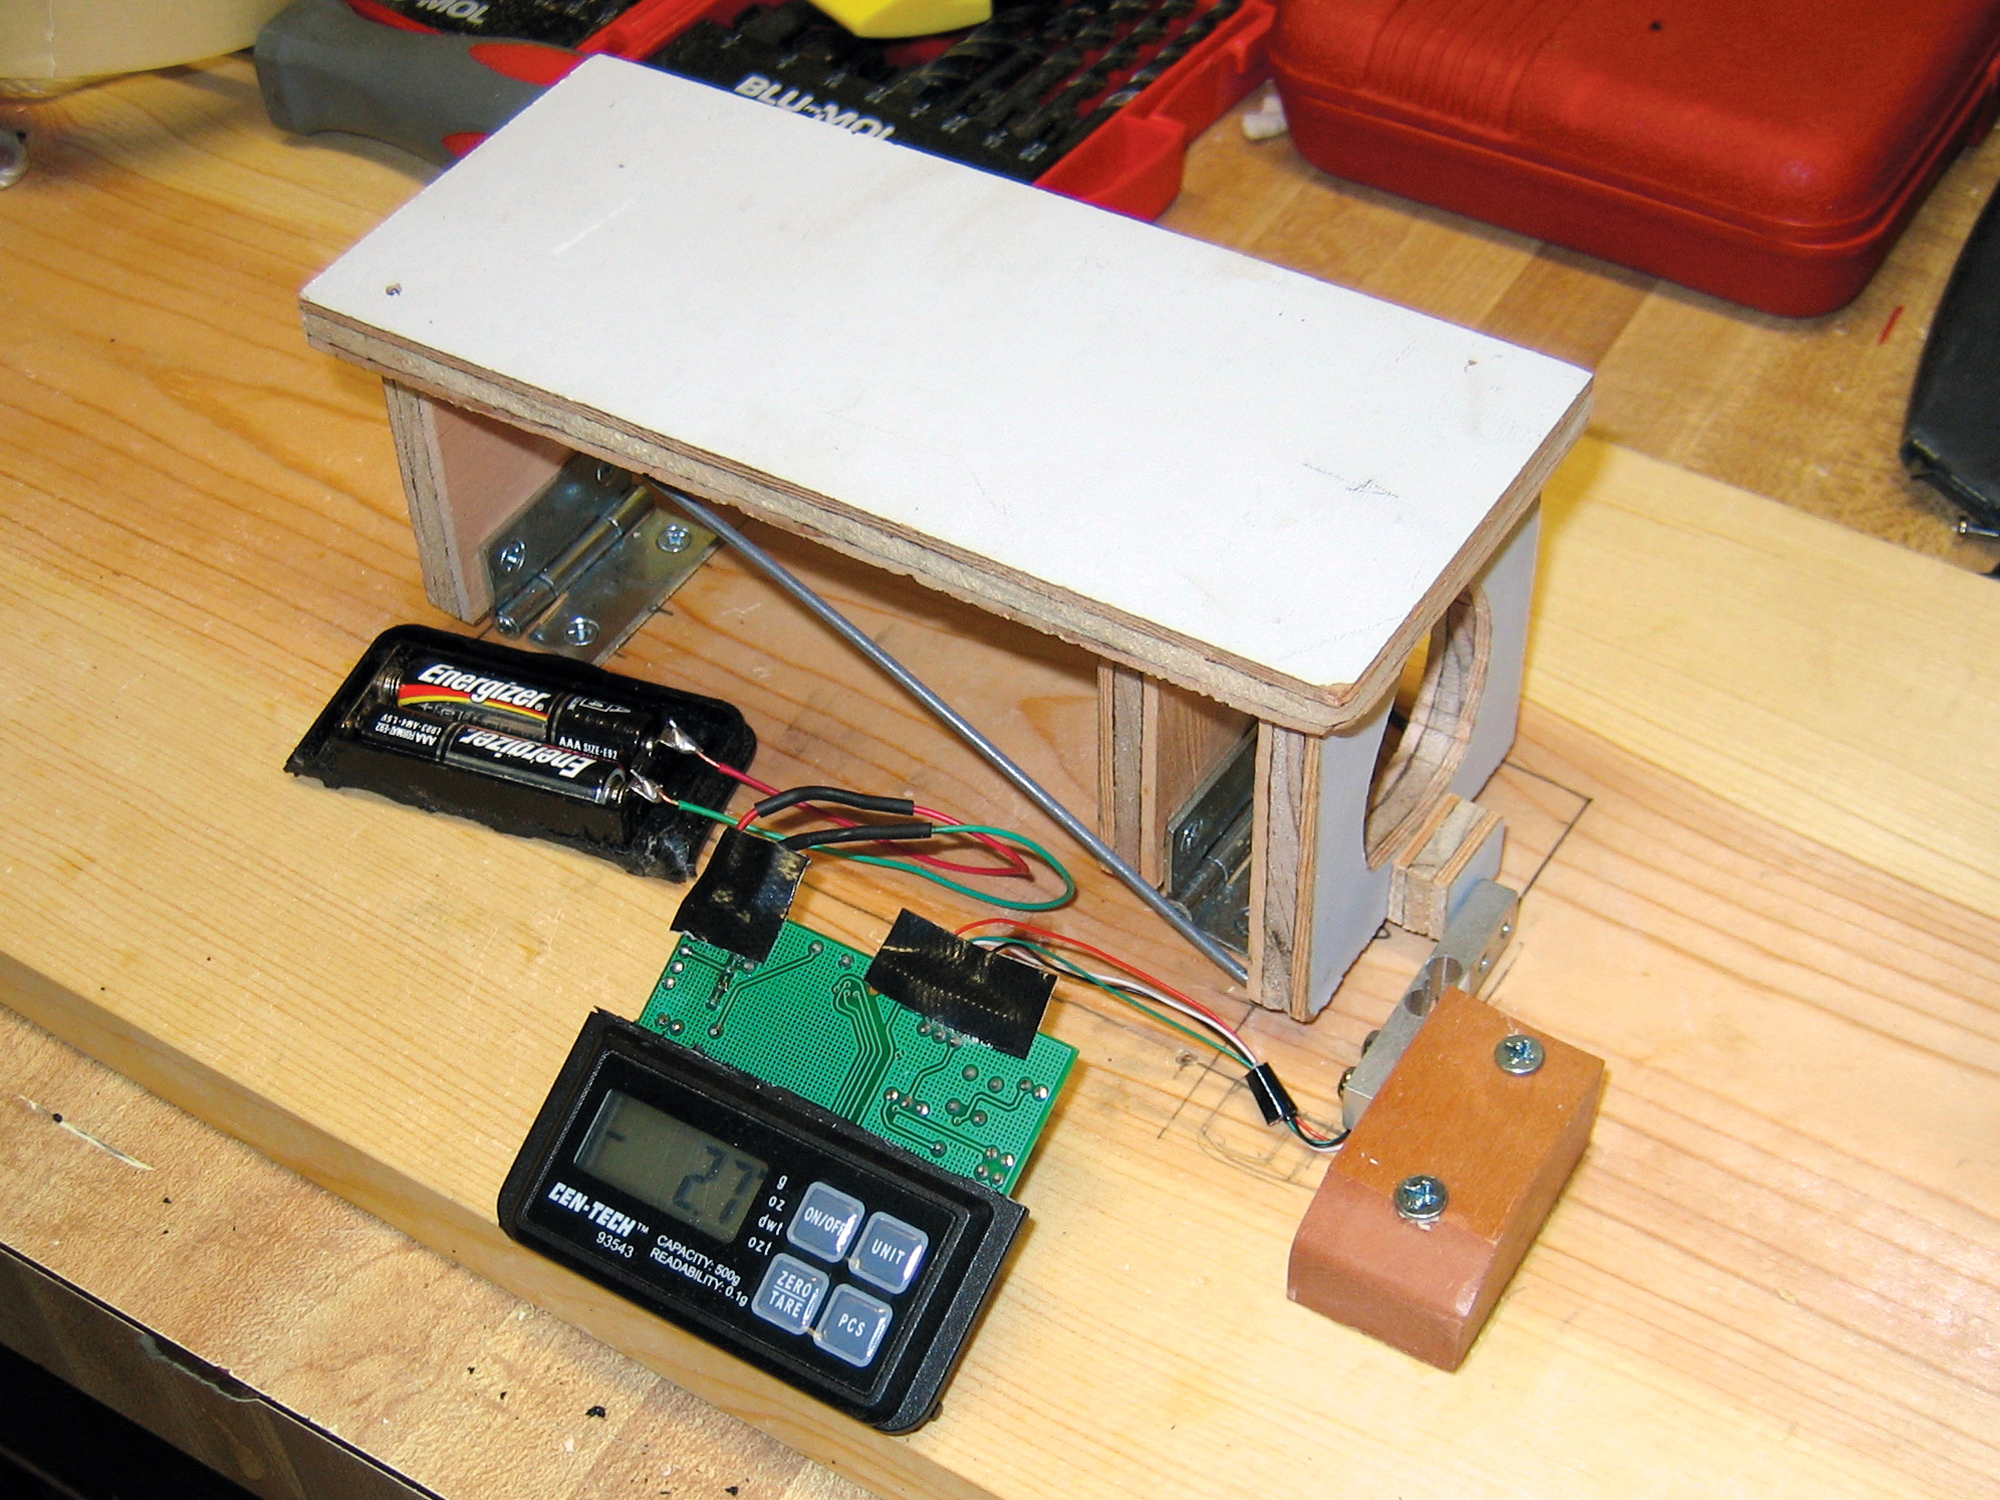
The highlight of this project is the test stand and its very accurate drag gauge. The stand holds test objects in the middle of the tunnel, and is supported by 2 hinged struts that pivot backward. When wind pushes against the object, the struts move a back plate that pushes into a force beam, which measures the force. The force beam is hacked out of an inexpensive digital scale that measures down to 0.1 gram.

What will the next generation of Make: look like? We’re inviting you to shape the future by investing in Make:. By becoming an investor, you help decide what’s next. The future of Make: is in your hands. Learn More.

Project Steps

Make the floor and base boards.

I used 7/8″ plywood, 8″x40″, for the tunnel’s floorboard. Paint it to make it smooth. Cut a 3″x7″ rectangle out of the center for the test section: first drill pilot holes, then cut it out with a jigsaw.

Make a base the same length as the floorboard but several inches wider, to give extra room for the control panel. I used a 1″ board for the base. Line up the boards and trace the 3″x7″ hole onto the base — this will help you align the test section later.

Build the test stand.

The upper surface of the test stand must be flush with the floor of the tunnel, and the hinged struts should pivot easily and balance just aft of vertical. All other connections must be rigid; minute movements of the stand must be applied to the force beam rather than absorbed in any joints.

Using scrap ¼” plywood, cut two 2″-square vertical struts and a 2¾”×6½” test section floor. Cut the back plate 2″×2½” tall, and lighten it with a large cutout, because weight not centered in the pivoting mechanism will tend to fall backward and inflate very small measurements. Glue a ½”×¾” block to the lower-center-back of the plate; this spacer is what presses against the force beam.

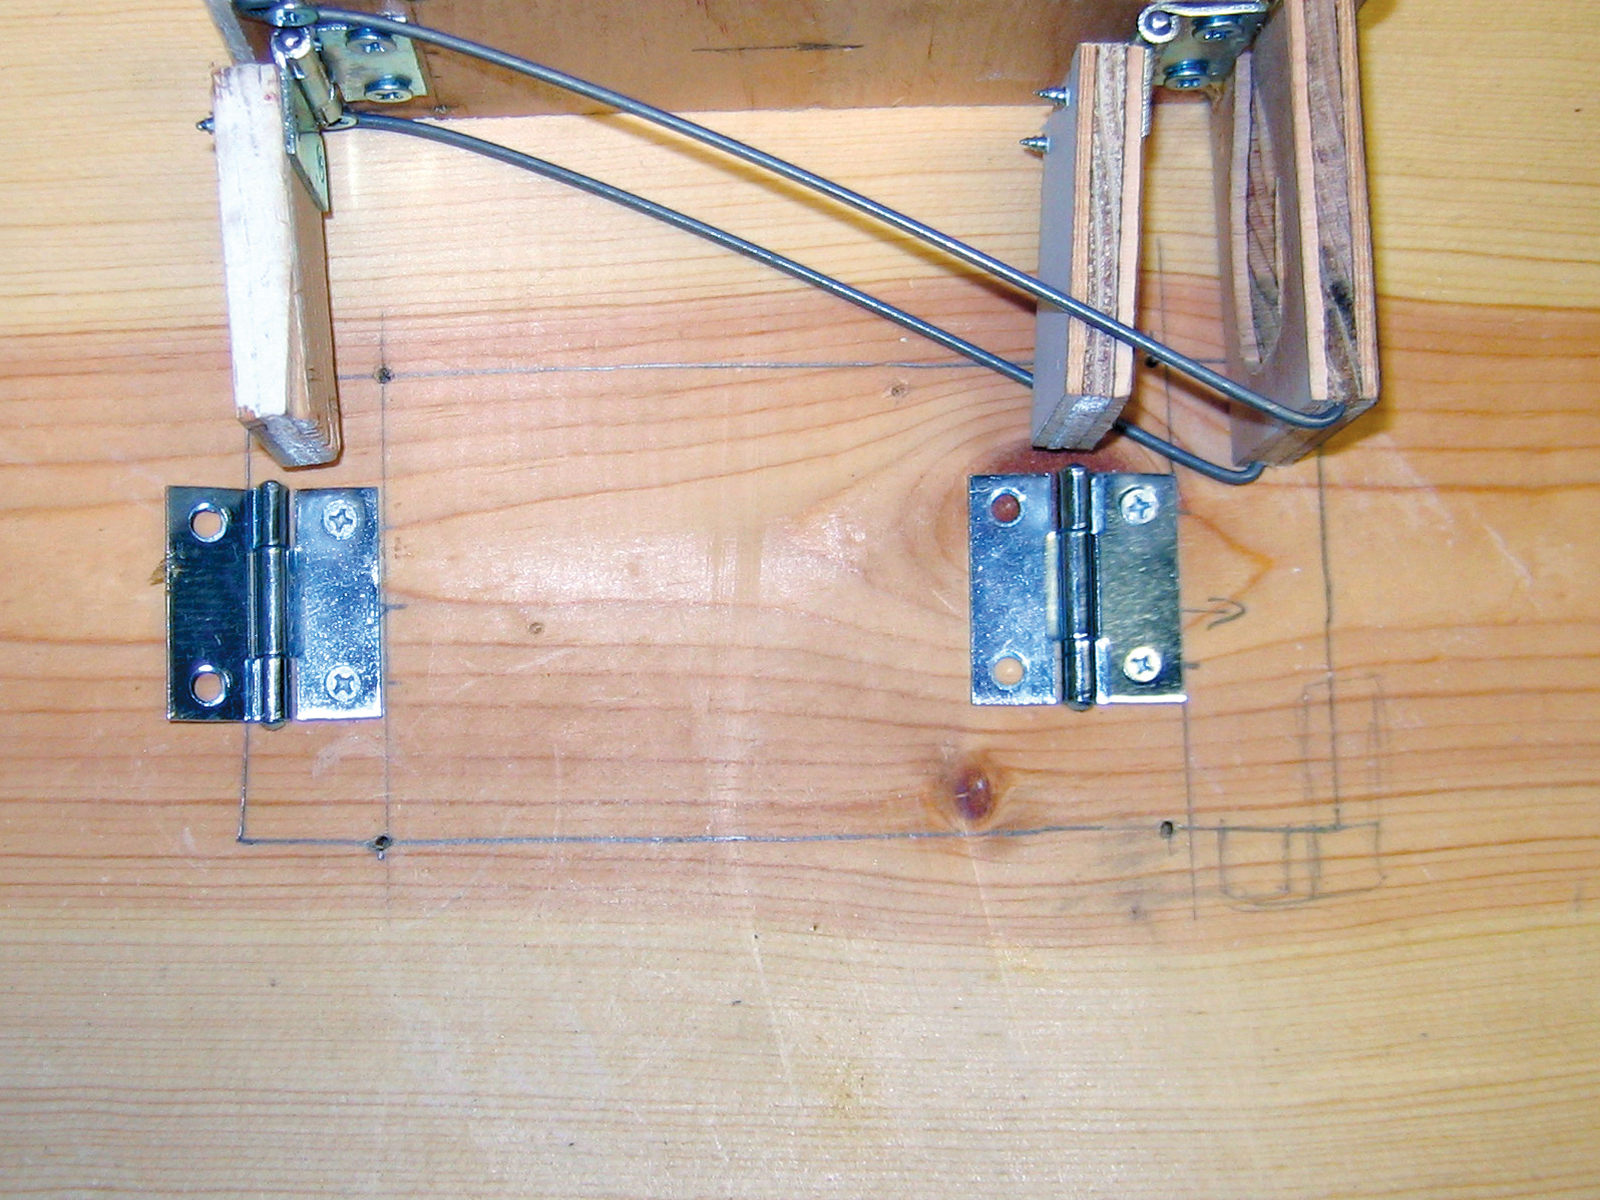
Mount the underside of the test section floor to the struts, using two 1½” hinges. Glue the back plate to the aft end, and brace the connection diagonally with stiff steel wire on either side. I looped one end of each wire, screwed it next to the front strut, and bent the other end up to fit into a hole drilled in the bottom end of the back plate.

Use 2 more hinges to mount the struts to the base board, making sure the stand pivots smoothly. A reliable mechanism requires tight tolerances! I needed a snub Phillips screwdriver to handle these lower hinges.

Hack the force beam.

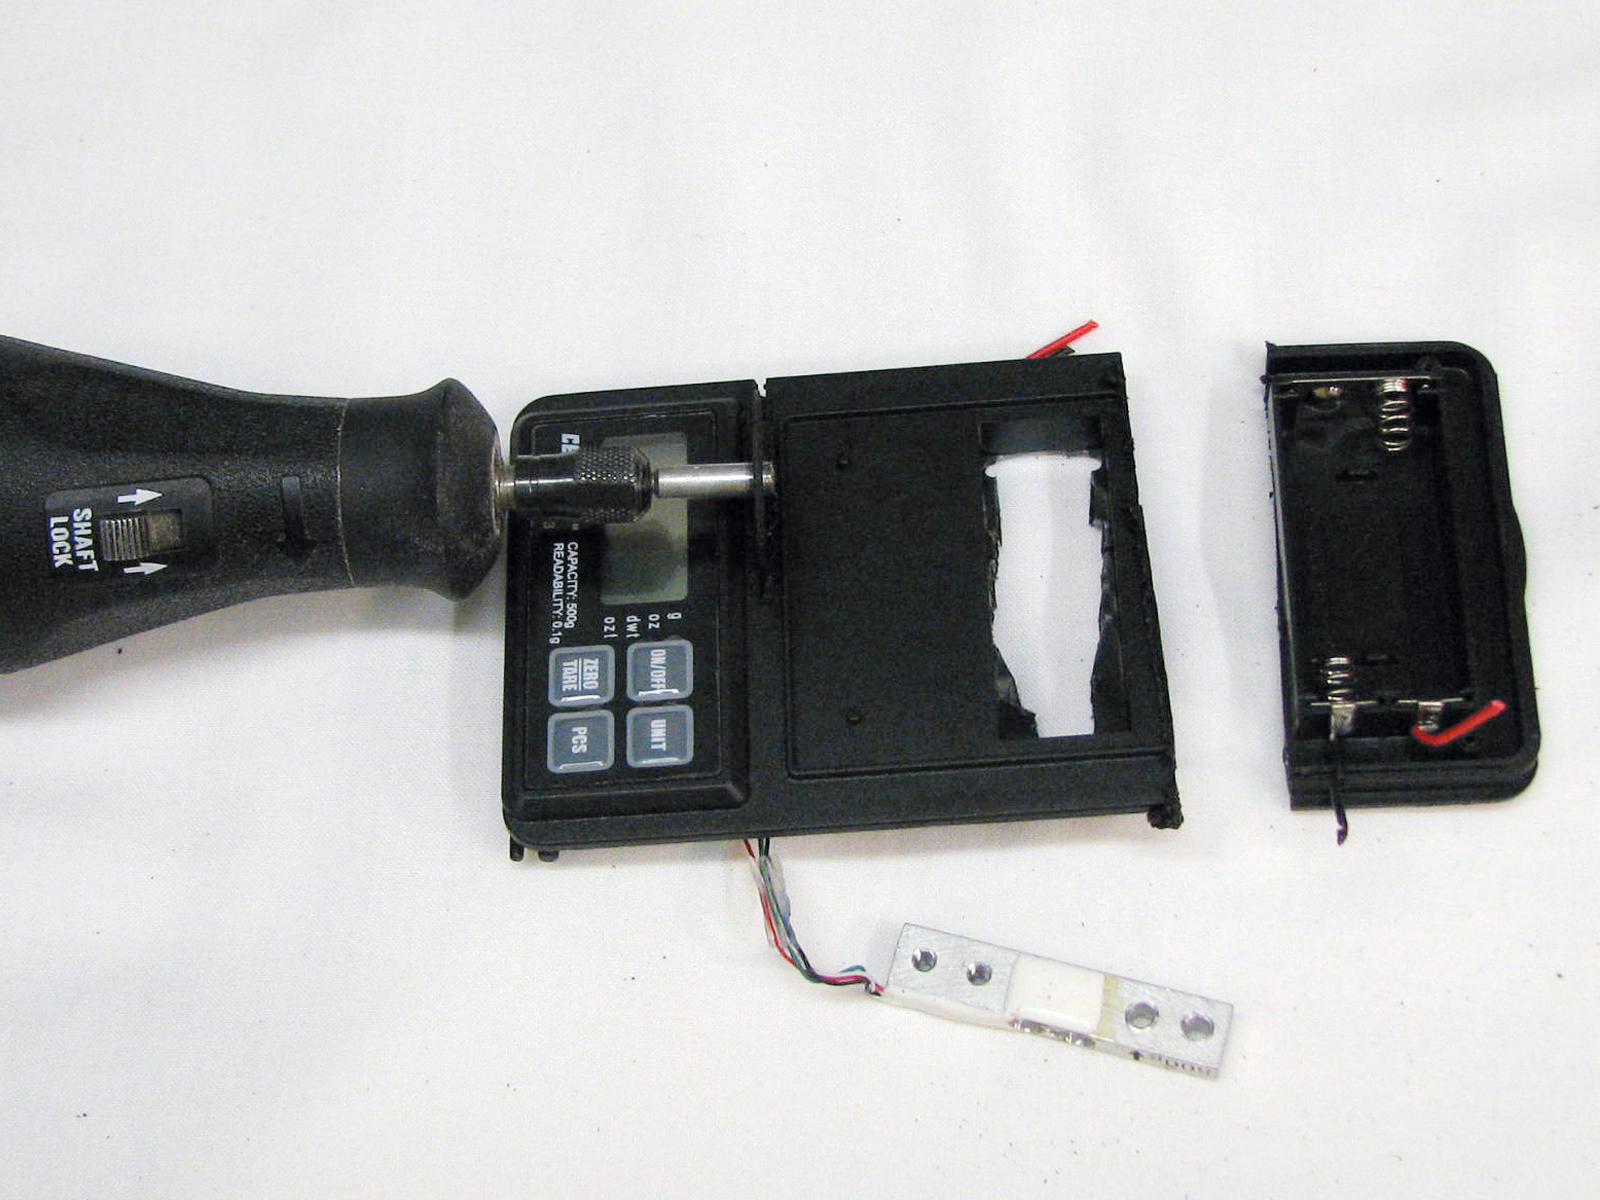
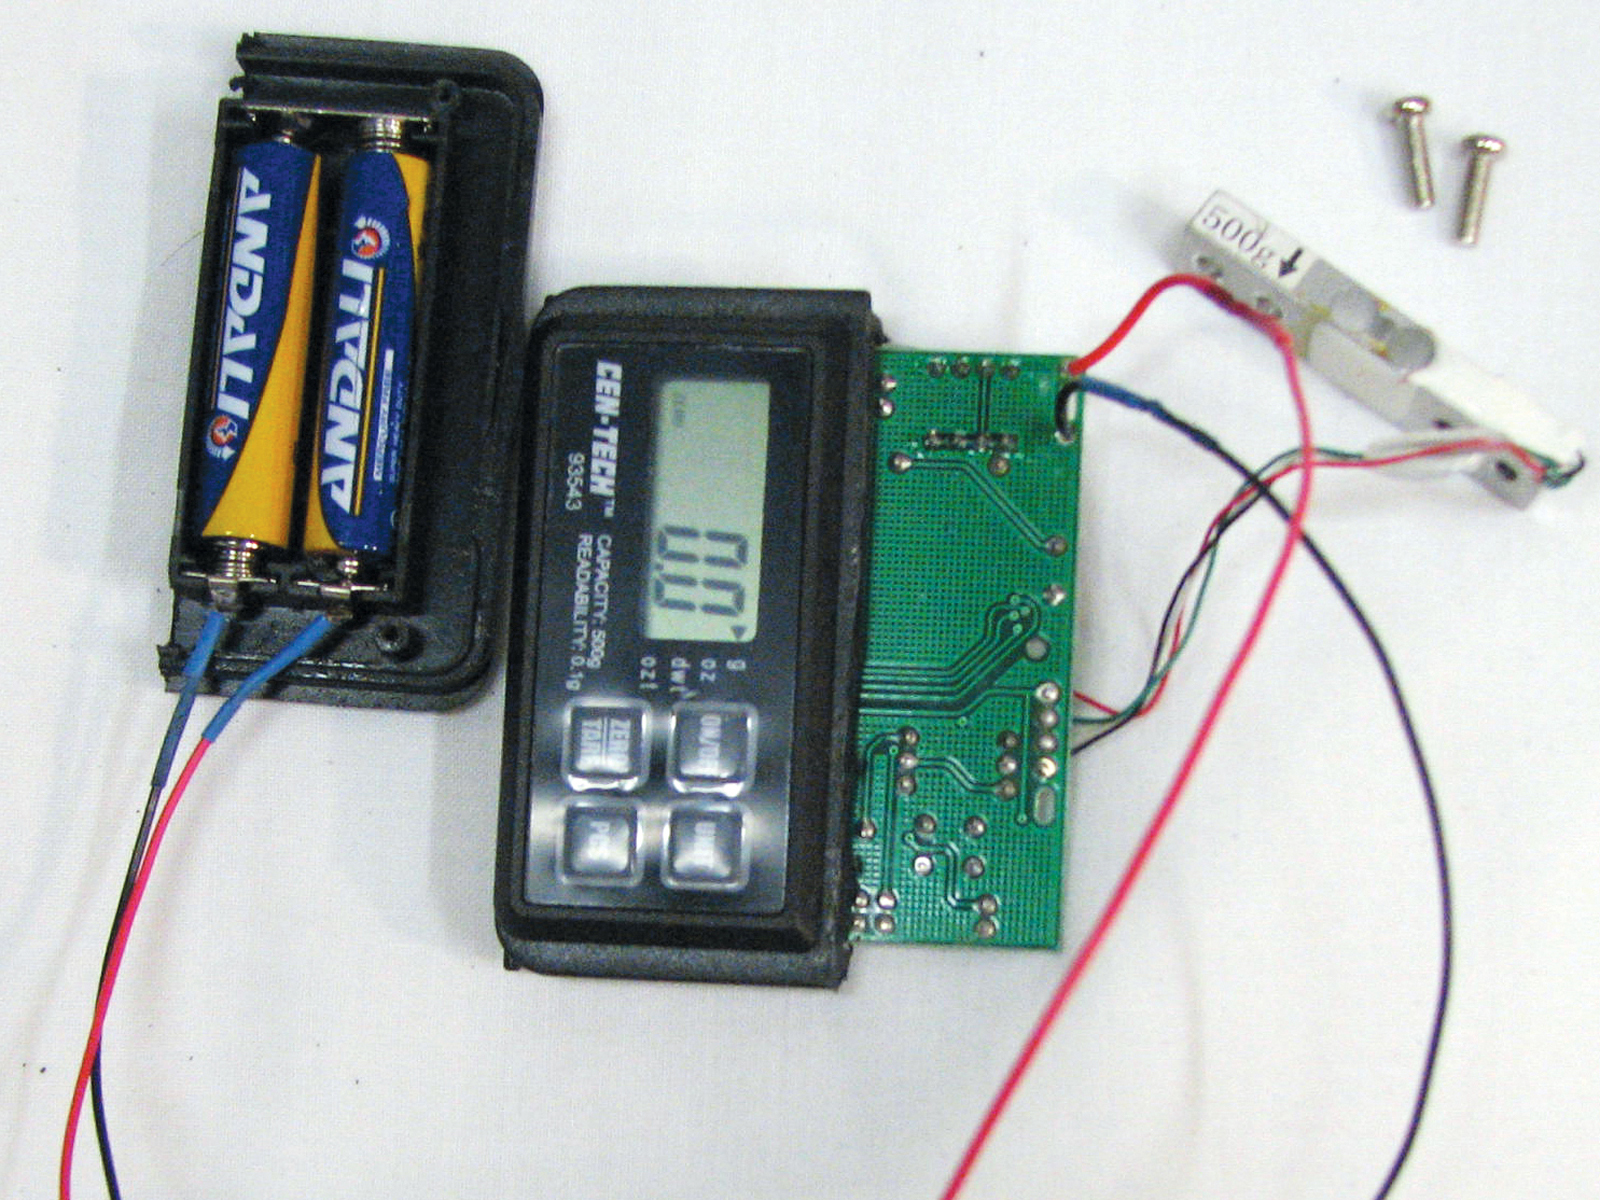
Unscrew the back of the Cen-Tech scale, then remove and save the screws holding the force beam. Carefully cut away the hot glue over the battery and force beam wires, and use wire cutters to cut an opening through the side of the case big enough to pull the beam through, keeping its wires intact. Use a Dremel to cut the frame above the display, not too deep, and toss the excess. Also cut off the battery compartment; I lengthened the power wires for more mounting options and duct-taped them down later for strain relief.

Cut a wood block about 1″×2″×½” and mount the force beam to this block, using the saved screws. Now, the critical part: lean the stand back slightly and position the force beam block on the base such that the spacer just touches the force beam near the sticker that says “500g.” Hold the block in place, power up the scale, and confirm that it responds correctly before screwing the block to the base board. If the scale reads negative values, flip the beam around.

Complete the base.

The rest is easy. Cut 4 support blocks sized to lift the floorboard so that its top sits flush with the top of the test stand. I used 2×4 scraps, shaped the middle blocks with a ledge for mounting the control panel, and attached them with wood screws.

Build the tunnel and control panel.

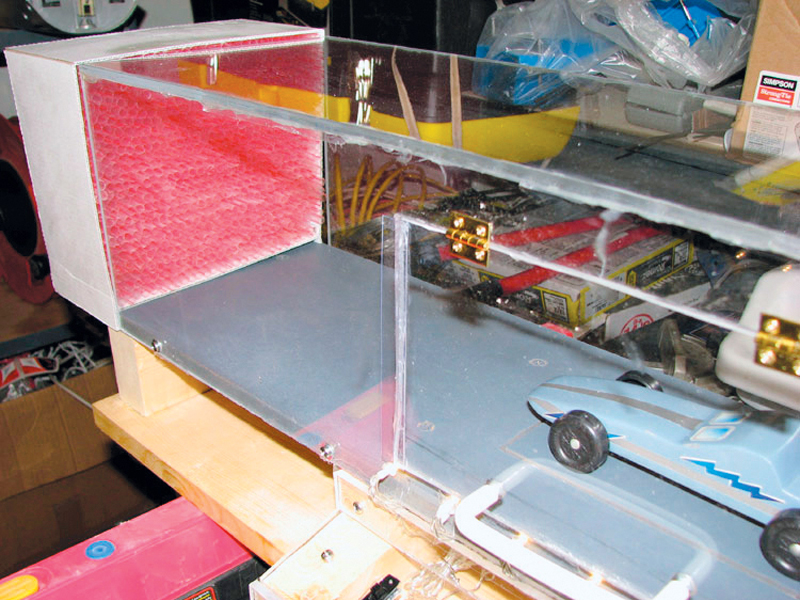
Cut 2 pieces of 0.220″ Lexan 7″×30″ for the tunnel sides, and 1 piece 74″×30″ for the top. Cut a test section access door in 1 side. If you’re adding LED lighting, the door should clear the floor by about 1″.

Mount the door with the brass hinges along the top, and attach the handle at the bottom. Air should not leak in around the door during use, so you need to seal it; clear tape works for low velocities, but Lexan is sturdier and better looking. One lesson learned: glue a small block of Lexan inside the door opening to prevent the door from swinging inward.

Finally, assemble the tunnel by screwing the Lexan sides to the floorboard and using plastic epoxy to secure the top piece.

Below the access door, create a control panel to house the scale display, fan controls, and LED switch. I used Lexan for better visibility. For the LEDs, I hot-glued 7 of the 10 along the floor near the test section and taped the remaining 3 under the test section, to illuminate the tunnel’s workings.

Mount the fan.

Crack open the fan, extend all its control wires about 2′, and remove any unneeded supports. Mount the fan as near as possible to the center of the tunnel, blowing out the back. Seal around it to close any holes between it and the tunnel. I used thin scrap plastic from toy packaging, to preserve the view, but cardboard and duct tape would work fine. Regardless, use tape and hot glue to make the seal complete.

Make a flow straightener.

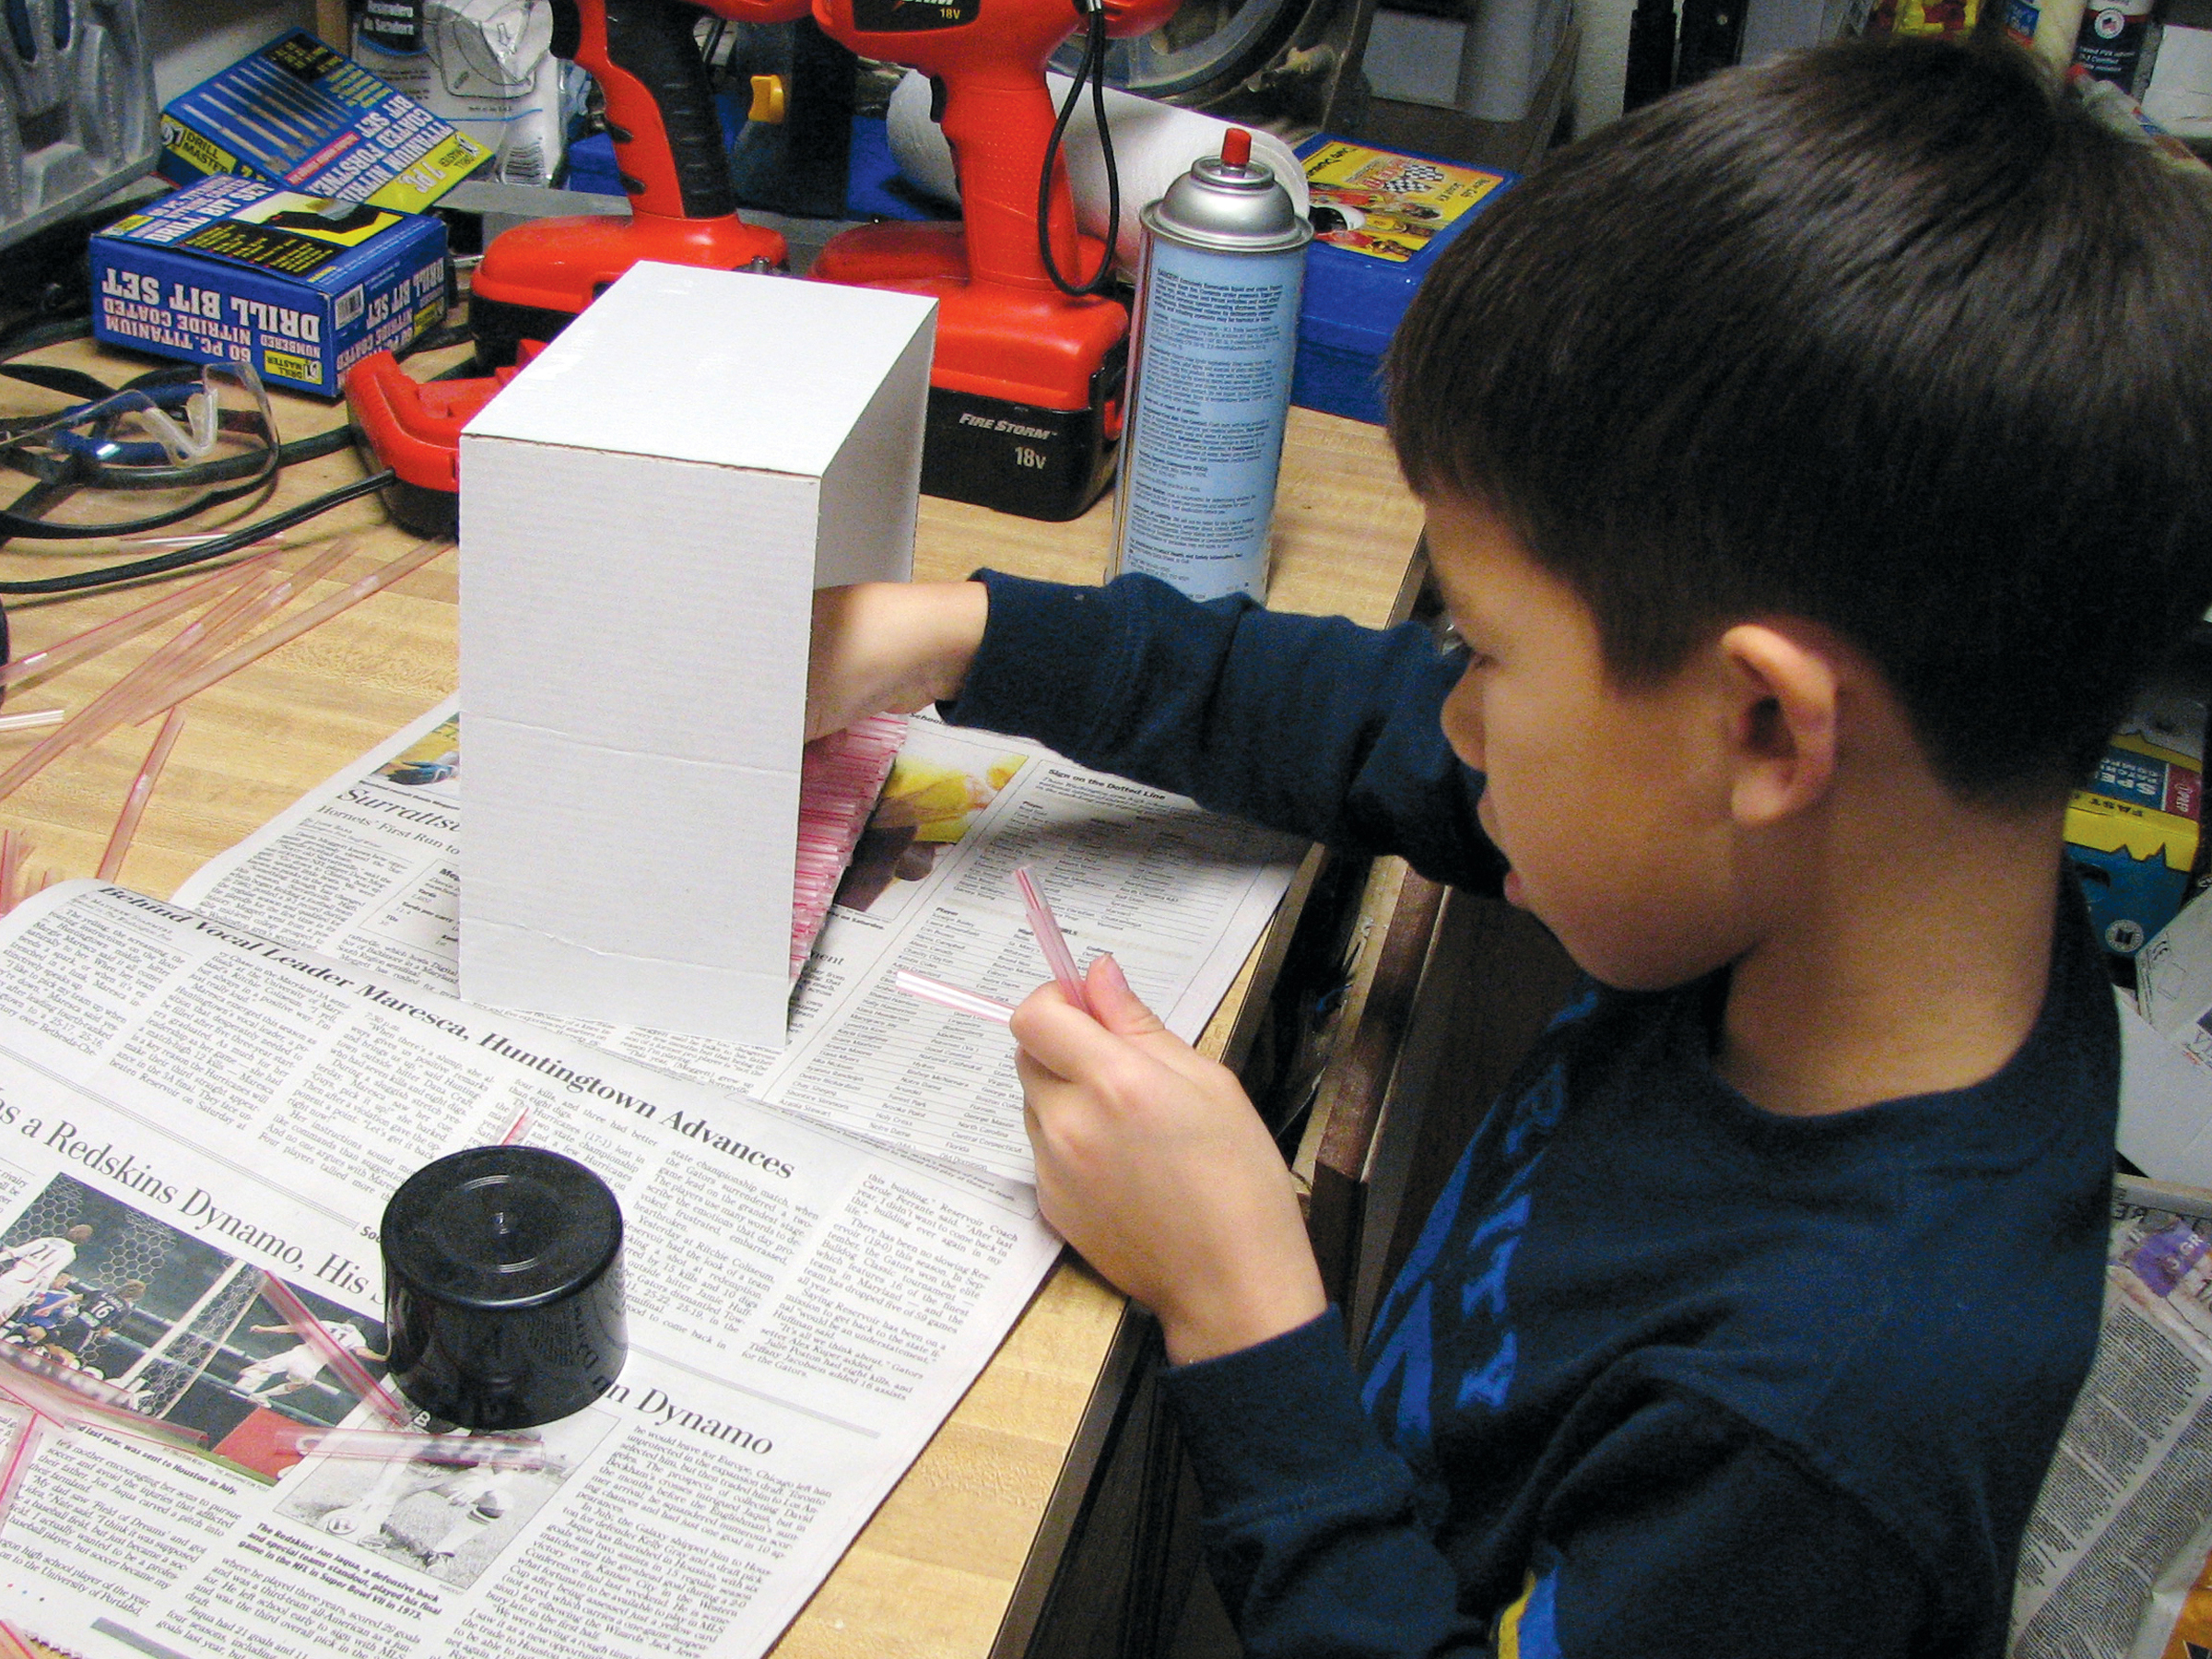
Make a cardboard sleeve with the same cross- section as the tunnel, and pack it with 2″ pieces of drinking straws — this part goes faster with a small- fingered helper. The straws reduce turbulence, but they also cut the wind speed by several mph, and the tunnel will work without them. To improve performance, add a cardboard airscoop in front of the straightener. That’s it!

Test the car!

Make sure the tunnel is level and stable, for repeatable drag numbers. Tape or block your car wheels on the test section floor.

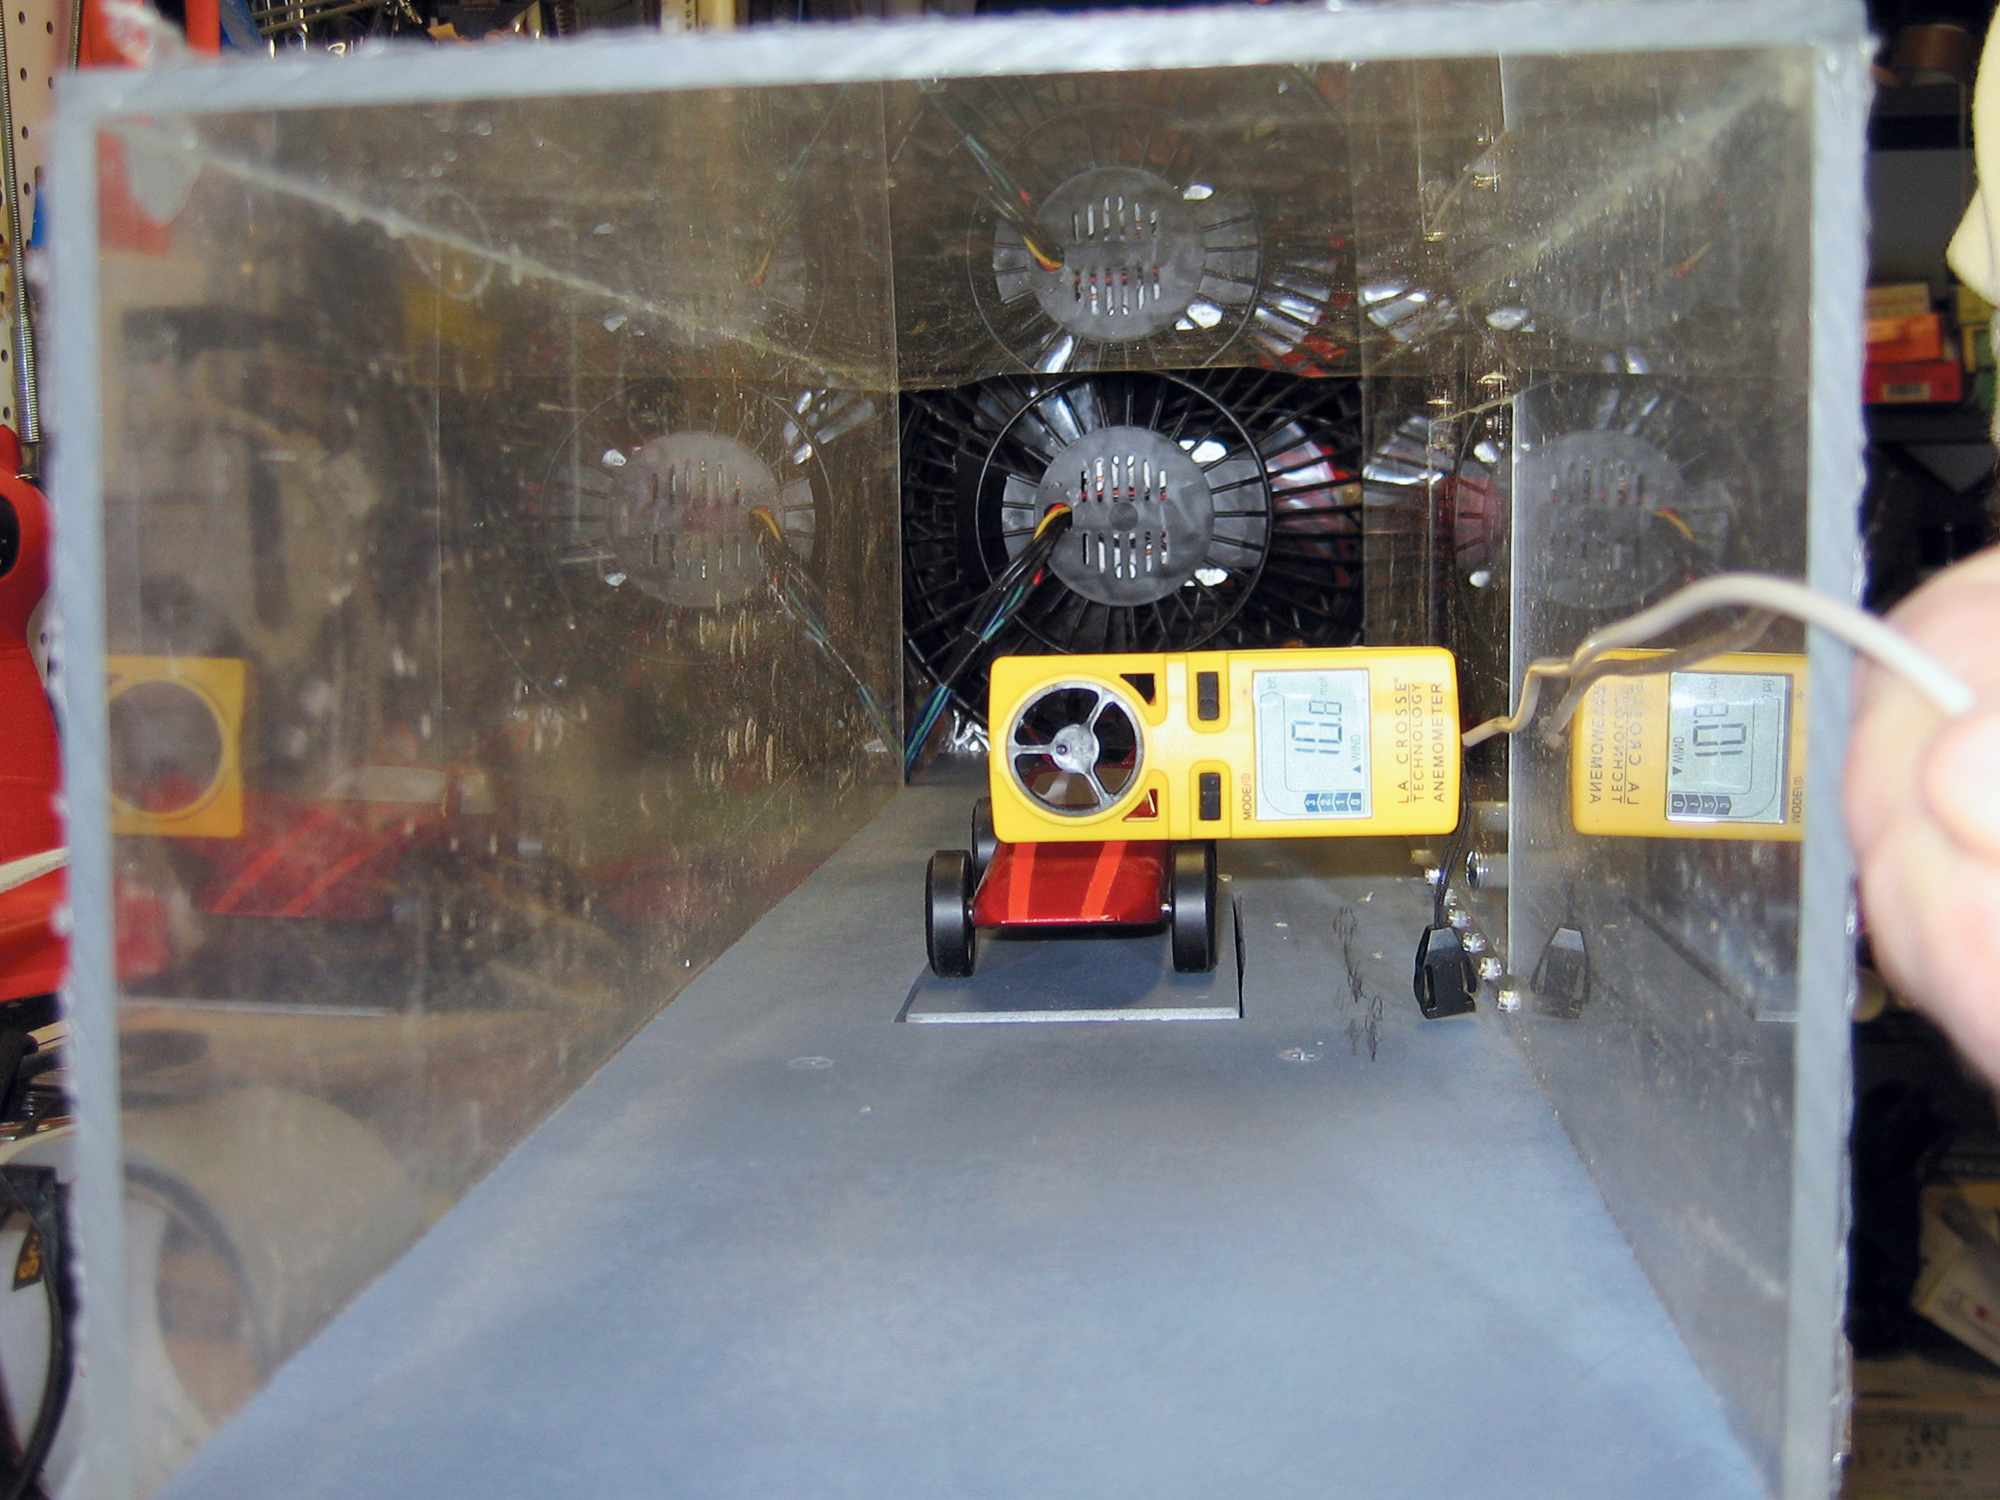
Now fire up the fan to test your car — the force in the display is very close to the actual drag caused by the car (set it to “grams” for higher resolution). Modify your shape to minimize that drag. Now set track records at the Pinewood Derby!

For airflow visibility, run a Halloween fog generator at the intake and take flash photos to capture the stream lines.

You can measure the wind speed with a mini- anemometer — eBay is a good source.

Conclusion

This project first appeared in MAKE Volume 15, page 143.