DSC00949 (Medium)

One of my many hobbies is modifying game controllers for people with special physical needs. It could be a missing finger, a missing arm, muscular dystrophy, etc. I’m no mega genius with incredible engineering skills, I’m just a normal guy with a soldering iron (and a 3d printer). Since I can’t modify as many as are really needed, I try to publish the plans and share the information whenever possible. Hopefully others can reproduce these things for people near them.10362668_10201798835204141_1993796308_n

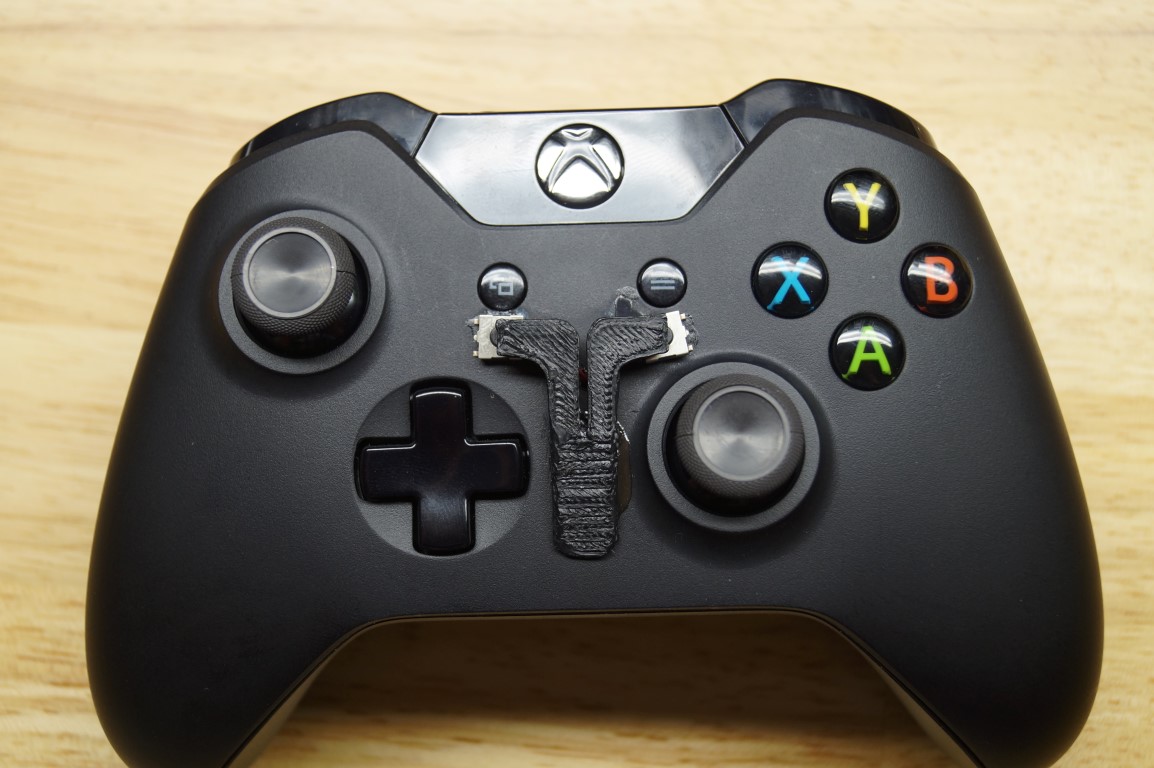
I’d like you to meet Jay. Jay is pretty awesome. He only needs some quick mods done to his controllers, but puts up with my slow methods so that others can hopefully benefit. This controller is for Jay. He has Muscular Dystrophy, which means he has to use his controller with his hands at a specific angle. This also means that he doesn’t quite have the strength or control to do certain actions. Specifically, he can’t press down on the thumbsticks to activate the thumbstick “click”. Frankly, I have a hard time with that one too!

According to one of Jay’s friends, he may not even need this mod anyway

Pffff Jay does’nt need a mod.The guy dominates face even in high paced shooters like titanfall


So, lets begin with the modification to put new buttons in place to function as the “thumbstick clicks”. These should take less force to operate and less muscle control (since you don’t have to hold the thumbstick steady while you depress them). The thumbsticks will still operate as normal when we are done.


If you would like to volunteer to modify a controller for someone, or if you need one done, you should check out thecontrollerproject.com forums and DIYability.org.

Project Steps

Disassemble the controller

Take that sucker apart and identify the solder points for adding external buttons. All you have to do is solder wires to these points, then to a button and you’re done.

On the top right, you see the two points for the higher thumbstick, the bottom left is the lower.

Brainstorm the location of the buttons

Here you can see where I was brainstorming how I would attach the buttons. You can see a standard 6mm momentary switch on the left compared to the extra flat momentary switch (that was just in my toolbox, no idea where I got it). For this project I used the flat ones. You could really use either.

Prepare your switches

I used wire wrapping wire from radio shack. You would optimally use stranded wire for added flexibility and easier soldering. I couldn’t find any wire that small locally though, so I had to use what was available.

Solder the wires to your switch.

Drill a hole and glue your buttons into place

I didn’t take a picture of this without the optional plastic cover (next step). You just drill a tiny hole to feed the wires through, then glue your switches into place

*OPTIONAL Design and 3d print a plastic cover

A plastic cover for the buttons can make them more comfortable to use as well as much cooler looking. This is not necessary to the operation of this mod.

Lulzbot.com donated a printer to thecontrollerproject.com for this kind of thing, so I like to use it!

Solder buttons to controller

I’ve drilled a tiny hole on the inside of the controller to allow the wires to pass through. At this point you need to solder them into place.

Reassemble and test!

I don’t have an Xbox One, so I plugged the controller into my windows machine and tested it there. Everything works fine.