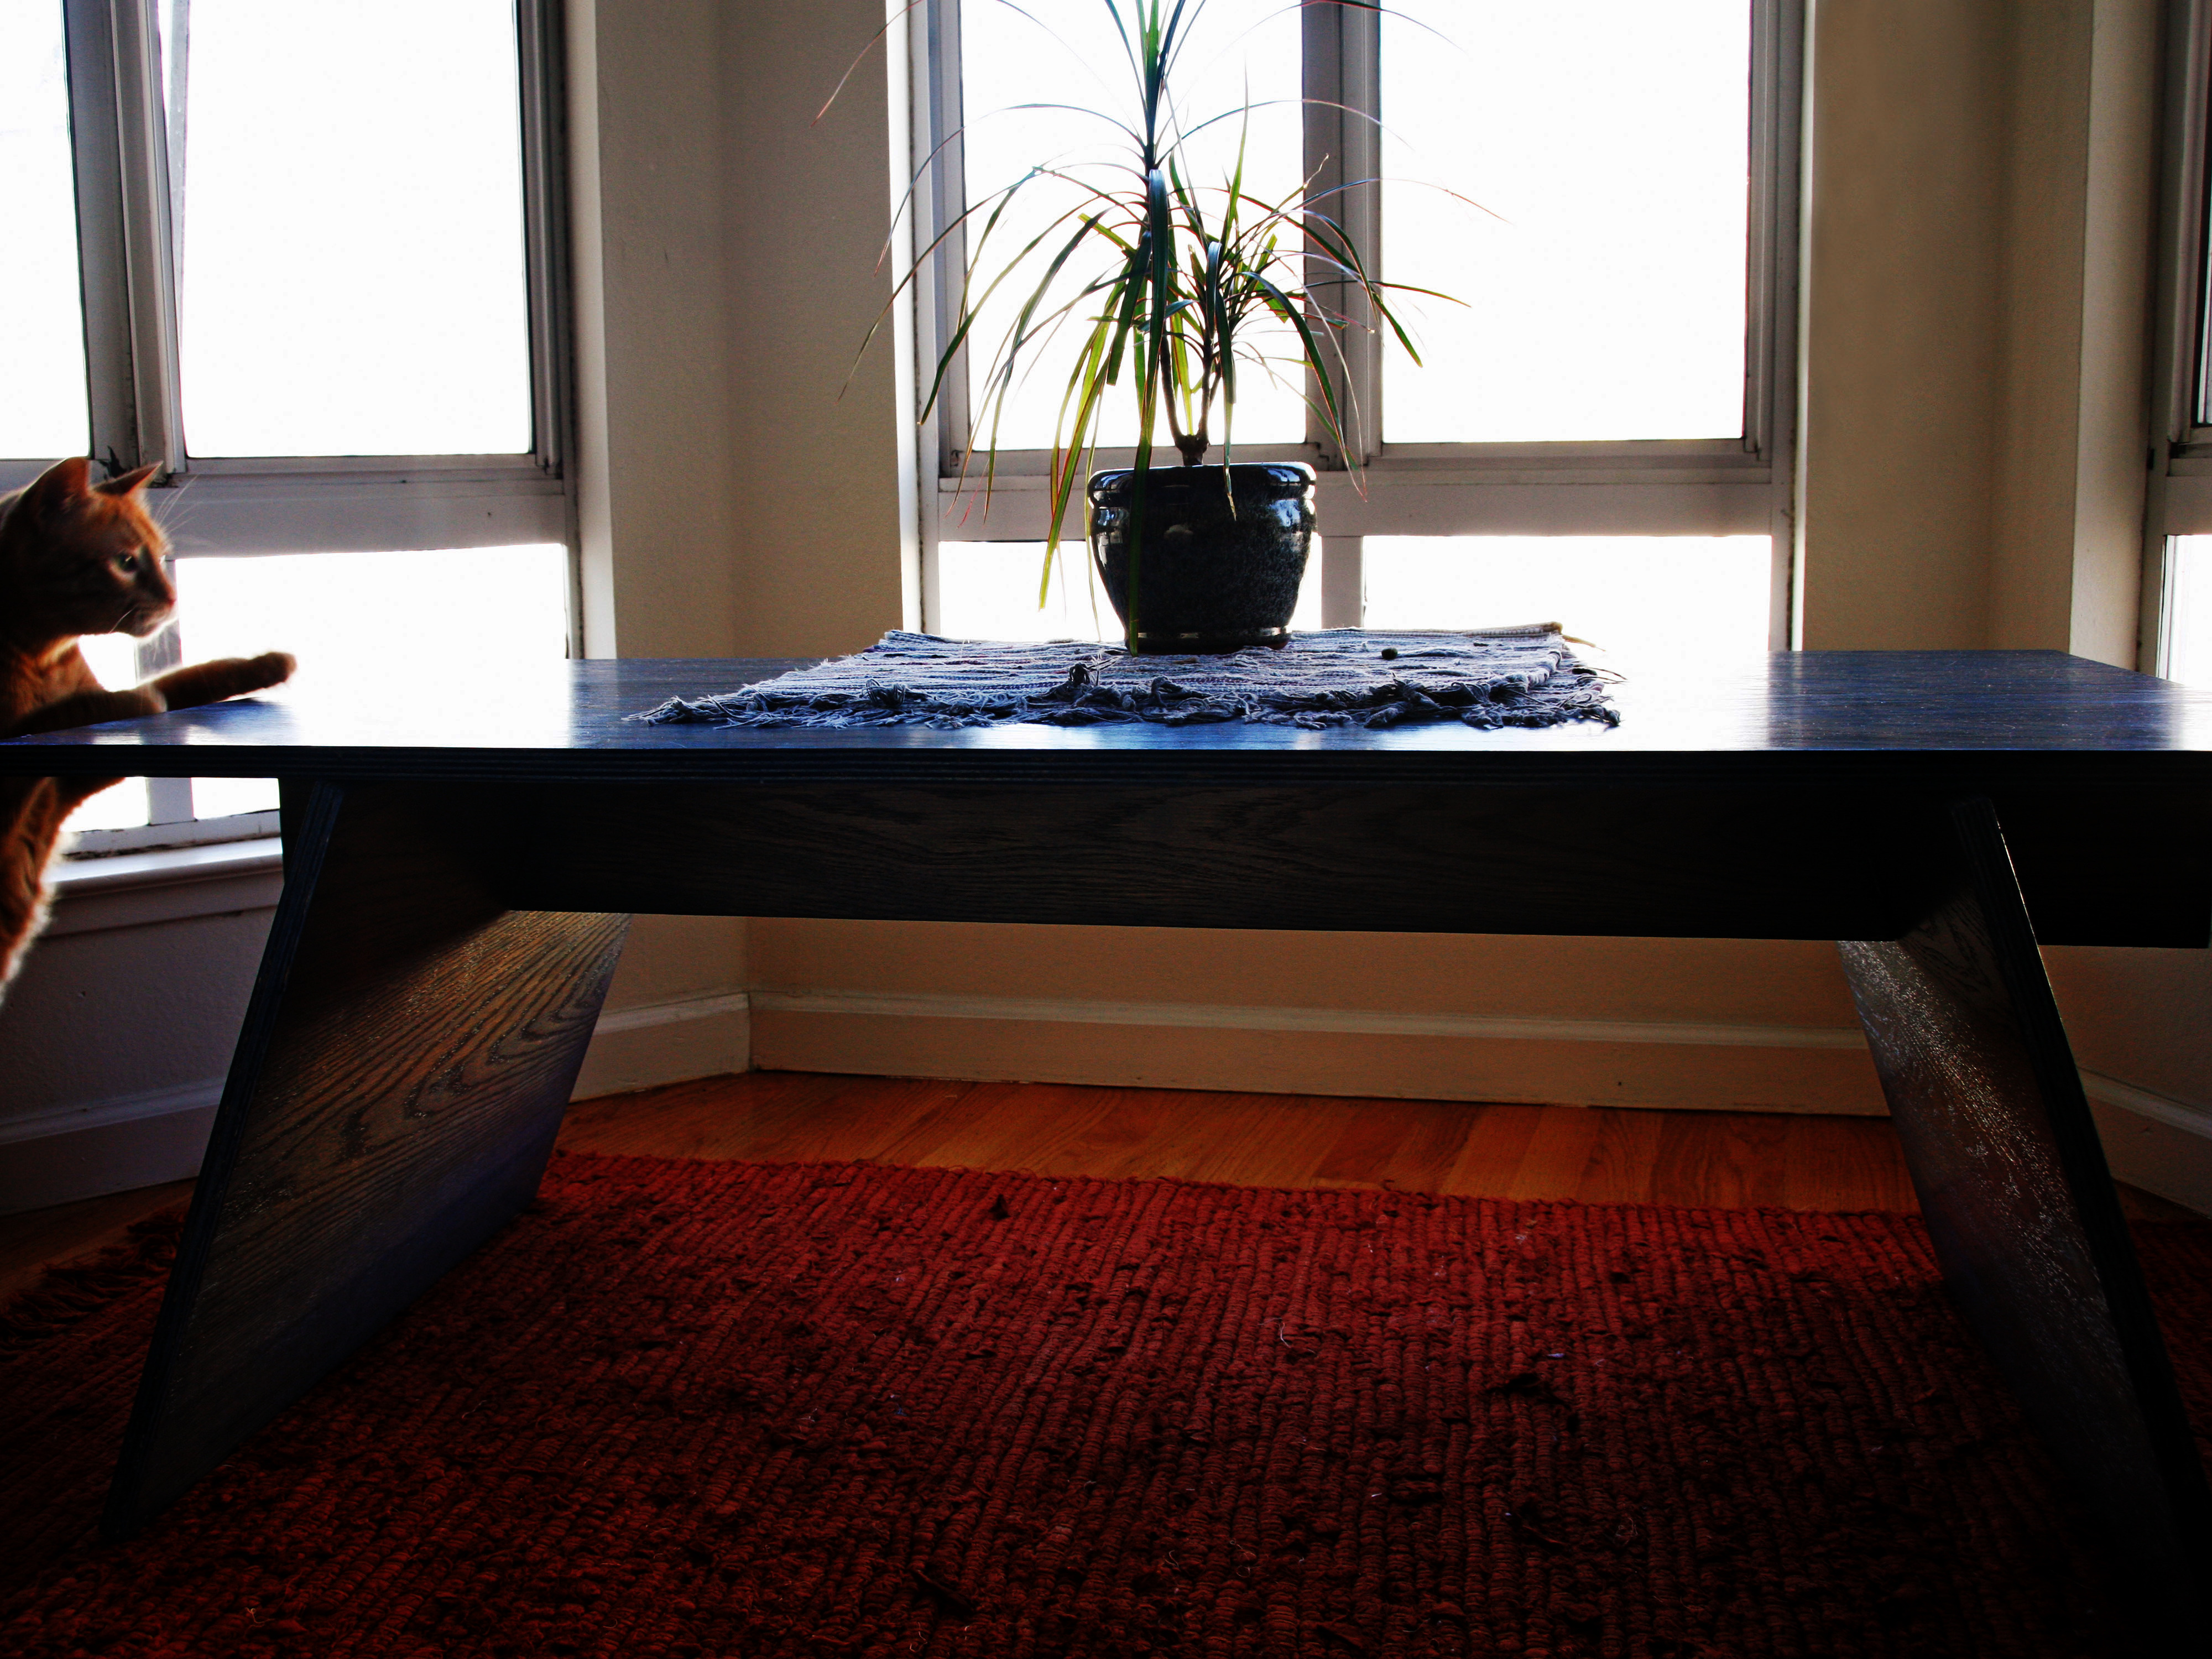
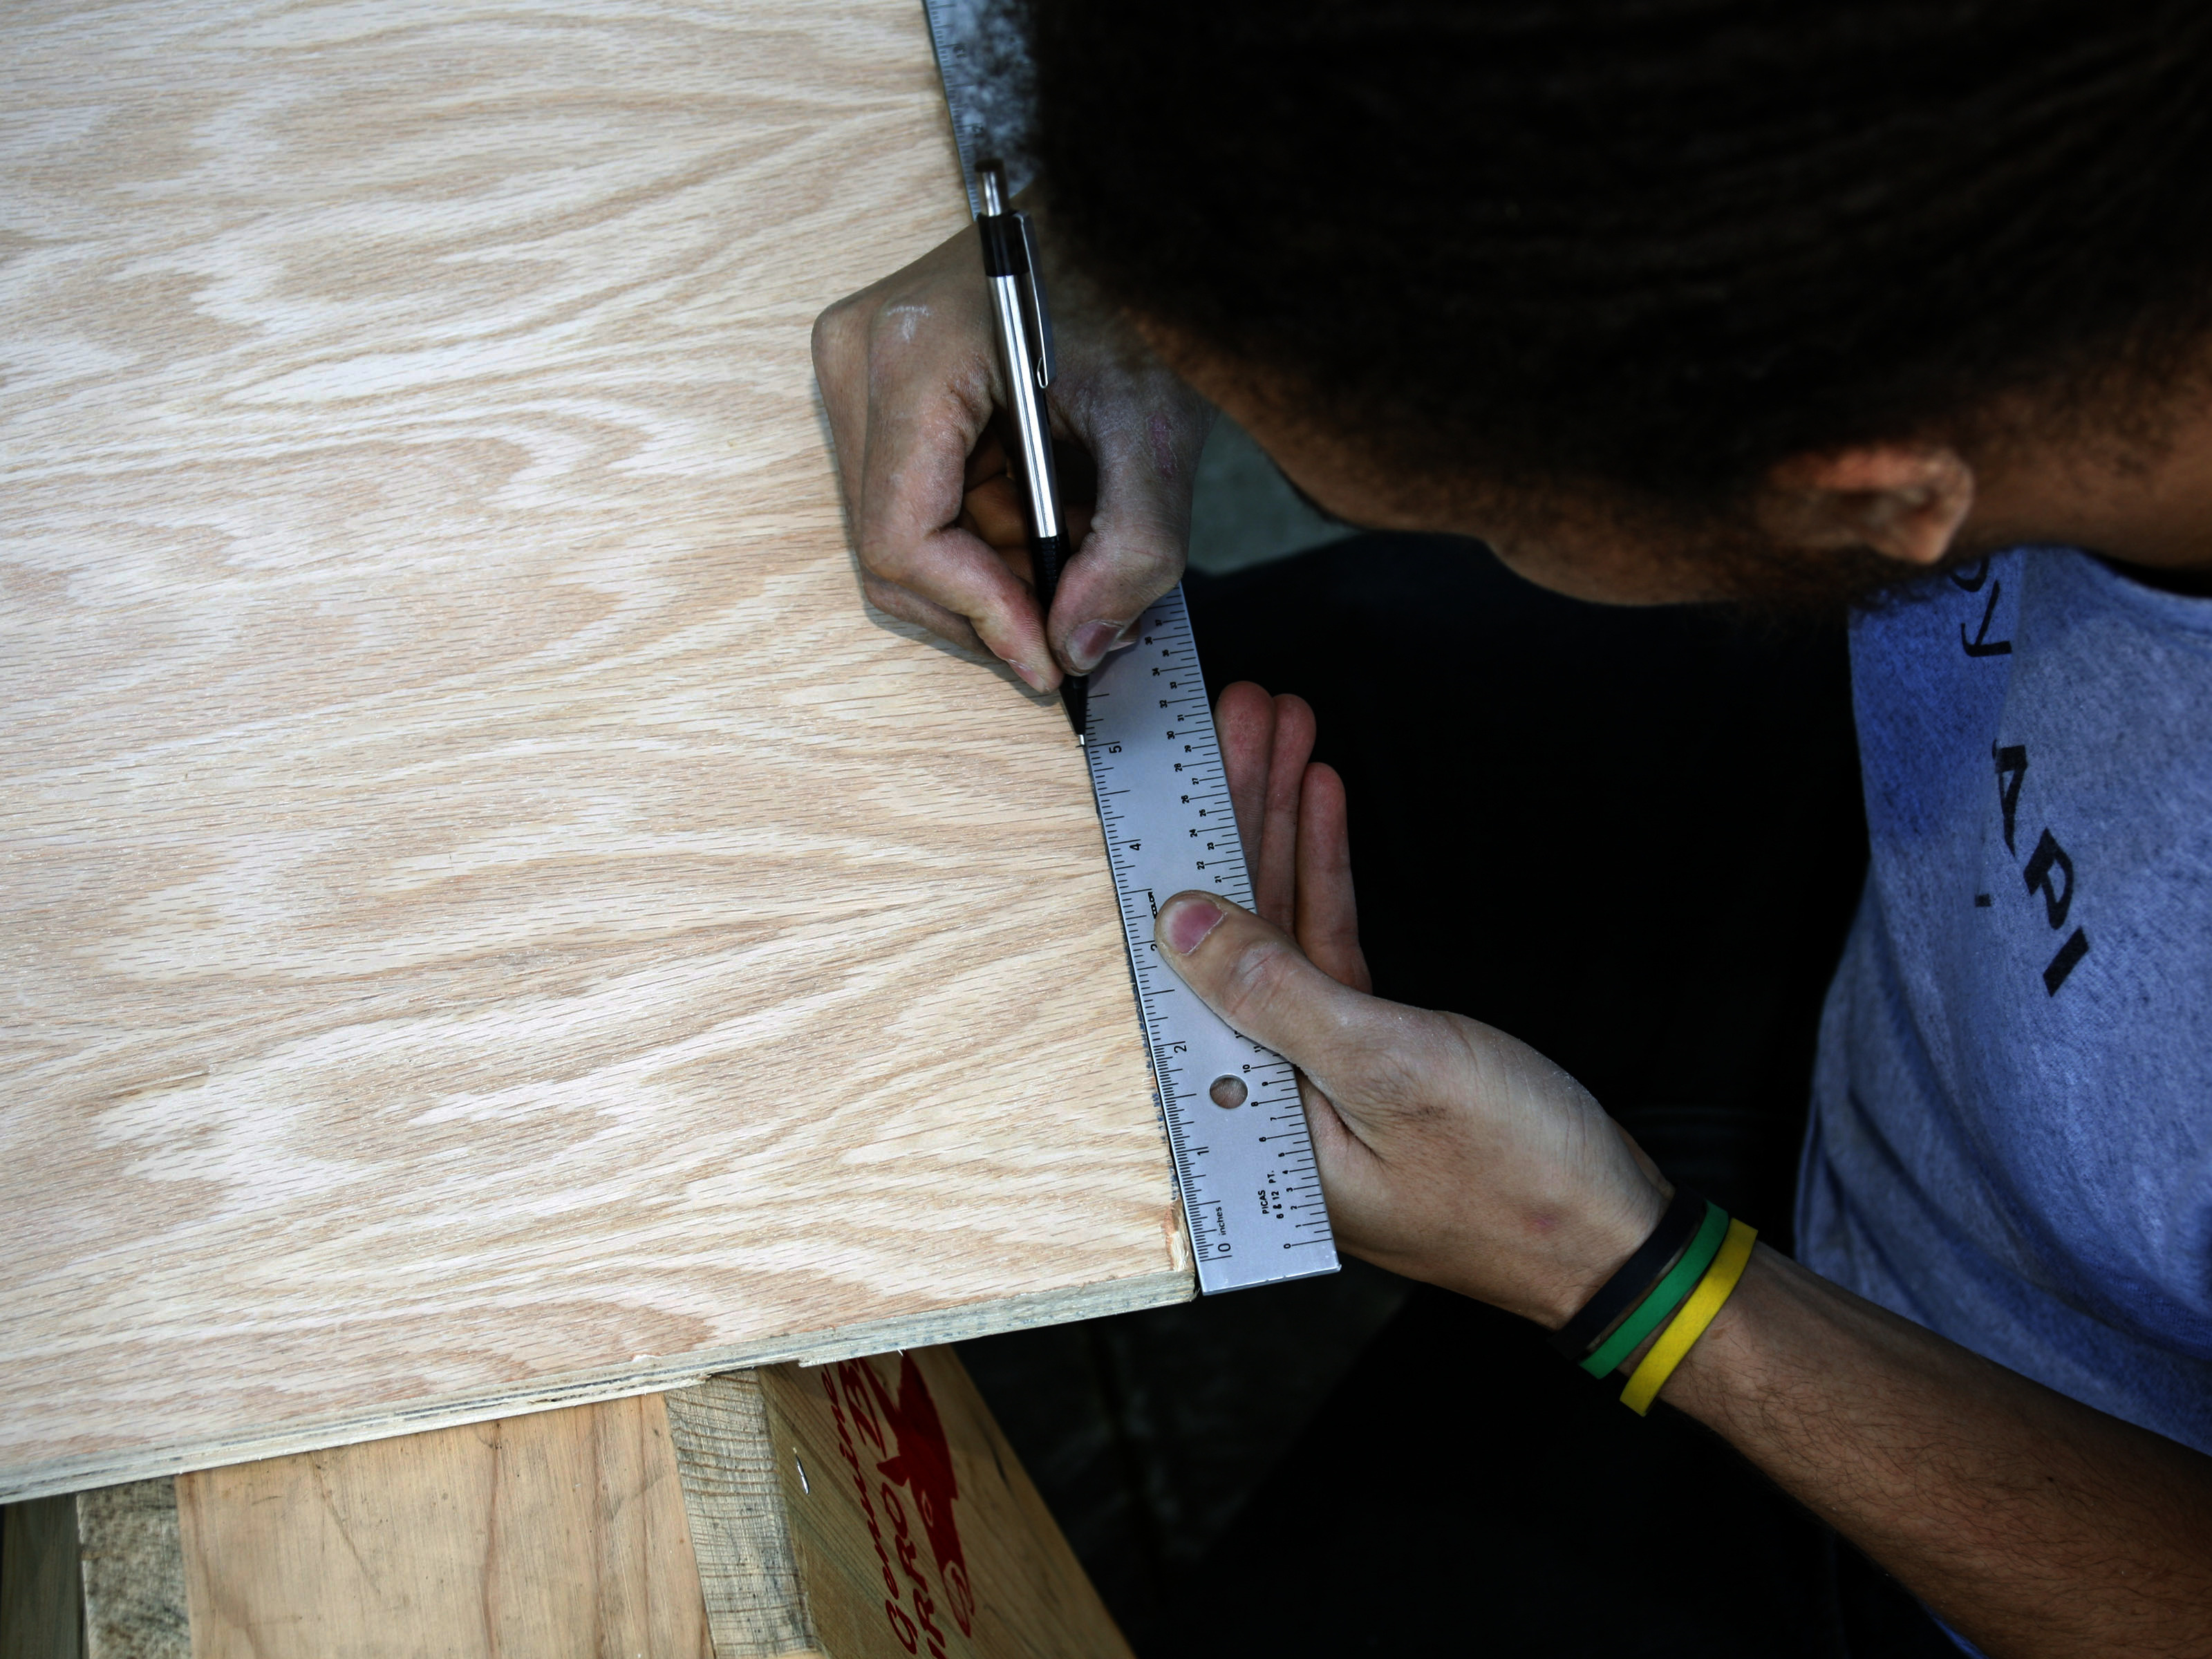
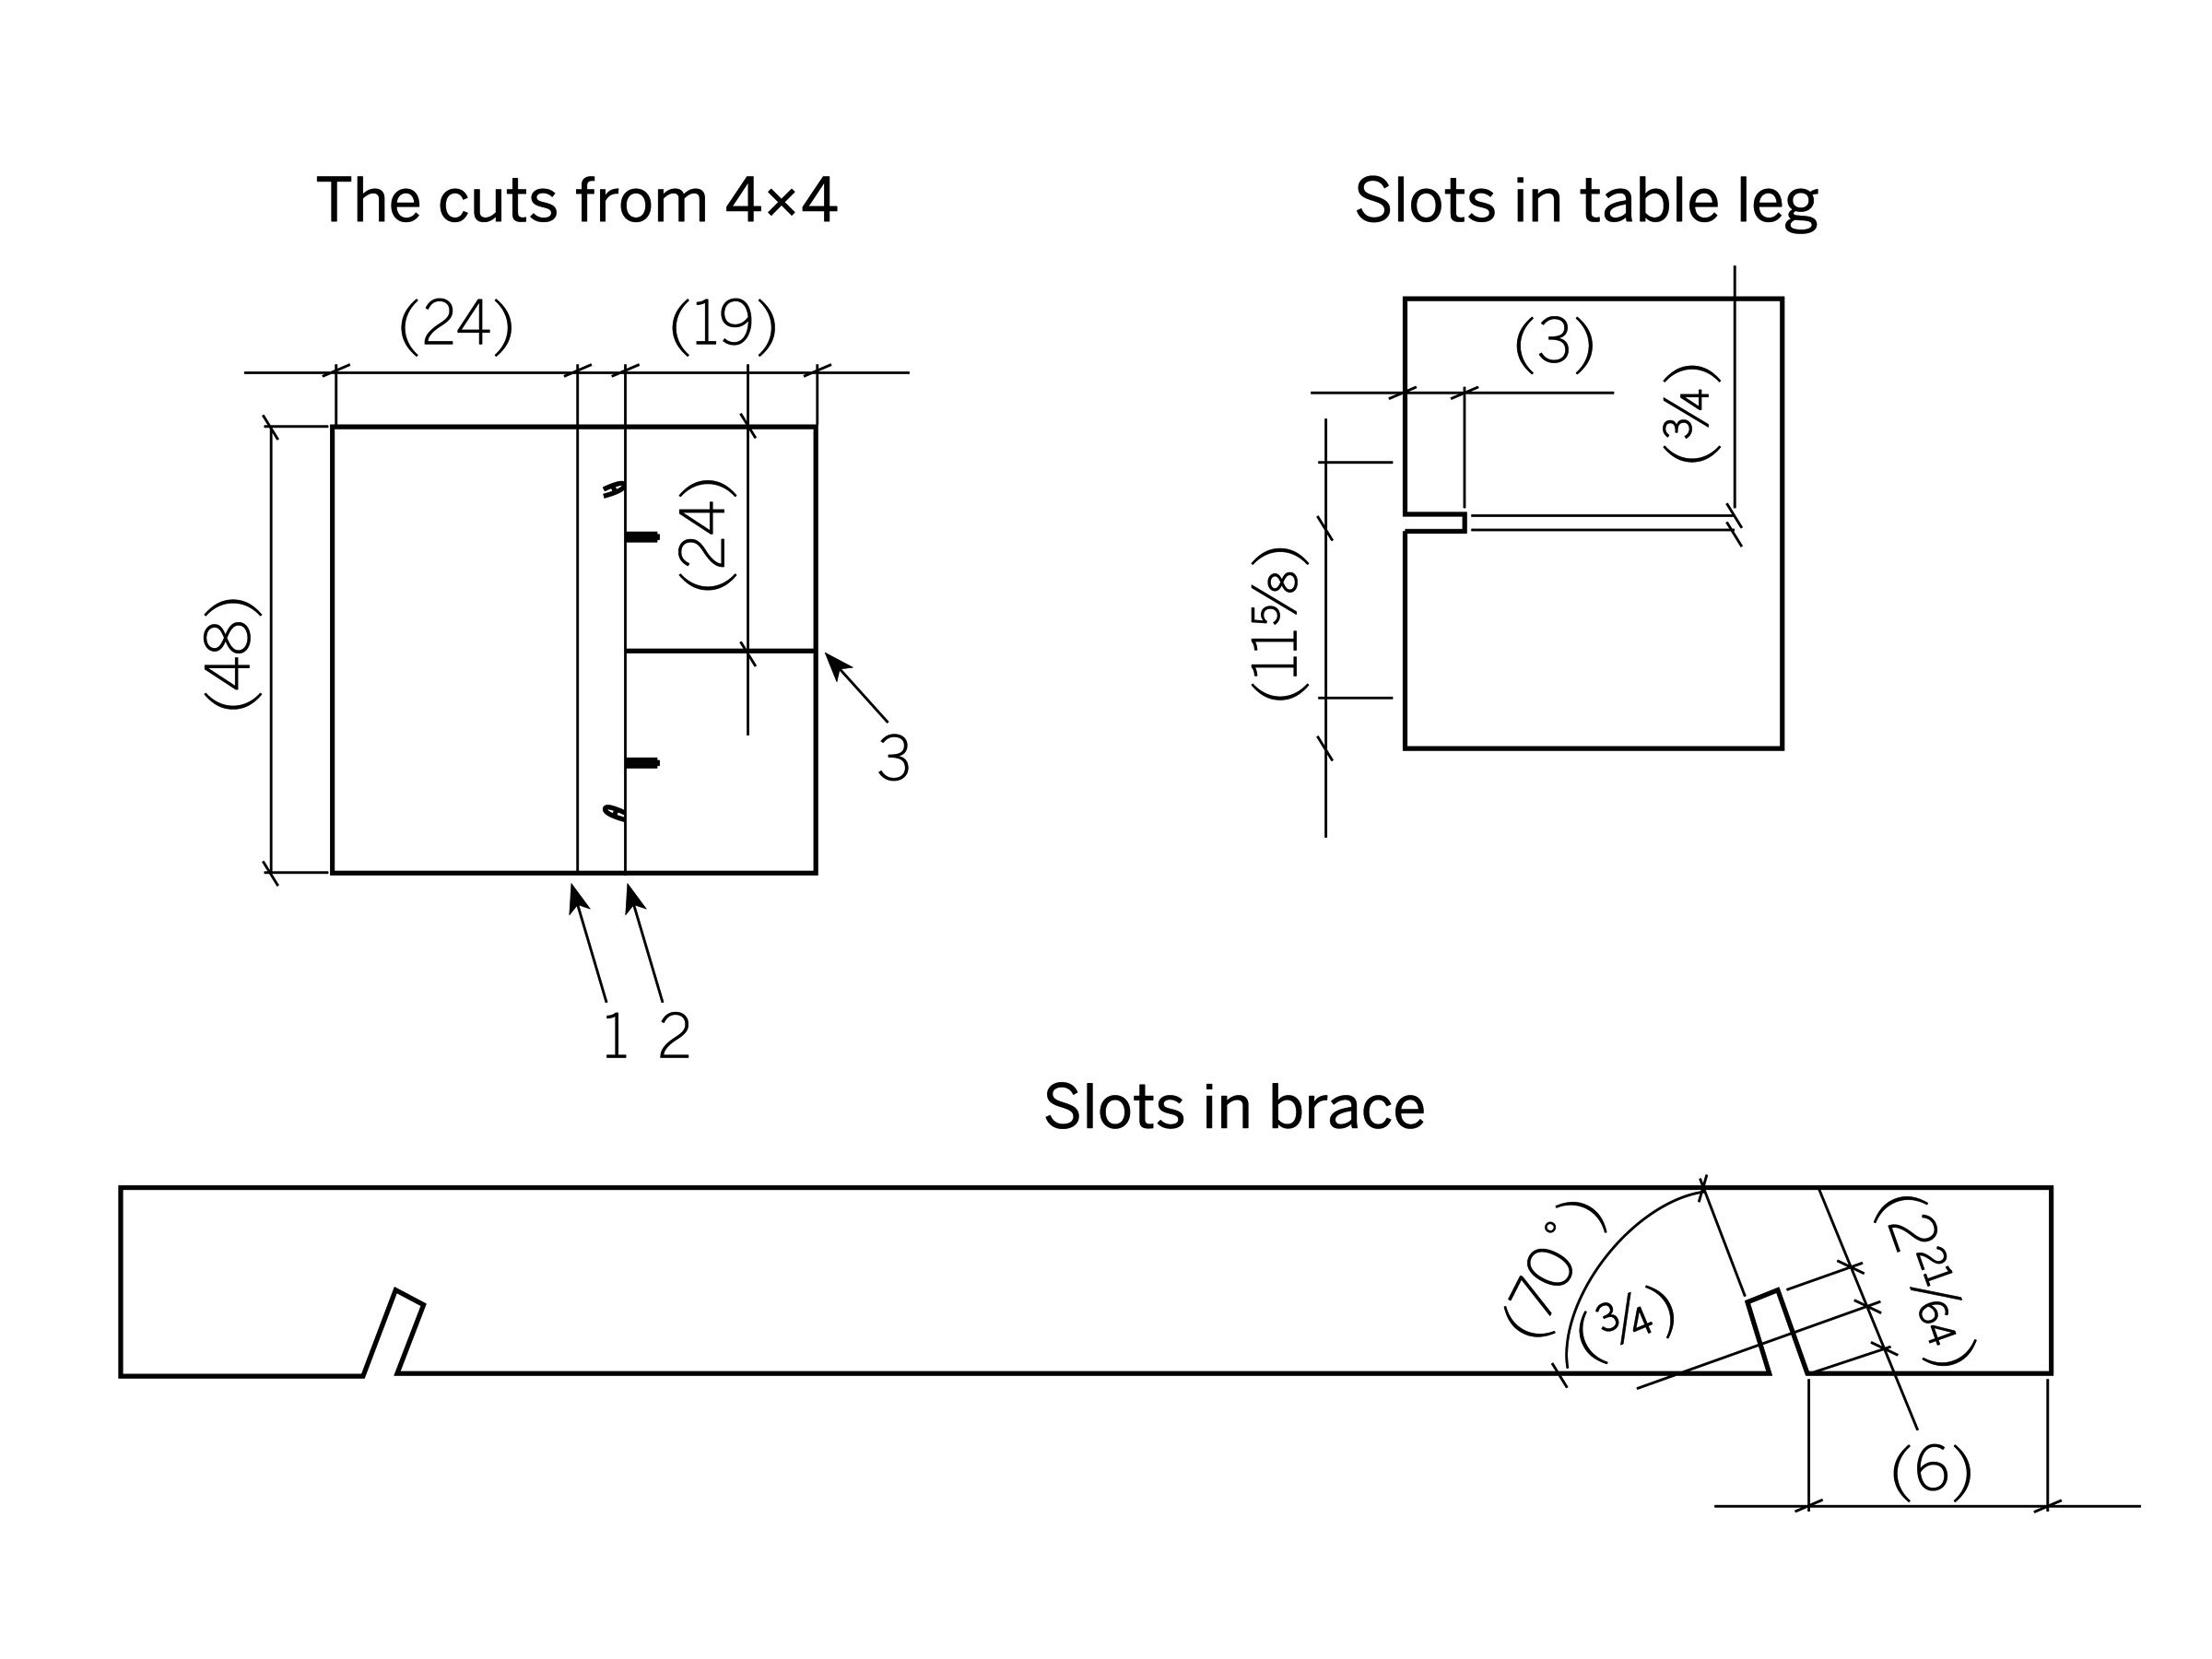
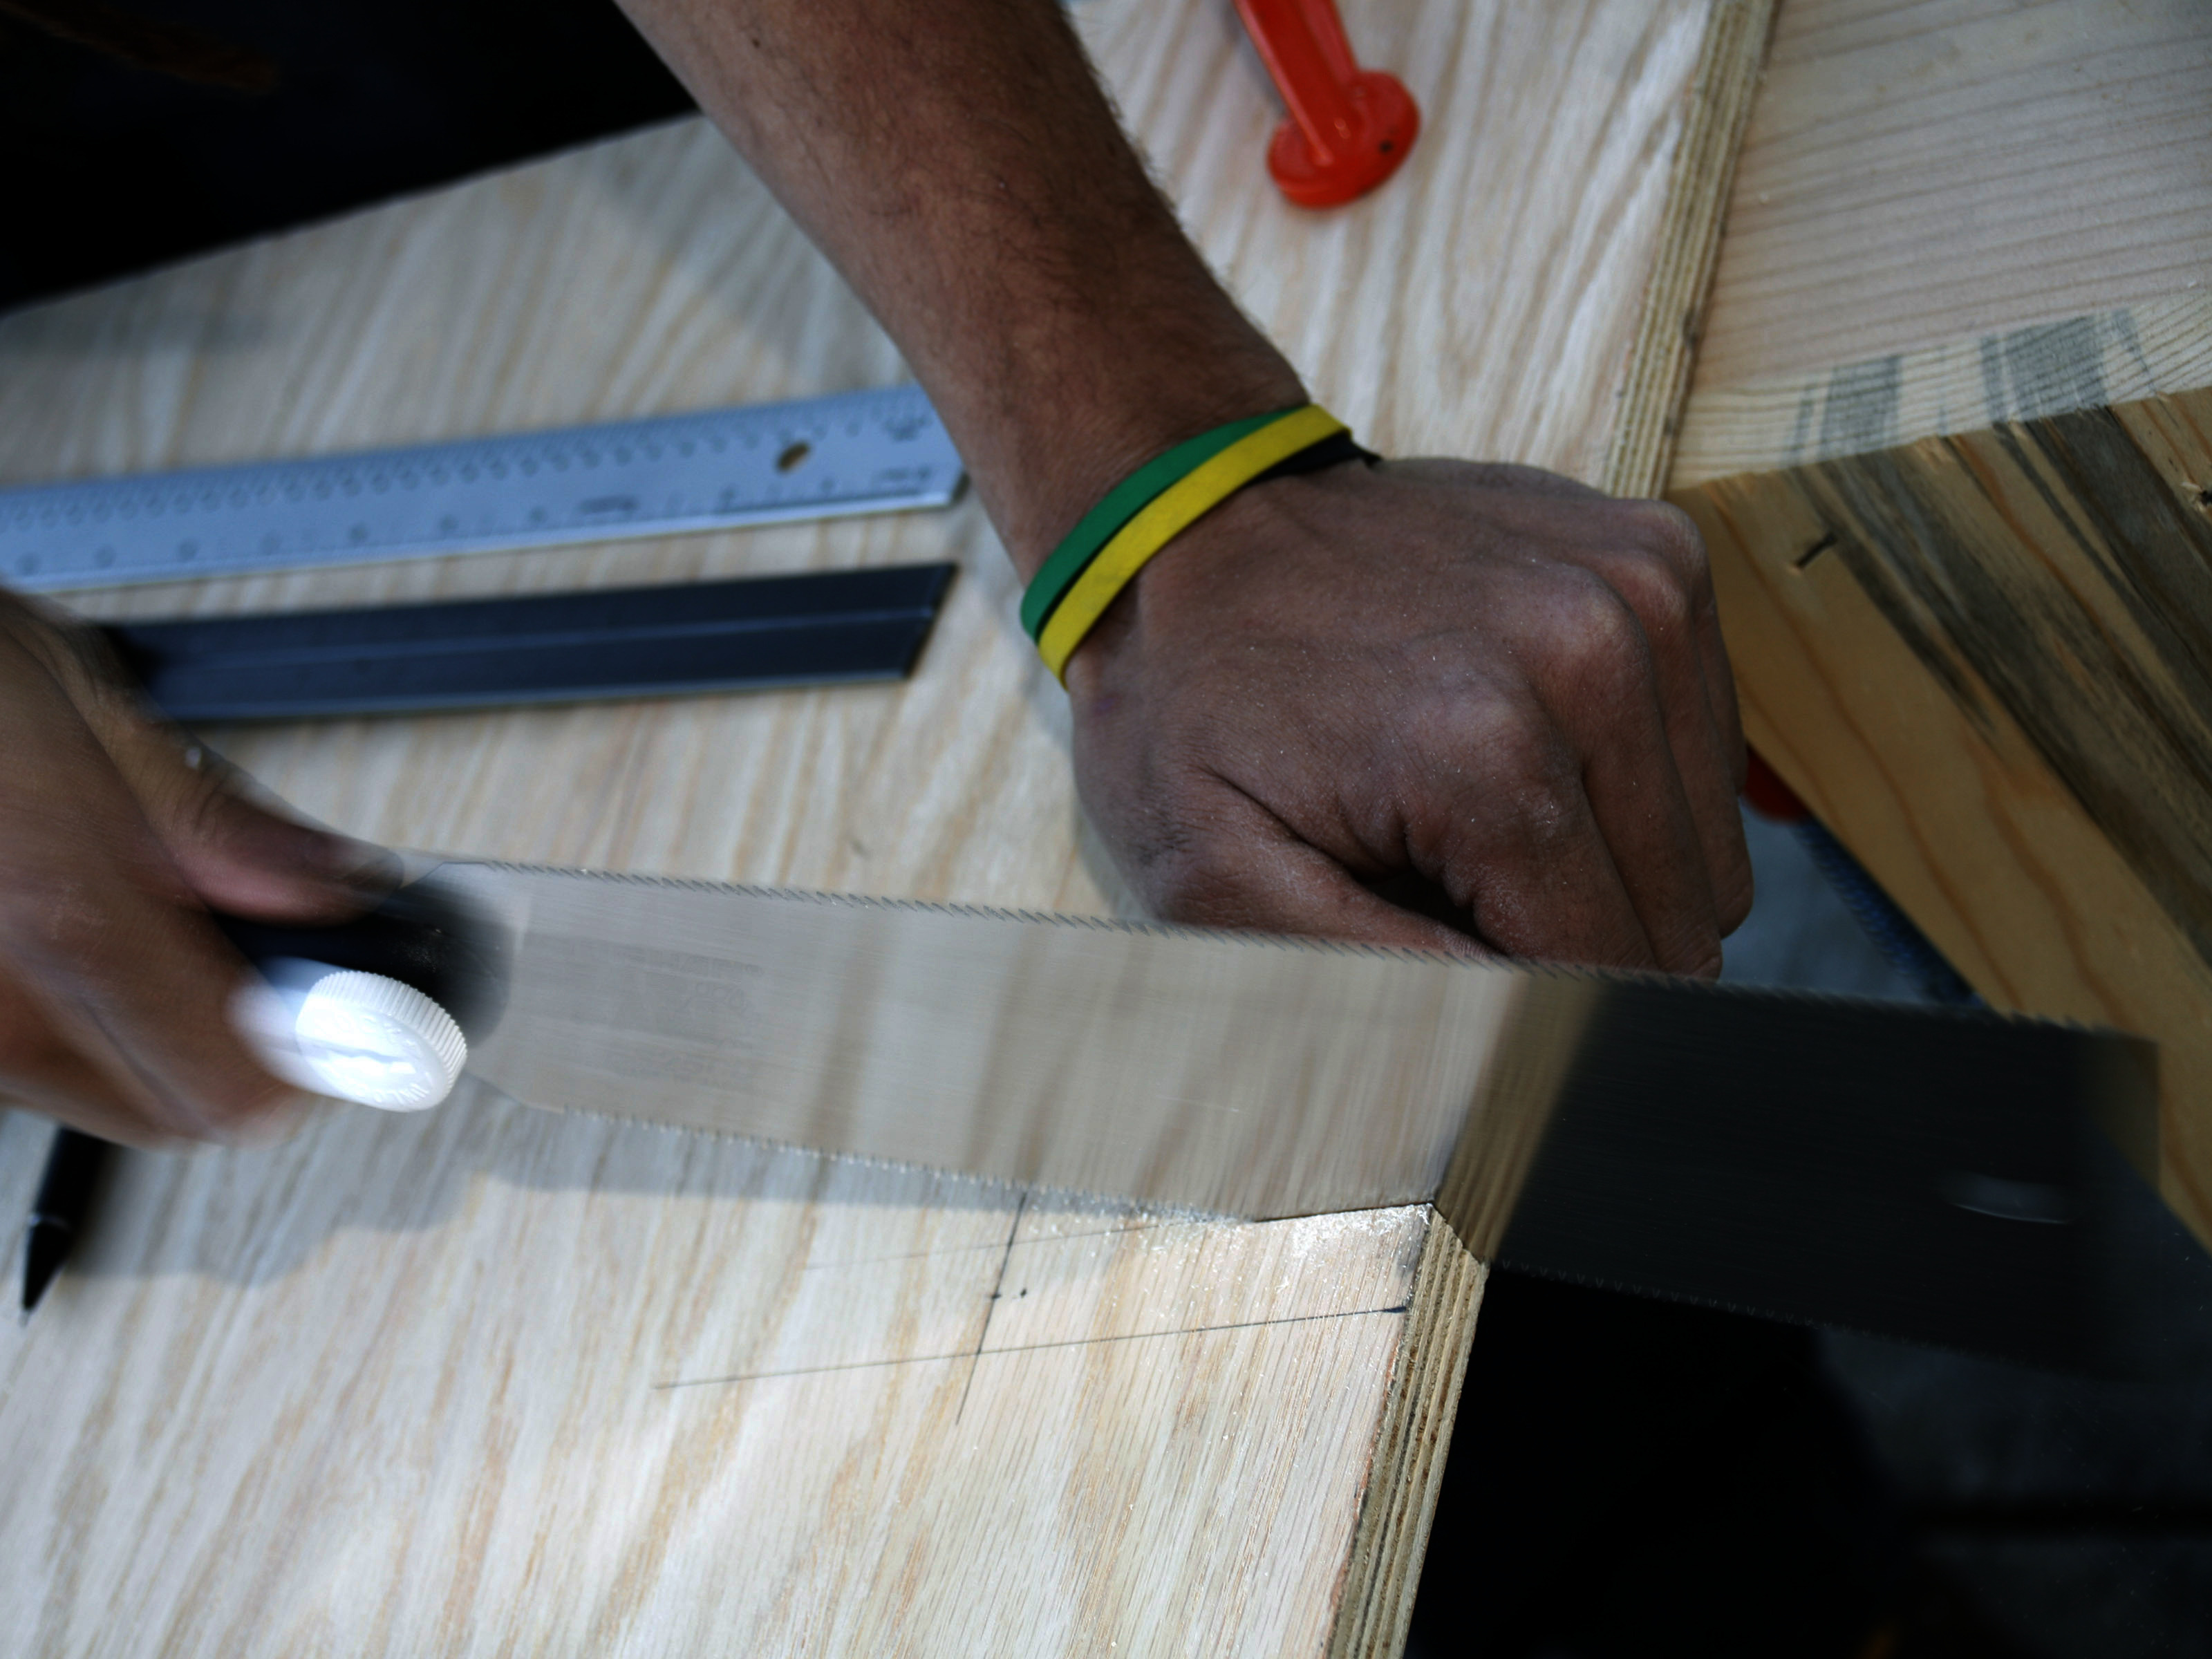
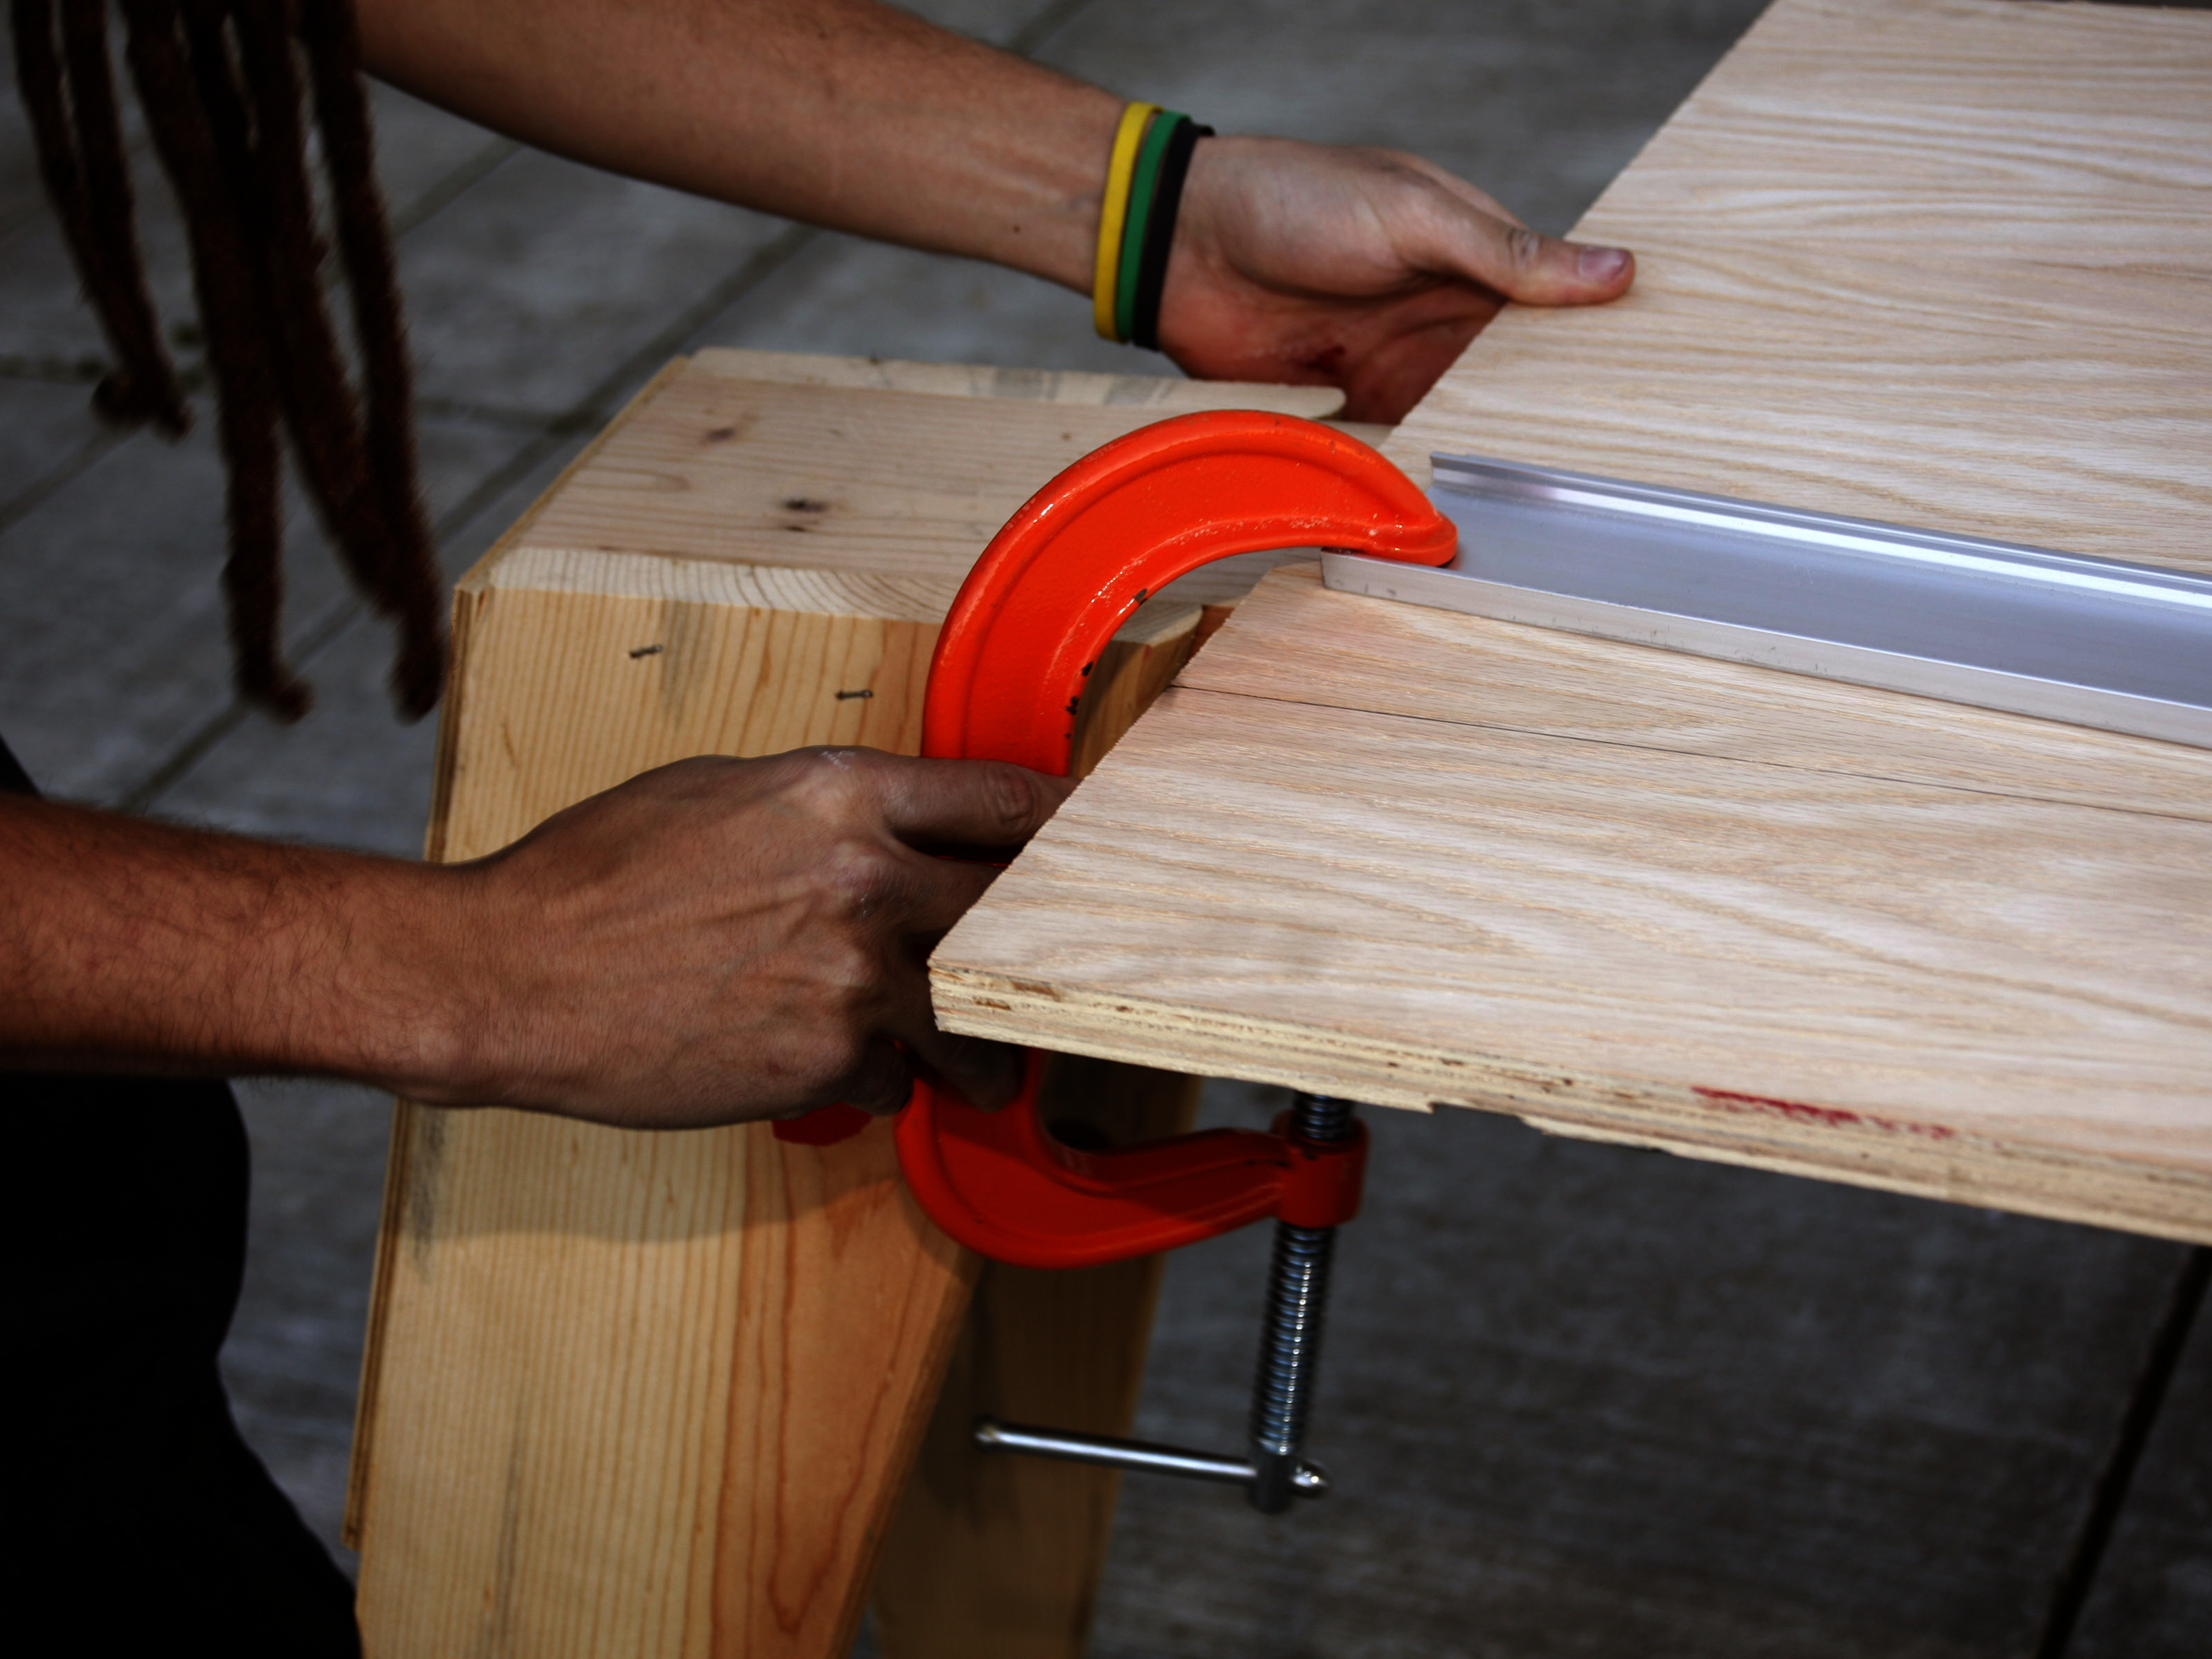
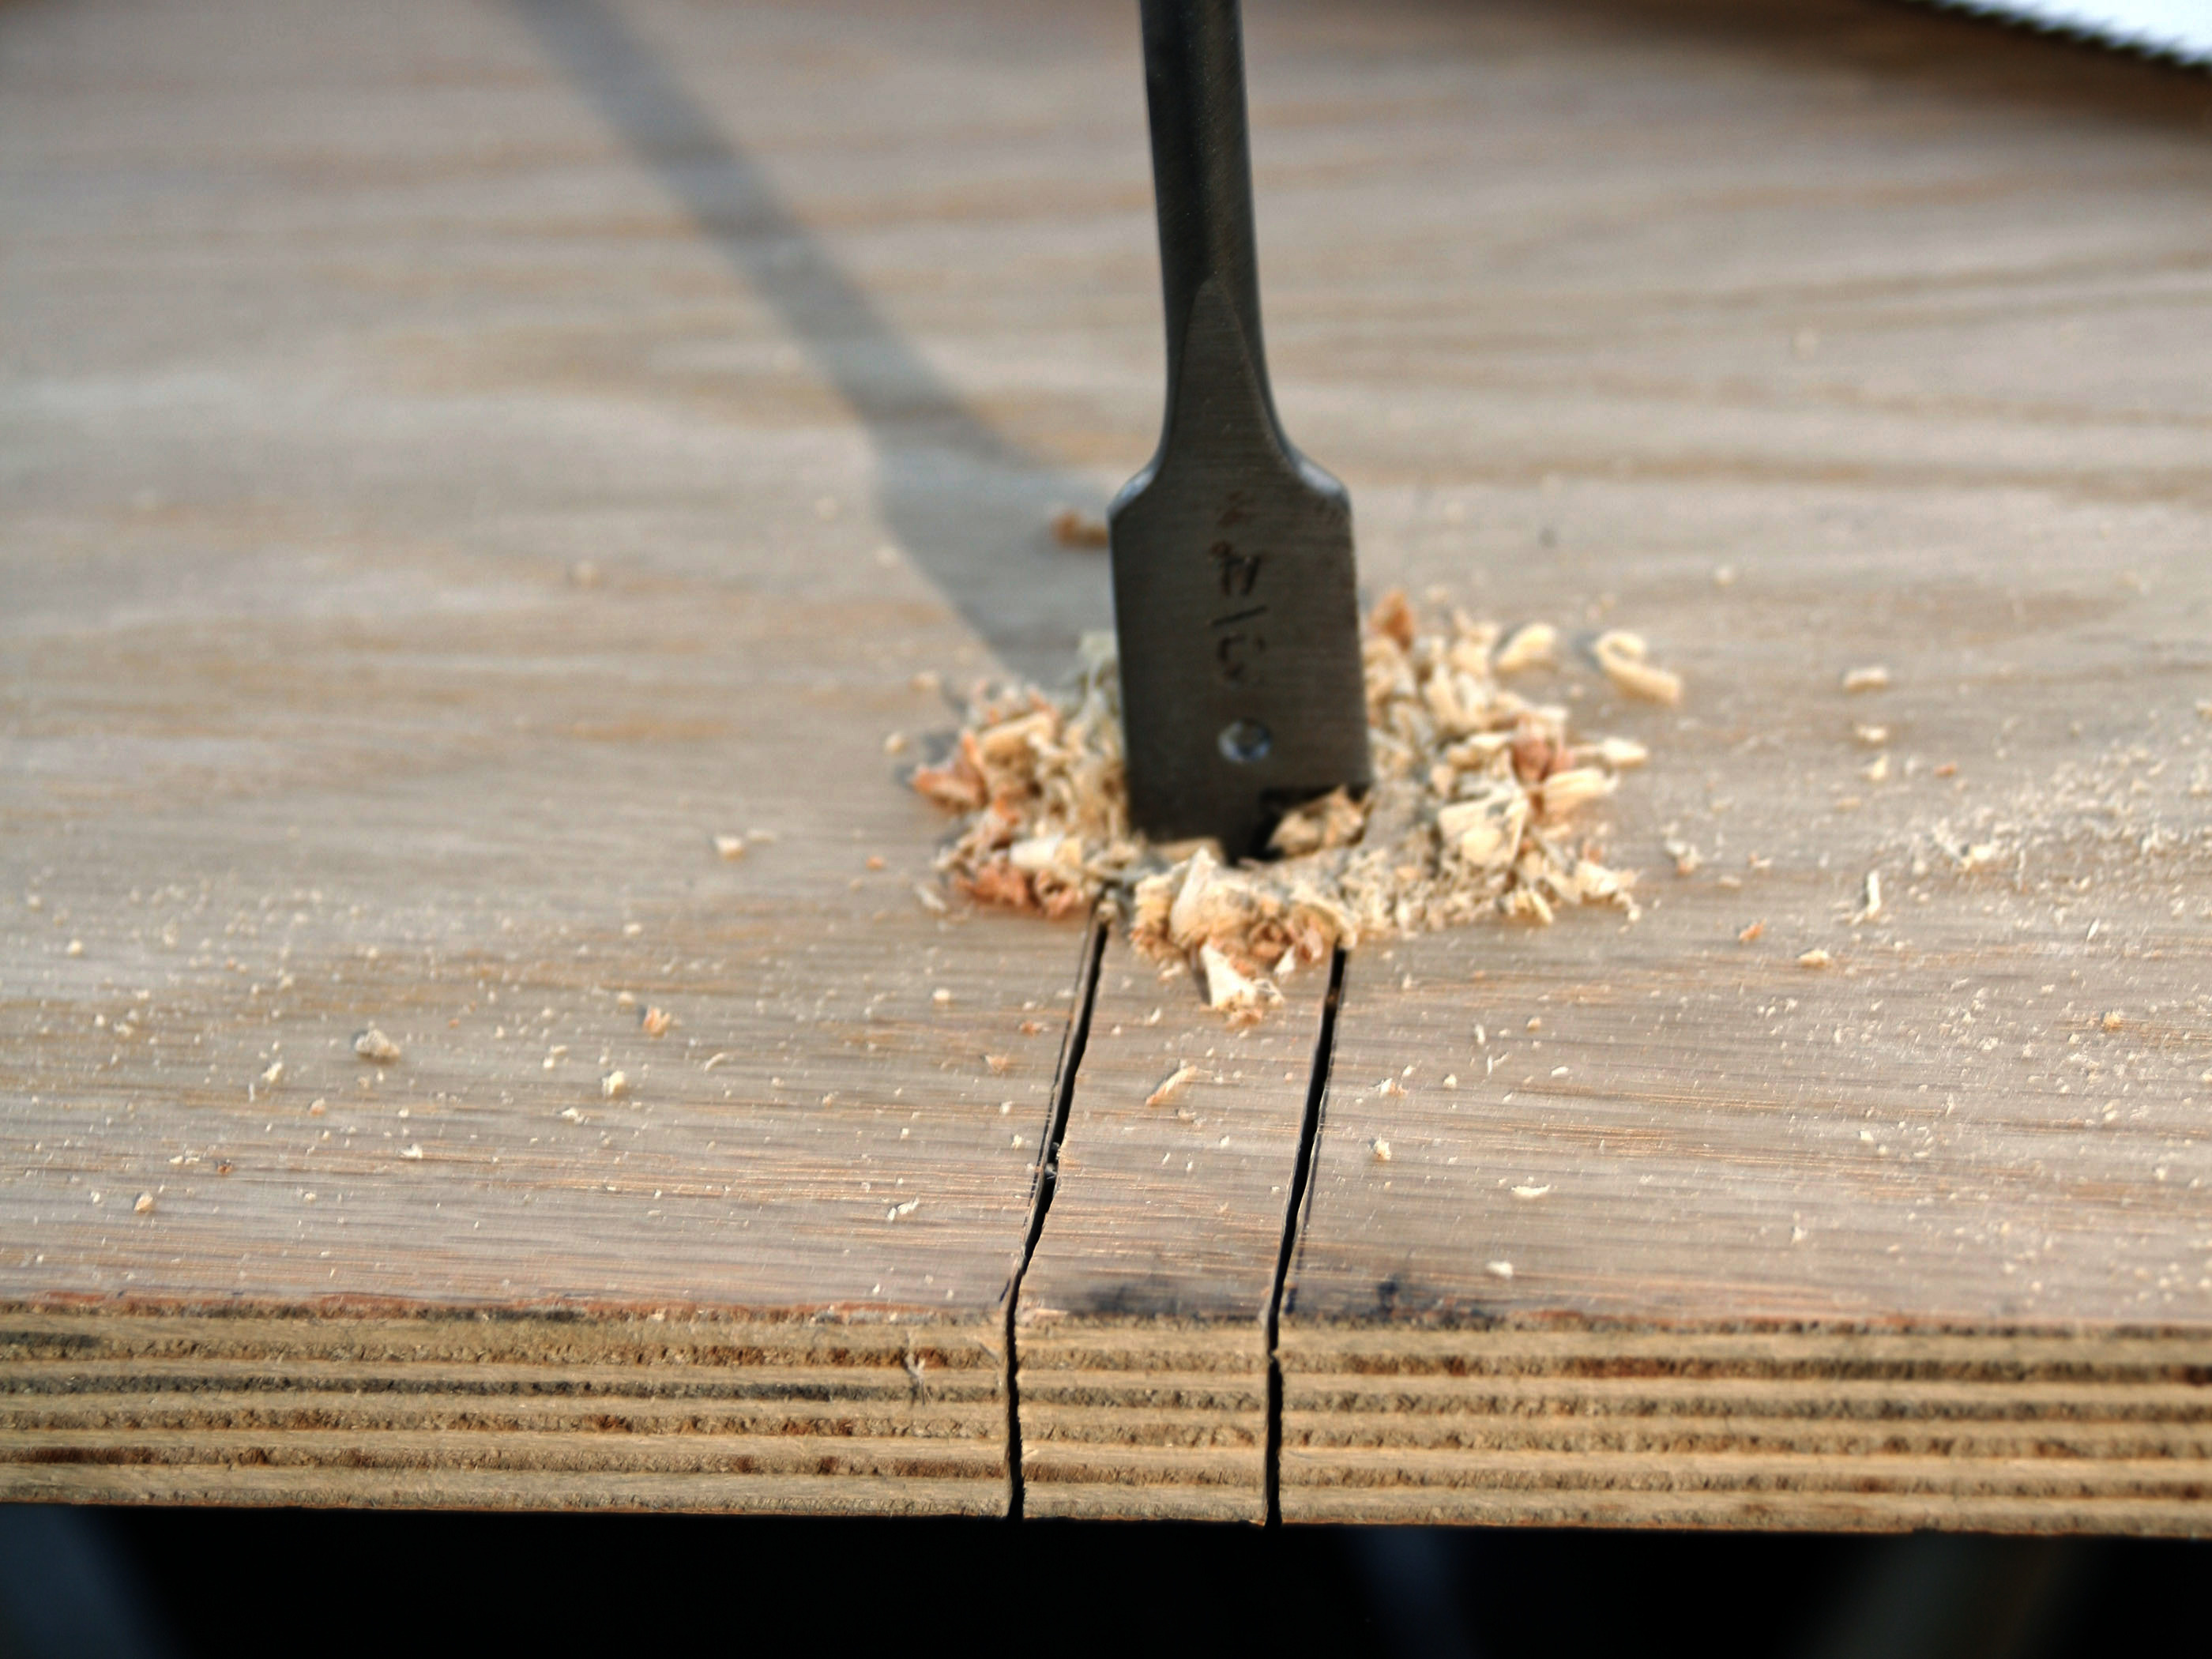
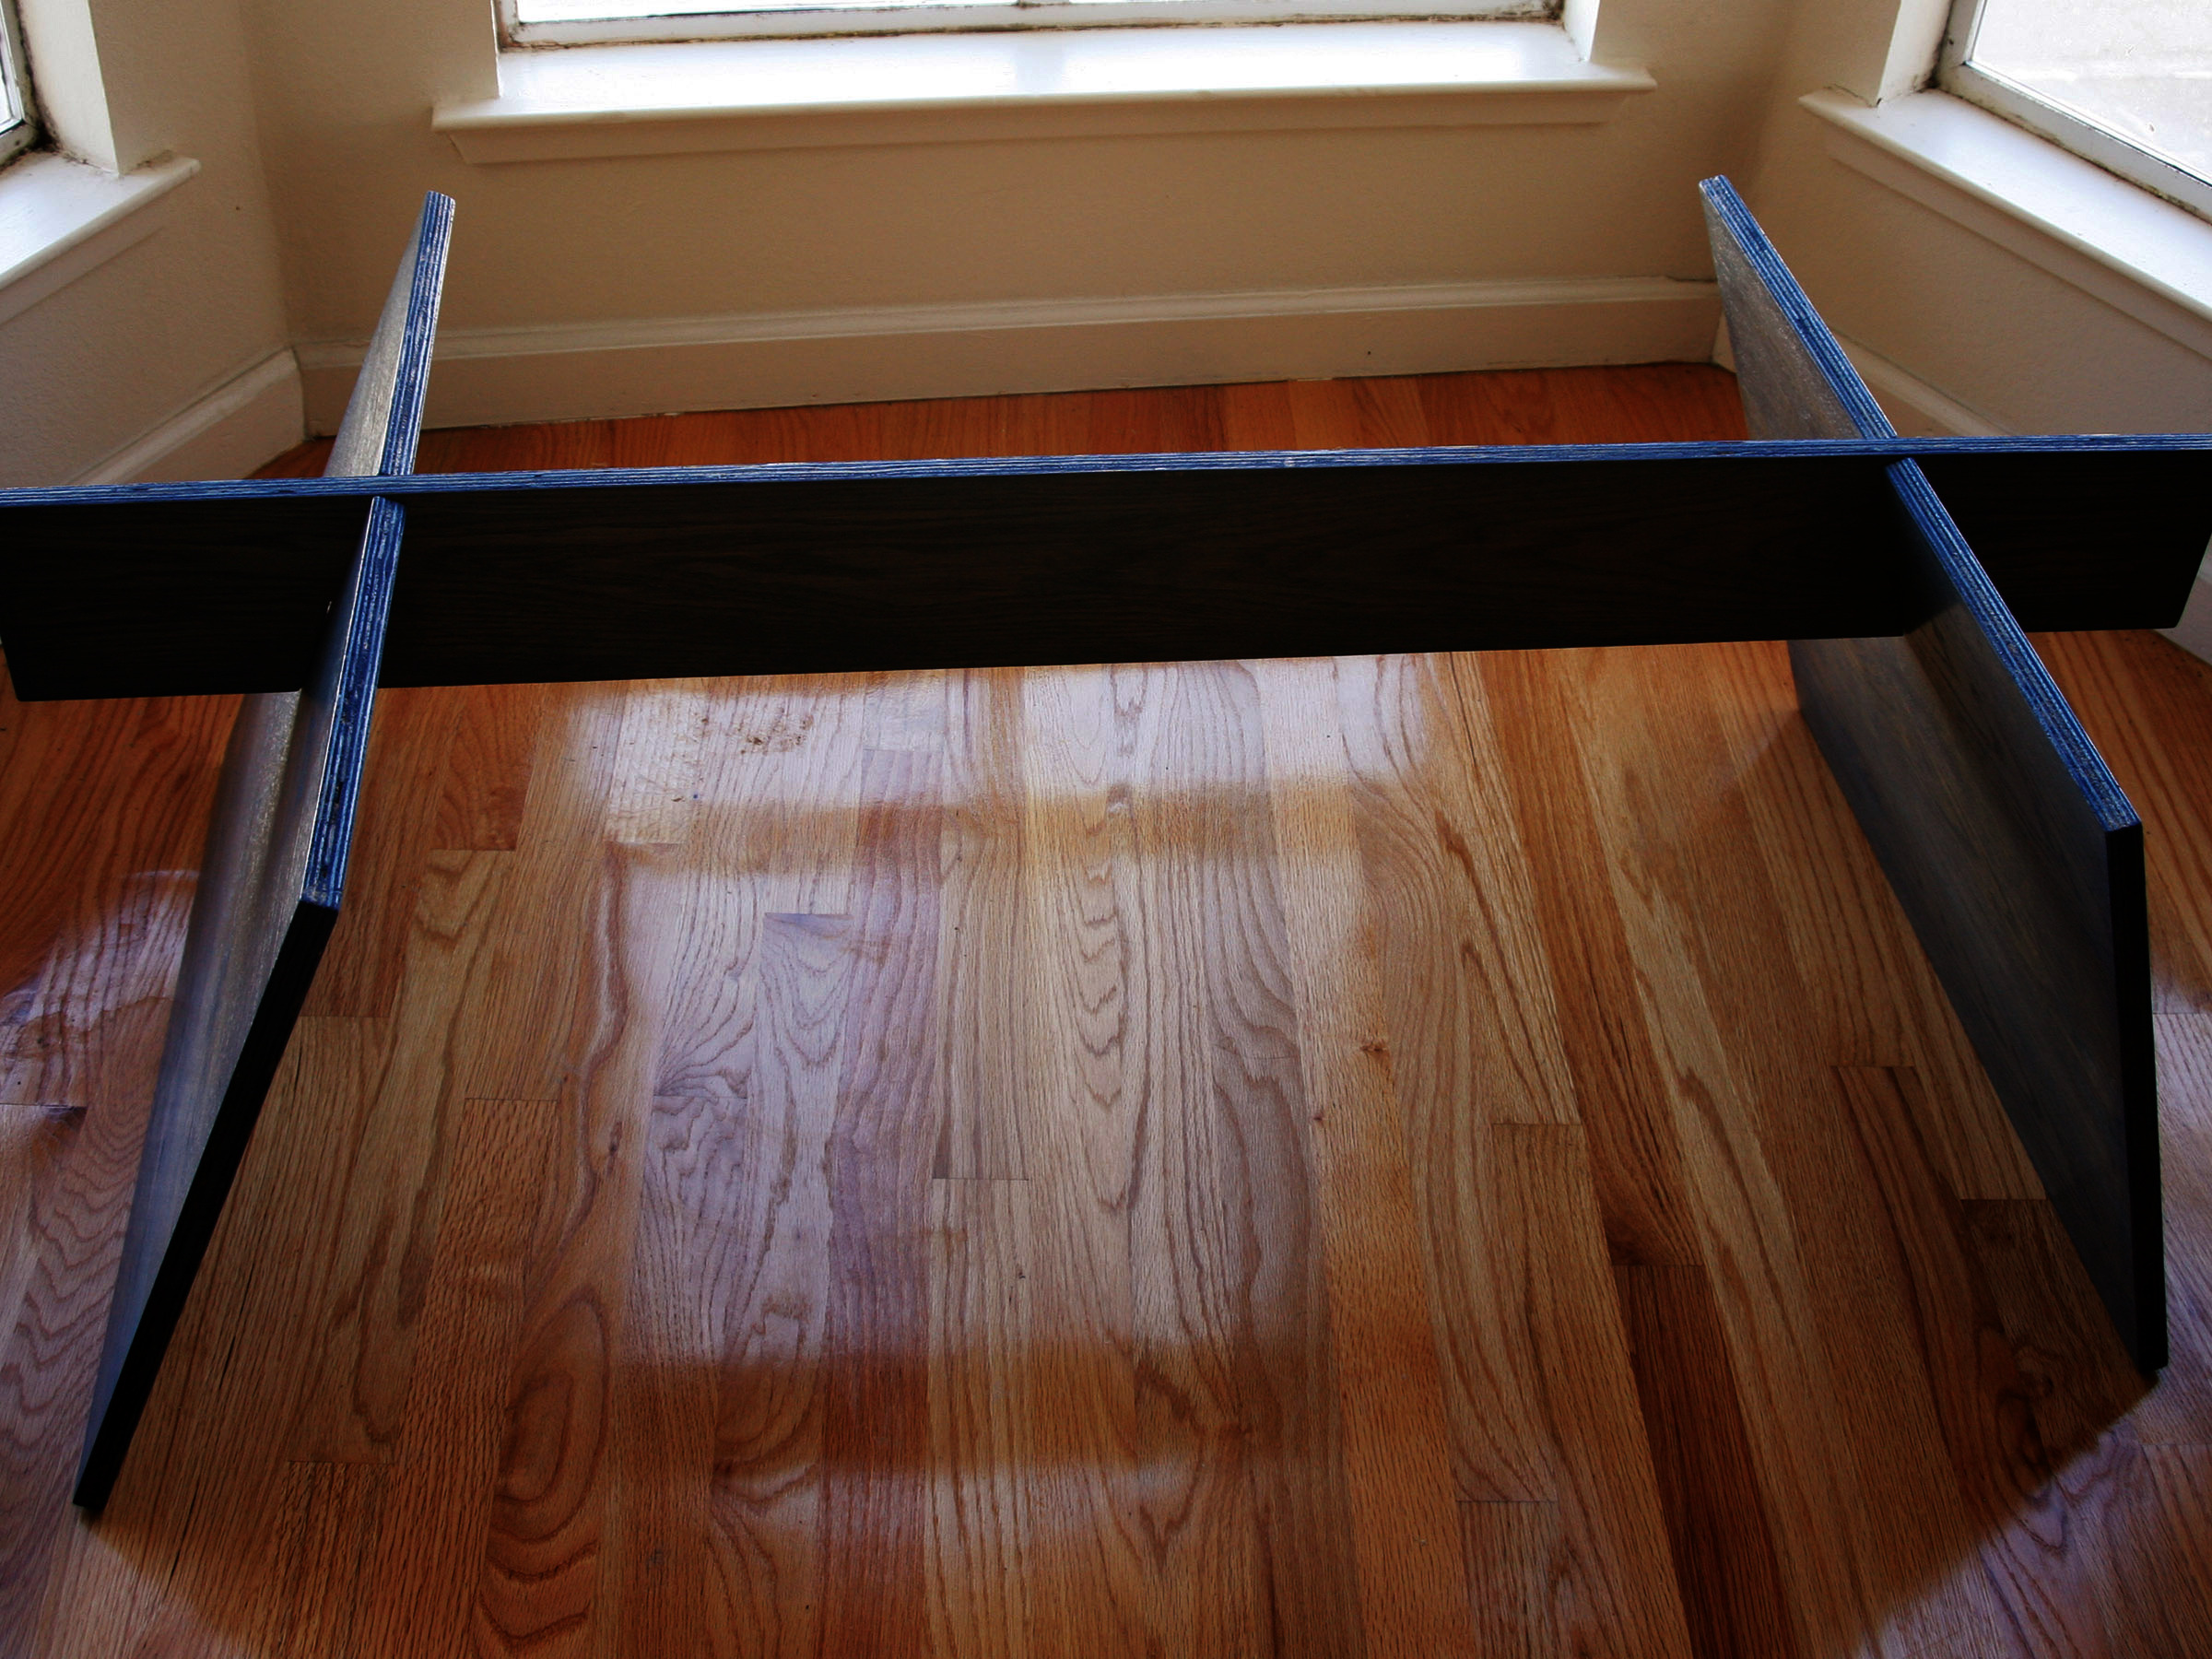
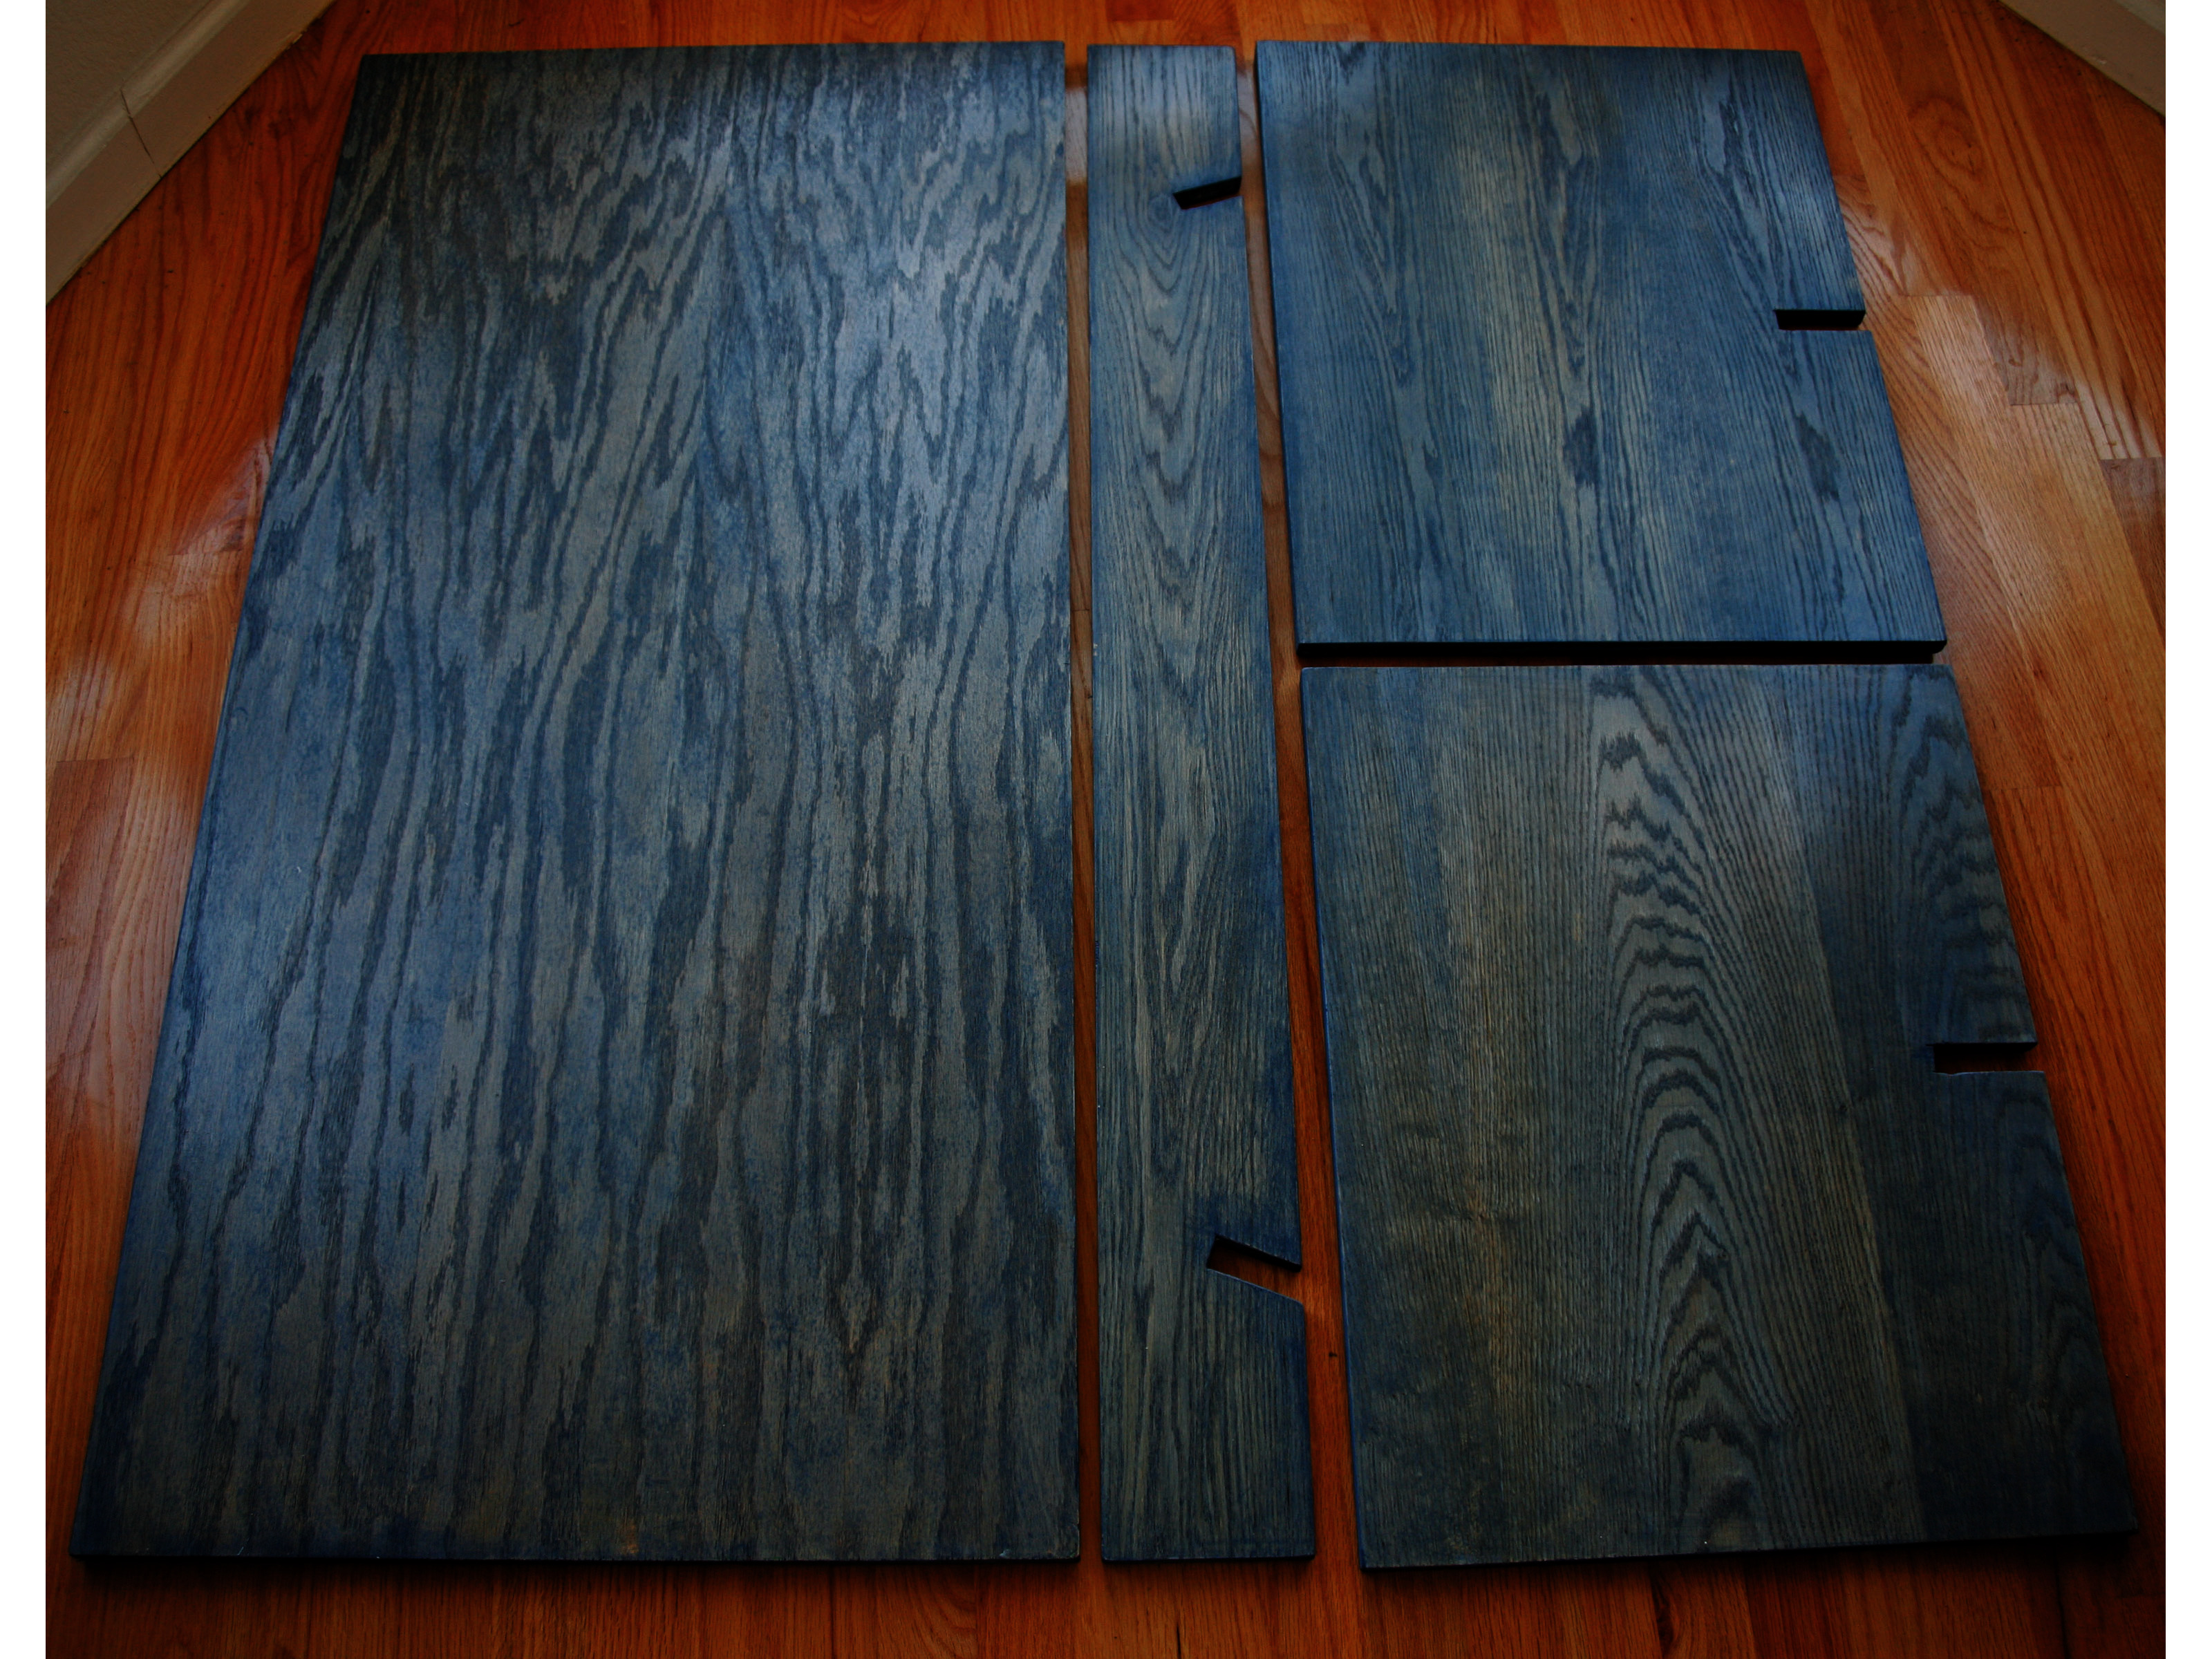
When I needed some furniture, I decided to build a set out of 3/4" birch veneer plywood. To make the furniture easy to assemble without any fasteners, I designed each component piece with slots that mate with one another and hold the whole piece together. Not having fasteners makes the furniture easy to pack up and transport. Finally, each piece is cut exactly from a half sheet of plywood to avoid waste.

Project Steps

Get the wood.

Obtain a 4’x4′ piece of 3/4″ plywood that is in good condition and free from warping and knots. You’ll also need four 1″ x1/4″ wooden pegs. Different grades of plywood vary in price, ranging from rough particleboard to finely veneered and pre-sanded. This project will work with any type. I chose Baltic birch veneered 5-ply from a local hardware store. If your sheet does have a knot or two, plan your production so that they wind up on the underside, rather than facing out. After sanding and painting, the piece will look great.

CAUTION: Whenever working with or handling wood it’s a good idea to use gloves to protect your hands from getting splinters. Wear safety goggles and hearing protection while using any tools, and always secure the material you’re working with to a stationary object using clamps or a vice. It’s best to work with a partner, and it also makes projects more fun.

Measure the wood.

Referring to the pattern, measure and mark your plywood along lines 1, 2, and 3. These divide the sheet into 4 pieces: a tabletop, a brace, and 2 legs. To ensure accuracy in measuring, the trick is to measure from 2 or 3 different directions and make sure that they all yield the same result. I often measure cuts I’m about to make from opposite ends of the plywood, and then use a square to ensure their proper angle against the edge of the material.

TIP: To make clean, straight cuts with a handheld jigsaw or circular saw, clamp down a fence at either end of the material and run it along the edge you want to cut. A fence is simply a straight, solid object that provides an edge for your tool to rest against.

Cut the wood.

Halve the plywood sheet to produce two 4’x2′ pieces. One piece will be the tabletop and the second one will become the legs and the brace that holds the other 3 parts together.

Make a cut parallel to the first that’s 5″-10″ in from the edge. This creates a narrow 48″ piece that will serve as the table’s brace. The wider you make this piece, the lower and more stable your table will be. I made a taller table by cutting a 5″ brace piece.

Clamp the larger piece left over from Cut 2, and cut it evenly in half, perpendicular to the first 2 cuts. With my table’s measurements, this turned a 19″x48″ piece into two 19″x24″ legs.

Cut the slots.

Cut the 4 slots, following the measurements on the pattern in Step 2. Note that although the plywood is labeled as 3/4″, its actual thickness may vary. So for each slot, you should first measure the thickness of the plywood it will fit around (calipers are handy for this), and make the slot a few hundredths of an inch larger.

TIP: There are several ways to cut slots with handheld tools. One method is to use a 3/4″ hole saw or paddle drill bit and drill a hole at the inside end of the “soon-to-be slot.” Then cut 2 parallel lines, tangent to the hole, out to the edge of the board. Another way is to drill holes at the inside corners of the slot that are just large enough to admit a jigsaw blade, then jigsaw out from those. The third method is to cut a slot straight out using a router and a 3/4″ router bit. This is the best method, provided you have the equipment.

Test assemble, and set the pegs.

Slide the legs and brace together, to make sure they all fit. Along the top edge of each leg piece, measure 2″ in from each end and mark a point centered on the edge of the plywood.

Disassemble the pieces, and drill  1/4″ holes at each of these 4 points, 1/2″ deep. On the underside of the tabletop, mark 4 corresponding points and drill 3/8″ receiving holes for the pegs 1/2″ deep. I marked locations by sliding pieces of pencil into the leg holes and centering the tabletop on top.

Finish.

You have many creative choices when it comes to finishing your furniture. You can sand the edges, finish them with a router, or level them square. You also need to seal the wood, especially if you intend to use this as a coffee table where you will serve beverages. I used a water-based stain and 3 coats of high-gloss finish for the product, but there are other options. Ask the friendly people at your neighborhood paint store for advice.

Conclusion

This project originally appeared in MAKE Volume 09.

Related Posts on Make: Online:

Playstation Controller Coffee Table

http://blog.makezine.com/archive/2010/08...

VHS Coffee Table

http://blog.makezine.com/archive/2010/08...