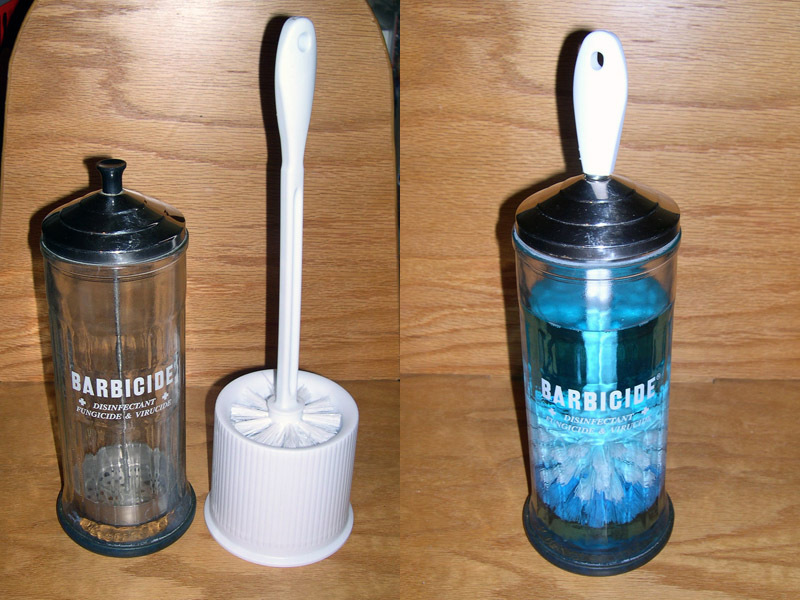
What do you do with the toilet brush right after you use it? Hang it up? Lay it in the sink or bathtub to dry first? Or maybe you have one of those brushes with a built-in base that keeps the bristles corralled when not in use. All of these alternatives kinda skeenge me out, honestly, and whether it’s realistic or not I have a kind of horror of loose toilet brushes and the germs I imagine growing on them.
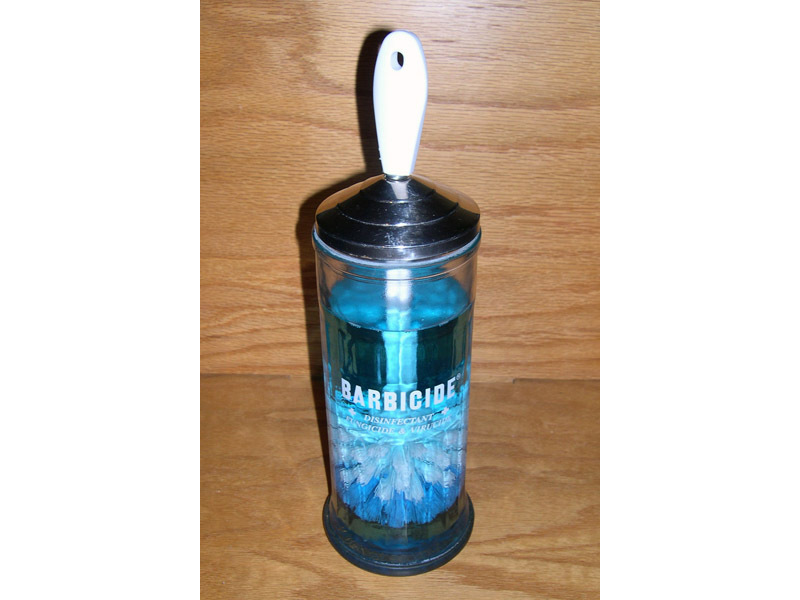
This is my Howard-Hughesian solution. A standard round plastic toilet brush is built into the lid of a barber’s disinfecting jar, so that the lid forms a sort of “guard” for the brush when it is withdrawn for use. When you’re done scrubbing, the dirty brush goes back down into the jar until the lid is back in place, submerging the bristles in disinfectant, where they are continuously stored when not in use. I used generic barber’s disinfectant from the beauty store, which comes concentrated and is diluted many-fold for use. The disinfectant is cheap to begin with; add to that the fact that the closed-lid design reduces evaporative losses to essentially zero and the expense associated with the disinfectant becomes trivial. You can also add detergent to assist in cleaning the bowl.
Project Steps
Disassemble the comb carrier
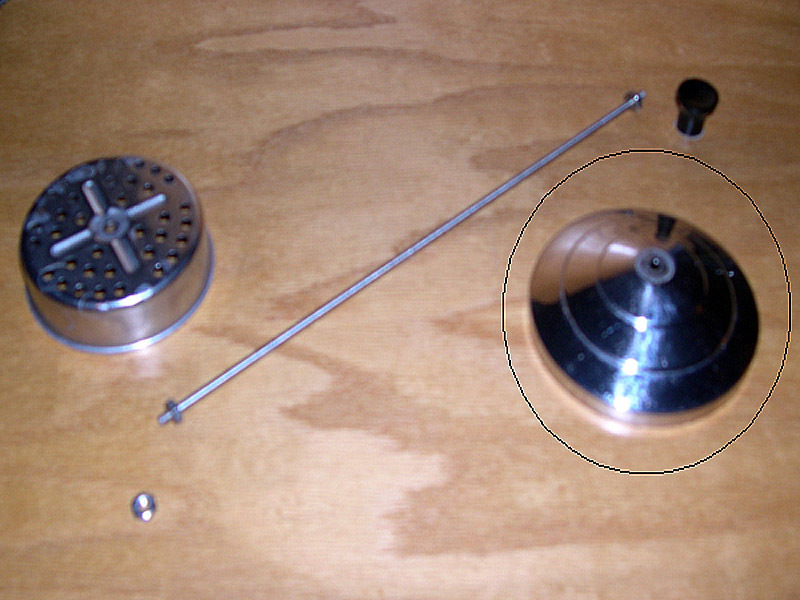
Grip the nut at the bottom of the comb carrier with a pair of pliers, and loosen the assembly by turning the handle on the lid. It should come apart easily.
Only the conical sheet metal lid is retained. The “filter,” tie rod, handle, and retaining nut can be repurposed, recycled, or discarded.
Cut handle and install dowel screw
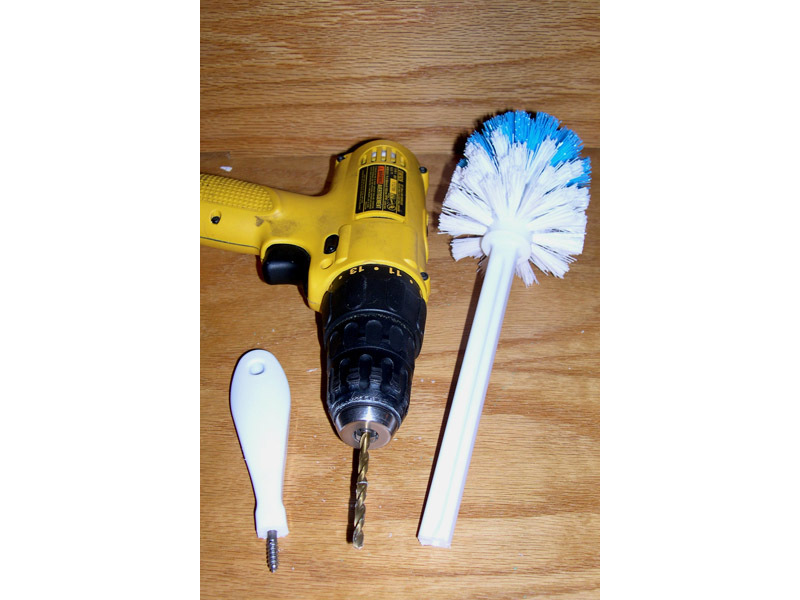
Choose a location on the toilet brush handle such that:
The bristles hang at least an inch above the bottom of the jar when the lid is in place.
There’s enough handle left above the cut to be useful.
Cut the handle using a small miter or razor saw.
Drill 3/16″ holes about 1″ into each half of the cut brush handle.
Thread the dowel screw into one of the holes as far as it will go with finger pressure.
Assemble brush
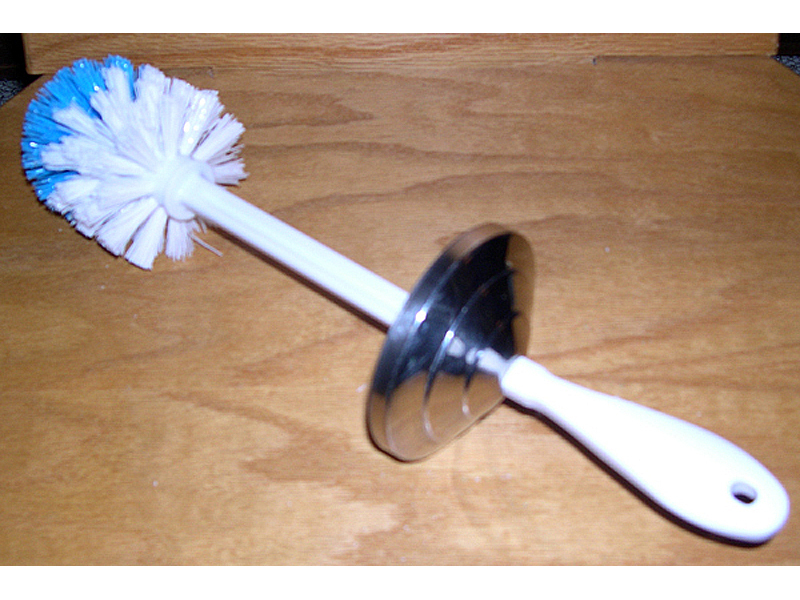
Add a split lock washer, and a flat washer, in that order, to the threaded-in dowel screw.
Slip the conical metal lid over the dowel screw, with the cone opening toward the brush bristles, and away from the brush pommel.
The hole in the metal lid may or may not be wide enough to pass the dowel screw. If not, expand it slightly using a the drill and an appropriate bit.
On the other side of the lid, add the other flat washer, and the other split washer, again in that order, and direct the free threads of the screw into the hole in the other half of the brush handle.
Twist the two halves of the handle to tighten the dowel screw on both sides of the lid. The split lock washers should be fully compressed against the flat washers.
Use it!
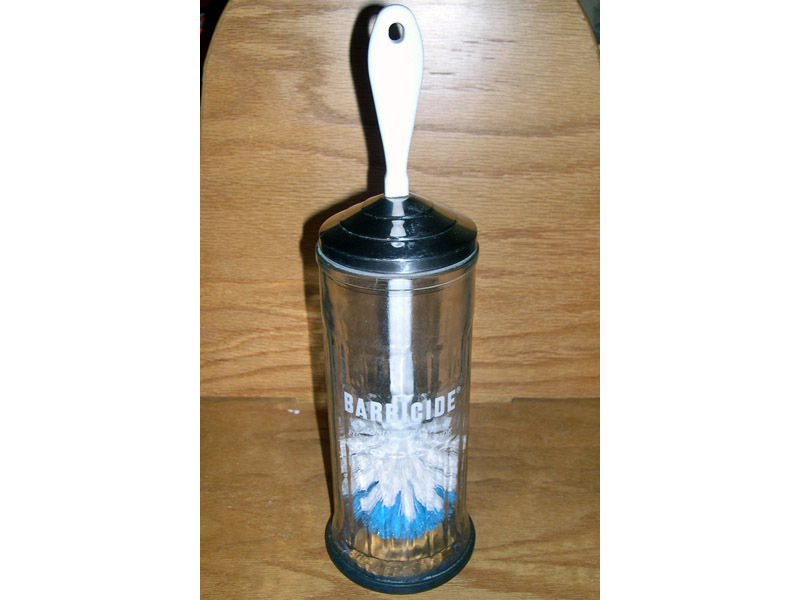
Prepare disinfectant by diluting per the label directions.
Fill the jar no higher than 3 inches from the top.
Insert the brush and verify that the lid closes properly.
Conclusion
I built two of these three years ago and they’re both still in great shape.
Yes, you can buy a toilet brush and caddy that has this general form, but I’ve never seen one with a canister actually designed to hold liquid disinfectant. Mostly the manufactured caddies are supposed to hide the brush when it’s not being used, and are therefore opaque. I wanted a clear canister so that no one using the brush or moving the caddy would be surprised by the fact that it’s full of liquid.


