m50_EFF_Opener-1

Capacitance — the ability to store a charge — is one of the strangest electrical properties. Every object in the universe that can conduct electricity has capacitance with every other object in the universe. The only reason you don’t notice this is that the effect is so small — unless the objects are extremely close together.

To construct a capacitor, all you need are two pieces of aluminum foil brought extremely close together, and an insulator between them. Add some voltage, and the capacitor stores it like a battery (although a tiny one). The opposite charges on the pieces of foil attract each other, holding themselves in place.

What will the next generation of Make: look like? We’re inviting you to shape the future by investing in Make:. By becoming an investor, you help decide what’s next. The future of Make: is in your hands. Learn More.

Project Steps

Make a DIY Capacitor

Start with a plastic supermarket shopping bag — the type that’s so thin, it tends to fall apart if you try to carry a gallon of milk in it. I used a bag from my local Family Dollar.

Cut around 2 edges of the bag, trim away the handles, and you should have a sheet measuring about 12″×18″. Patch any holes in the bag with Scotch tape.

Cut 2 pieces of aluminum foil that are the same width as the plastic, but 2″ shorter. Sandwich the plastic between the sheets of foil, which are offset from each other so they stick out at either side, as shown in Figures A and B. The sheets of foil must not touch each other. That’s important!

Figure A: A capacitor can consist of 2 layers of aluminum foil separated by a thin layer of plastic. The layers of foil must not touch each other.
Figure B: Charging the capacitor. A momentary connection is all you need.

foil1

This is your capacitor. If you have a meter that measures capacitance, attach one lead to each piece of foil. I got a reading of 3nF, which is 0.003µF. This may seem disappointingly low — but we can increase it by rolling up the layers to pack them closer together.

Figure C: An additional layer of plastic is required before rolling everything up.

foil2

Lay another piece of plastic over the upper sheet of foil, so that the aluminum sheets won’t touch when they are rolled around each other. Figure C shows what I have in mind.

Now cut a piece of corrugated cardboard about 15″×1″, tape the bottom edge of your foil-and-plastic assembly to it, and roll the foil and the plastic around the cardboard, as shown in Figure D. Add more tape to prevent everything from unrolling.

Figure D: To avoid short circuits while rolling the layers, the plastic must be longer than the foil. Each piece of foil sticks out only on one side or the other.

foil3

Charge and Discharge

To check for short circuits, use a meter to measure the resistance between the 2 sheets of foil, which should be infinity (). If you have no meter, put a 9V battery in series with a 1K resistor and an LED, as in Figure E. Touch the LED to the battery and the resistor to the foil. The LED may flicker briefly, as the capacitor charges through it. After that, the LED should stay dark. If it lights steadily, you’ll have to unroll your capacitor to find where the sheets of foil are touching each other.

My rolled-up capacitor had a value of 73nF. This still seems low compared with the physical size of the thing, but we can have some fun with it.

Figure E: Test for short circuits. The long lead of the LED is on the right. If the LED lights steadily, the layers of foil are touching each other somewhere.

foil4

Charge your capacitor by touching the battery to it, as in Figure F. Now discharge the capacitor through your LED and the 1K resistor. If you watch carefully, and your room lighting isn’t too bright, you’ll see the LED flicker, proving that a roll of foil and shopping bags really can store and release electricity.

Figure F: Apply voltage momentarily to charge the capacitor. Then discharge the capacitor through the LED. The long lead of the LED is on the left.

Next you can run a more counterintuitive test, shown in Figure G. First discharge the capacitor through the black wire at the bottom. Then touch the red alligator clip to the capacitor, and the LED will flash. You might wonder how this can happen, because the 1K resistor ensured that the right-hand end of the capacitor was at zero volts. So how did the right-hand side of the LED become positive enough to make it flash? Because even though a capacitor will not pass DC current, it will pass a brief pulse of current sufficient to light the LED. This is sometimes called displacement current, and I think it’s so interesting, I added a section explaining it in the new edition of my book Make: Electronics.

Figure G: Now you can witness displacement current, which passes through the capacitor. The long lead of the LED is on the right.

Squeezable Audio

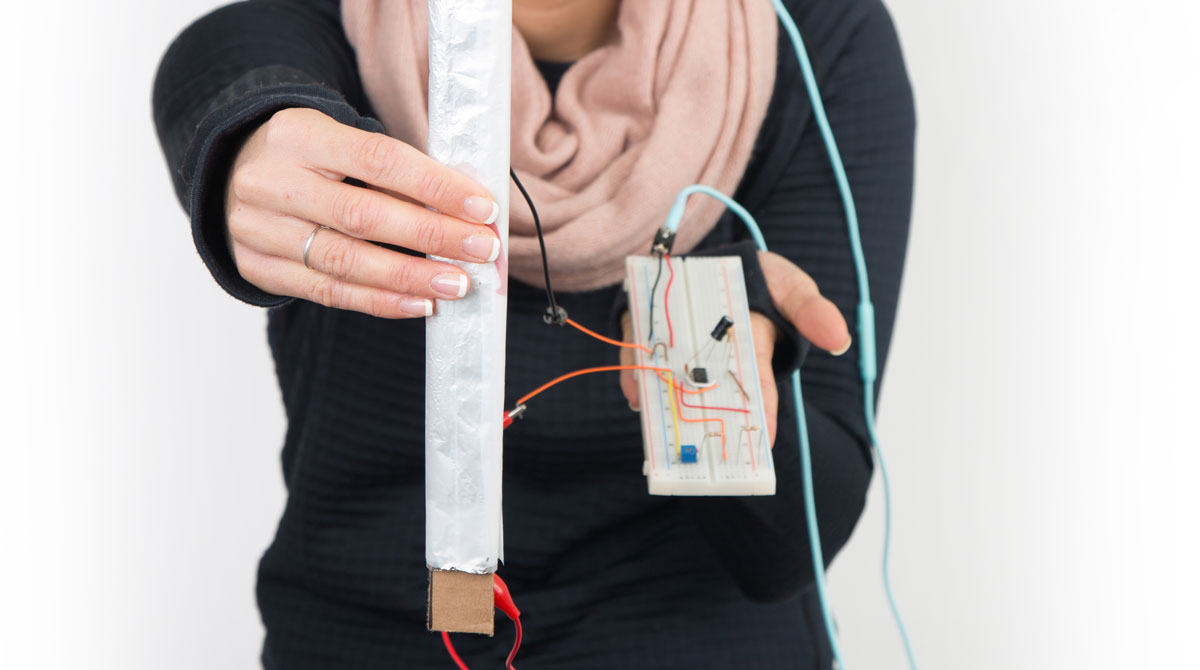
For added entertainment, use your capacitor to control the audio output of a 555 timer. The schematic is in Figure H, and a breadboard layout is in Figure I. Adjust the basic tone with the trimmer potentiometer, then press down hard on your rolled-up foil and plastic, and the tone should drop. This is what I call the Sound Squeezer. It gives you a source of instant vibrato.

Figure H: Schematic for generating squeezable audio.
Figure I: Breadboard layout for squeezable audio.

Calculating Capacitance

The Sound Squeezer works because when you press the layers closer together, you increase their capacitance. And why does this happen?

If a capacitor has 2 flat plates, each of area A (in square meters), and the distance between them is d (in meters), then capacitance C (in farads) is calculated like this:

C = ε × A / d

What is ε [epsilon]? That’s the permittivity of the material between the plates. Permittivity describes how good an insulator the material is. The permittivity of air is about 9 divided by 1 trillion. For a polyethylene shopping bag, it’s about 20 divided by 1 trillion.

It so happens there are a trillion picofarads in a farad, so we can divide the left side of the formula by a trillion to match the division by a trillion in the permittivity factor on the right, and the trillions will cancel out.

Now if we express C in picofarads, and we use a plastic shopping bag, the formula looks like this:

C = 20 × A / d

The area A is about 25cm × 40cm = 0.1 square meters. Let’s suppose the foil layers are about 0.1mm apart, which is 0.0001 meters. So the formula becomes:

C = 20 × 0.1 / 0.0001 = 20,000 picofarads = 20 nanofarads = 0.02 microfarads.

This is close to the 0.03 microfarads that I measured when the foil and plastic were flat on the table.

When the layers are rolled up, their capacitance greatly increases, because the space between the layers decreases. Also, rolling up the layers makes use of both sides of the foil, instead of just one side.

How can a tiny electrolytic capacitor store so much more charge than a big homemade capacitor? Because it uses ultra-thin layers of foil, spaced very close together, with a special coating in between that has high permittivity. Even without the special stuff, you can see from the formula that if you reduce the gap between the layers of foil by a factor of 1,000, you multiply the capacitance by 1,000. Then if you reduce the thickness of the foil also, you get more capacitance because the foil contributes to the spacing of the layers.

And if this has roused your curiosity, why not cut open an electrolytic capacitor and take a look inside? You’ll find there are just layers of coated foil — but special foil, and a special coating.

One last idea, suggested by my friend and collaborator Jeremy Frank: To achieve a higher capacitance value, forget about shopping bags and cooking foil and instead use a space blanket made of mylar film silvered with aluminum on one side. Two rectangles of that would be all you need.

In the meantime, the Sound Squeezer proves that capacitance is everywhere around you, if you take a moment to look for it.