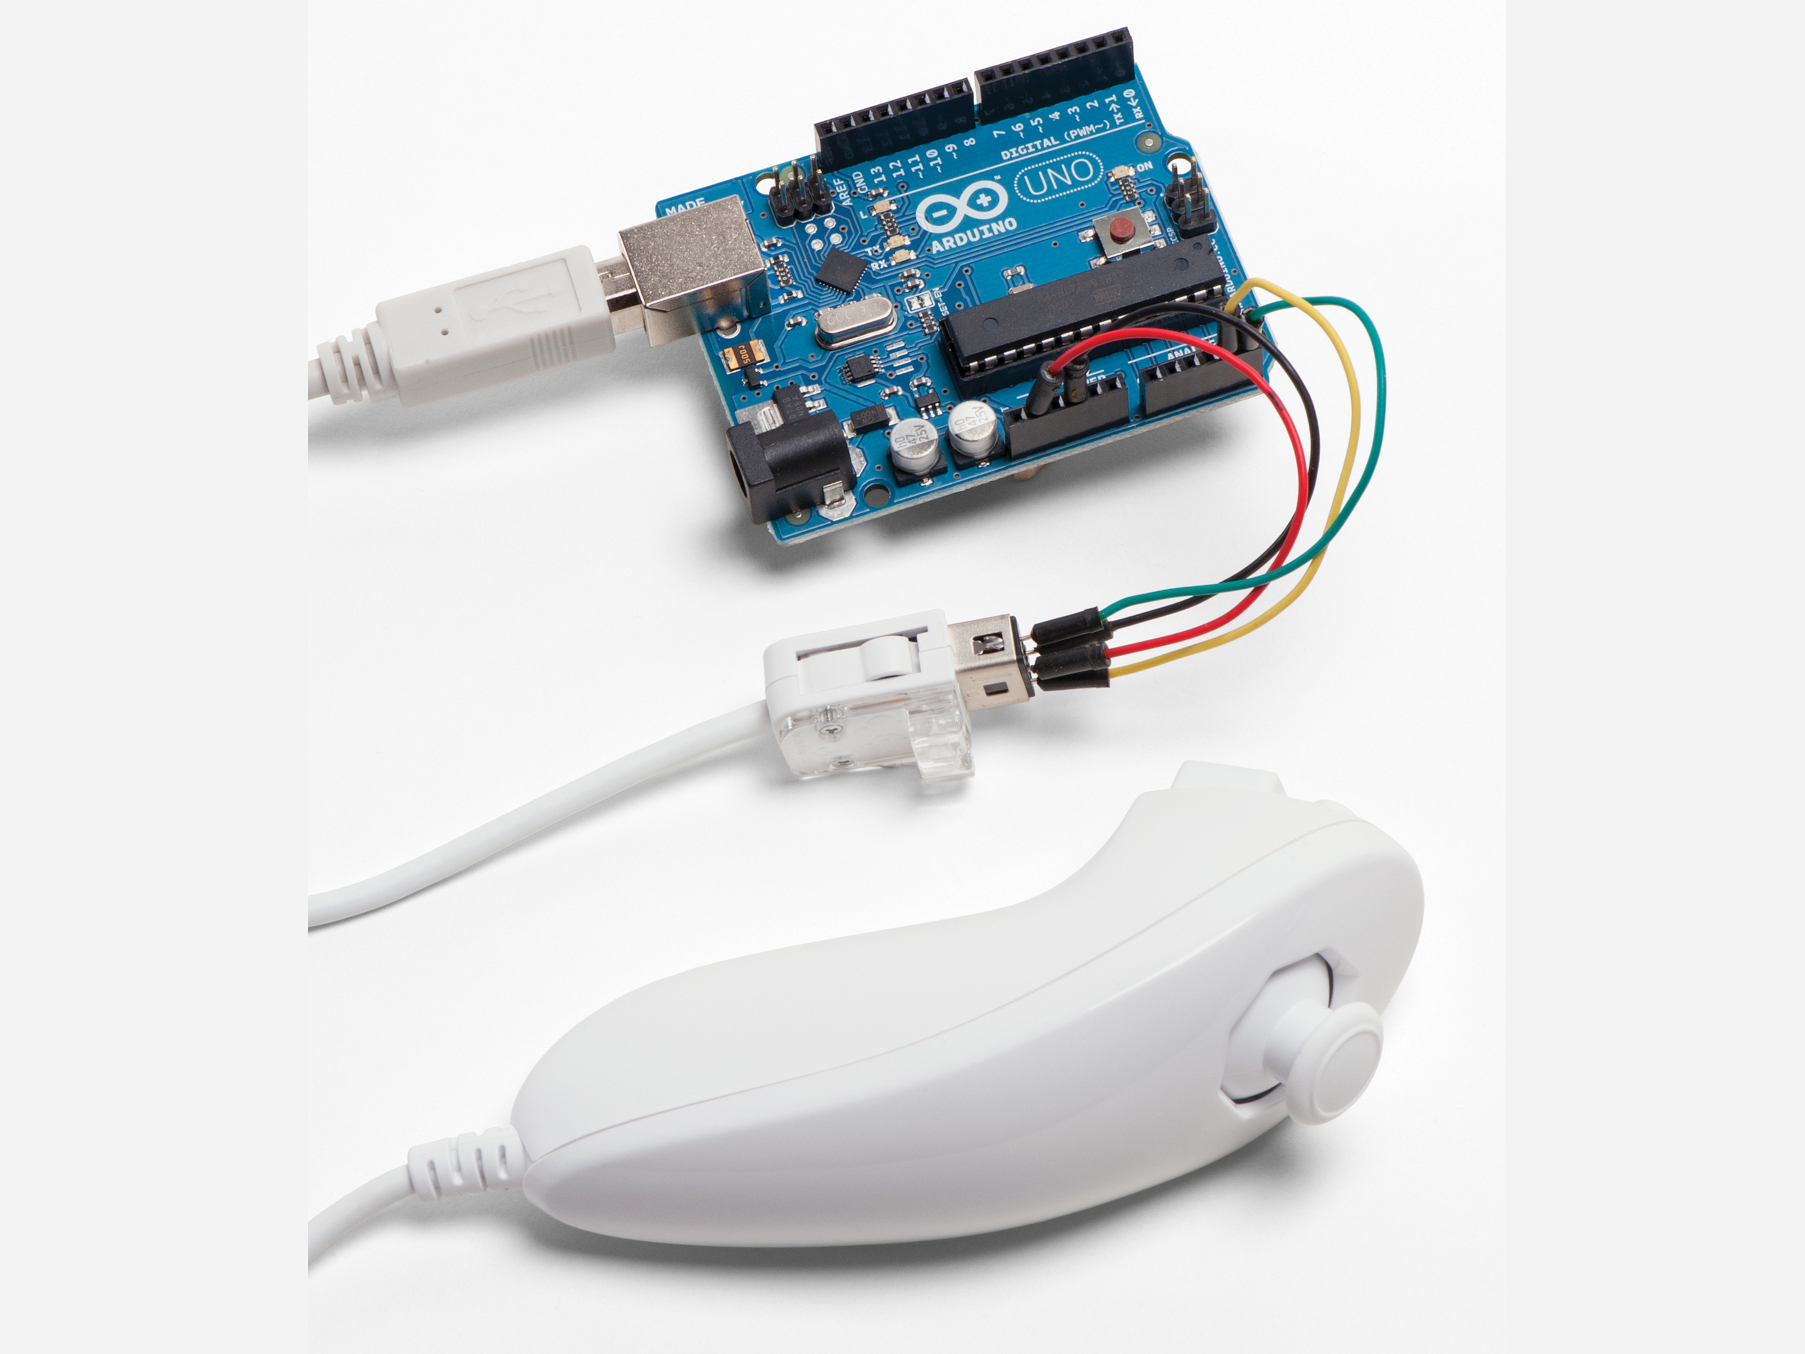
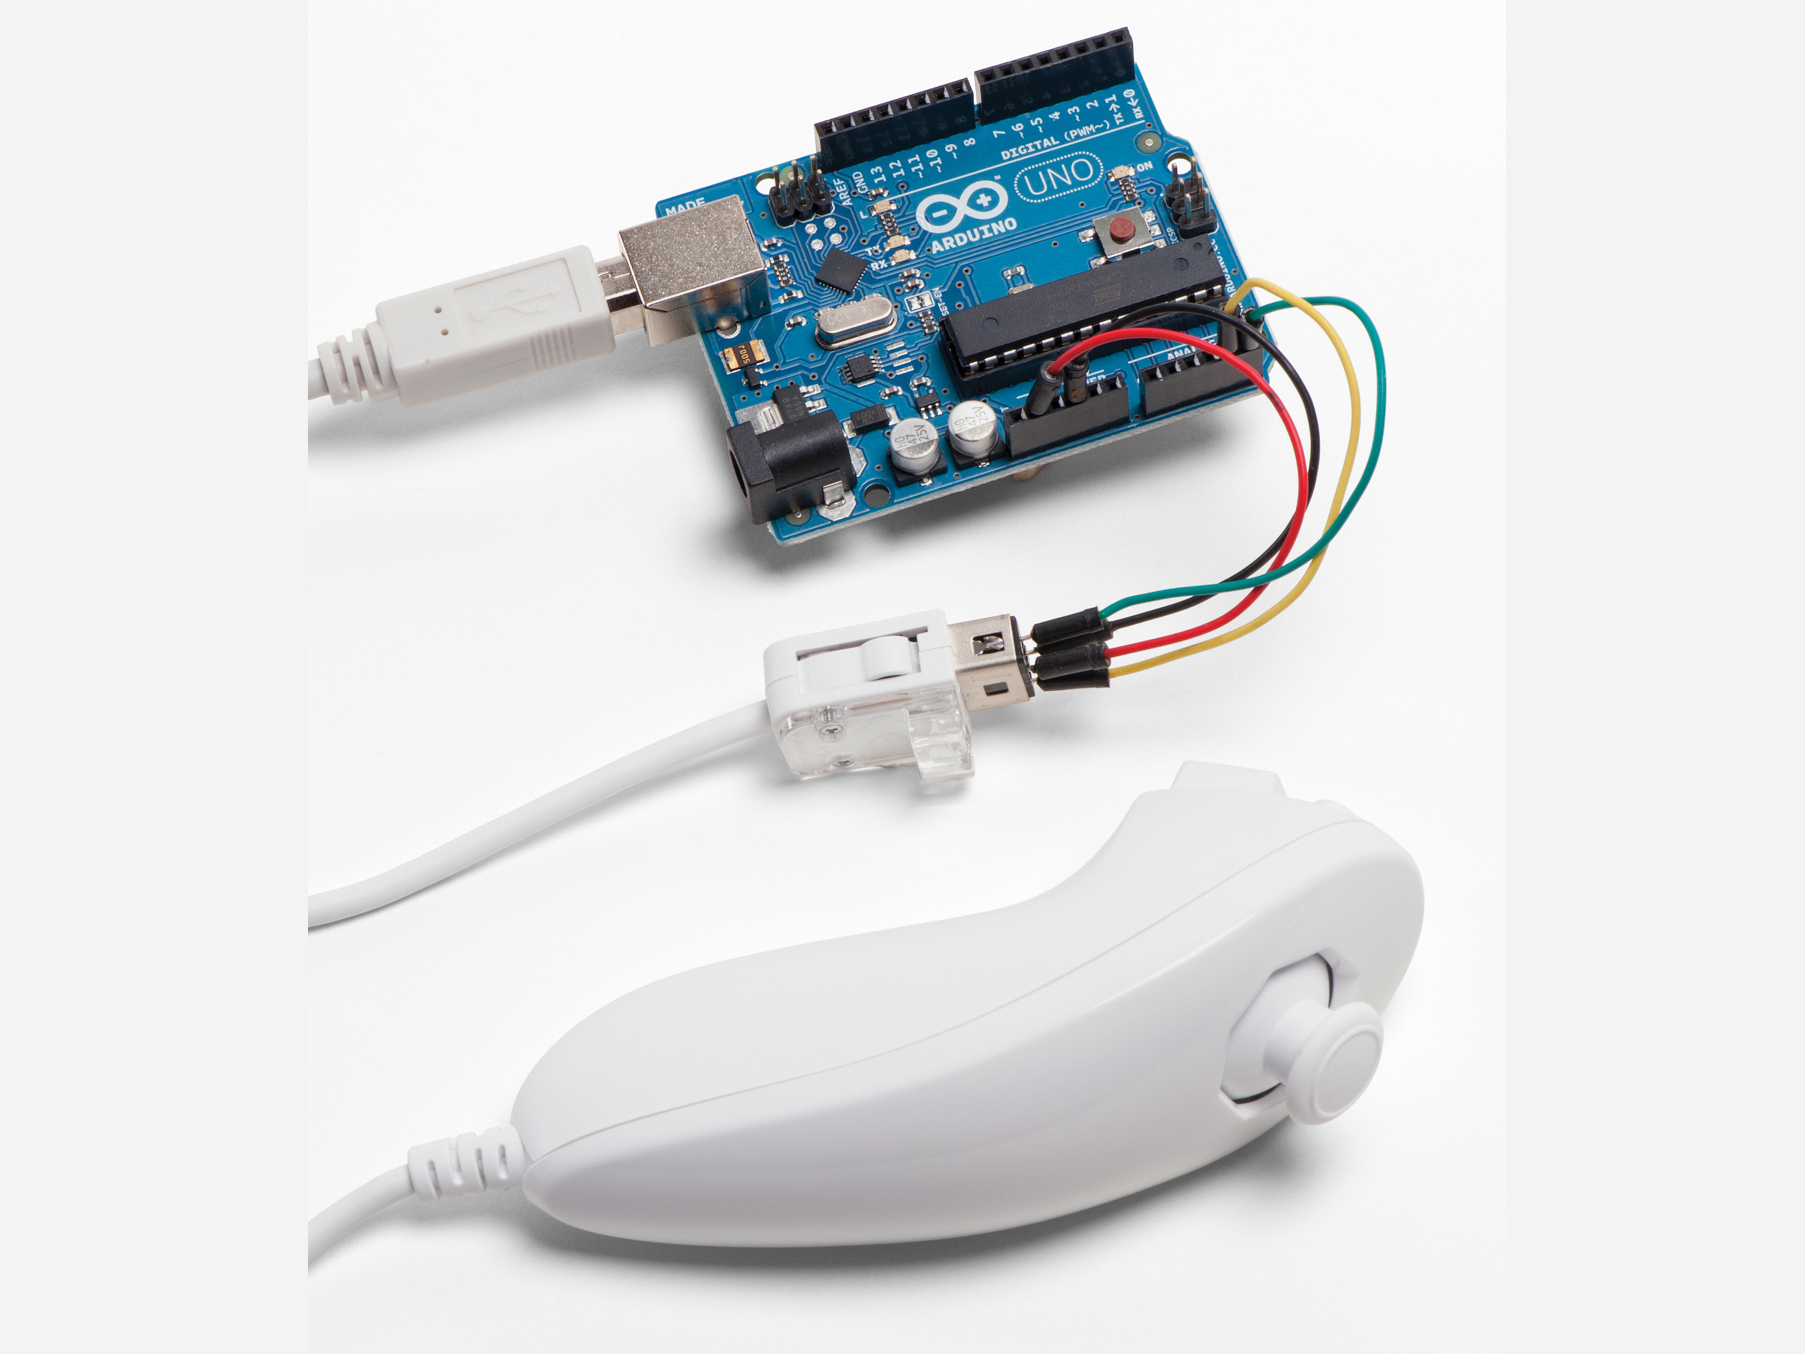
Today, more and more devices are using motion control. From tablets to cellphones to game consoles, people are getting used to interacting with electronics using gestures. Personal computers, however, have lagged behind a bit. Unable to find a suitable gestural controller for my Windows PC on the consumer market, I set out to build my own.

I based my design on the Wii Nunchuk controller for several reasons. First, it’s a versatile, comfortable, well-designed controller; second, it‘s cheap and easy to find; and third, its native I2C serial protocol is easy to interface with Arduino. As a bonus, the connector will accept standard jumper wires, so there’s no need to cut up the cable or use a dedicated adapter.

The Arduino runs a sketch that reads data from the controller and prints to the computer’s serial port. The computer runs a Python script, which receives serial data and emulates a mouse.

What will the next generation of Make: look like? We’re inviting you to shape the future by investing in Make:. By becoming an investor, you help decide what’s next. The future of Make: is in your hands. Learn More.

Project Steps

Install the Software

Download the Arduino IDE for Windows at http://arduino.cc/en/Main/Software. Extract the arduino-1.0 folder to your hard drive. Inside this folder you’ll find arduino.exe.

Download the Arduino Nunchuk library at http://github.com/GabrielBianconi/Arduin…. Extract the ArduinoNunchuk folder to your hard drive.

Open theArduino IDE and select File → Preferences. Note the folder under Sketchbook folder and open it in Windows Explorer. Look for a folder named libraries. If there isn’t one, you should create it. Move the ArduinoNunchuk folder into libraries.

Download Python 2.7.2 for Windows at http://python.org/ftp/python/2.7.2/pytho… and run the installer. You can find IDLE, the Python IDE, atStart → Python 2.7 or launch it at C:Python27Libidlelibidle.pyw.

You should not download Python 3. The script used in this project won’t work with this version.

Download the pyserialmodule at http://pypi.python.org/pypi/pyserial. Extract the pyserial-2.6 folder to C:. Launch the command prompt window at Start → Accessories → Command Prompt. Type cd /d c:pyserial-2.6 and hit enter. Now type c: Python27python setup.py install and hit enter again.

Download pywin32 at https://makezine.com/go/pywin32 and run the installer.

Connect the controller to the Arduino.

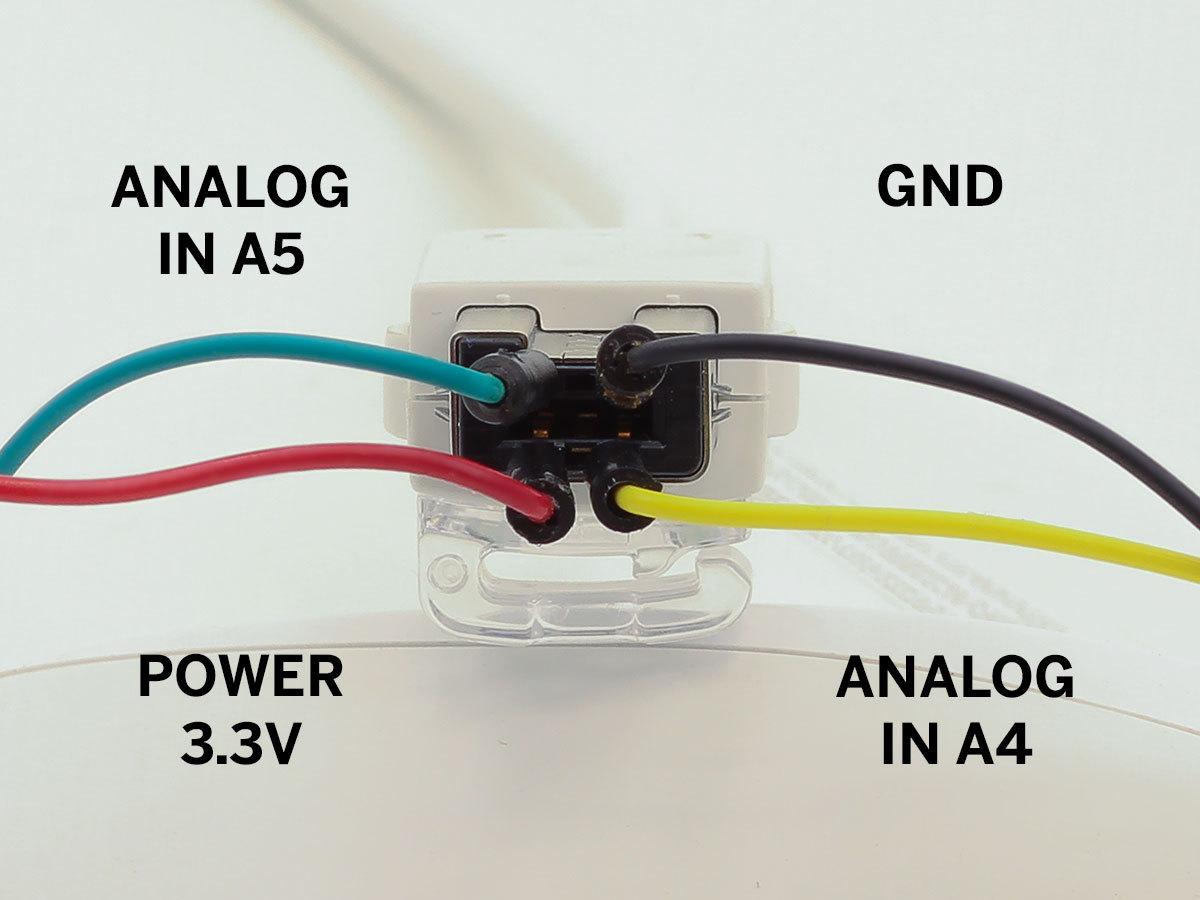
We’ll use 4 colors of jumper wires to simplify the instructions. Insert the jumpers into the Wii Nunchuk’s connector.

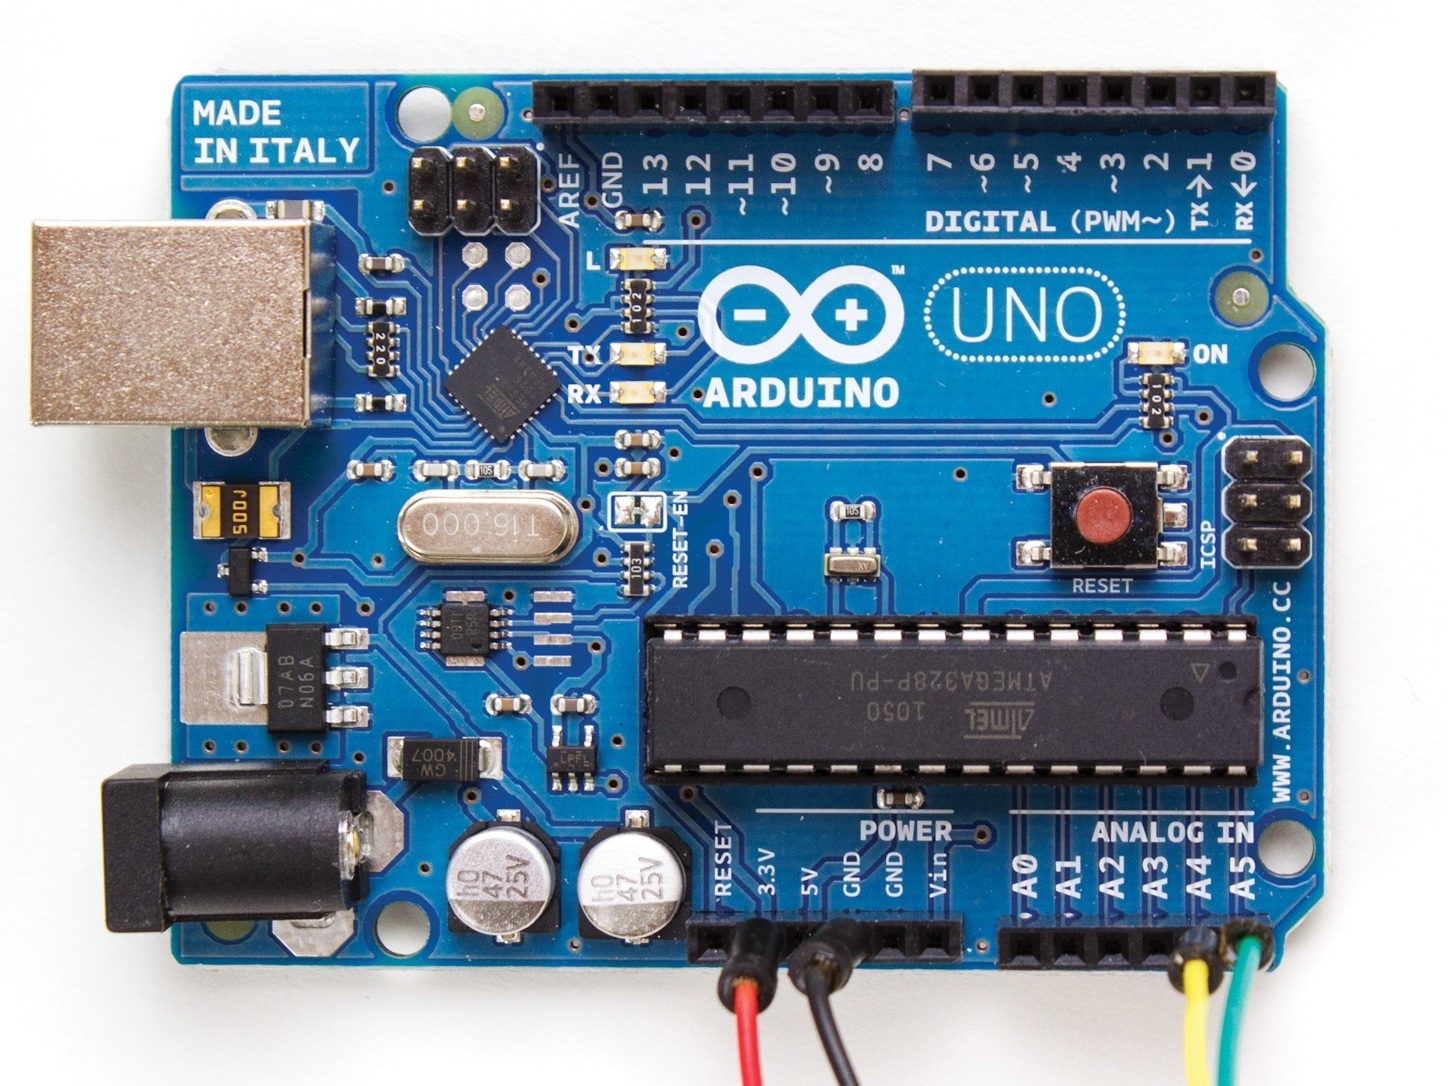
On your Arduino, connect the red wire to +3.3V and the black wire to GND. Connect the green wire to A5 and the yellow wire to A4

Upload the arduino Sketch

Connect your Arduino to your computer via USB. If this is the first time, you’ll need to install the required driver. Windows will not be able to install it automatically, so you’ll need to select it in arduino1.0/drivers.

Open the Windows Control Panel and search for the Device Manager. You can find the port in which your Arduino is inserted under Ports (COM & LPT). Open the Arduino IDE and select the correct port under Tools → Serial Port.

Relaunch Arduino. Select your Arduino model under Tools → Board.

Open the Serial Monitor. At the bottom right, change 9600 baud to 19200 baud and wait a few seconds. You should see 7 columns of values that change if you move the Wii Nunchuk, move the analog stick, or press a button. If it’s working correctly, close the serial monitor.

The ArduinoNunchuk library that you’ve installed has an example sketch that prints the data from the Wii Nunchuk to the computer’s serial port. Open the example file by selecting File → Examples → ArduinoNunchuk → ArduinoNunchukDemo. Upload this sketch to your Arduino.

If you can’t find the example sketch, try relaunching the IDE. If this doesn’t fix the problem, you probably didn’t install the library correctly.

If you don’t see the numbers, you probably did something wrong or skipped a step. Make sure that the wires are connected properly and the baud rate and serial port are set up correctly.

If you get an error when trying to run the file, make sure that the port was correctly set up and both pyserial and pywin32 installed. If this doesn’t solve the problem, try restarting IDLE and your Arduino. If it still doesn’t work, restart your computer.

Set up the script.

Download the Python script at https://makezine.com/go/nunchuk.

4b. Open it with IDLE (Rightclick → Edit with IDLE). Look for the line which says port = ‘arduino_port’ and write the correct port (leave the quotes). It should look like port = ‘COM10’ (use the same port as set up in the Arduino IDE). Save the script (File → Save or Ctrl+S).

Press F5 to run the file and wait a few seconds. Enjoy using the Wii Nunchuk as a computer mouse!

Conclusion

This project first appeared in MAKE Volume 33, page 118.