By Lish Dorset
One of my favorite parts of being a babysitter when I was a teenager was coming up with activities that would keep the kids I was watching entertained for hours. One of those activities was taking a roll of butcher paper, rolling it out the length of the kitchen, and giving the kids the task of creating whole towns, amusement parks, or whatever they could think of with a box of crayons. It was always a hit.
Fast forward to a family vacation of mine just a few weeks ago. I was with my family that now includes two junior members, one of whom is 4. Something told me there might be a need for an all-consuming project for said 4-year-old, so the chalkboard tote was born. With a few basic supplies and a few pieces of chalk cloth, you can make this right away and let the hours of entertainment begin.
Materials
24″ x 12″ chalk cloth
Scissors
26″ x 26″ canvas fabric, plus extra for an outside pocket
26″ x 26″ cotton fabric
Pins
Quilting needle
Thread
Double-fold bias tape
Twill tape, cut to desired handle length
Directions
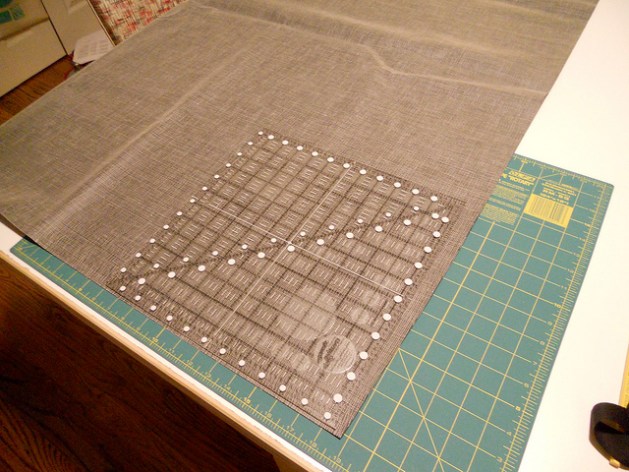
Step 1: Start out by cutting your chalk cloth squares. You’re going to cut two squares the same size. I had a 12″ x 12″ quilting square to use as my guide, but you can use an old record album sleeve, too, for a quick cut. Just don’t use your favorite record! Yikes! Set aside.
Step 2: Next, cut your canvas and cotton fabrics. Together these two fabrics will be the actual tote. If these fabrics need to be pressed, now is the time to do so. Mark the fabric and cut.
Step 3: With the right side of your cotton fabric facing up, position your chalk cloth squares. You should leave about an inch between each square. Pin the squares to the cotton. Pin only at the top and bottom of each square. Chalk cloth pierces easily, so you don’t want to make any unnecessary holes in the fabric.
Step 4: Sew the chalk squares to the cotton. I used a quilting needle to sew through the chalk cloth. Set aside.
Step 5: If you’d like to add an outside pocket to the tote, do so now. Cut a piece of fabric to your desired size and sew to the outside of the canvas. Once that is done, pin the fabrics together, place the wrong sides of the fabric together, and sew close to the edges.
Once this is done, sew in the 1″ gutter you created with a straight line. This will be the tote’s fold.
Step 6: Add the bias tape to the bag around all sides.
Step 7: Depending on the size you want the tote handles to be, cut the twill tape. Sew each one to the outside of the tote. Reinforce with an “X” stitch.
You’re done! We found that the chalk cloth can be cleaned with a tissue, and further cleaned, after a few uses, with a damp cloth. We’ve been using washable sidewalk chalk on this and it’s been working very well.
About the Author:
Lish Dorset loves to craft and inspire others around her craft (including her cat Ronnie), too. She’s a staff writer for CRAFT and a lover of Maker Faire. A lifelong Michigan resident, Lish is a part of Handmade Detroit, a DIY gang that’s been hosting the Detroit Urban Craft Fair, Michigan’s first indie craft fair, since 2006. While she loves all crafting mediums, she spends most of her time sewing, quilting, and finding ways to involve a glass of wine into projects.
ADVERTISEMENT


