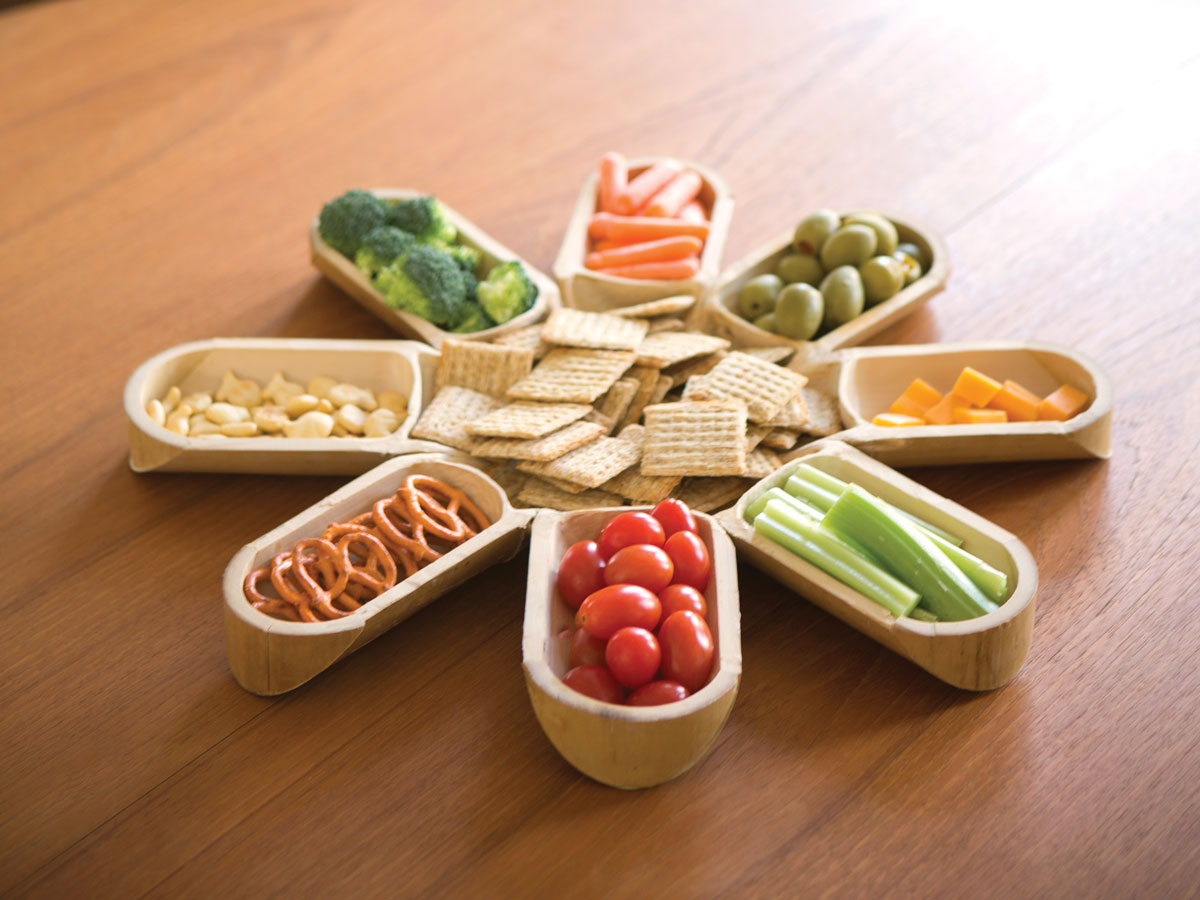
M37-Bamboo_Tray_Open_Braverman

Somewhere between grass and wood on God’s celestial materials list, bamboo is exceptional stuff. Lightweight, strong, elastic, and durable, it’s one of mankind’s earliest building materials. It works, bonds, and finishes well. Many of the more than 500 distinct species have been used to make rafts, fishing poles, blowguns, fences, houses, and all the furniture, flooring, blinds, and rugs therein — even skyscraper scaffolding. You can use bamboo chopsticks to eat tender bamboo shoots. Its leaves and shoots even possess medicinal properties. It’s such a perfectly renewable resource you can almost watch it grow — often between 2 and 4 feet a day.

Here’s an hors d’oeuvre tray you can make with only bamboo and a little glue. Bamboo poles are available from such sources as calibamboo.com or bambooandthatchetc.com, or if you live in a temperate or tropical clime, you may be able to find some growing locally. Harvest it after it loses its foliage and thoroughly dries to a nice beige.

You’ll need enough running feet to yield four 9″ finished pieces that include a node, 5-1/2″ of plain hollow material on one side of the node and about 3-1/2″ on the other side (drawing “bamboo segment”).

M37-bamboo-tray-diagram

If you want to make a smaller tray, use 3 pieces and adjust the dimensions and angles accordingly.

What will the next generation of Make: look like? We’re inviting you to shape the future by investing in Make:. By becoming an investor, you help decide what’s next. The future of Make: is in your hands. Learn More.

Project Steps

Split the bamboo.

You’ll need enough running feet to yield four 9″ finished pieces that include a node, 5-1/2″ of plain hollow material on one side of the node and about 3-1/2″ on the other side (drawing ‘bamboo segment’). Split the 4 pieces lengthwise into 8 halves using a band saw. Adjust them to the same thickness, if necessary, with a disc sander.

As you work through the project, save some of the fine sawdust you create. Later you’ll mix it with a bit of wood glue to fill any small gaps between pieces.

Make a cutting guide.

On the band saw, cut a 45° vee in the end of a scrap of 2×4, on its centerline, as shown here. Position this 2×4 fixture on one end of a bamboo piece, so that the sides of the 45° angle run out of the piece just before the node. The pointed end should be about 3-1/2″ from the node (see top view of drawing “bamboo segment”). Tightly wrap both pieces with masking tape to hold them together when you make the cuts (Step 3).

To mark the 45° vee, we used an adjustable triangle. You can also just go into any drawing program that will do precise angles, such as AutoSketch, then print the vee, cut it out, and tape it to the wood. (We’ve found that this is a very good way to accurately cut out most anything. If it can be printed accurately, it can be cut accurately.)

Cut the inside angles.

With the band saw, cut a 45° angle on the short end of the bamboo piece, using your fixture as a guide.

IMPORTANT: To ensure a good fit between adjacent pieces when assembled, keep the saw blade very close, and parallel to, the inside walls of the fixture. Smooth the angled end by sanding.

Repeat for 6 more pieces. You now have 7 tray segments with 45° points that will be positioned together; later you’ll make an eighth segment to fill the gap. Because of irregularities in bamboo, none of the segments will be identical (except for the 45° angles).

Cut the outside angles.

On a table saw, cut a 45° angle on the opposite end of each segment (see side view of drawing “bamboo segment” and 4-1). To ensure good fits with the end caps, they must be cut with their flat faces against the table saw fence.

Make the end caps.

From scrap bamboo of the same size, cut 8 matching 45° pieces about 1″ long as shown in diagram. Bond 7 of these caps to the segments using the water-resistant glue. Use masking tape to hold them in place while the glue dries.

Sand everything flush.

Sand the tops of the finished segments so they’re flush with their new end caps.

Pass the segments through a simple gauge to compare their thicknesses and sand if necessary to make them match.

Test-fit 7 segments.

The next few steps are important for best appearance of your finished tray.

Make a peg about 1-1/4″ long out of approximately 1″-diameter PVC pipe or wood dowel. Temporarily hot-glue the peg to a smooth work surface, standing up. You’ll use it as a jig to keep the segments’ points in the same plane.

Turn the 7 segments over (round side up) on your work surface and test-fit them together with their points meeting in the center, their tips resting on top of the peg, and their flat surfaces facedown on your work surface. Drive finishing nails to hold them in place. You may have to cut some off the peg and/or rearrange the segments a few times for the best fit.

Make the final segment to fit.

Now make the eighth segment and glue on its end cap. Make the angled end slightly oversize and trial-fit it into the gap in the 7-segment array. Again, make sure its tip rests on the peg in the center. You’ll probably have to cut and sand this segment on a trial-and-error basis for best fit.

When you get them arranged, mark each with tape (alphabetized or numbered) so you can duplicate the arrangement.

Glue all 8 segments together.

A friend can help at this point. Cut a 1″ hole in a large sheet of waxed paper or aluminum foil and place it over the peg to keep glue off your work surface.

Glue all 8 segments together in the proper order with their pointy tips on the peg. Drive additional finishing nails into the work surface as necessary to hold all the segments firmly together while the glue dries. We set a quart can of paint on top of a piece of firm foam to hold all the tips down tight while drying.

Sand and fill.

Let the glue dry overnight, remove the holding nails and admire your new tray!

Using a Dremel with a small drum sander, fair and smooth any sharp edges where the segments meet. Follow up with hand sanding.

Fill any cracks or blemishes with a thick mixture of your saved sawdust and the water resistant glue.

After it’s dry, hand sand the whole interior of the tray.

Finish with polyurethane.

Finish the tray all over with at least 2 coats of the specified gel polyurethane sealant, which is FDA-approved for food contact and often used for butcher blocks. Lightly hand sand between coats.

Serve it up!

The tray is perfect for serving party snacks, and it also makes an interesting wall decoration, hung either side out, when you’re not using it to help feed your hungry, green-minded friends.