dremelexhaust01

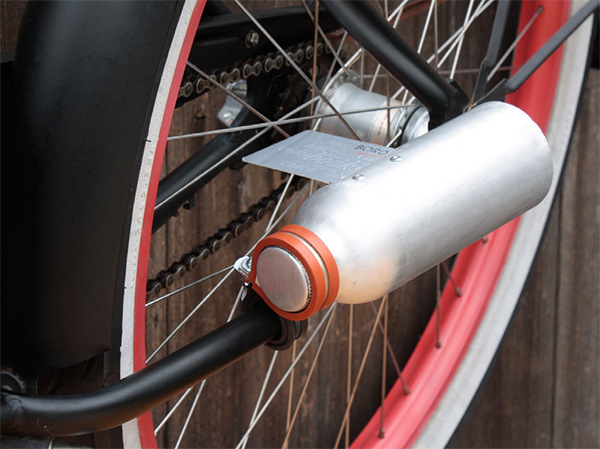
My son has this totally awesome “exhaust” pipe on his bike that I covet. It’s really a resonator for the classic baseball-card-in-the-spokes trick. It makes a terrific racket, and gets people to move out of the way without necessitating a honk on your horn. I decided to build my own, using a recycled beverage bottle. Armed with a Dremel Rotary Tool, a bottle of energy drink, and a depleted gift card, I set out to make my own soda bottle bike exhaust.

What will the next generation of Make: look like? We’re inviting you to shape the future by investing in Make:. By becoming an investor, you help decide what’s next. The future of Make: is in your hands. Learn More.

Project Steps

Instead of advertising an energy drink, the first thing to do is go for a stylish brushed aluminum look and sand the paint off the bottle. To avoid denting it, make sure it’s full of the original beverage, otherwise, refill with water.

WARNING: It’s always important to use safety goggles or safety glasses when operating any power tools. Work in a well ventilated place and wear a dust filter to avoid breathing in particles.

Put the can in a vise, then don your dust mask and goggles. Use the 180-grit abrasive buff on the Dremel to remove the paint. The abrasive buffs work well in curved areas like the neck of the bottle, and they have some give, so they don’t gouge the metal. I set the tool to about 15,000 RPM and used light pressure, moving vertically to create a consistent “grain” in the aluminum.

Once all the paint is off, you can switch to the 280-grit buff to smooth it out more. You could continue refining it down to a cotton buff with polishing compound and create a very shiny exhaust, but I decided to stick with the brushed look.
We’ve got to remove the bottom of the bottle so the sound isn’t too muffled, but is instead amplified.

Wrap masking tape around the bottom to indicate your cut line. Clamp the bottle in a vise, switch the Dremel to the cutoff wheel, and use a speed of about 20,000 RPM to carefully cut off the bottom.

Remember to let the tool’s speed do the work, don’t apply much pressure.

To smooth the sharp edge where the bottom used to be, affix the grinding wheel to the Dremel and de-burr the metal

Measure and mark the slot for the card, then use the cutoff wheel to cut it

Next, measure and mark for two aligned holes on both the card and bottle where they will be attached.

I made things easy on myself (who wants to measure on an irregular topology like the bottle neck?) and marked in 1cm from either edge of the card, then drilled two 1/8″ holes in the card and used it as a template to mark the bottle holes.

Drill out the 1/8″ holes in the bottle.

Insert the card in the slot, then use the gun to pop the rivets into place

Wrap one hose clamp around the bottle cap. Wrap the other around the bike’s chain stay. Then thread the screw, washer, and nuts.

Position everything so that the card will come into contact with the spokes, but nothing else (such as a pedal) will be impeded by the bottle.

Tighten it all up with a screwdriver and wrench.

Ride (loudly) into the sunset on your sweet cruiser. (See a video of it in action here: http://www.youtube.com/watch?v=ni-mXPfiHHg )