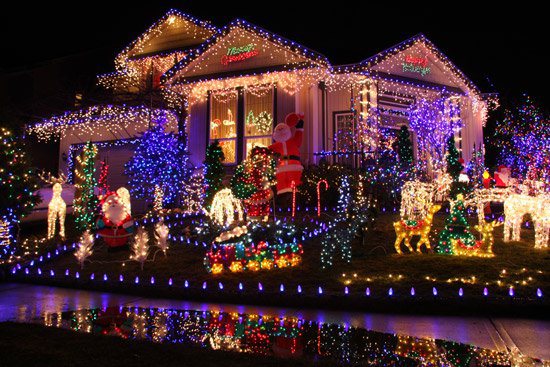
Are you a Christmas enthusiast? As autumn comes, the air turns nippy and the leaves begin to fall, do you look forward to digging out your Christmas lights from storage and stringing them up? If so, you might want to consider building your own customized light lines this holiday season.

lights

Building customized light lines is how professional lighting installers consistently create such crisp, picture-perfect light displays. Building your own light lines eliminates the problem of light strings always ending up too short or too long. Customizing your lines also gives you complete control over bulb spacing and other aesthetics such as bulb color, style, size, and design.

And building a custom light line is surprisingly easy. In fact, it’s all just a 1-2-3…

What will the next generation of Make: look like? We’re inviting you to shape the future by investing in Make:. By becoming an investor, you help decide what’s next. The future of Make: is in your hands. Learn More.

Project Steps

Step 1: Choose Your Cord and Bulbs

The first step in building your own customized light line is choosing the cord you’re going to use. The cord used for building custom lines is called an empty socket light line. It’s called ’empty socket’ because you purchase the bulbs separately and screw them into the fittings molded into the line. Empty socket light line is available in both bulk and custom lengths.

You’ll need to make several decisions before you purchase your cord:

· Bulb Size. Empty socket light line is available for both C7 and C9 bulbs – the most popular sizes for outdoor lighting displays. C9s are a bit larger than C7s, and are the most common choice for perimeter lighting such as outlining a structure, or bordering a driveway or walkway.

· Spacing Between Bulbs. Unlike pre-built light sets that you use right out of the box, you have lots of options with bulb spacing when you build your own lines. Empty socket light line is available with bulb spacing in 6″, 9″, 12″, 15″, 18″, 24″ and 36″ increments.

· Cord Gauge. Empty socket cord is available in SPT-1 and SPT-2 gauges. The difference lies in the thickness of the insulation. If your lights will be in place just for the Christmas season, SPT-1 should be fine. But if your lights will be on display for 6 months or more, SPT-2 will be your best choice.

· Cord Color. The most popular cord color is green, but white is also available.

Once you’ve decided upon the cord size you’ll use – C7 or C9 – then you can choose your bulbs. LEDs are rapidly becoming the most popular choice, and offer advantages in energy-efficiency, service life, color purity and brightness. But incandescents offer a lower initial purchase price (though over time, the LEDs will likely be more cost-effective).

But one of the great advantages of building your own light lines is that you can choose whatever type of bulb you prefer; empty socket cord will accommodate both LED and incandescent bulbs.

Step 2: Cut

To build a customized light line, you’ll simply measure out the precise length you need for a line, and cut that length off your supply of empty socket cord. You can create light lines of any length you desire; the only limitation is that it’s probably best to avoid exceeding 300 bulbs per line.

Now you just need to install a fitting on each end of the line: a male fitting on one end, and a female fitting on the other. The male fitting is what you’ll plug into an electrical outlet or extension cord (or the end of another cord), and the female fitting will allow you to plug another line into the end of this one.

Installing the fittings is very simple – no insulation-stripping or wire-crimping is necessary. You don’t even need any tools; you just slide the fittings onto the ends of the cord.

(By the way, you can also use these fittings in combo with a bulk cord – called ‘zip cord’ – to build custom extension cords.)

Now screw your bulbs into the sockets, and your custom light line is ready for installation.

Step 3: Clip

Now that you have light lines custom-built for your Christmas lighting project, you’ll want to install them neatly and with precision. You can do that by using the same installation aids that professional installers use: an assortment of purpose-built clips.

Plan on using one clip per bulb socket, even for light lines with the closest bulb spacing. And choose the correct clip for the surface to which you’re attaching your line. Clips are available for attaching to:

· Clay roof tiles

· Wood or asphalt shingles

· Flashing

· Roof ridge rows

· Gutters

· Trees and shrubs

· Smooth, flat surfaces (wood, metal or plastic)

· Artificial foliage (trees, wreaths, garlands, sprays)

· Brick

· Ferrous metal (magnetized clips)

· Concrete and brick surfaces

With the proper attachment hardware, your custom light line installation will be quick and easy, and will yield a professional look.

Professional-Looking Results for Do-It-Yourselfers

Most professional installers build their own custom light lines because doing so saves them money and results in superior displays. That makes customers happier and contributes to long-term business success.

But there’s no reason that the advantages of build-it-yourself light lines should be limited to professional installers. After all, you don’t need to be a professional to achieve professional looking results; you just need to know the how-to-do-it 1-2-3 process for building your own light lines.

And now you do.

You can find everything you need to customize your own light lines from any reputable Christmas lighting supplier in your area or online, including Christmas Designers, the site where this author works.