cannon-cam-opener

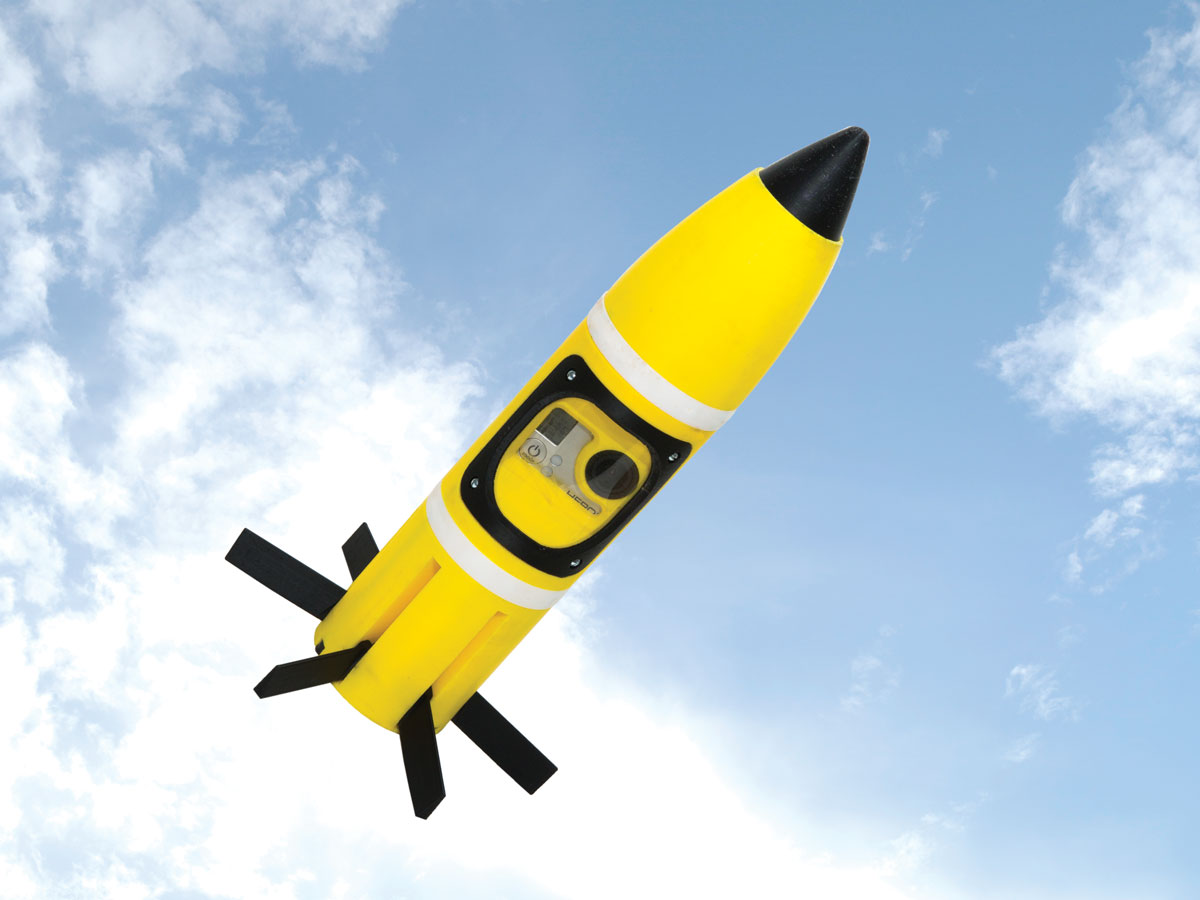
The original Cannon Cam shell was one of the first custom 3D projects I made when I started working at Make Labs. Due to the design constraints of the Thing-O-Matic 3D printer, the idea was doomed from the start, but I printed it out anyway. (It looked cool and I was excited about 3D printing.) It sat on my workbench for 3 years, until my editor noticed it during a brainstorm session for new 3D-printed projects. I told him it would probably wobble in flight and shatter on the first crash landing. Intrigued by the concept, he asked if I could design a new one that would fly stable and survive a crash. Of course I said yes — I can’t pass up a design challenge. The result was this new GoPro Cannon Cam, and video from the unique perspective of a human cannonball.

YouTube player

Originally, to give it stable, roll-free flight I added an electromechanical gyro stabilization system in addition to 6 spring-loaded retractable fins. To help it survive landings I designed a shock-absorbing nosecone and a non-electronic time delay parachute deployment system, triggered by the inertia the projectile experiences when fired from the cannon. After spending days researching World War II torpedoes, warhead fuses with clockwork time delays used by the Nazis, and gyro cars from the 1900s, I developed a projectile with several “modules” that each had a different function.

A nose cone module featured a spring-loaded shock-absorbing tip to protect the rocket on impact. But the impact would be lessened by a parachute module; a fan would rotate a series of lugs and when they lined up, the rear section would break away and drag a parachute into deployment. Meanwhile, a camera module with a built-in window held the camera in place without disrupting the aerodynamics. The gyro module had a small motor, mounted on a one-axis gimbal, that powered a steel washer flywheel. The final section was the retractable fin module, which was rigged to break away.

To incorporate all those components required a “rocket” almost 2 feet long and weighing around 6 pounds. (I have a tendency to over-engineer things.) So I took a step back. I abandoned the gyro and parachute systems in favor of a small, lightweight projectile with the shock-absorbing nose cone, camera, and retractable fins. If the projectile was light but strong, I reasoned, it would survive landings at terminal velocity. After a quick destructive test of a 3D-printed part, I incorporated threaded rods running the length of the body to hold the parts in compression and help it resist delamination during violent impacts. All that was left to do was print it out and test-fire it.

What will the next generation of Make: look like? We’re inviting you to shape the future by investing in Make:. By becoming an investor, you help decide what’s next. The future of Make: is in your hands. Learn More.

Project Steps

Print the components.

Print the nose cone impact head, fins, slip rings, and window frame (get files here) at 80 percent solid infill. Print the remaining parts with 30 percent infill.

Make sure all the major body modules printed correctly, then use three 8.75″ lengths of 6-32 thread rods to hold things together temporarily.

Once you have lined everything up and made sure all the modules sit flat against one another, mark the parts with a black Sharpie to ensure the Cannon Cam is always assembled the same way.

TIP: If your printer doesn’t print evenly, line up the pieces so they lean the same way, to keep the modules from binding up.

Assemble the spring-loaded fin module.

Cut 6 lengths of 1/8-inch brass rod to 5/8-inch long, and de-burr the ends. Drill out the holes in all the fins with a #30 drill. Take one torsion spring and place it with one of the legs resting in the slot on the fin. Trim this leg so it is flush with the fin’s body, about 1/4″ long. Now trim the other leg to around 3/4″. Slide the brass rod into the spring.

With the brass pin and torsion spring in place, insert the protruding 3/4″ leg of the torsion spring into the small hole on one of the slots on the fin body cap, then lay the brass pin in the corresponding trough. Repeat with each fin.

Fit the body cap and fin assembly to the spring loaded fin body, holding the two parts firmly together, and test all the fins to make sure they don’t bind and get stuck in the grooves of the body. If they do, disassemble it and file the sides down until the part no longer binds. Once every fin retracts and springs out freely, fix the two parts together with three 8-32×1/2″ screws.

Build the camera module

Carefully peel off the label of the soda bottle, then cut off the top and bottom to leave a large clear cylinder. Place your window frame over the plastic and trace out the shape of the frame on it, including markings where the screws will enter the body. Cut the window out of the plastic, trimming the corners until it fits in the camera module body. Drill holes to accept the screws.

Trace a line along the window’s vertical edges where the all thread rods will pass through the body and cut off the extra material. Place the window in the body and use the 4-40×3/8″ screws to attach the window frame to the camera module, sandwiching the window between the two.

Final assembly

In preparation for firing, start by assembling the nose cone module. Take the impact head and put the large spring in the hole in its base, then slide both into the hole in the bottom of the nose cone body. Screw the three 6-32×8.75″ all thread rods into the small holes in the bottom of the nose cone body and add the first slip ring, making sure your tick marks are lined up.

Make sure your GoPro has a fully charged battery and an empty memory card, and slide it into the cavity in the camera module, then screw the cover on using the remaining 8-32×1/2″ screws. Slide the camera module assembly onto the all-thread rods, making sure it is right-way up. Add the second slip ring, followed by the fin assembly. Finally, thread three 6-32 Allen nuts onto the ends of the rods and tighten to hold the whole assembly together. Check that all your marks line up and all your fins spring open freely.

Launch it

Firing the Cannon Cam is pretty straightforward. Get yourself a spud gun with a 3-inch barrel. Turn on the GoPro and set it to record video. Tilt the muzzle to approximately 80 degrees, and slide the projectile in with the camera facing down. Launch it, collect it, and download your footage.