I have always been a geek. I tear everything apart to see what I can make of it. I just got into small robots with the LetsMakeRobots.com starter pack and some Basic Stamps and Arduinos. The Let’s Make Robots kit is so complete you just stick it together with double-stick foam tape and it starts running around. I needed an analogue cable for the infrared rangefinder that came in the Let’s Make Robots kit. I made my first one. I will show you how.

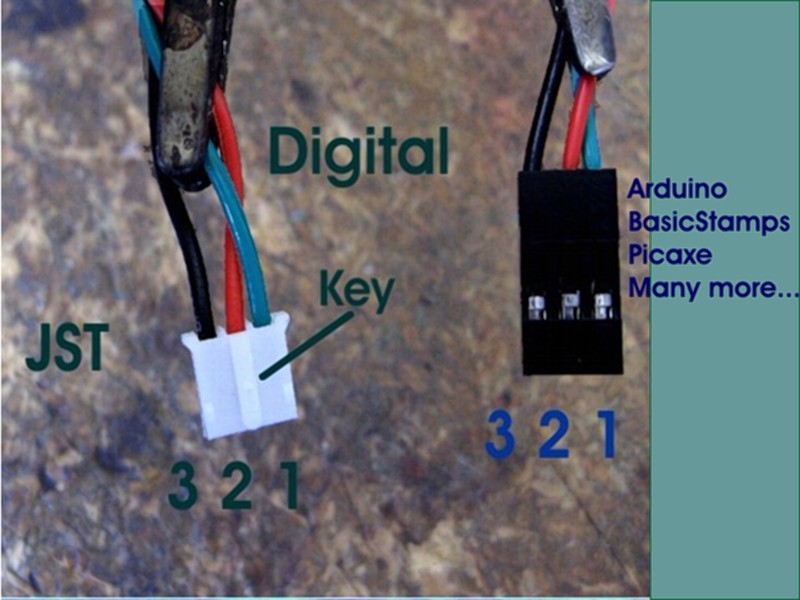
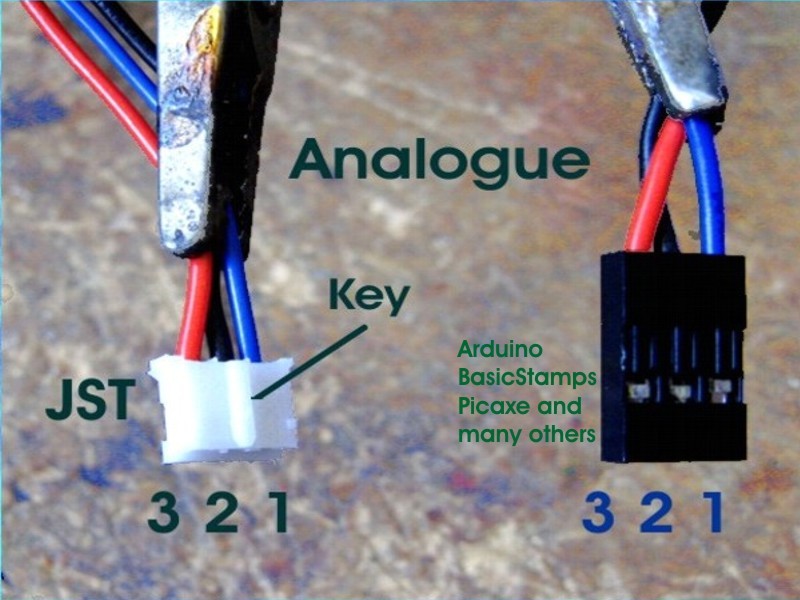
I did not find any complete information on the analogue cable I needed. I found bits and pieces that lead me to the Arduino analogue and digital cables. They are not perfect, but they can be made to work if you know a little connector magic. The wires are not in the correct order and the JST connector is too big for the Sharp rangefinder’s connector.

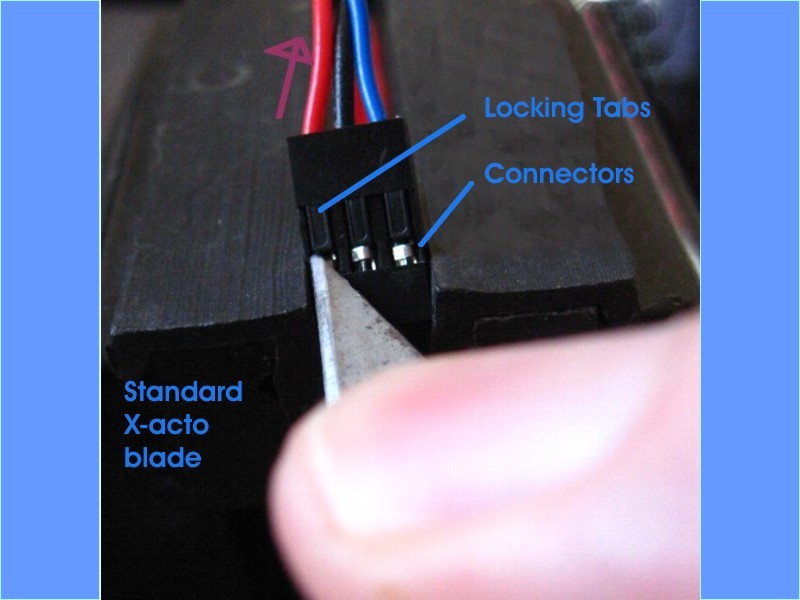
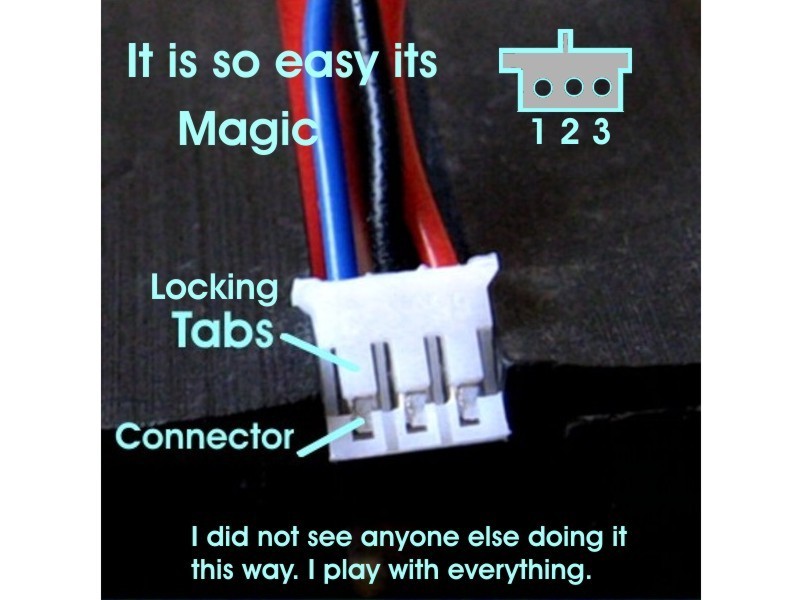
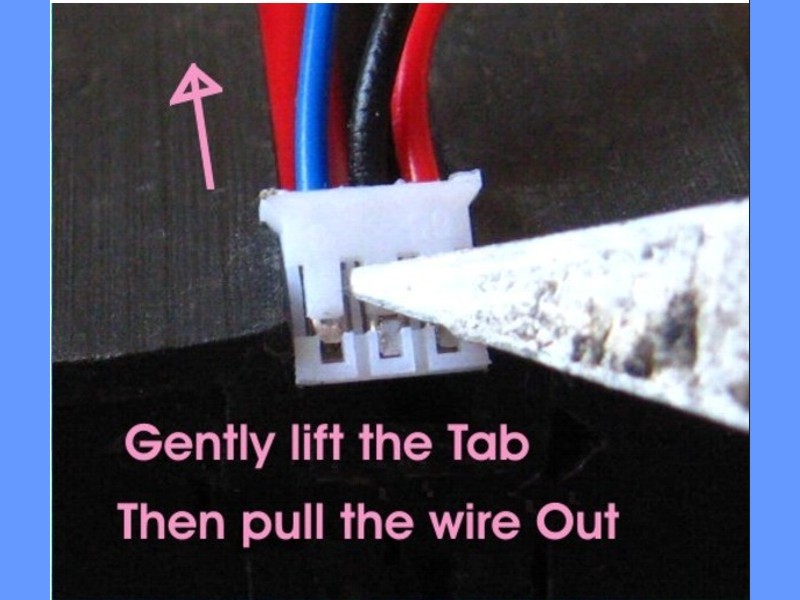
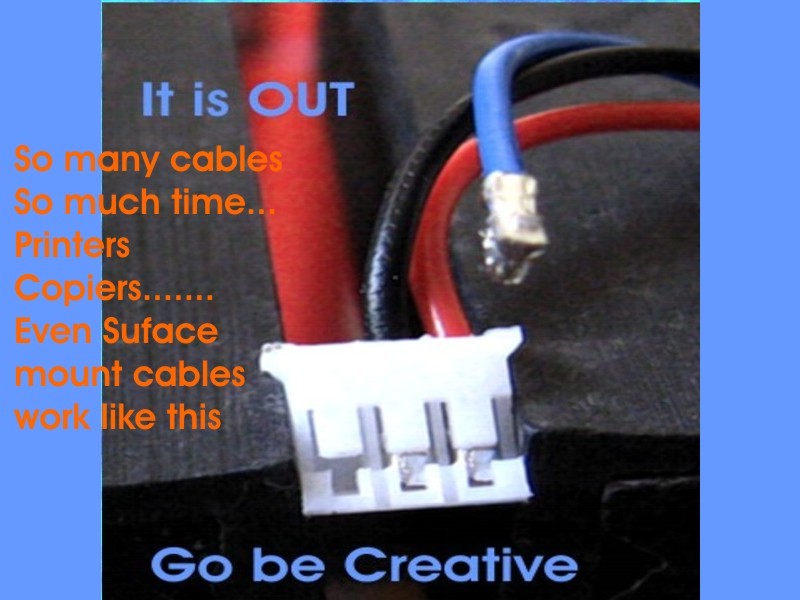
I used to have a connector tool. It looks like a small screwdriver except it is a hollow tube and the front half is open. It works by slipping between the wire and the connector body; it blocks the locking tabs so you can get the connector out. Anything thin like a pin can block the locking tabs too. It does not take too much to play with connectors and make your ideas come together. I did find connector tools on Jameco.com under Tools.

What will the next generation of Make: look like? We’re inviting you to shape the future by investing in Make:. By becoming an investor, you help decide what’s next. The future of Make: is in your hands. Learn More.

Project Steps

This is the information I found out about the analogue cable. No one had a complete guide as to what number the pins were. The cables all look the same. They are not the same.

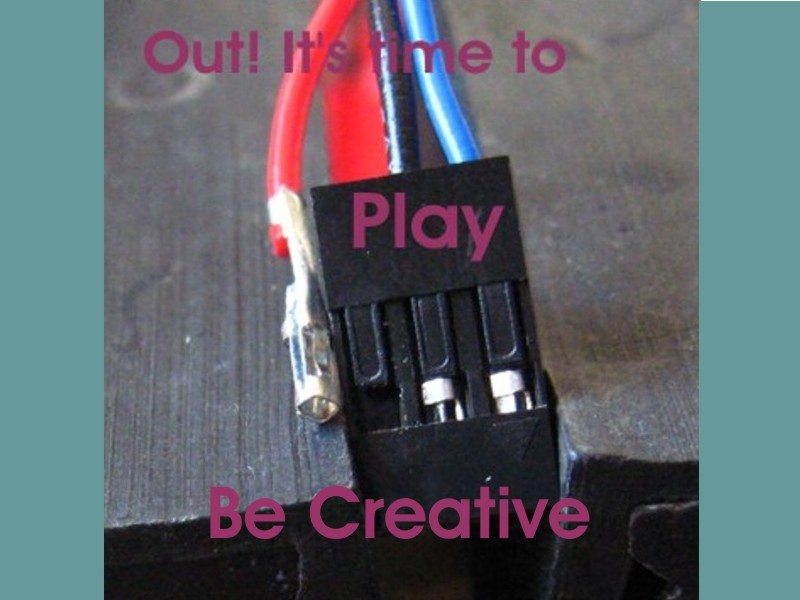
To correct the analogue cable pop out the Ground and Signal wires of the black connector and swap them to match what the Sensor needs. Be very careful not to bend the locking Tabs too much or they will break off or not lock any more. A little heat from a soldering gun tip or small heat gun fixes the tabs so that they will lock correctly. Just hold the locking tab down so the connector is held in place when you apply the heat. The locking tabs are very small, but made of fairly tough plastic.

This is how to work with JST connectors.

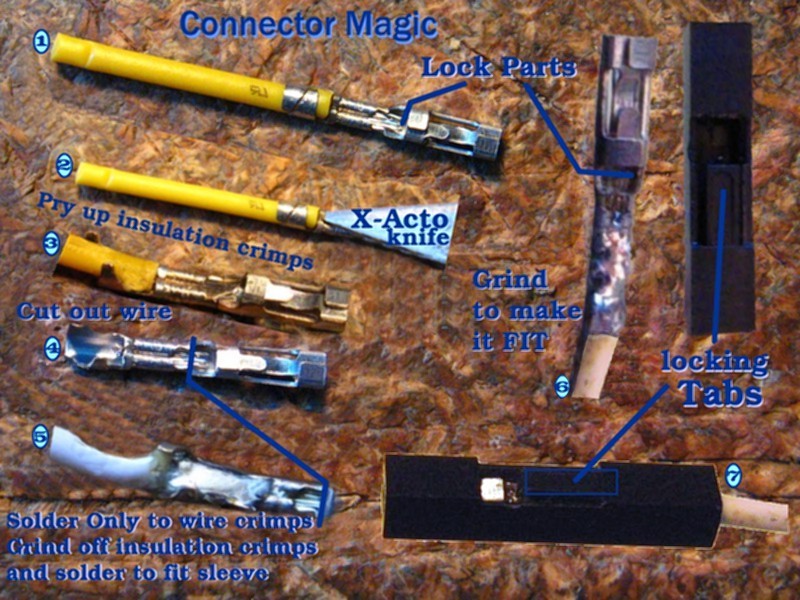
I found that the JST connectors are made of tough fiber-ish plastic that does not work well with grinders or files. I used a Dremel sanding drum to get the Arduino analogue cable JST end to fit into the sensor connector. It was too tight. I cut up a five-contact JST connector that fit my analogue rangefinder down to three pins to make this cable.

Just pop the contacts out and make it your way.

Soldering wires onto the connector you have to be careful to not get solder on the locking parts of the connector. I cut off the insulation crimps and then ground everything down until it fit into the connector sleeve. I only solder onto where the wire crimps are. I found it too hard to open the wire crimps. You can if you want to.

Soldering on top of the crimped wires makes it too high to fit into the connector sleeve.

Conclusion

Make connectors your own and build your dreams.