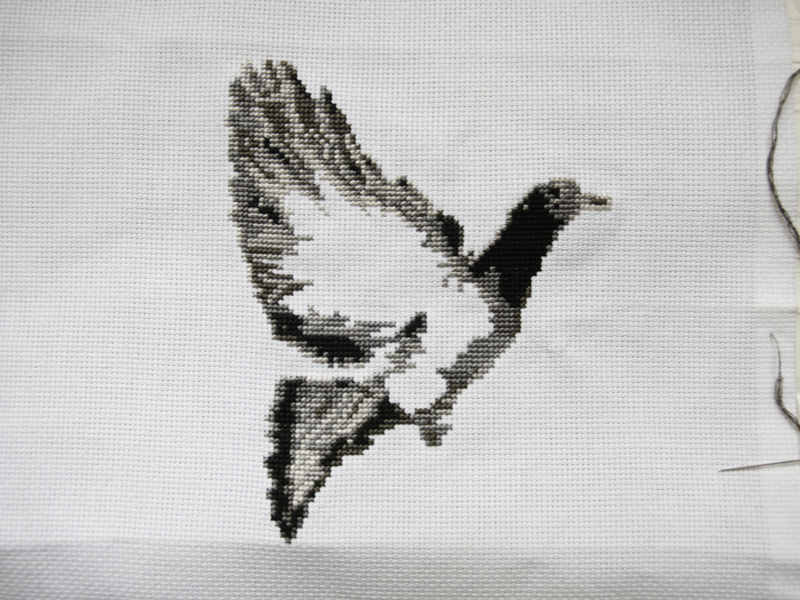
Almost all printed photographs are made of dots. Look closely in magazines, on inkjet pages, or even on billboards, and you can see the dots — but as you move farther away, your eyes perceive the image created by the dots.

Here’s a project that applies this optical phenomenon to the ancient art of cross-stitching. Close up you’ll see the stitches, but at arm’s length the stitches will seem to merge to form a photographic image. All you need to make this happen are a little patience, traditional cross-stitching supplies, a digital camera, and an image editing program such as Photoshop.

What will the next generation of Make: look like? We’re inviting you to shape the future by investing in Make:. By becoming an investor, you help decide what’s next. The future of Make: is in your hands. Learn More.

Project Steps

Choose a picture.

For best results, it should not contain a lot of fine detail, and it’s helpful to select an image with a single-color background if possible. Portraits are ideal. I chose a picture of a pigeon.

Paint out the background and choose your image size.

You have to isolate your subject visually from the background if it’s not already. Open your picture in Photoshop. I used the Eyedropper tool to sample a light gray in the pigeon’s wing, then applied that color to the background with the Paintbrush tool. Don’t worry about painting around very thin lines, which will disappear anyway.

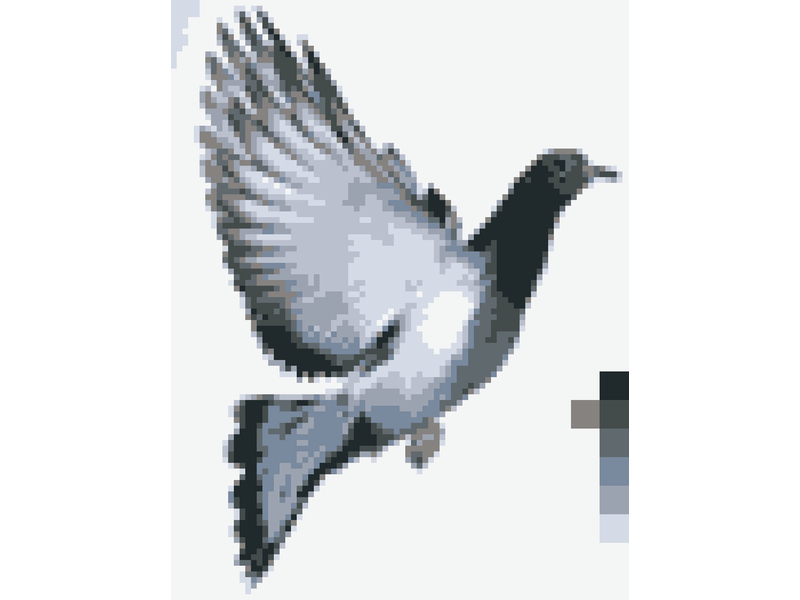
For a starter project I suggest a stitched area about 5″ wide on 16-thread-count fabric. This means you’ll be sewing 80 stitches per line. Since 1 stitch will represent each pixel, you need to convert your image to 80 pixels per line.

In Photoshop, choose Image ⇒ Image Size from the menu bar. In the dialog that opens, make sure the Resample Image option is checked near the bottom. Enter 80 pixels for the image width. Ignore the height and other data fields; click OK. Your image will shrink to almost nothing, so choose View ⇒ Fit on Screen from the menu bar to see the pixels.

Preview the effect and choose a palette.

Move a few feet away from your video monitor. If the image doesn’t adapt well, try a different photograph.

Your computer displays images in millions of colors, but for cross-stitching we want to use only a few colors of floss. From the menu bar, choose Image ⇒ Mode ⇒ Indexed Color. In the dialog box that opens, for the Palette option choose Local (Adaptive); for the Forced option choose None; for the Dither option choose None; and for the Colors option try entering various numbers from 4 upward.

You should be able to preview the results while the dialog box is open. Eight colors were sufficient for the pigeon. Click OK when you’re happy with the result.

Add saturation.

When you reduced the number of colors, each one became a compromise. This is like mixing many colors in a paint box: they tend to get muddy. From the menu bar, choose Image ⇒ Adjust ⇒ Hue/Saturation and play with the sliders to make your picture more interesting.

Create swatches, convert back to RGB, print your image and add a grid.

You’ll be able to keep track of your colors more easily if you make a row of swatches in a blank area of your image. Using the Eyedropper tool, click in an area of your photo, then use the Marquee tool to create a small square. From the menu bar, choose Edit ⇒ Fill and click the Foreground Color option. Repeat this procedure for all the colors in your photo.

Convert your image from Indexed Color back to RGB color by selecting Image ⇒ Mode ⇒ RGB Color. This will make subsequent steps easier.

We want your printed version to be the same size as your cross-stitched version, but your printer may be unpredictable if you try to print only 16 pixels per inch. We’ll keep it happy by “upsampling” the image.

Again choose Image ⇒ Image Size from the menu bar. In the dialog box that opens, for the Resolution option, enter 160 if you’re going to use 16-count fabric, or enter 140 if you’re going to use 14-count fabric, and so on. Don’t click OK yet!

Now change the width from 80 to 800 pixels, and near the bottom of the dialog box where it shows you options to Resample Image, choose the Nearest Neighbor option (otherwise, your nice sharp pixels will get blurred). Now click OK, and you should be able to print your image full-size without problems.

You’ll need a grid (like graph paper) to help you count stitches. The easiest way is to print your image and draw a grid by hand, in colored pen. Some people find it easiest to use 1 grid square per pixel. I like using 1 grid line per 5 pixels to reduce the workload.

Print color separations and find your floss.

To avoid confusion, you can make a separate print of each color (Figure E). First, in the Toolbox, change your background color to white (consult Photoshop Help if you aren’t sure how to do this). Save your work. Now select the Magic Wand tool, set its tolerance to 0, uncheck its Anti-Aliased option, and uncheck its Contiguous option.

Use it as follows:

Save your art under a new filename.

Using the Magic Wand tool, click the first of your swatches. This should select all the instances of the color that you clicked.

Choose Select ⇒ Inverse from the menu bar.

Choose Edit ⇒ Cut from the menu bar to remove all the pixels except the ones you selected.

Print the page.

Choose Edit ⇒ Undo Cut Pixels from the menu bar to restore everything.

Conclusion

This project first appeared in CRAFT Volume 07, pages 99-102.