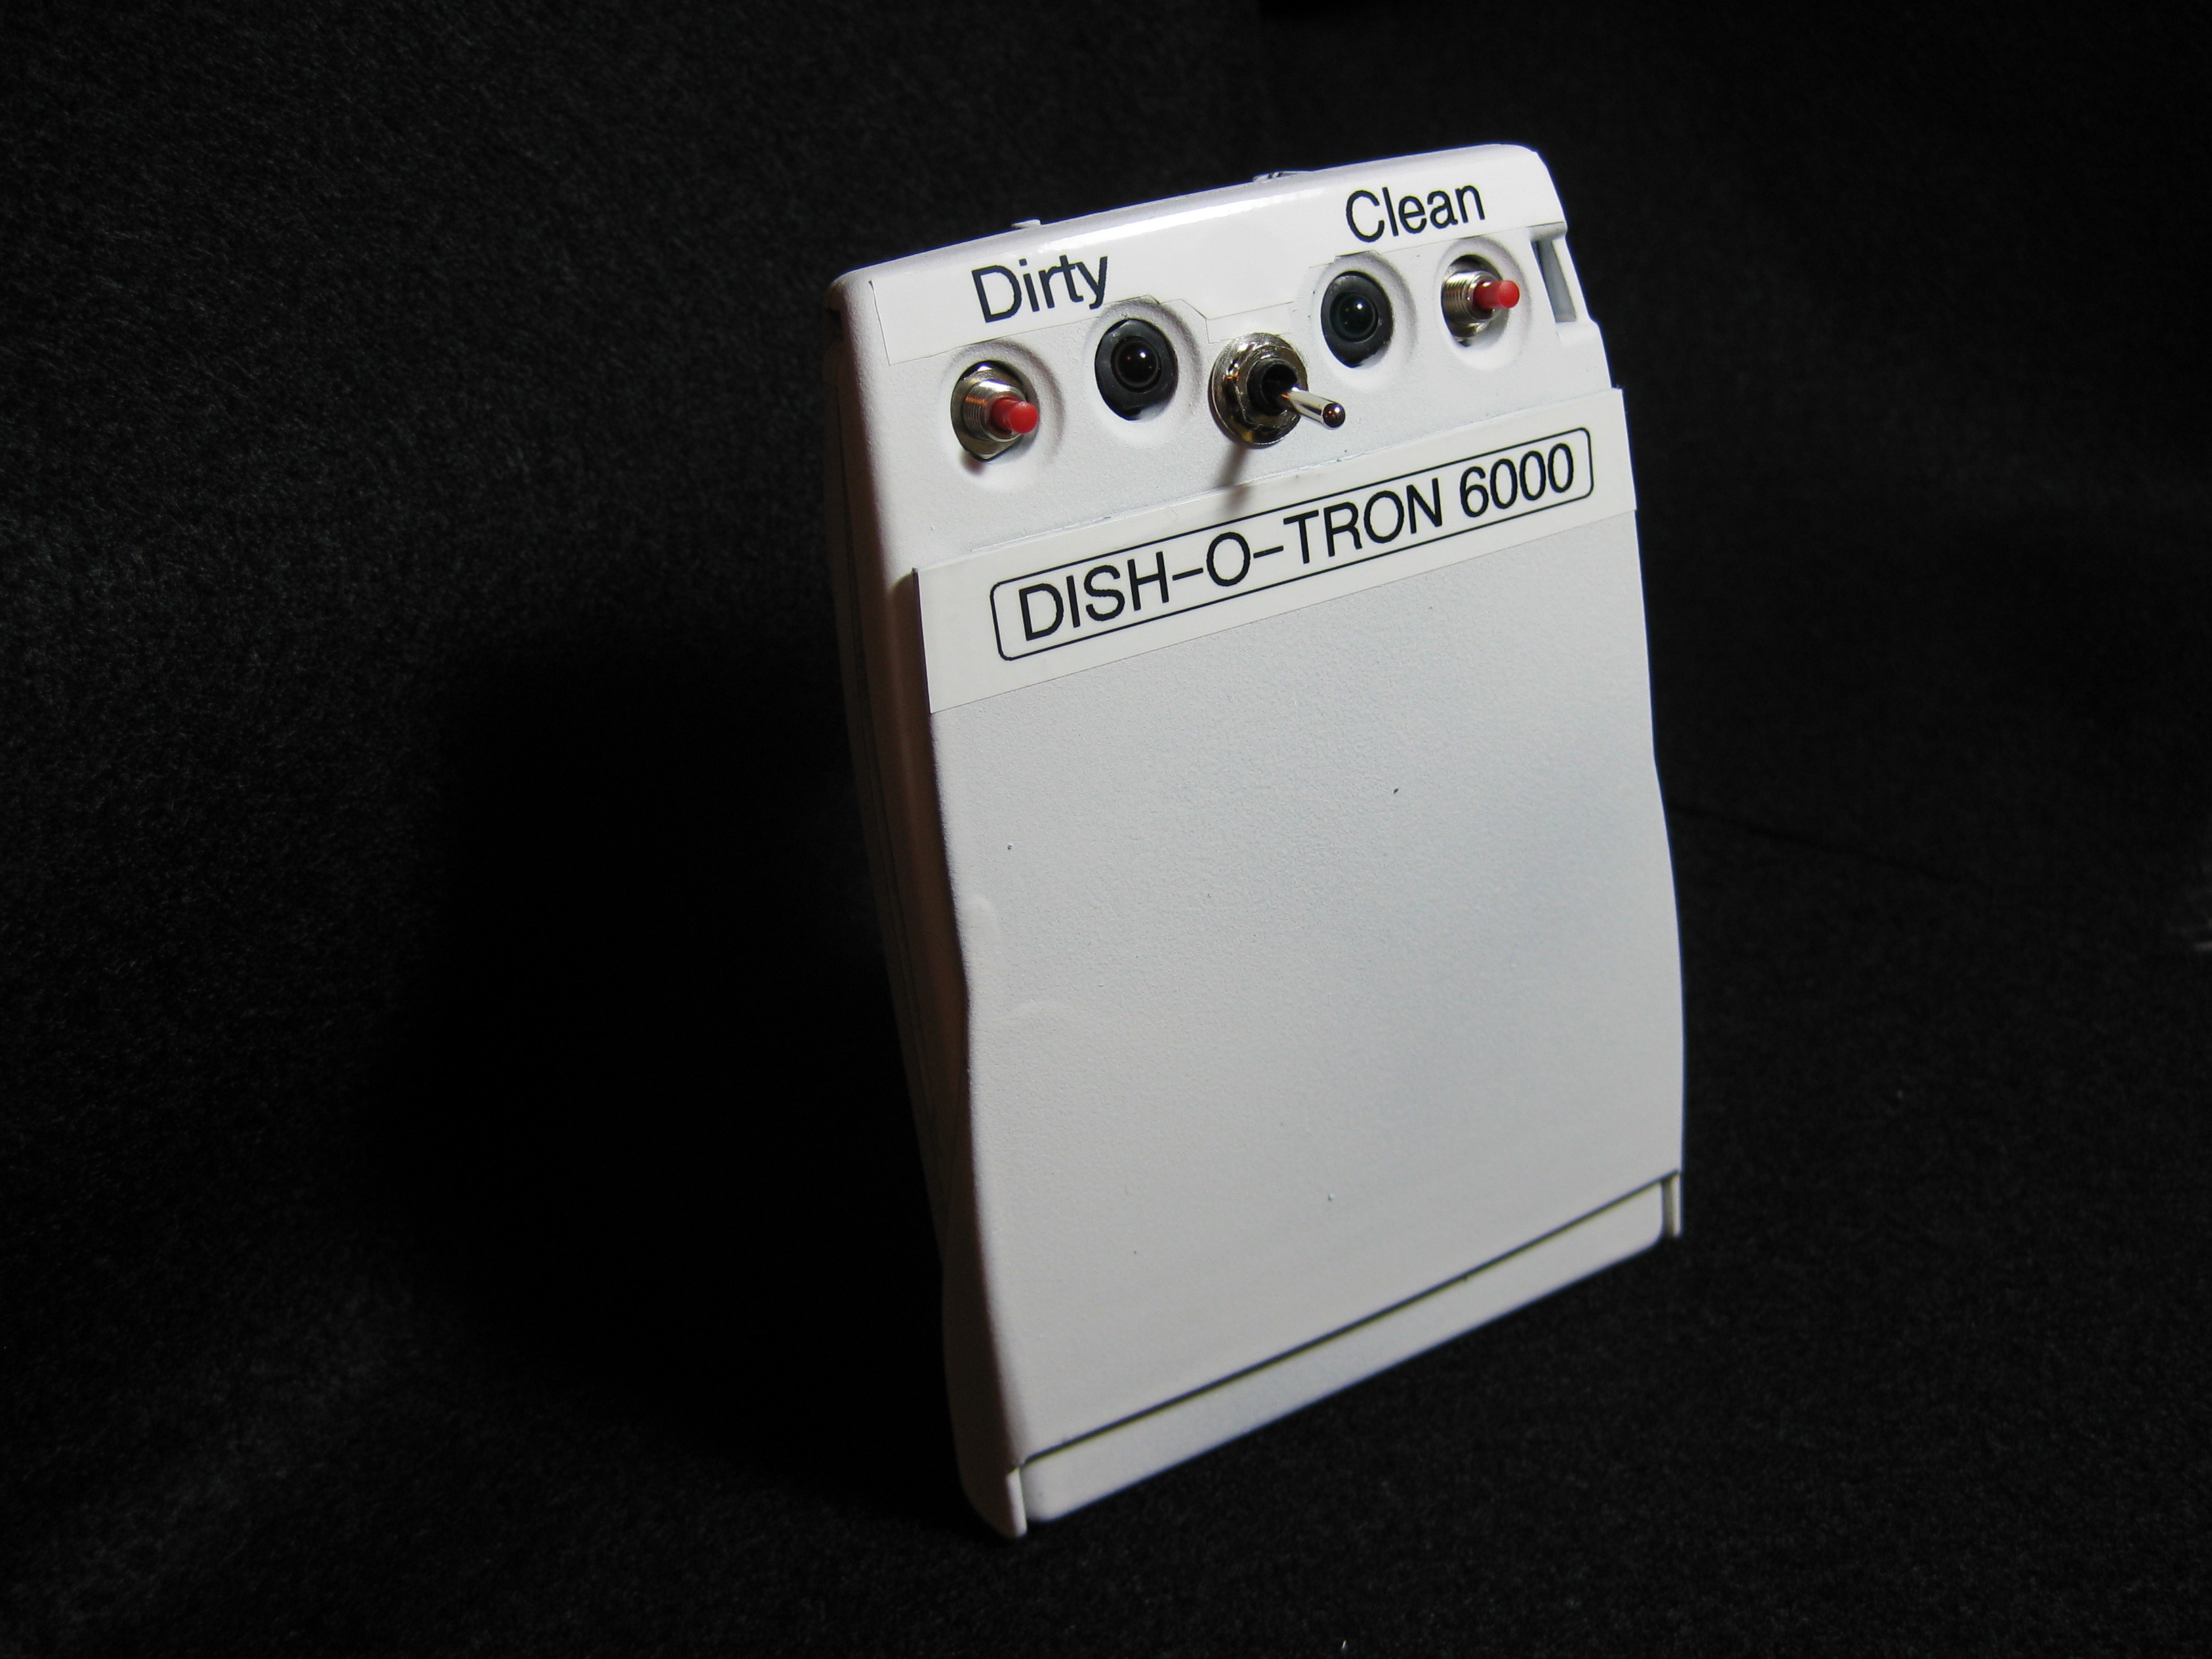
I’m absentminded in general, but especially when it comes to the dishwasher. I can never remember whether the dishes are clean, whether the machine needs to be run, or emptied, or whatever. I needed a solution to this problem. My first thought was to hang a flippable sign on the door that said “clean” on one side, and “dirty” on the other. Simple, logical, functional. My second thought was, “What?!? That’s dangerously under-engineered. I can make something much more ridiculous than that”.

This contraption is the result.

What will the next generation of Make: look like? We’re inviting you to shape the future by investing in Make:. By becoming an investor, you help decide what’s next. The future of Make: is in your hands. Learn More.

Project Steps

The challenge here is to automatically detect when the machine is running (so we know when dishes have been cleaned), and to automatically detect when the machine has been unloaded (so we know when the dishes inside are dirty once again).

For more detail and better pictures, see: BlondiHacks – Dish-O-Tron 6000

Here’s a video showing the Dish-O-Tron 6000 in action! YouTube link

As you can see, all you do is slap it on the door, and turn it on. Then use your dishwasher as you normally would! It’s brilliant!*

*Product may not actually be brilliant. Void where prohibited.

To determine when the dishes are clean, we need to know when the machine runs. This is done by detecting the temperature of the door panel. When the machine runs, it gets quite warm.

In this photo you can see the small blue thermistor sticking out the back, which contacts the dishwasher’s front panel.

You can also see the magnets that hold the Dish-O-Tron securely to the front of the machine.

Next we need to know when the machine has been unloaded (which means the contents are dirty once again).

This is a bit tricky, because we need to distinguish between grabbing a quick dish or two (thus leaving the machine full but still clean), versus unloading the machine completely. This is done by detecting when the door is fully open (using a rolling-ball tilt switch), then waiting a full minute. If the door is open that long, it’s because I’m unloading it. If the door only opens part way, or only opens briefly, I’m probably just grabbing a clean bowl for my cereal, but don’t feel like unloading the machine right now.

So, here’s the schematic!

The upper 555 is configured bistable, and tracks the state of the dishes (Clean or Dirty). The initial state is Dirty. The 3103 thermistor forms a voltage divider that pulls pin 2 low enough to flip the state when the machine gets warm. The lower 555 is configured astable. It starts timing when the tilt-switch is closed, and if a minute passes without the tilt-switch opening again, the upper 555’s state is reset again. Simple!

Here’s the schematic with the functional units marked.

You can see there are also manual controls for setting the state, since there are bound to be cases where the device gets out of sync with the real world. Also note that the Dirty state is just the inverse of the Clean state. The device really only tracks whether the dishes are Clean. The lower 555 is only enabled when the upper 555 is in the Clean state. If the dishes are dirty, I don’t care what the door is doing. The unloading timer’s RC circuit has a trim pot in it, so I can tune it if I find that I unload the machine quicker or slower than expected.

With the basic design settled, the next step was to figure out the voltage divider for the thermistor. For that, I needed to know how warm my dishwasher gets. I ran a full cycle with a 3103 taped to the door, and kept an eye on the resistance.

Using that setup, I graphed the results to determine a good trigger point. The trick is that it still has to work when the ambient temperature is high (such as in August, since I have no A/C). That means trying to choose the hottest point in the cycle, with a bit of margin for error.

I believe that graphing the temperature profile of my dishwasher may in fact be the dorkiest thing I have ever done.

I decided to set the cut-off at 7.5k. That’s close to as hot as the machine gets, and it represents about 33°C, which is hotter than my kitchen ever gets. Just in case though, the voltage divider has a trim pot in it that provides lots of room to play with this.

The next step was to breadboard it and test it in real-world conditions. I had bench-tested it prior to this, using a 10k pot to simulate the thermistor, and a toggle to simulate the tilt-switch.

Once it was working on the breadboard, I soldered it up, and tested the real circuit. The little metal can is the rolling-ball tilt switch, mounted outboard on some stiff wire so that the angle can be adjusted as needed.

That is some ghetto soldering right there, kids. Do try this at home, but as you can see, I am not a trained professional. Well, I am a trained professional smartass*, just not a trained professional solderererererer.

* “Trained Professional Smartass” is not a thing you can be. Void where prohibited.

Once the PCB was done, I bench-tested it by sticking LEDs in the header connection, and again simulating the thermistor with a 10k pot. This time I’m using the real tilt switch, hence the hilarious angle I needed to get the helping-hands up to. Well, I thought it was hilarious. Unconventional angles are funny. Shut up. No, YOU shut up.

For the casing, I decided to gut a broken old Palm Pilot that a friend gave me. It’s about the right form factor, and it has nice holes already well-placed for the I/O elements. I mounted magnets to stick it to the dishwasher, and the thermistor sticks through a crack in the original battery hatch such that it contacts the door panel.

I built a chassis harness with all the I/O elements, and routed it to a header on the PCB. This way the PCB is removable, in case I ever want to futz with it some more.

Next I test-fit everything, and did a full chassis shakedown. Holding a soldering iron near the thermistor (no touchy!!) did a nice job of simulating a dishwasher cycle.

I modified the shell a bit to suit my needs, then gave it a nice coat of white to match the dishwasher. An old wire hanger makes a nice painting jig.

There you have it! The Dish-O-Tron 6000. It was fun to build, and might be the most ludicrously over-engineered way to solve this simple problem. That’s why I love it.

In closing, I’d like to mention that the development of this wasn’t nearly the smooth path that it might appear to have been from reading this. In fact, I went through a bunch of designs before settling on this one. Simplicity can be a difficult goal to reach. At its worst, the design had four(!) 555 ICs, managing six(!) states. I swear it made sense at the time. Talk about over-designed. Here it is on the breadboard, where it stayed, because I never actually got this version to work.

In addition to being over-designed, this approach had fundamental issues that would have kept it from ever working. It was like the mechanical difference engine of dishwasher state detectors.

So why am I including this information? Hey, any excuse for breadboard pr0n. Aww, yeah.

If you made it this far, thanks for reading!

You should also check out One Girl, One Laptop Productions. Help me pay for more hacks!

Conclusion

This project assumes some basic knowledge of electronics, but nothing super fancy. You could easily build it without knowing how it works.