Projects from Make: Magazine
High-Power Blinking LED
Make a high-power LED blink as a warning light, a robot eye or whatever else you might need.

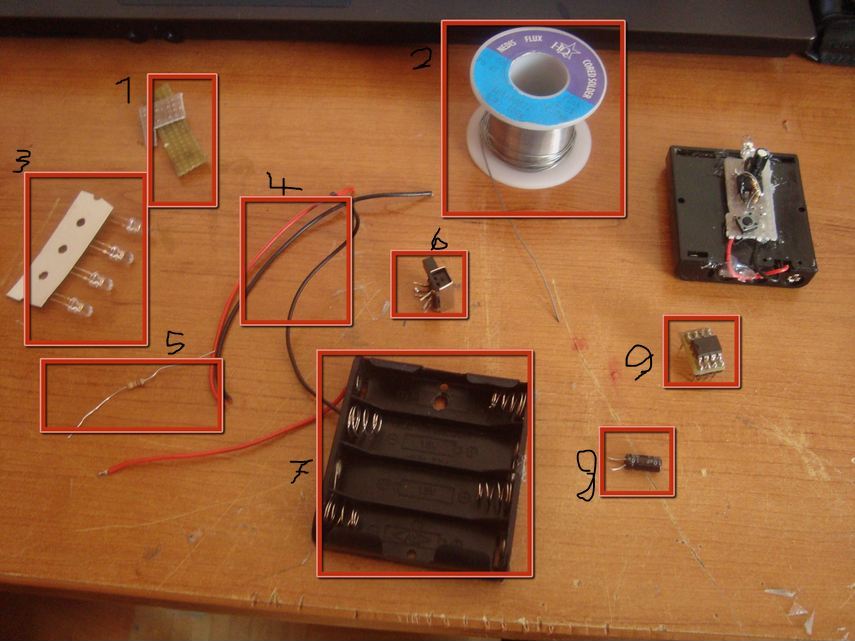
Materials

1: PCB; 2: Solder; 3: White LEDs; 4: Wire; 5: 10kΩ resistor; 6: Switch (it can be a momentary switch); 7: Battery holder for 4 AA batteries; 8: 10μF Electrolytic capacitor; 9: 555 timer (NE 555).
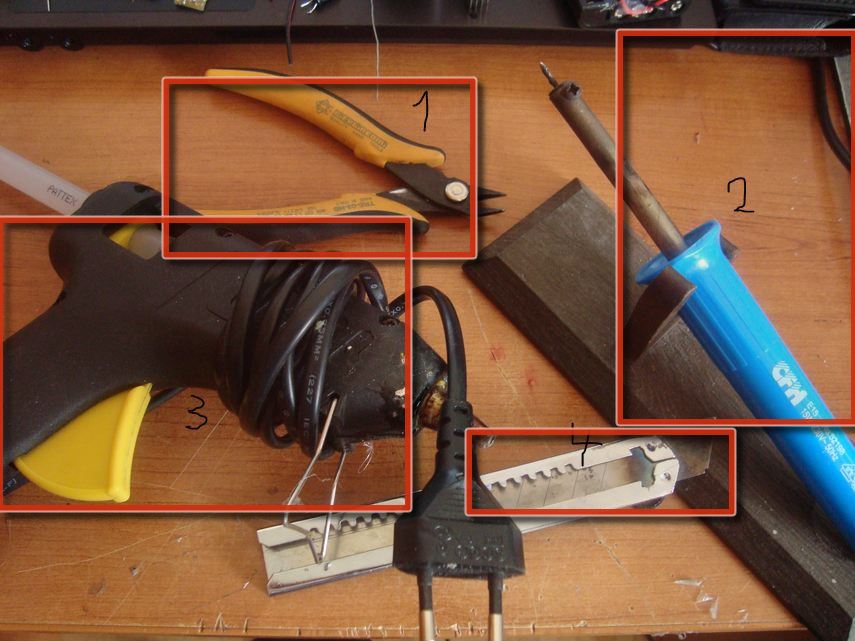
Tools

1: Wire clippers; 2: Soldering iron or gun; 3: Hot-glue gun; 4: Knife for stripping insulation from wire.
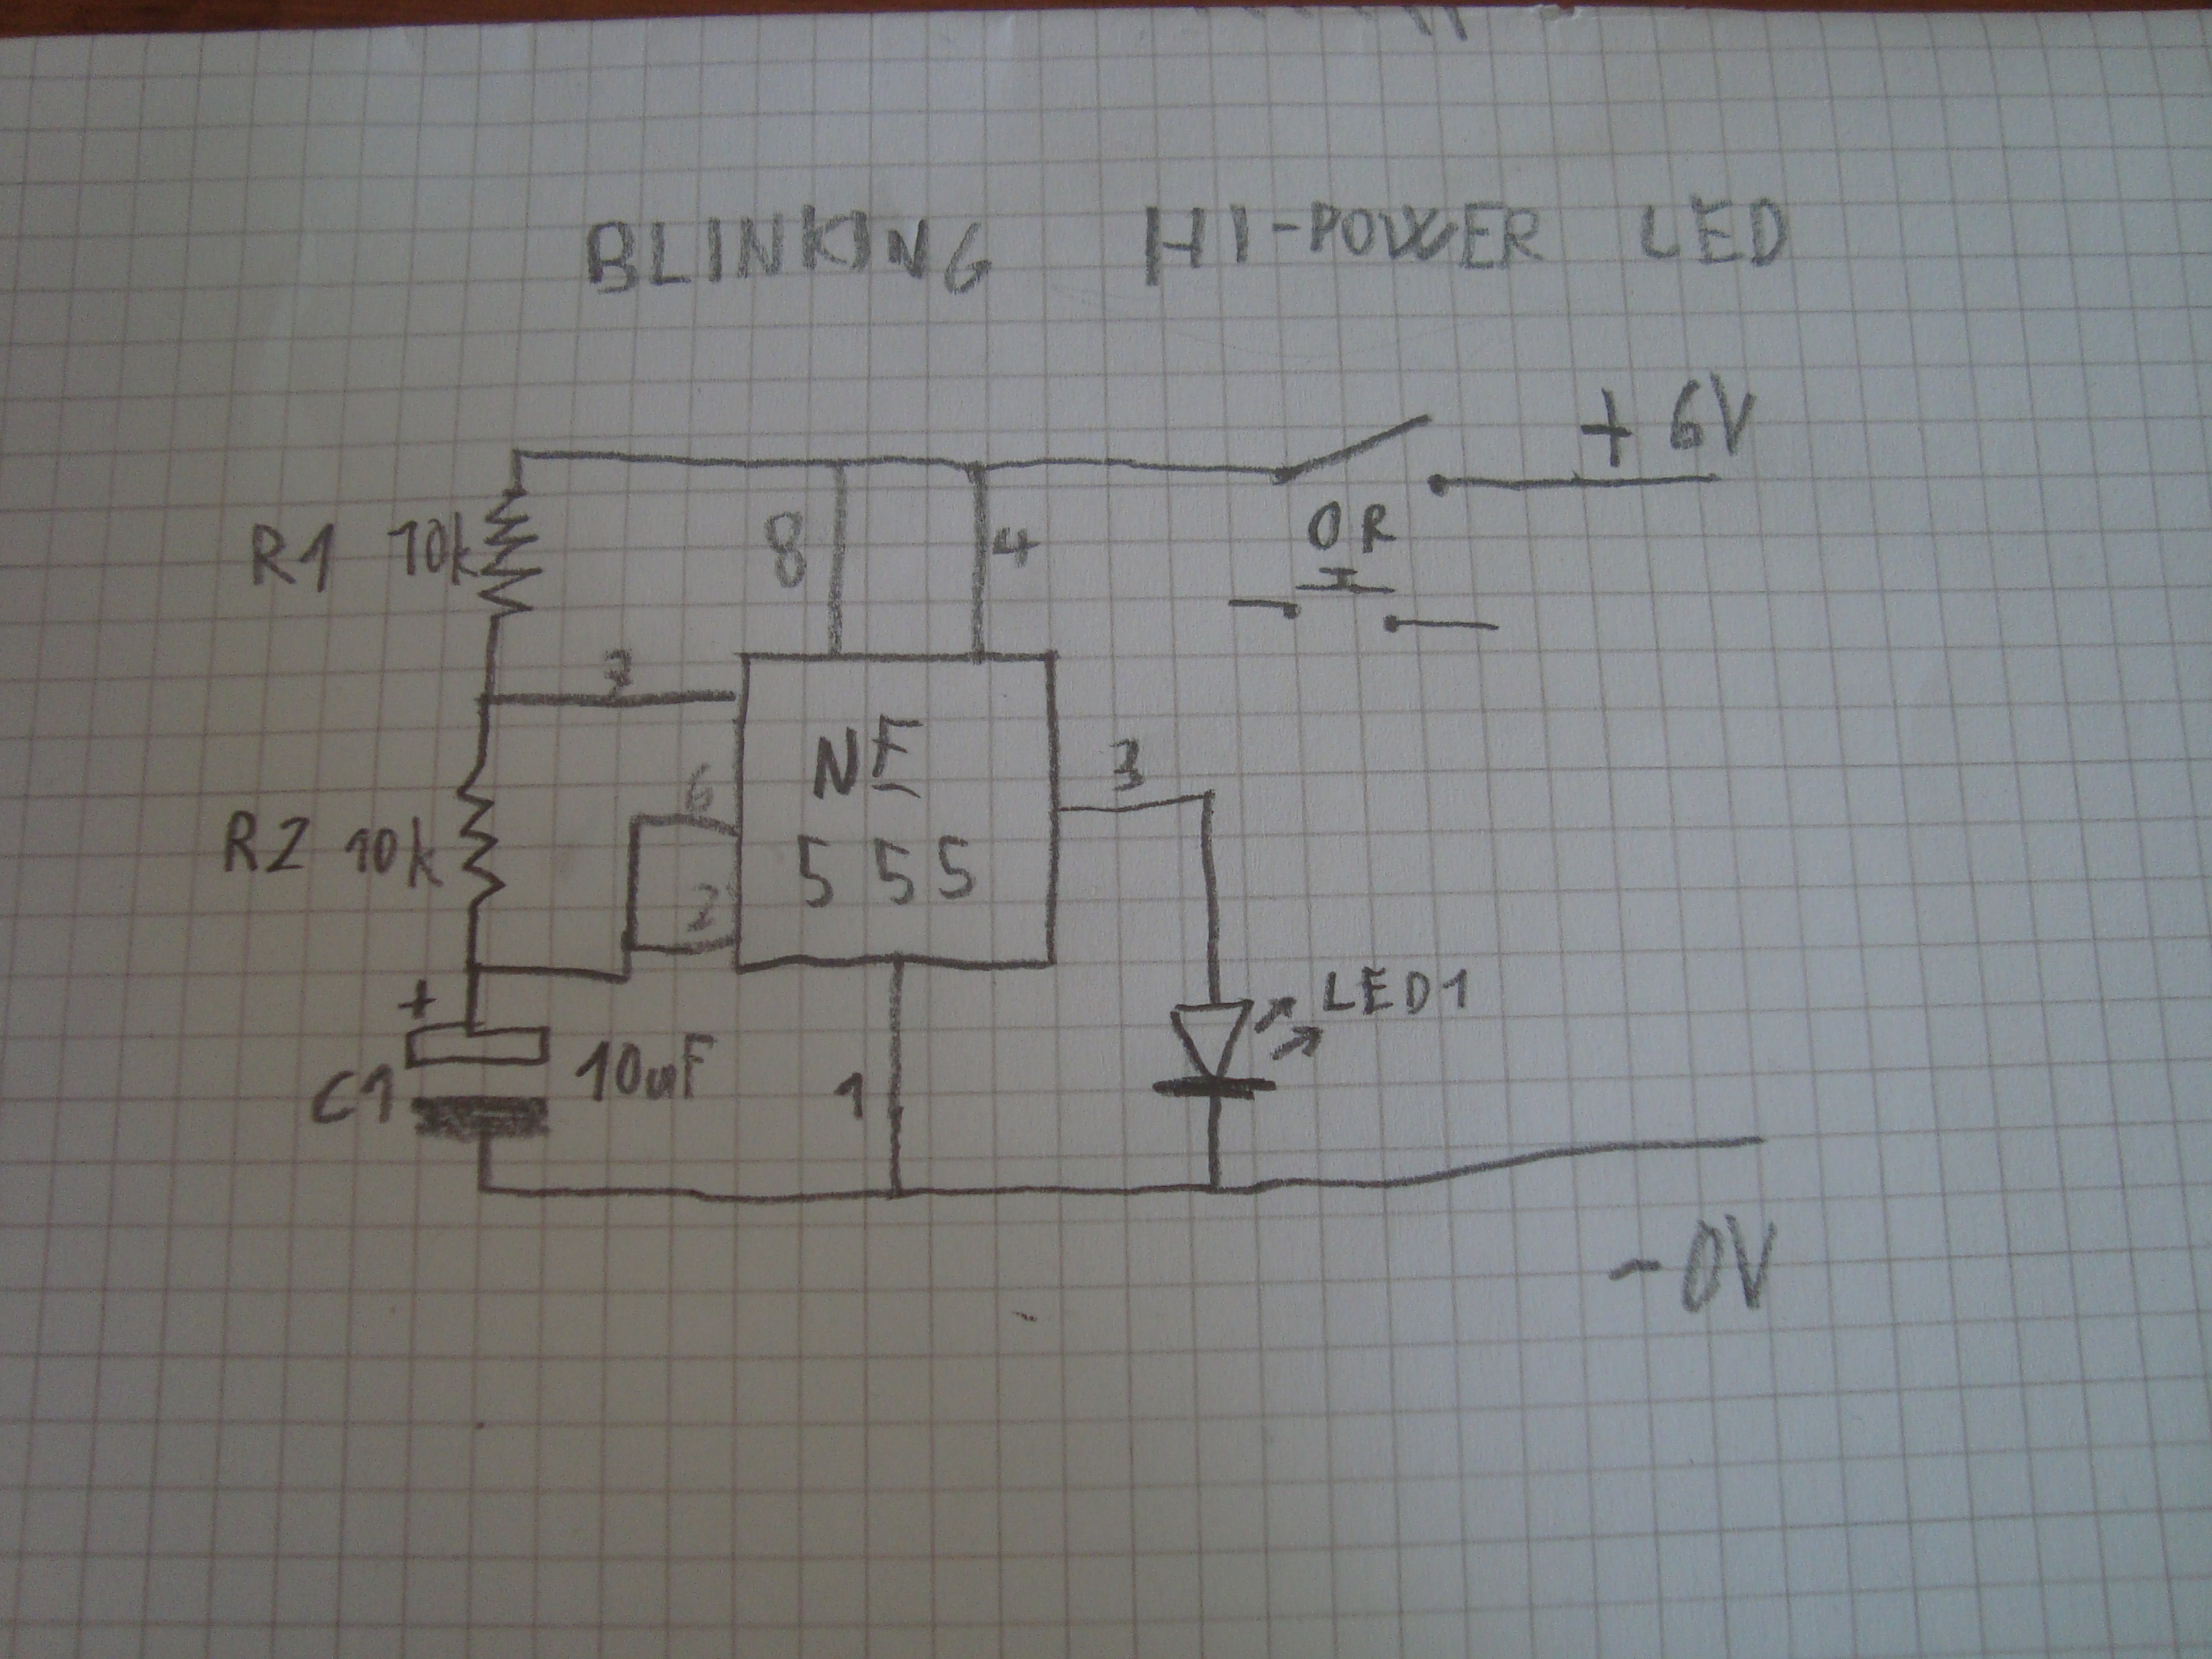
Schematic

Solder all parts together on a small PCB according to the diagram at left.
By changing the value of R1 you can change the speed of the LED’s blinking. You can also add a 10kΩ potentiometer trimmer instead of R1.
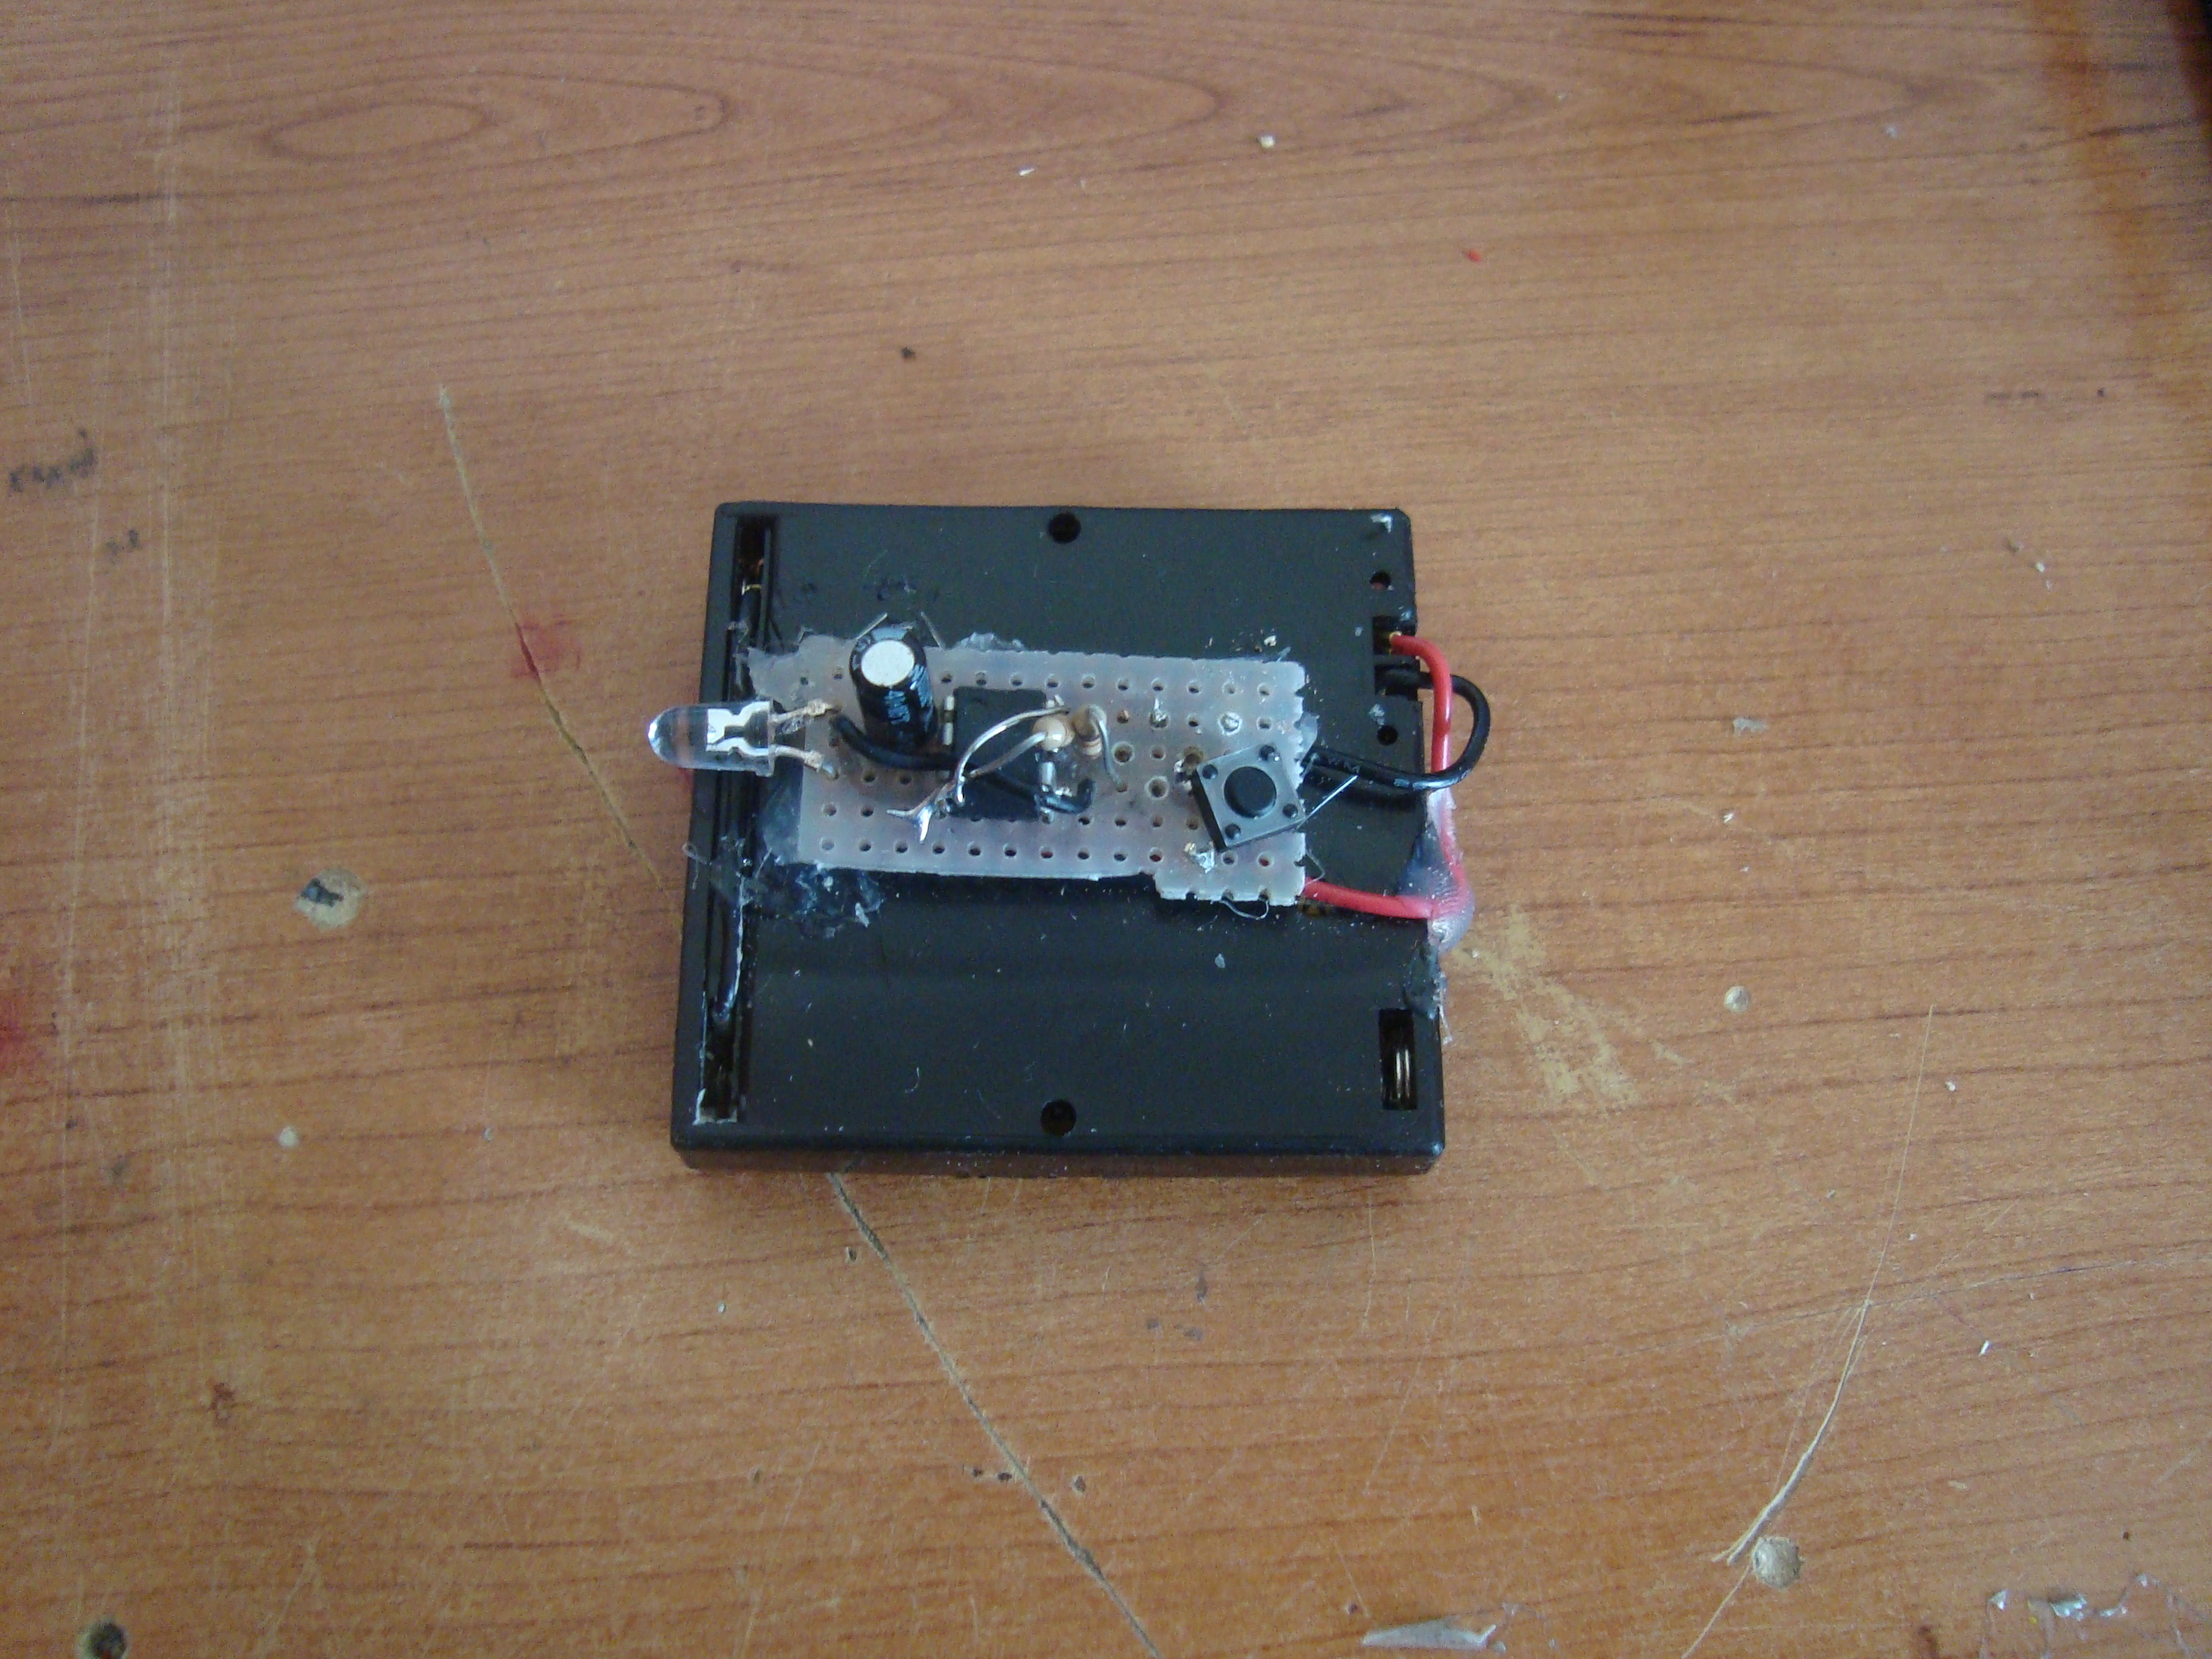
Finished project

Here is a video of this project on YouTube.


