Edge-lit displays typically consist of an etched sheet of acrylic, with one edge embedded in an opaque base containing a light source. The light diffuses through the acrylic to make the etchings glow. Different colors applied around the edge will blend smoothly inside; you can see this effect in my Edge-Lit LED Rainbow project in Make: Volume 69.

This article is from Make: Vol. 71. Subscribe now to make sure you don’t miss out on any of our awesome builds.

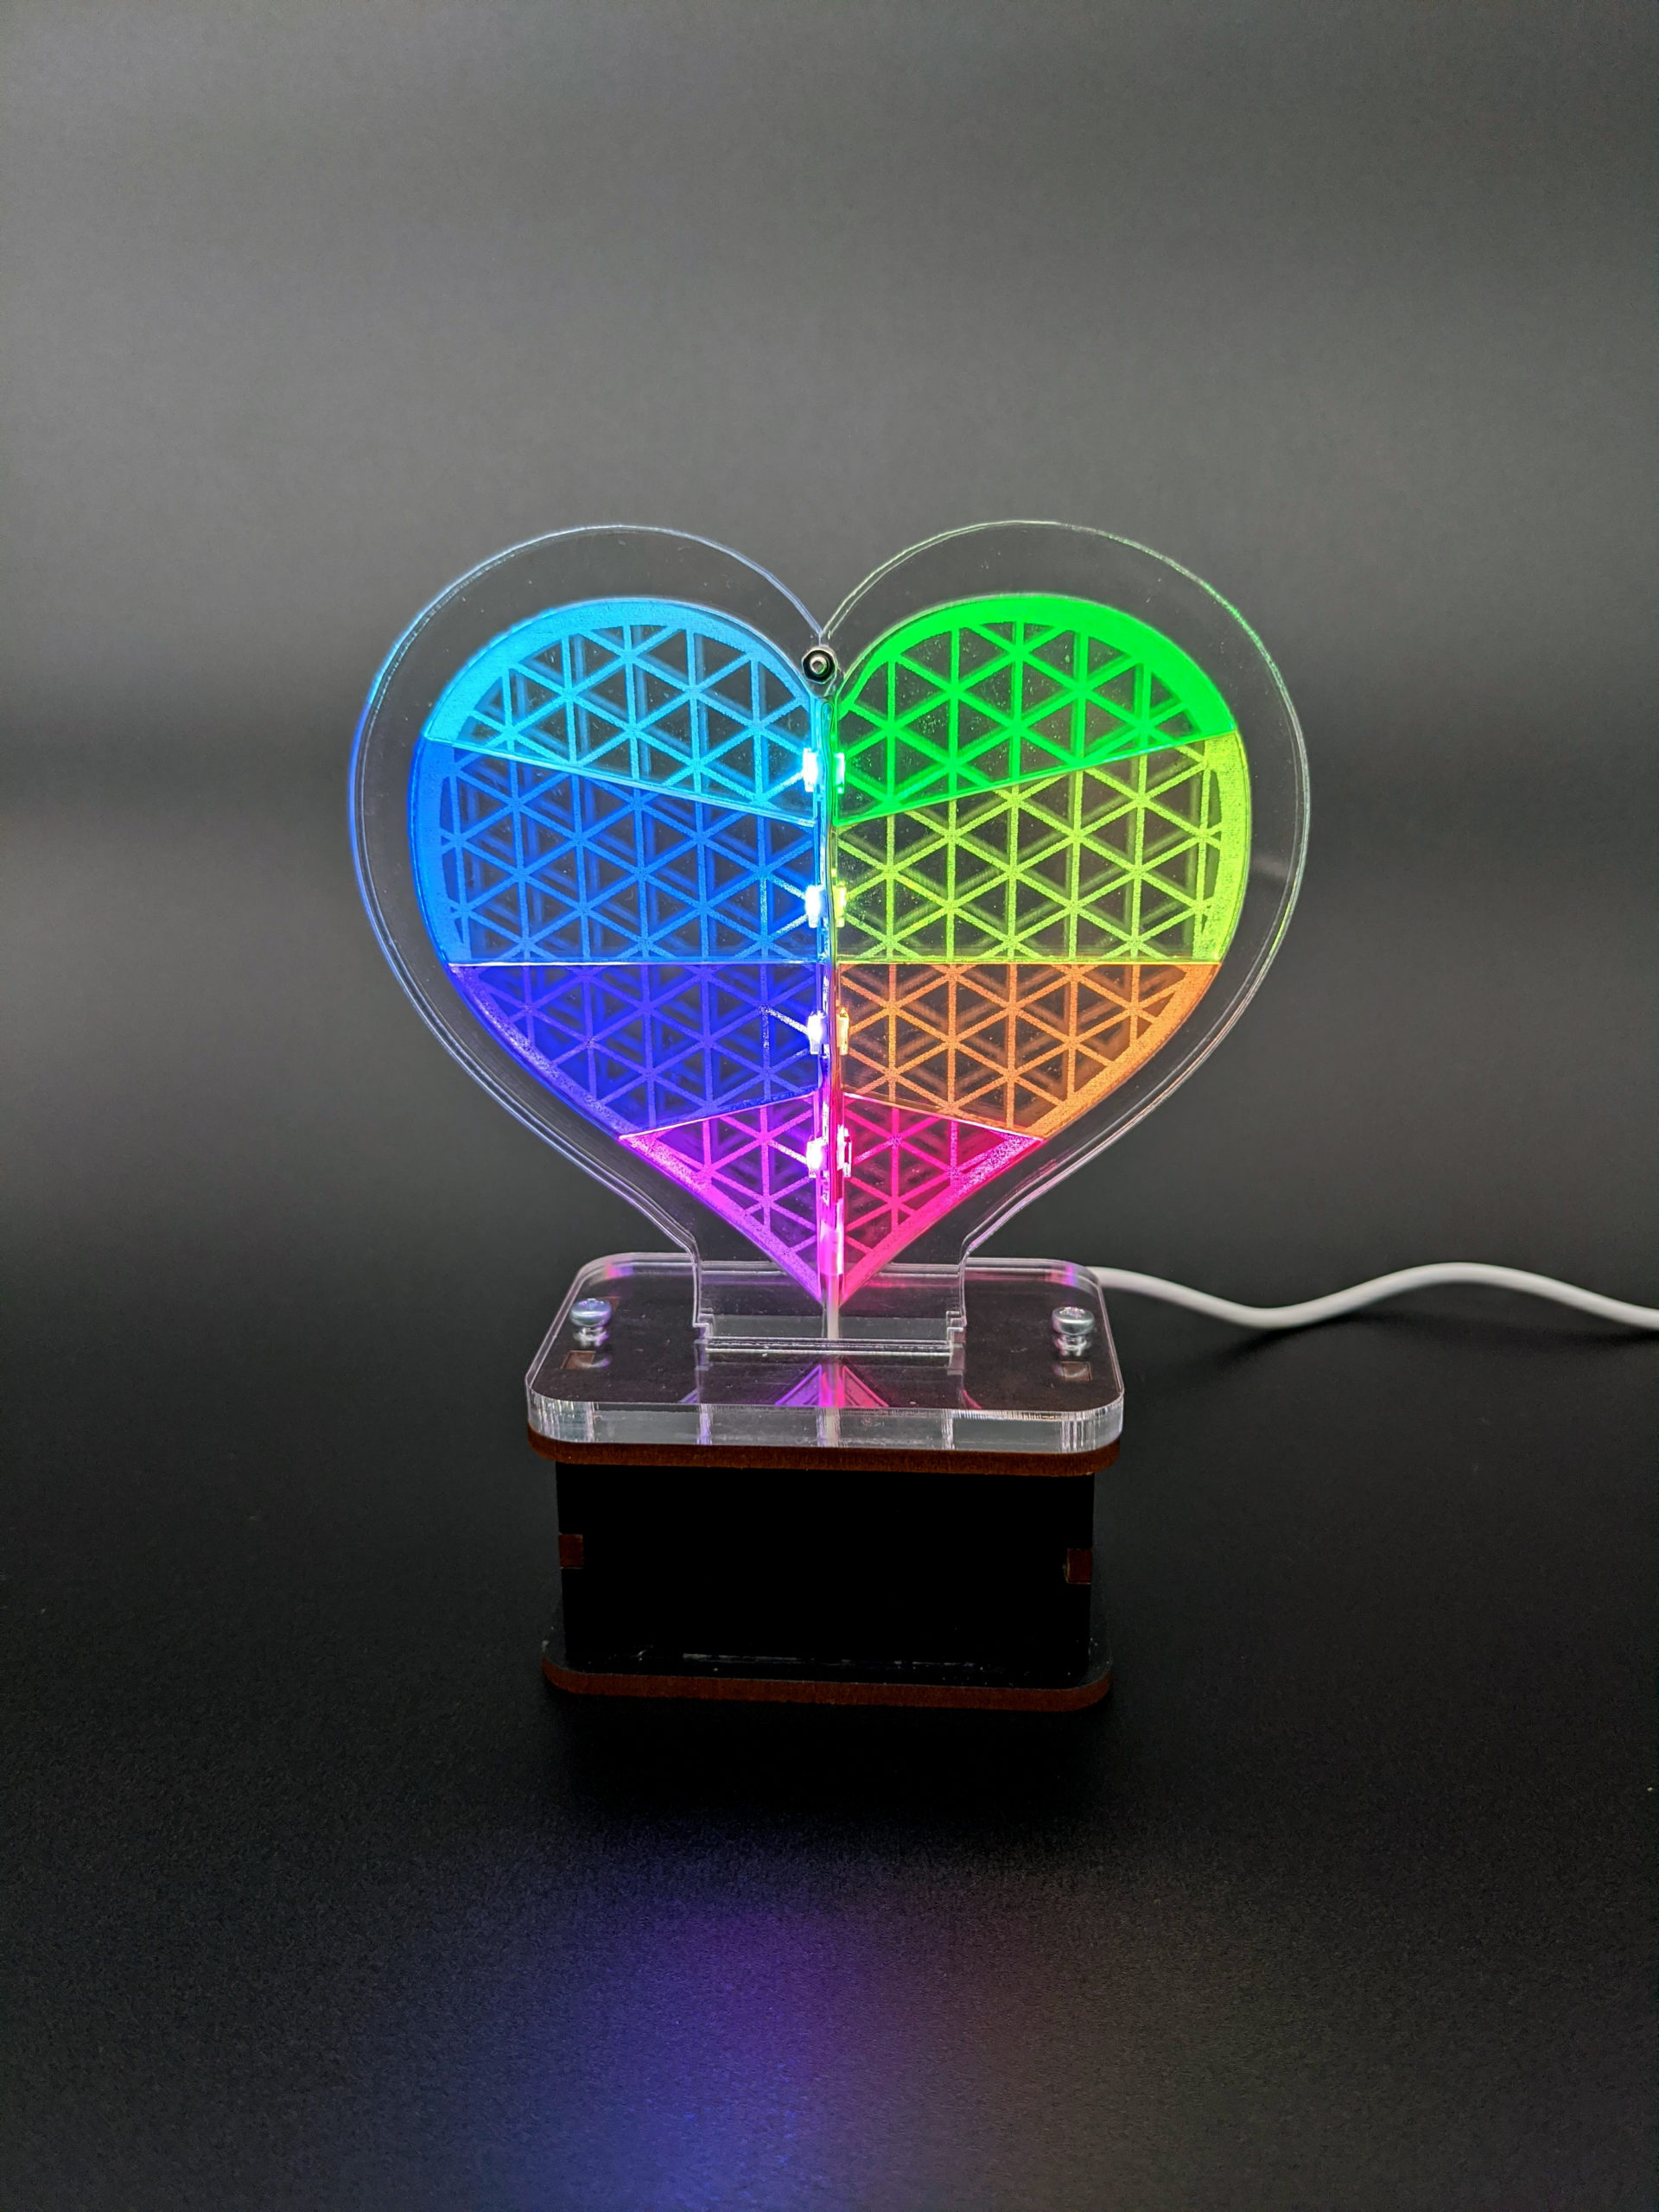
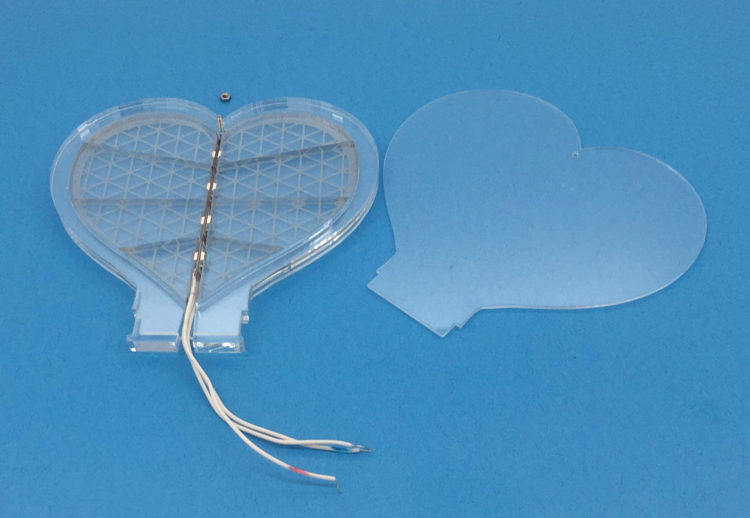
My new project takes a different approach to edge lighting, by cutting the acrylic into jigsaw-puzzle-like sections and embedding the light source between the pieces. This technique makes the shape appear to glow from the inside out. Illuminating each piece with its own color creates sharp boundaries for an unusual effect that’s great for dynamic, colorful animations. If you do your own laser cutting you can make it for 30 bucks.

Here I’ll show how to build an inner-glow heart, in plenty of time for February gift giving (hint hint). I also provide two other designs, and you can easily customize this project to create your own.

What will the next generation of Make: look like? We’re inviting you to shape the future by investing in Make:. By becoming an investor, you help decide what’s next. The future of Make: is in your hands. Learn More.

Project Steps

1. BUILD THE WOOD BASE

Laser-cut the base pieces from 1/8″ wood (Figure A), using the template in WoodPieces.svg (download the full set of cutting files   –edit: Here’s a fixed heart file, if yours has double lines. ). If you’re using veneered wood, you can use a single-sided veneer as only one side will be visible.
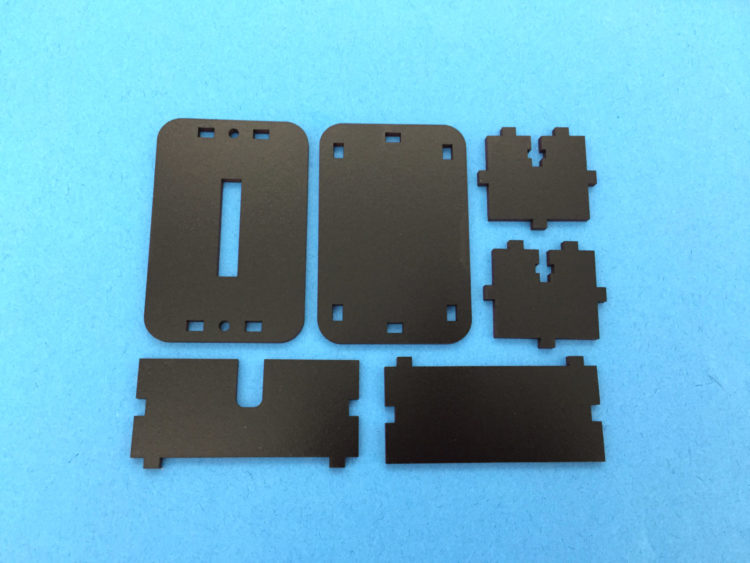
Figure A

Spread a little wood glue on the bottom edges of all side pieces and slot them into the bottom piece (Figure B). Don’t glue the top, as it needs to be removable to place the microcontroller inside.
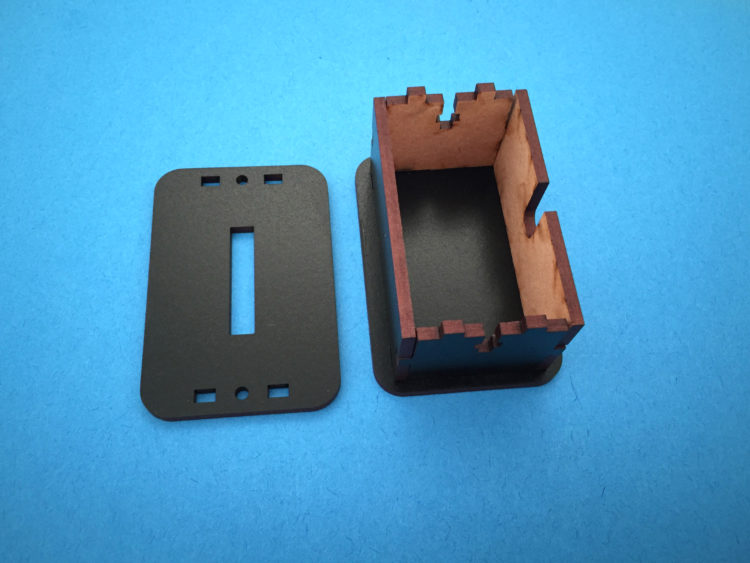
Figure A

2. LASER-CUT THE ACRYLIC

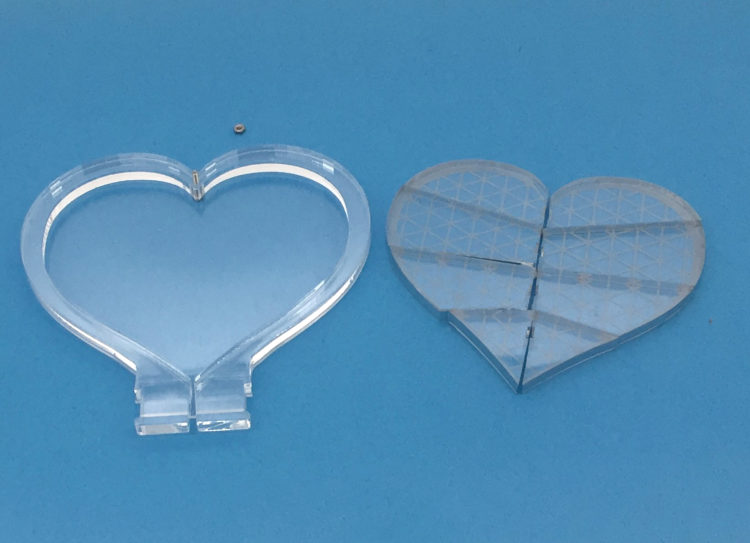
There are three layers of acrylic. The 1/16” outer layers (HeartSixteenthInchAcrylic.svg) serve to hold in place the ¼” pieces in the inner layer, HeartQuarterInchAcrylic.svg (Figure C). There’s also a ¼” acrylic base to support this assembly.
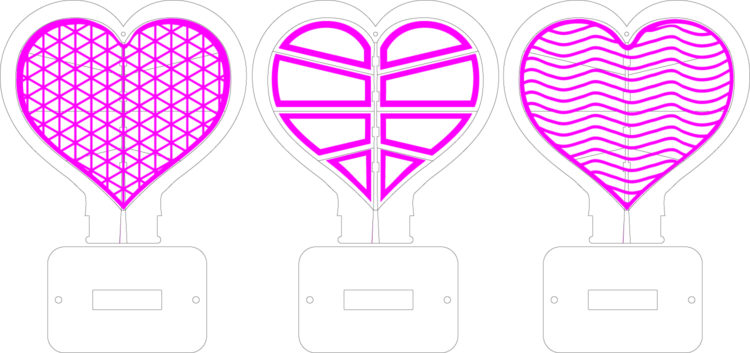
Figure C

Cut the shapes in both files. When laser cutting the ¼” acrylic, etch the pink shapes and cut all the black outlines. Several different etching patterns are included to choose from — or create your own. Remove any protective paper from the acrylic.

3. PREPARE THE LED STRIP

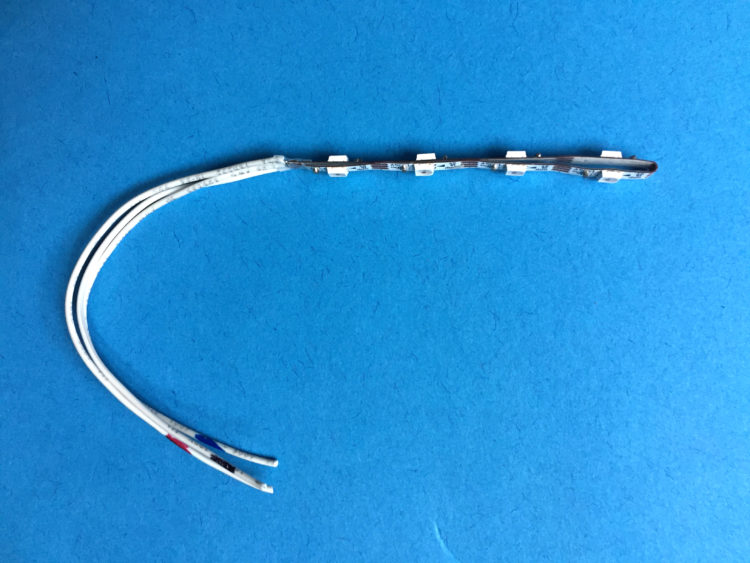
Cut a length of 8 LEDs from the LED strip. Cut three 4″ lengths of 26 AWG white hookup wire, strip one end, and solder them to the three pads at the data input end of the LED strip. The white wire almost vanishes within the clear acrylic, which is aesthetically pleasing, but it can be hard to distinguish between power, ground, and signal. I use different color Sharpies to mark the wires (Figure D). To provide strain relief, cover the solder joints with a bit of heat-shrink tubing.
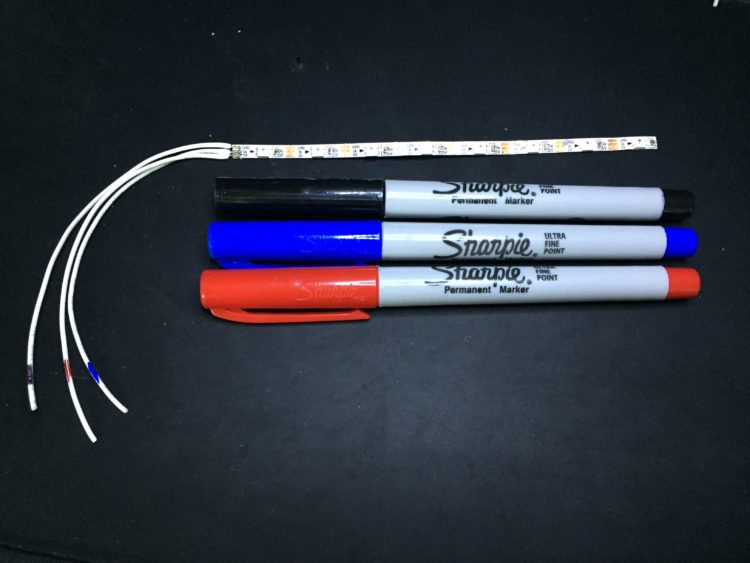
Figure D

Find the middle of the LED strip, and carefully bend it in half so the LEDs on both halves sit back to back. When the alignment is correct, remove the adhesive backing from the strip and stick the two halves together (Figure E).

Figure E

IMPORTANT: Don’t crease the strip at the bend. It’s OK if there’s a small loop at the end.

Strip the unsoldered ends of the hookup wires and connect them to your microcontroller to be sure the LED strip lights up. With the Trinket M0 it’s easy just to slip the wires into their corresponding pins — LED Power to Trinket 3V, LED GND to Trinket GND, and LED Signal to Trinket Pin D1 — and hold them in place for a few moments to verify the connections (Figure F).

Figure F

4. MASK THE INNER ACRYLIC PIECES

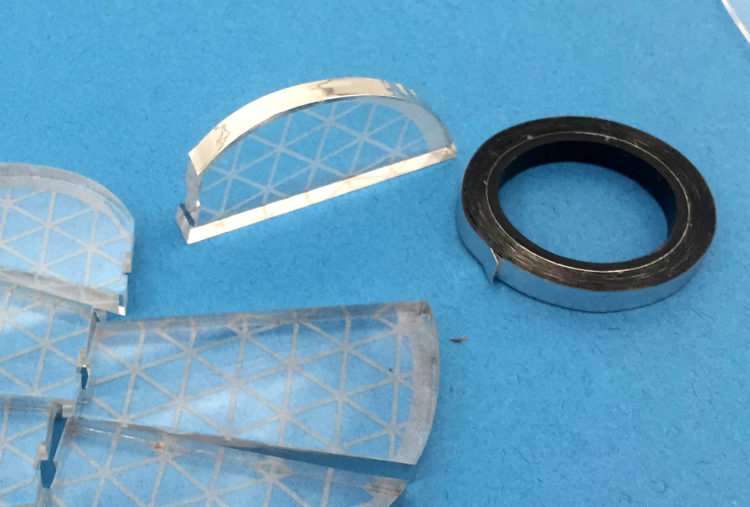
Because the inner acrylic pieces are small, light may leak between them. To create distinct edges, you’ll mask off their outer edges with reflective tape. You can use 3/16″ copper or mylar tape.

Take each of the etched pieces and cover every side with reflective tape except the side containing the notch for the LED (Figure G).

Figure G

5. ASSEMBLE THE ACRYLIC LAYERS

Place one of the 1/16″ outer layers flat on a tabletop, with a 10mm M2 screw protruding vertically through the small hole near the top.

Next, assemble the middle layer. Start with the large ¼” outline, aligning it atop the outer layer so the screw passes through the hole (Figure H).

Assemble the other ¼” pieces inside the outline, making sure their etched sides all face the same way. Nudge the pieces away from the center to create a gap where the LED strip will go.

Figure H

6. EMBED THE LED STRIP

Lay the folded LED strip carefully within the gap so the LEDs fit neatly into their notches (Figure I).

Then lay the final 1/16″ layer of acrylic across the top to hold it all together. Secure the layers together by fastening the M2 nut to the screw.

Figure I

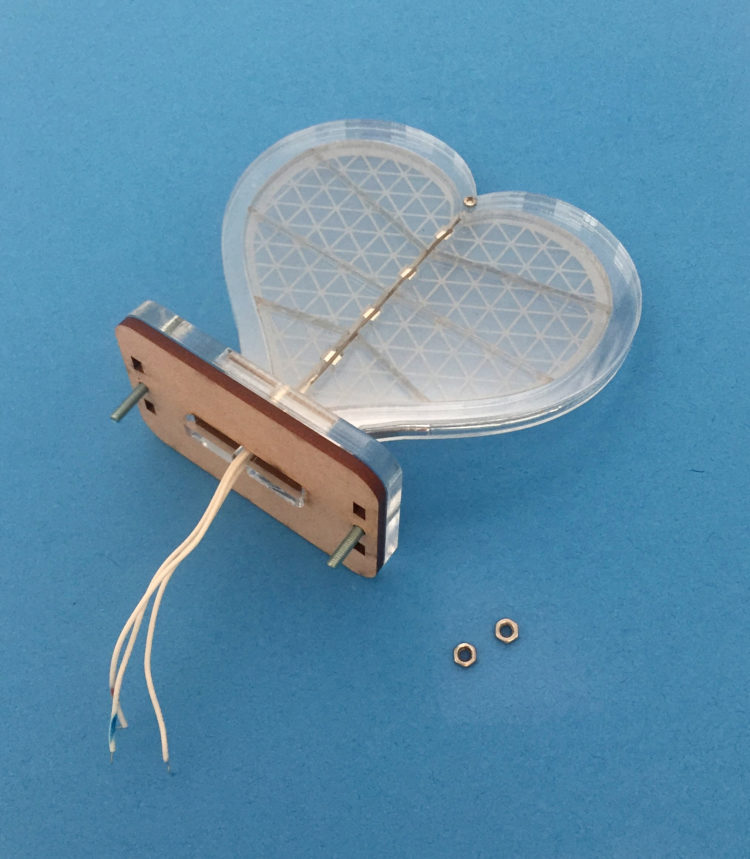
Hold the layers of the heart together so the tabs at the bottom align. The middle tab will protrude below the outer tabs. Slide the wires and all three tabs through the rectangular hole in the ¼” acrylic base (Figure J). The middle tab has a slot in the center; you’ll need to squeeze the edges together make it fit. Don’t force it, just squeeze gently and wiggle the base until it slips over the tabs.
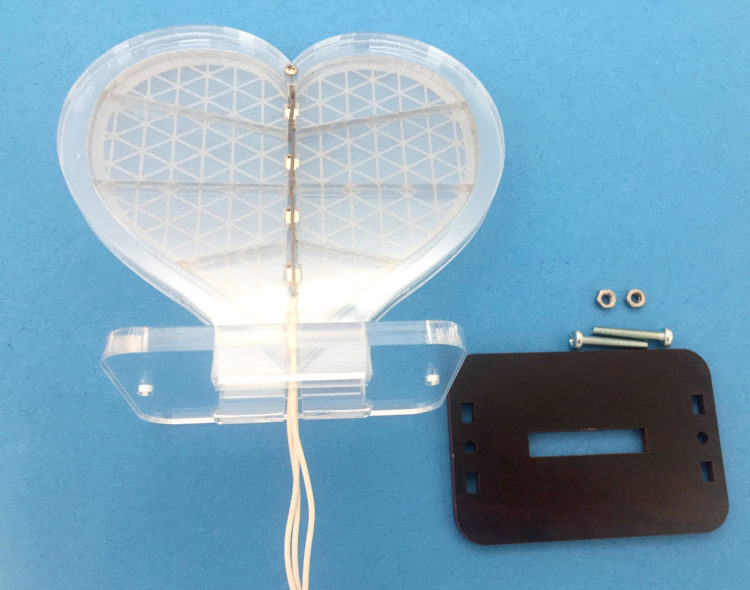
Figure J

Now gently slide the wires and the middle tab through the wooden box lid. Again, you’ll have to gently squeeze the middle tab to make it fit. Slide the 20mm M3 screws through the corresponding holes in both layers of the base (Figure K).

Figure K

7. CONNECT THE MICROCONTROLLER

Solder the wires from the LED strip to the microcontroller. I soldered the ends to the Trinket M0, and attached a Micro USB cable to the Trinket for power and programming. Place the microcontroller into the wooden base so that the USB cord extends out the back slot (Figure L).

Figure L

8. CLOSE UP THE CASE

Slip the M3 nuts just over the ends of the 20mm screws, place the lid on the base so the nuts fit into the their slots (Figure M), then tighten the screws to secure the heart and lid onto the base.
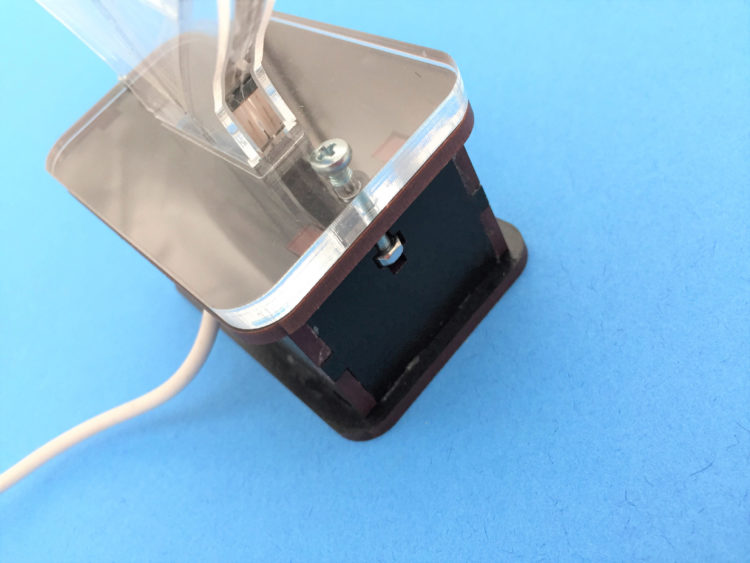
Figure M

9. PROGRAM THE MICROCONTROLLER

You’re ready to light it up. CircuitPython-enabled microcontrollers like the Trinket M0 make it easy to generate colorful dynamic LED patterns with only a few lines of code. For an easy jump start, I adapted Adafruit’s CircuitPython NeoPixel code from their Learning Guide. Only one line of code requires changing, since the example code is already written for a sequence of eight LEDs. Instead of line 6:

pixel_pin = board.A1

change the LED signal pin to board.D1:

pixel_pin = board.D1

or whatever pin on your microcontroller provides signal to your LED strip.


Conclusion

THE LIGHT WITHIN!

As soon as you save your code, you should see the acrylic heart light up in a series of solid colors and rainbow patterns. Spend a little time with the CircuitPython NeoPixel learning guide and soon you’ll be writing your own patterns to make this heart your own.

CHANGE IT UP

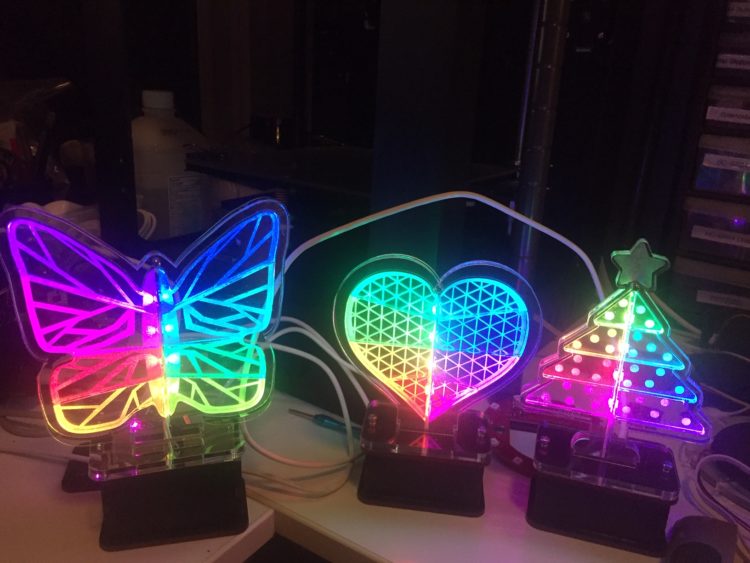
You can easily make different inner-glow edge-lit shapes by adapting the outer contours of the acrylic pieces. I made a Christmas tree whose etched “ornaments” are illuminated in different colors, and a butterfly, just for variety (Figure N).

As long as you leave notches for the LED strip inthe same place, you can adapt this design to come up with your own original decorations to match the season, for gifts or trophies, or just for fun.