I made a stencil of the mighty cordless drill using vector art and a laser cutter.

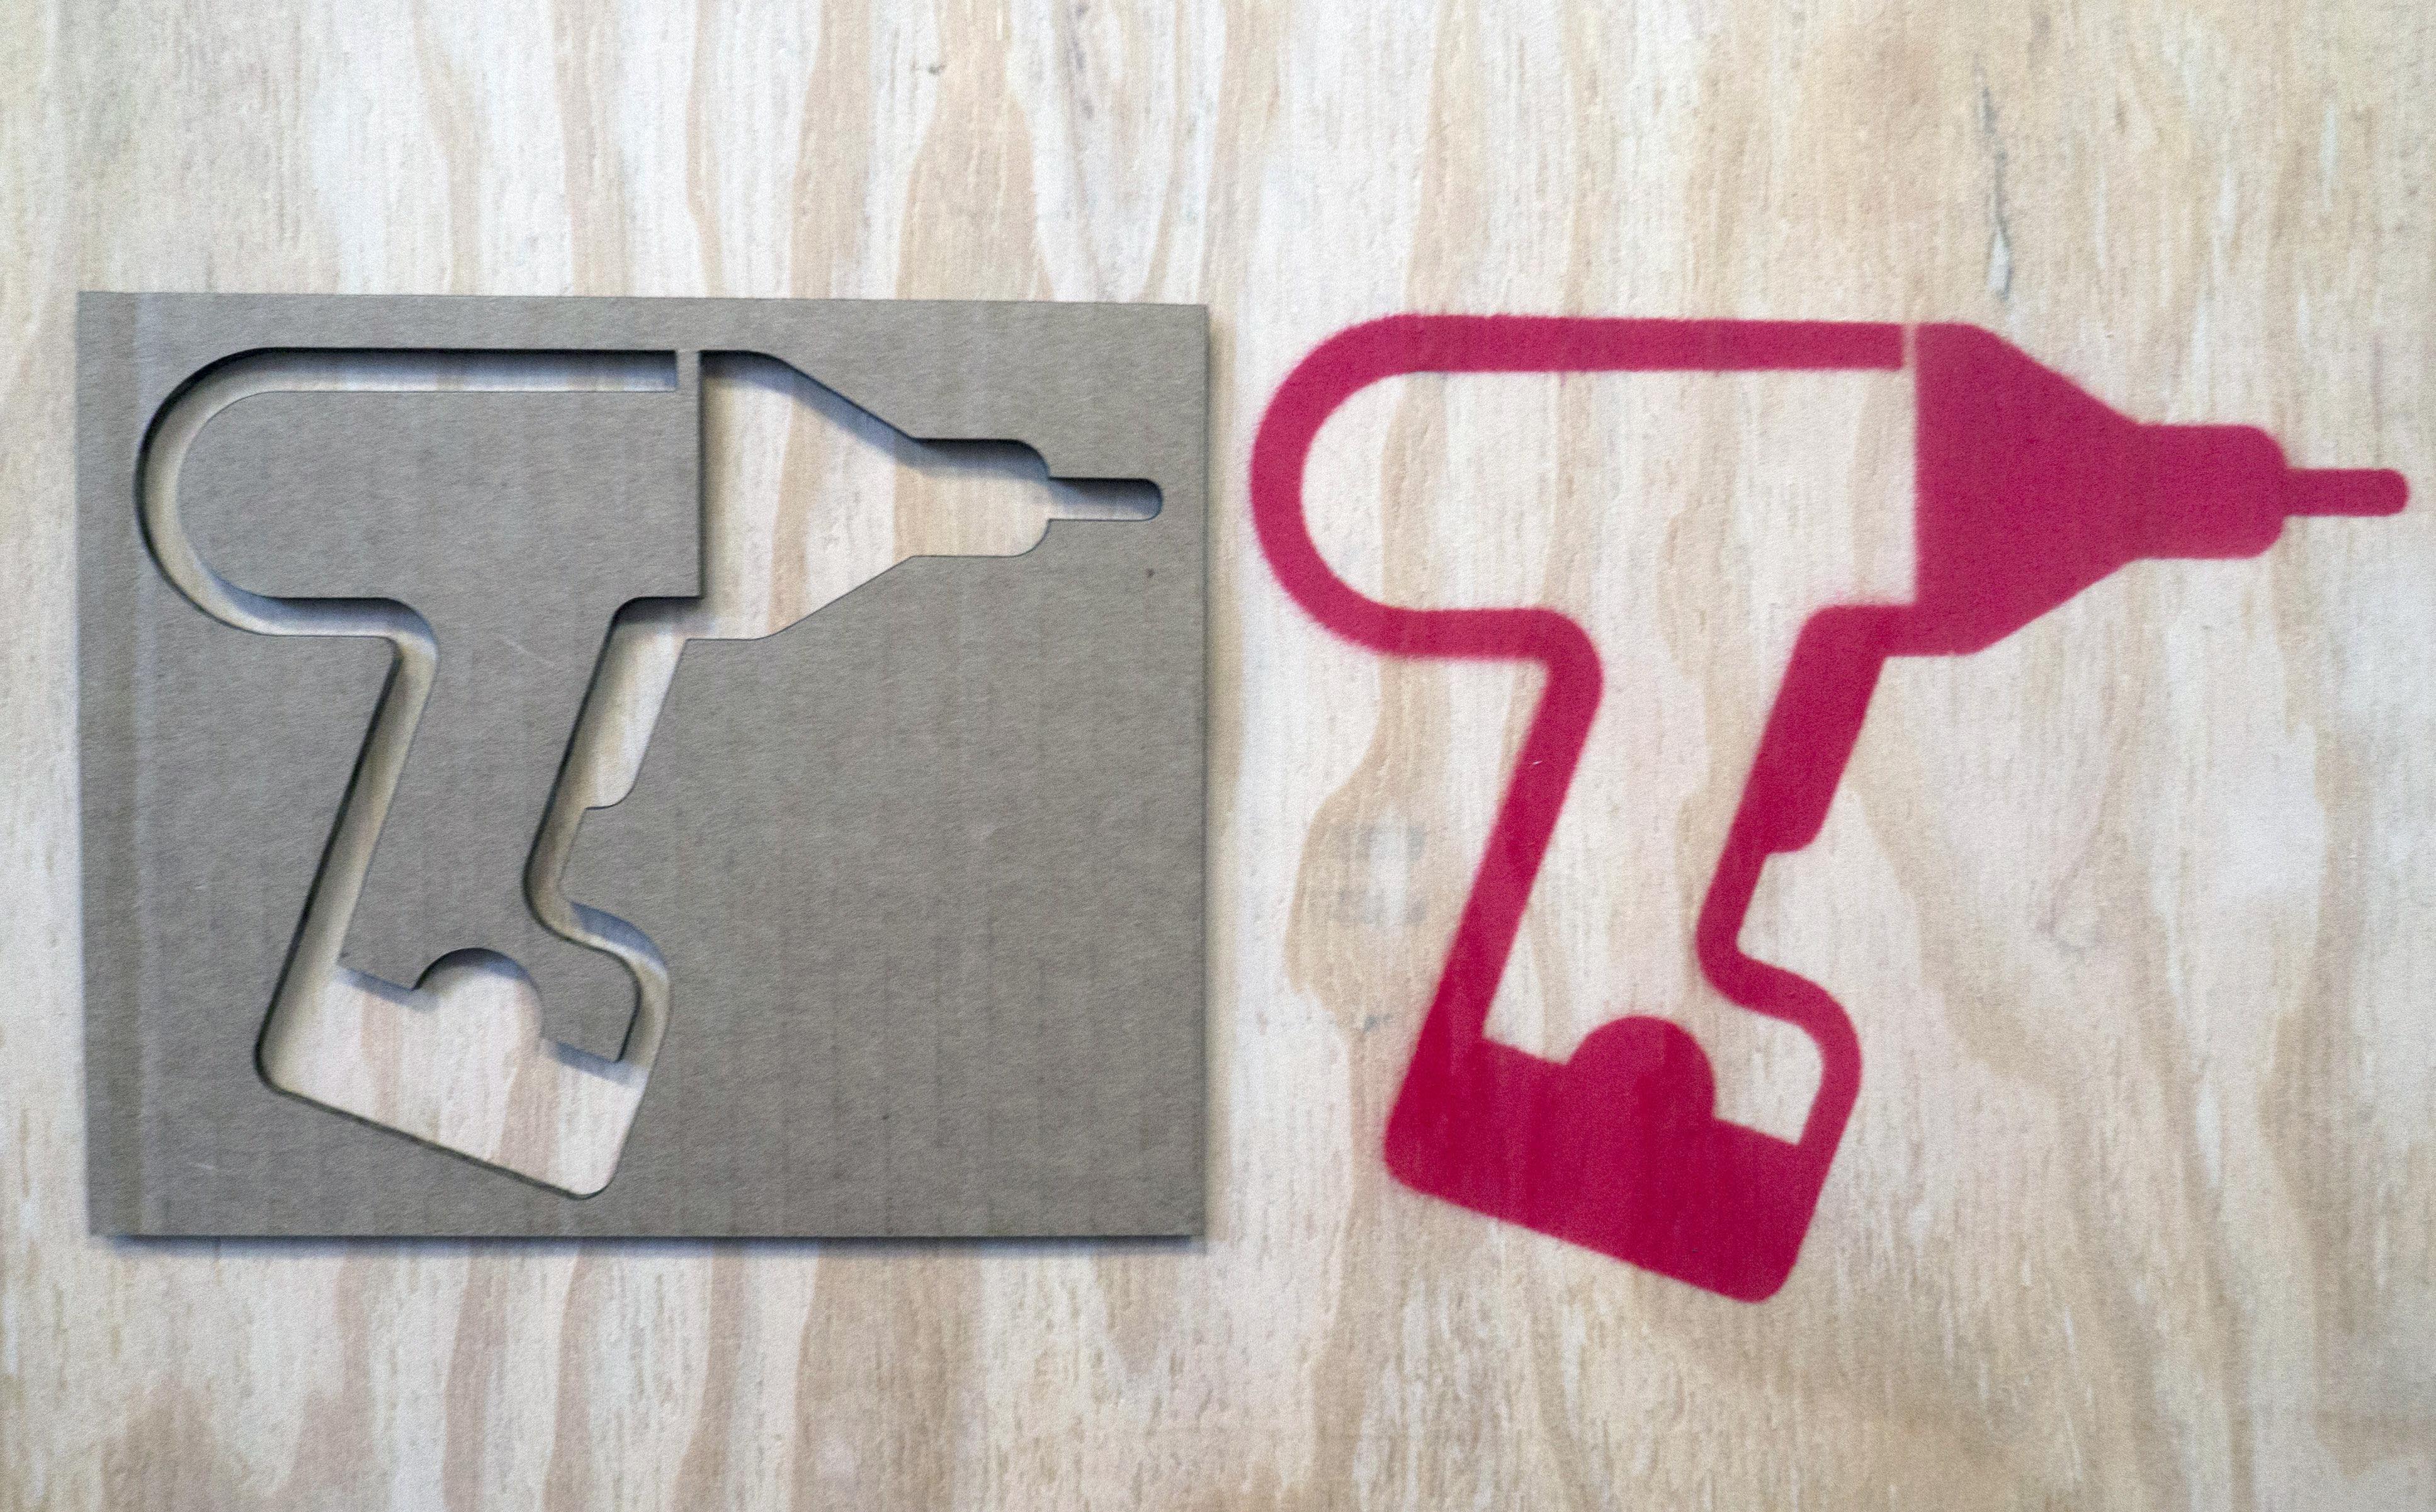
Vector art files are perfect for making stencils. Here at the Maker Media Lab, we’ve been working hard to ramp up our public appearance. As part of this process, I made laser cut stencils to paint our favorite tools on the sides of our desks. I thought it was a pretty neat project and learning experience, so I decided to share it with the Maker community.

In this tutorial, I will show you how to use vector art files to make laser cut stencils. You can design your own image for this project or find one online. I personally like downloading vector art from the Noun Project, but in this case, I was given vector art files for several tools. In your vector art program, you will scale your image as needed and make minor edits to colors and line thickness to ensure that your laser recognizes the paths for cutting. For more complex shapes and images, you will also need to cut and reconnect paths so that “floating” paths show up on your stencil.

As for the laser cutting, you will be using a technique called “vector cutting,” where the laser cutter’s beam follows one or more paths defined by the vector art file. Laser cutters can also be used for “raster cutting,” where the beam moves side to side rapidly like an inkjet printer. Both processes have their strengths and weaknesses, but vector cutting will allow you to make much smoother stencils. Raster cutting is more appropriate for laser engraving solid shapes and images.  Please be warned, your laser cutter may operate differently from the Lab’s Epilog Mini 24. For your safety, please consult the appropriate manuals to get properly acquainted with your laser cutter.


Project Steps

Choose your vector art or make your own

For this project, I was given vector art files for several tools. To show you how to make this stencil, I will use the mighty cordless drill.

Choose and measure your stencil material

I cut out a cardboard box flap that was about ~13¾”×6¾”.

Create a new Illustrator file

Create a new Illustrator file making sure your “Artboard'” is the same size or smaller than your stencil material.

Insert and scale your vector art

Chances are your vector art isn’t the exact right size for your stencil. Fortunately, vector files are perfect for scaling. Scale your art as needed with the text boxes labeled “W” for width and “H” for height.

Make sure that “Constrain Width and Height Proportions” is active by clicking the chainlink button near the width and height boxes.

Add outline colors and remove fill colors

The left and right color swatches control the fill and outlines respectively. Recall that the laser cutter will essentially trace around the path set by the outlines.

Cut and stitch floating paths

Note that my drill has basically two paths: the main outline path and a “floating” path inside. In order to include floating paths in your stencils, use the “Direct Select” tool to find and select “Anchor Points.”

Cut the paths at the Anchor Points and use the path drawing tools to connect the paths.

Change your stroke thickness

This step is specific to the Maker Media Lab’s Epilog laser cutter, which uses .001pt thick paths for vector cutting. It can also use colors to differentiate paths for multiple speed and feed settings. Your cutter may be different. For your safety, please consult the appropriate manual for instructions!

Draw a border around your art (optional)

The border will make the stencil look neater and allow you to cut multiple stencils from a single sheet.

Send the job to your laser cutter

Our laser cutter is connected to the computer as a printer. Again, your cutter may be different. For your safety, please consult the appropriate manual for instructions!

Your stencil is ready

Get your laser cutter running and enjoy your new stencil!