M36_VinylSilkscreen

With this technique, you can make your own custom silk-screened T-shirts or posters without any darkroom or chemical access.

The one specialized tool you need is a vinyl cutter, but you only need access to it for one step. The vinyl stencil can last for years and allows you to print dozens of images.

What will the next generation of Make: look like? We’re inviting you to shape the future by investing in Make:. By becoming an investor, you help decide what’s next. The future of Make: is in your hands. Learn More.

Project Steps

Prepare the image

Choose a high-contrast image and crop your selection. Next, convert the image to black and white and if necessary, increase your contrast until you have a fairly simple-looking graphic. (Download the Makey the Robot logo here.) See Step 11 below for more on how to create a graphic.

Ready the file for the vinyl cutter

Prepare the file with the vinyl cutter’s bundled program — I use Roland CutStudio, but you can use Inkscape or another program. Add a box around the image, leaving at least 2″–3″ of margin around all sides of your image so that the ink won’t seep around the edges.

When you have your design all set, send it to the vinyl cutter. The knife of the cutter will follow the contours of your design.

Make a mask for the screen

It’s easiest to use a pre-stretched silk-screen, but you can also make your own. See Step 12 below for instructions on how to make a screen out of a picture frame and silk-screen mesh.

Cut a piece of vinyl the length and width of your screen, plus some extra on all sides, to ensure that it overlaps the frame. In the center of the vinyl, cut a rectangular hole that’s big enough for your image. This hole in the mask should be the only place where ink can flow through the screen.

Peel the backing paper from the vinyl and place the mask on the table with its adhesive side facing up. Place the stretched screen frame onto the vinyl, bottom (T-shirt side) down, so it sticks to the adhesive. Make sure the vinyl is attached as neatly as possible to the frame. If your mask is bigger than your frame, make cuts from the edge of the frame to the edge of the vinyl to make it fold neatly.

TIP: If you make the mask by hand, use a straight metal ruler and a sharp utility knife.

Weed the stencil

With a weeding tool or utility knife, remove the parts of the stencil where you want the ink to flow through. You can make a more kid-friendly weeding tool by taping a pushpin to a ballpoint pen barrel (after removing the ink cartridge).

Be careful not to remove parts of the image where you want no ink to flow. To keep a complex design clear in your mind as you do the weeding, it’s helpful to refer to a black-and-white print of your image.

Weed the whole image and leave it on the backing paper.

Add transfer tape to stencil

Transfer tape is thinner and less adhesive than masking tape. It’s designed to hold the vinyl stencil together until you put it on a surface. Choose a roll of tape that’s just wide enough to cover your image.

Get a friend’s help to make this step easier. One person applies the tape to the vinyl, smoothing it on gradually and evenly. The other person holds the roll with both hands, keeping an even tension on the tape so that it lays down on the vinyl without bubbles or wrinkles.

You can use the squeegee to make sure the transfer tape goes on evenly, but your hands should be enough.

Once you’ve covered the stencil with the tape, cut it off the roll.

Apply stencil to the screen

Remove the backing paper, making sure the vinyl stencil stays stuck to the transfer tape.

Neatly and evenly apply the stencil to the top of the screen, making sure the image is completely inside the hole in the mask. Burnish or rub the stencil so that it’s completely adhered to the screen.

Attach stencil to the screen

Carefully remove the transfer tape from the stencil, peeling the tape back as flat as possible. If you peel the transfer tape at any angle much less than 180°, the vinyl tends to stay stuck to the tape.

If the stencil doesn’t stick to the screen, fold the tape back over, rub the vinyl some more, then try peeling the tape again. Make certain that the stencil stays stuck to the screen.

Fill in any gaps between the stencil and the mask with masking tape. For future projects, when you want to switch to a new stencil, leave the mask on and just peel off the stencil.

Prepare the shirt for printing

Remove the tags and stickers from the shirt. You shouldn’t need to wash it beforehand (unless it’s already dirty). Brand new shirts seem to take the ink just fine.

I like to put a thickness of coroplast or 1″ MDF inside the shirt. A small stack of newspapers works as well. The insert serves 2 purposes: It keeps the ink from bleeding to the back of the shirt, and it adds a bit of tension to the screen while printing, which helps you make a more crisp print.

Make the print

With the ink knife, put some screen printing ink into the well of the frame.

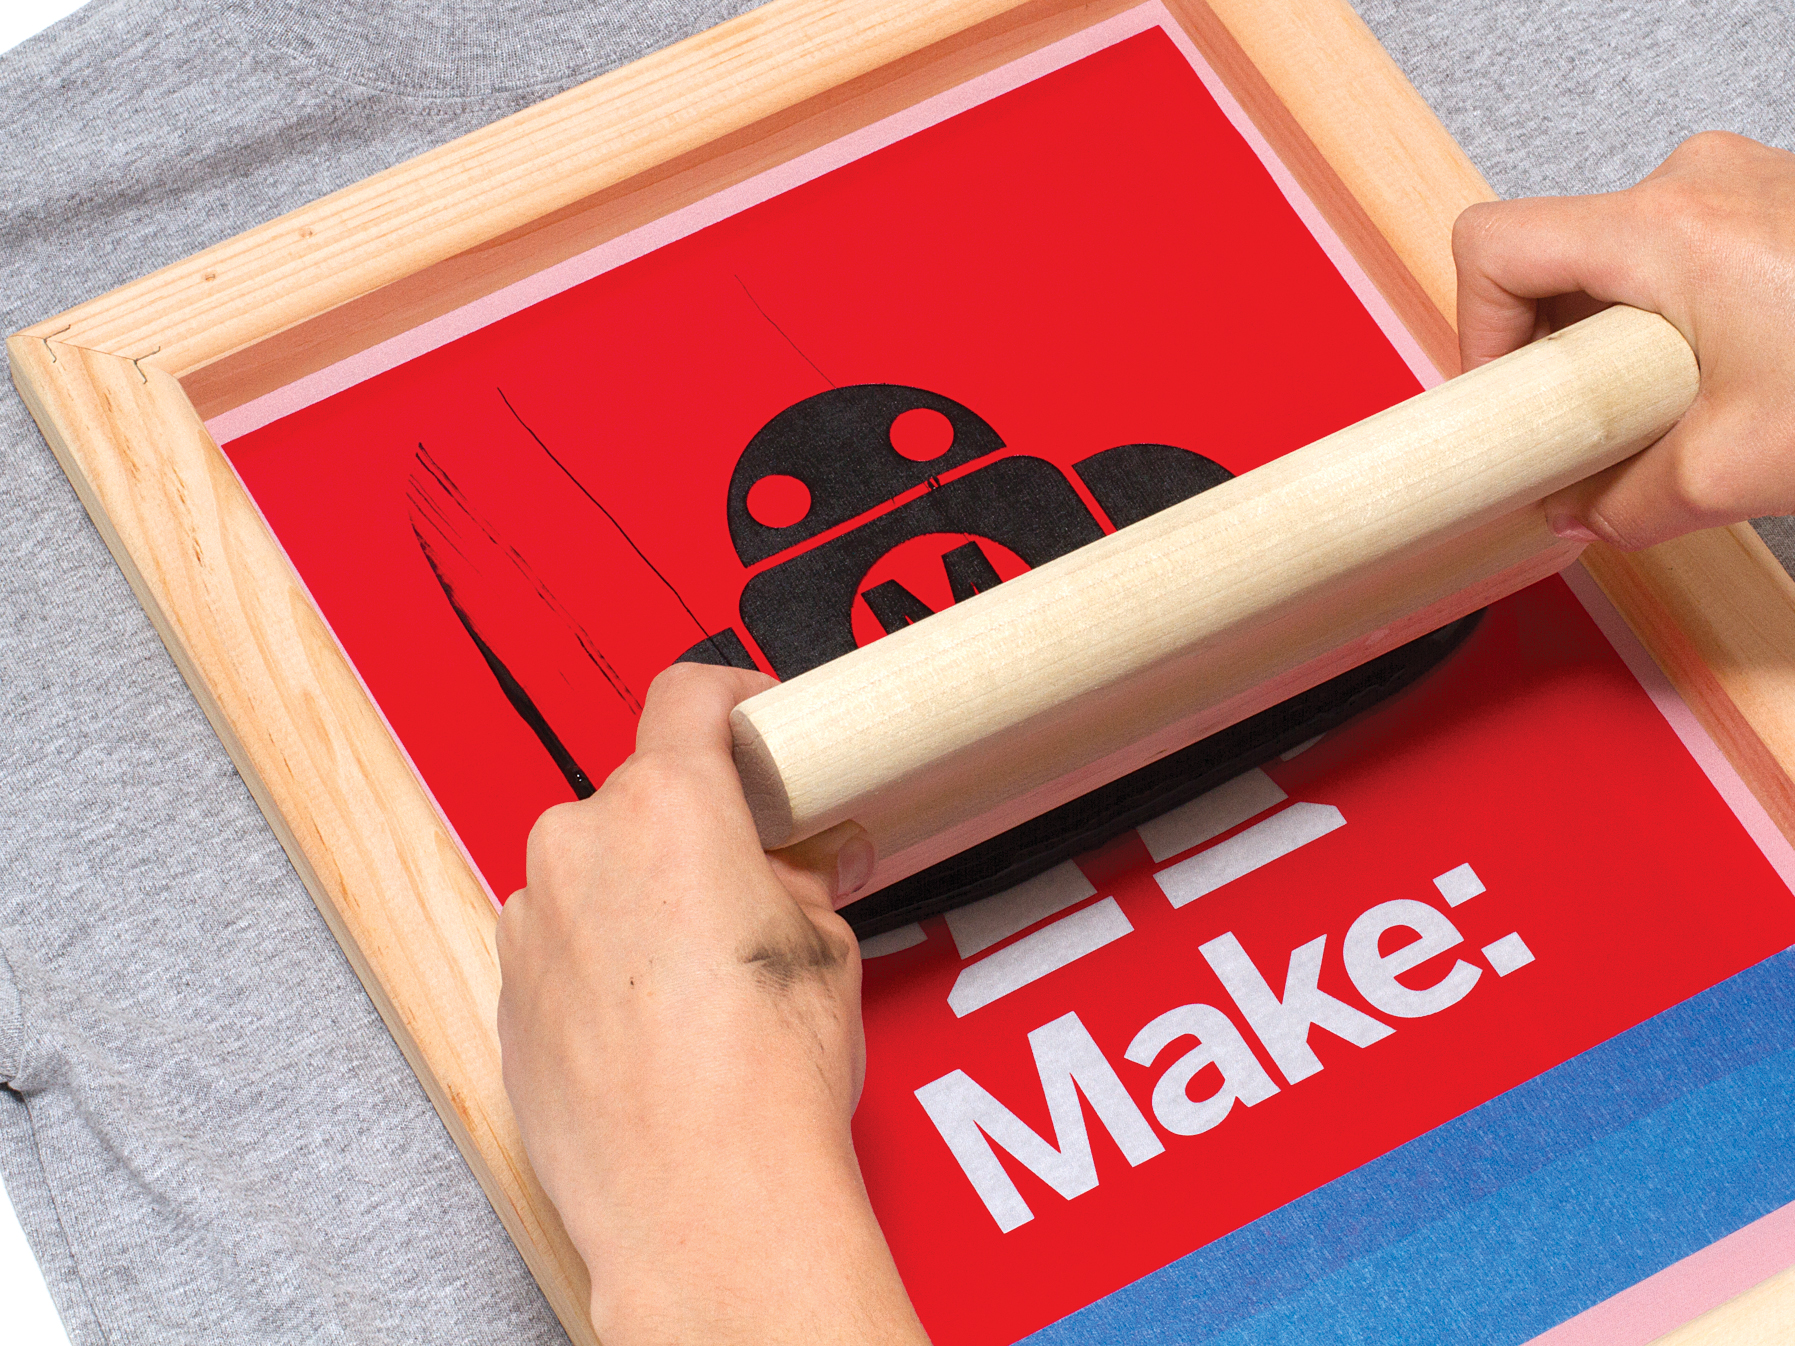
Use the squeegee to draw the ink across your design.

You want to use enough pressure to push the ink through the holes in the screen, but not so much pressure that the ink goes sideways beyond the stencil. This may take a bit of practice. Do some testing to find the right touch for inking the shirts.

When you’re done printing, clean the screen promptly with water to remove the ink. You can take the insert out of the shirt, or leave it in during the drying process.

Dry and heat set

You can speed the drying process up with a hair dryer.

Once your shirt is totally dry, heat-set the ink by putting it in the clothes dryer on high for 20 minutes or so. The label on your ink bottle might specify a more precise time. You can also use a clothes iron to heat-set the ink, but make sure the ink is dry to the touch first.

WARNING: If you skip this step, you might ruin a whole load of laundry!

How to create graphics for silk-screening

Choose a picture. The image you choose should have reasonably high contrast. I picked this image from my Flickr account: it’s from a Neil Young concert. It’s best to work with a simpler image initially; after you get some experience, you can work with more complex compositions.

Get GIMP. If your image is overly cluttered, or doesn’t have high contrast, you’ll need to do extra editing work. I use GIMP software for image editing; download it for free from gimp.org. The program is pretty powerful, and you’ll only need to use a few of its tools.

Crop the photo. Put a selection box around just the parts of the picture you want. Then go to the Image menu, and choose Crop to Selection. The parts of the image outside the box will be discarded.

Adjust the contrast. The best way to do this step is with the Threshold tool. This tool will convert a color image to black and white, and give you sliders to control the dark (contrast) and light (brightness) in one dialog box. Push the image with the Threshold tool until it’s made up of only strong black and strong white shapes, removing all the little bits you can. Then clean up the image as needed with the eraser or paintbrush tools. You want as much of the image as possible to be made of good-sized shapes. If there are too many little “crumbs” then you’ll have extra work in the weeding process.

How to stretch your own silk-screen

Buy (or make) a cheap wooden picture frame for this step. And you’ll need a piece of silkscreen mesh that’s wider and longer than the frame. Make sure the frame’s surface where you’re going to put the screen is flat, smooth, and free of staples.

Staple one edge of the screen to one side of the frame. Start in the center, then pull the screen taut and straight as you staple the end of that same side. Pull the screen straight again as you staple the other end of that same side. Then staple the centers of each section until your staples are about 1″ apart. Use a hammer to flatten the staples.

Pull the screen to the opposite side of the frame. Staple the center, then the ends, then the centers as you did before, again pulling taut while you staple. Repeat this process for the other two ends of the frame.

When your screen is stretched, it should be tight like the surface of a drum. Trim off the excess screen material with a utility knife or scissors.