For more on 3D printing, check out Make: Volume 42.  Don't have this issue? Get it in the Maker Shed.
For more projects, check out Make: Volume 42.
Don’t have this issue? Get it in the Maker Shed.

My boss is an avid sculptor who likes to re-create characters and monsters from various games and comics. He wanted to get a new professional modeling table but didn’t want to pay the $800 price tag. So he asked me if I could make one for less than $200.

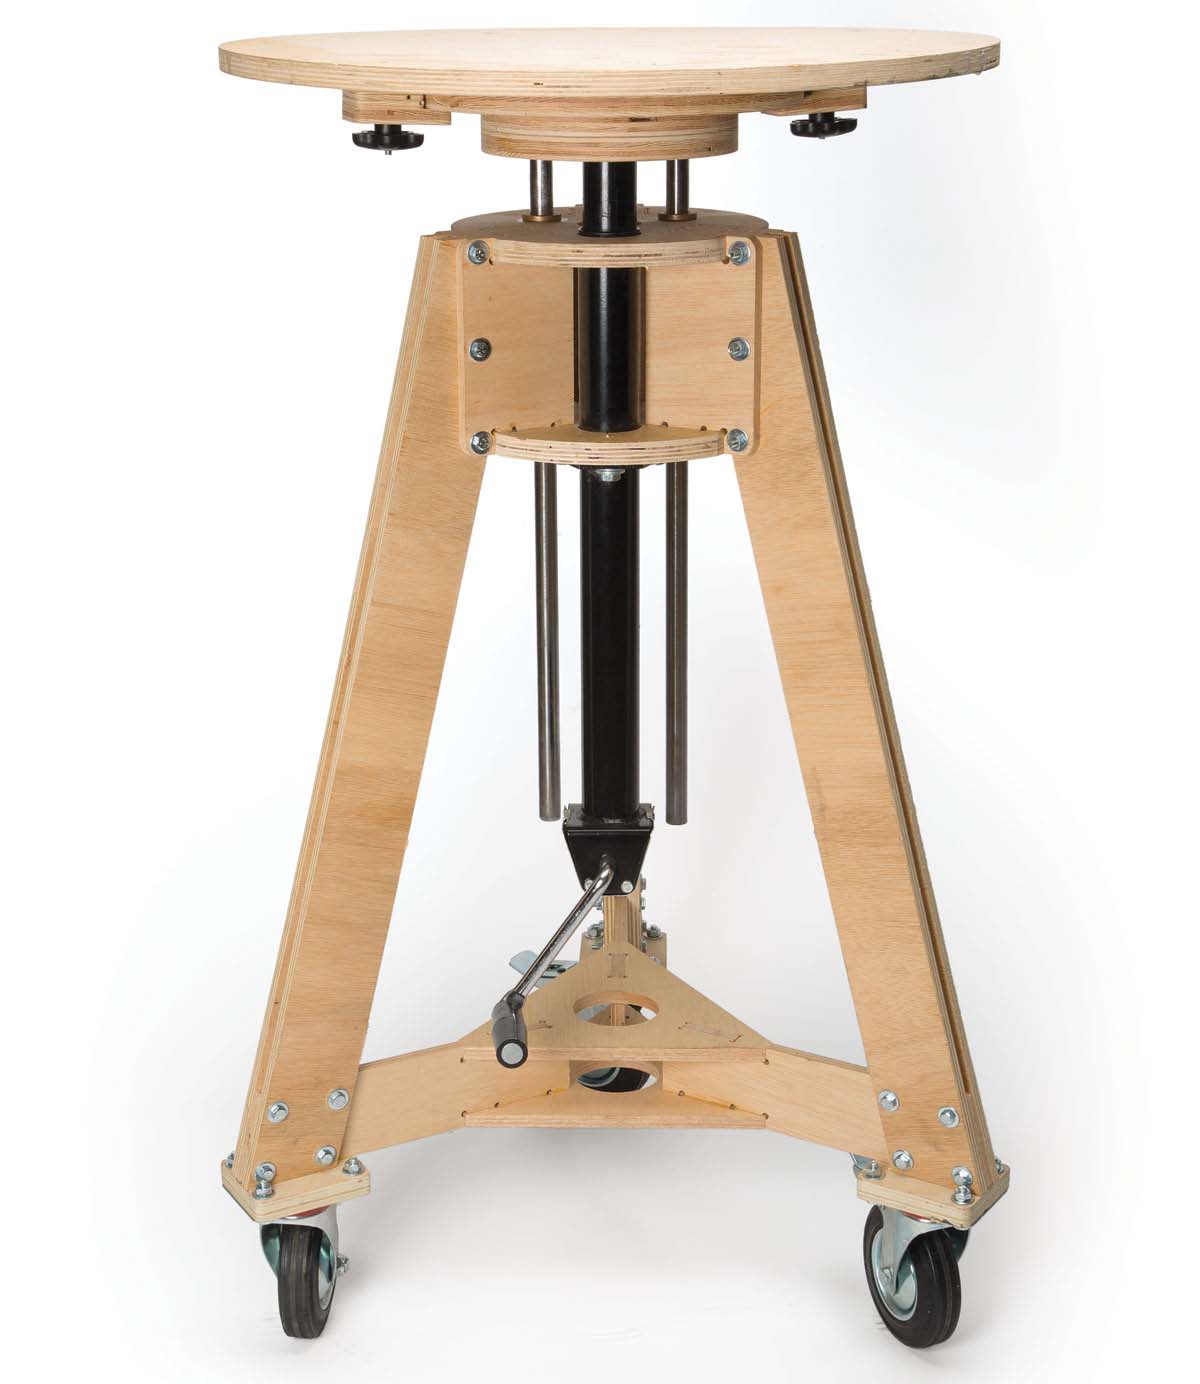
I did, and I used a boat hitch jack to do it. The trick to a modeling table is that you can raise and lower the table surface, giving you better access to the underparts of your model when it’s raised, and a more comfortable working position when it’s lowered. This one’s got 15″ of vertical travel. Additionally, the tabletop needs to spin, and to support 200lbs — clay is not a light material.

I designed the parts in 3D in Autodesk Inventor, then laid them out in AutoCAD as 2D parts for cutting on a CNC router. You can download them for your CNC or cut them by hand. To finish it off, I added big 5″ caster wheels to the base so the boss can roll it around his cramped and messy shop without getting tripped up by stray clay stuck to the floor.

boat-hitch-diagram
Illustrated by Rob Nance

Project Steps

1. CUT THE PARTS

Download the part files and cut them on your CNC machine, or follow the dimensions to cut them by hand. Both 1/2″ and 3/4″ plywood are used, so make sure you use the right thickness. All the cuts are through-cuts, except the tabletop (A) has six 1/2″-deep blind holes: four are 5/16″ diameter and the last two are 1/4″.

2. TRIPOD HEAD

Glue the 9 tripod head brackets (B) into the slots on the 2 tripod head plates (C). Make sure all the holes in the tripod head plates line up. Clamp together and let dry for the recommended amount of time on the bottle.

3. TRIPOD BASE

Glue the 3 tripod base boards (D) into the corresponding slots on the 2 tripod base plates (E). Then glue the caster brackets (F) to the ends of the base boards.

4. TURNTABLE MOUNT

Stack and glue the 3 table mount discs (G) and lazy susan adapter plate (H) as shown, taking extra care to line up all the holes on the table mounts.

5. JACK AND BEARINGS

In the bottom of the tripod head, slip the jack (I) through the medium-sized hole that’s offset from the center hole. Make sure the crank is facing away from the center of the assembly, then clamp the jack in place. Use a pencil to mark the holes in the jack’s mounting plate onto the bottom of the tripod head. Remove the jack and drill 3 pilot holes for the 3/4″-long lag screws, then fix the jack in place with the lag screws.

Press the four 3/4” flanged bronze bushings (J) into the 4 smallest holes in the tripod head, with a dab of super glue or epoxy to keep them from working themselves out.

6. TRIPOD LEGS

Fit a pair of tripod legs (K) into the gaps of a tripod head bracket. Line up the holes and fix into place with the 1/4-20 × 3″ screws, washers, and nuts. Repeat for all 3 brackets. 

Place the tripod head (now with legs) on top of the tripod base, and slot each base board into its pair of legs. Then bolt the legs into the base with the 1/4-20 × 2″ screws, washers, and nuts.

7. TABLETOP PREP

Using a hex drive, screw the eight 1/4-20 threaded inserts into the 5/16” holes: 4 in the top of the turntable mount and 4 in the bottom of the tabletop.

Epoxy the 2 threaded rods (L) into the 1/4″ holes on the bottom of the tabletop.

8. GUIDE RODS

Carefully hammer the two 3/4″×24″ steel rods (M) into the 2 small holes on the bottom of the turntable mount.

CAUTION: Don’t use a metal hammer directly against the ends of the steel rods. This will deform them and you won’t be able to get them through the bronze bushings. Use a piece of scrap wood between the rod and the hammer to soften the blows.

Carefully fit the steel rods into the bronze bushings in the tripod head. Guide the top piston of the boat hitch jack into the hole on the bottom of the turntable mount. Then, using a large steel mallet, hammer the piston into the hole.

9. TURNTABLE

Using 1/4-20 × 1/2” button-head cap screws, attach the 12″ turntable (N) to the top of the turntable mount. Then attach the tabletop to the turntable.

10. TABLETOP BRAKES

Glue together the 2 parts of the brake (O) as shown. Place a spring (P) onto one of the threaded rods on the bottom of the tabletop, then add the brake, and finish with one of the large threaded knobs (Q). Repeat for the other side.

11. CASTERS

Flip the whole table over. Bolt the large swivel casters (R) to the bottom of each tripod leg using four 5/16-18 × 1-1/2″ bolts, washers, and nuts.

Flip the table back onto its new casters. You’re done!

The Boat Hitch Table can be used for any kind of sculpting, not just clay maquettes. It would also make a stylish drink table for a trendy bar. For version 2.0 I would definitely add some kind of plastic or metal surface to protect the tabletop, and a tool rack and tray for stray bits of clay and other things. And why not add strip lighting around the edge to illuminate the underside of the model you’re making?