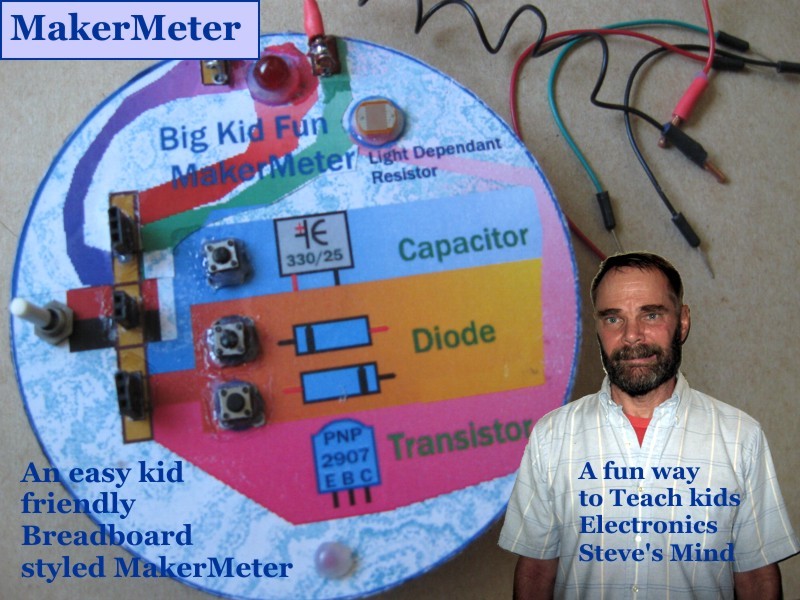
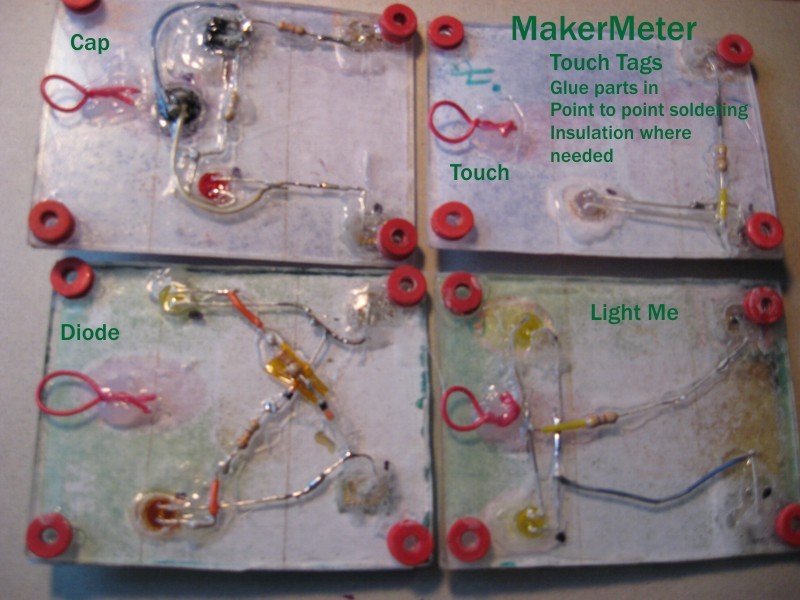
Kids of all types need an easy way into electronics or they will get confused or bored with it. Putting electronics into simple blocks that the kids can play with may peak their interest in electronics. A MakerMeter is one or more blocks of electronic components built in a way that the kids can play with. Teaching is more fun if the kids are having fun. My first experience of electronics was with my Dad’s Simpson 260 analogue volt/ohm meter. Conductivity is the first step to understanding electronics. The MakerMeter should be built for that group of kids as something they can each take home and play with.
The parents, teachers and supporters will design and build the electronics behind each MakerMeter. They should also design the look of the MakerMeter so that it is safe and easy to use for that group of kids. Keep things simple so that everyone understands the circuits. Let the electronics people deal with the electronic details. With a little graphics skill you can build an informative functional MakerMeter the kids will love and show off to their friends.
Each family or supporter of each kid should pay for or buy the parts for the MakerMeter. Depending on time you could have a design-and-build meeting and another meeting for the kids, or just one meeting. You must determine if the kids in that group need to know the electronics behind the MakerMeter.
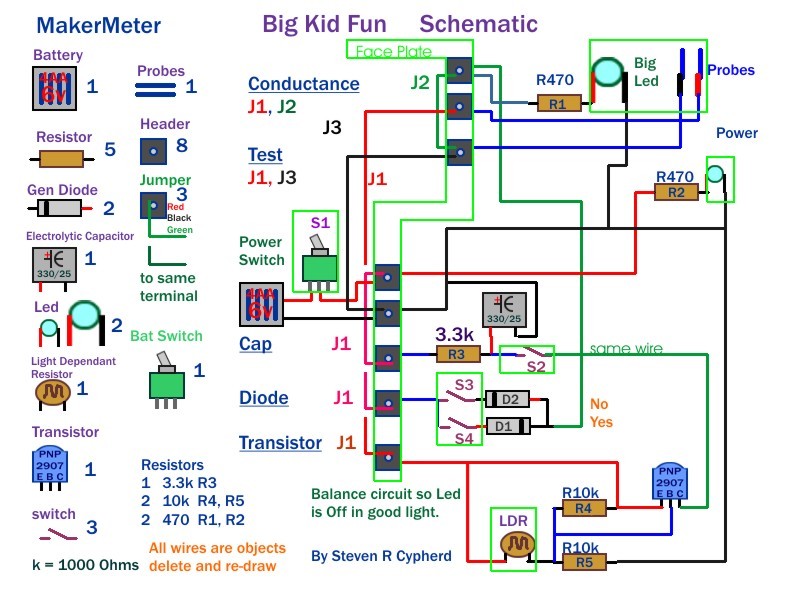
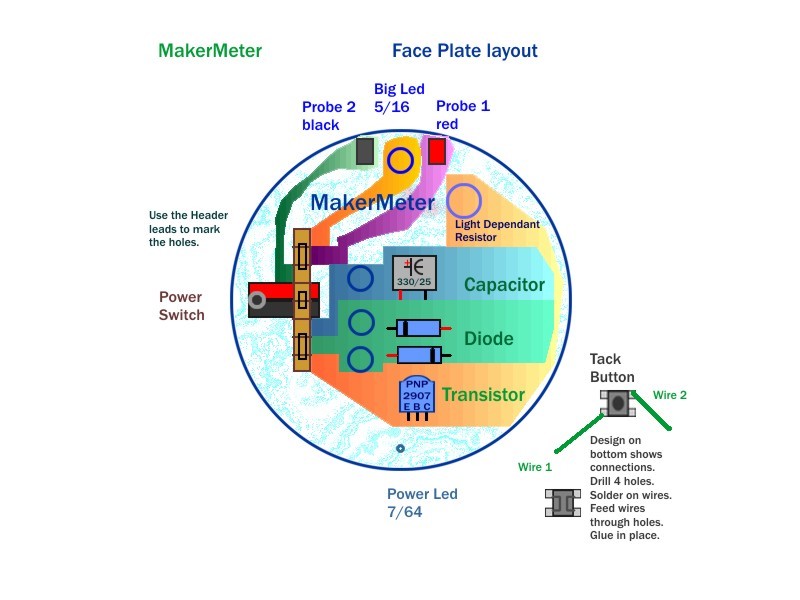
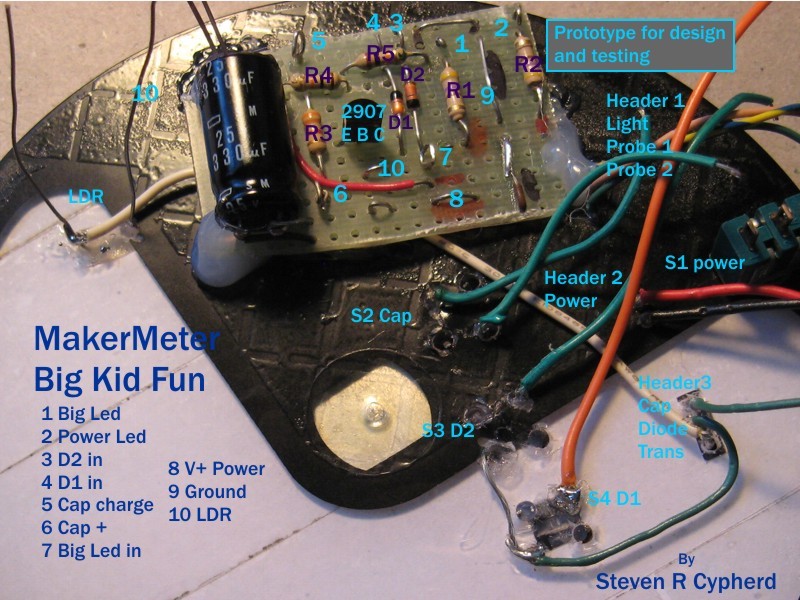
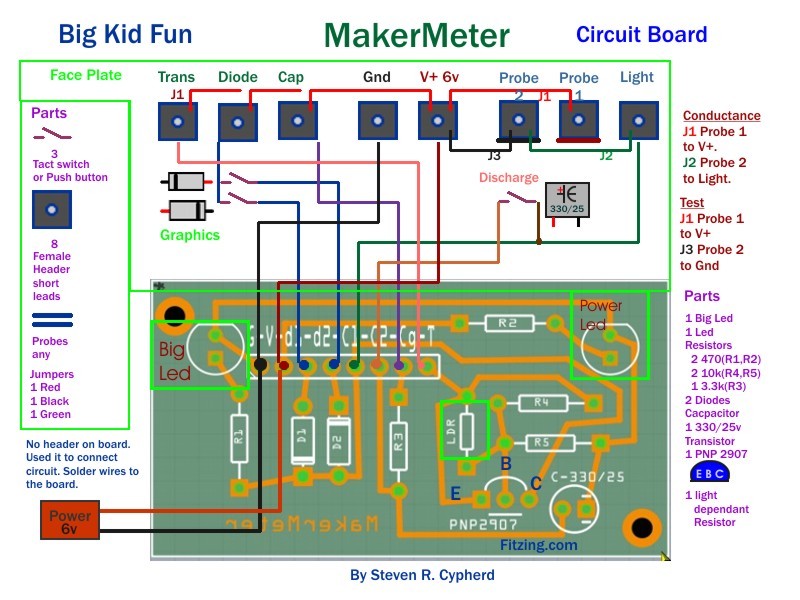
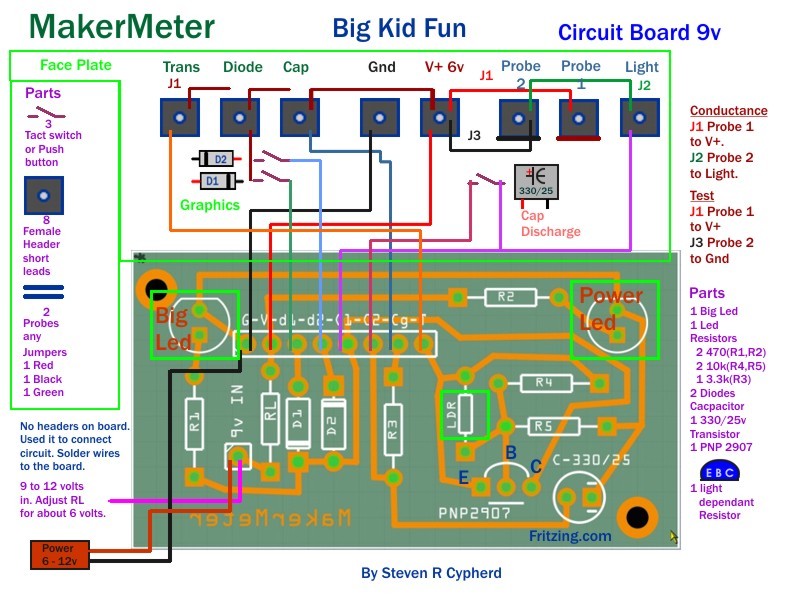
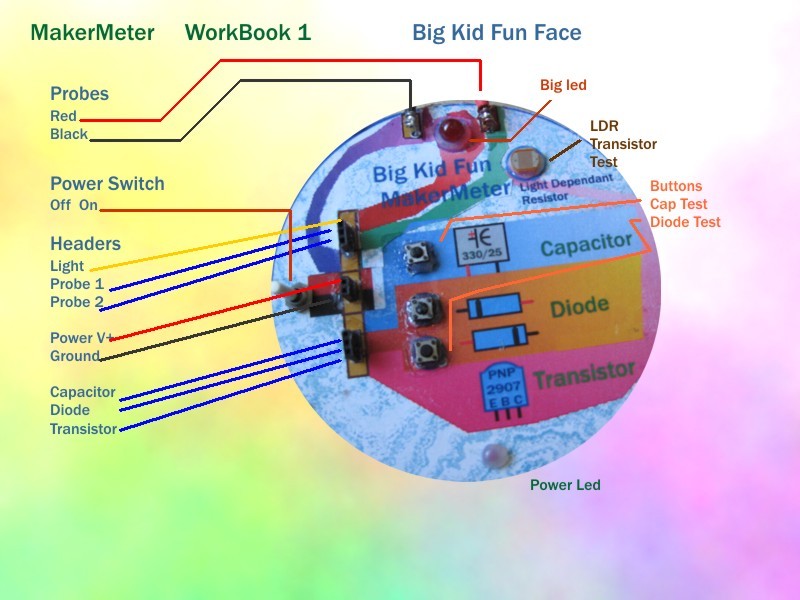
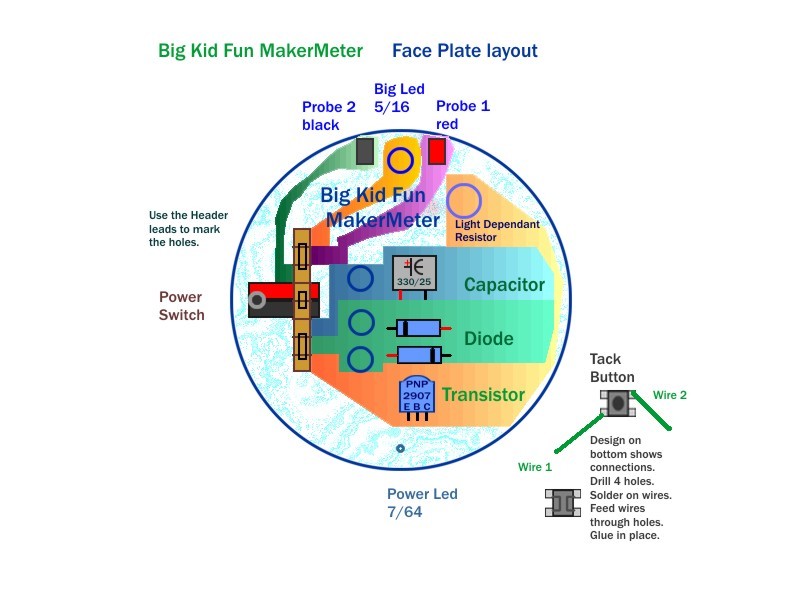
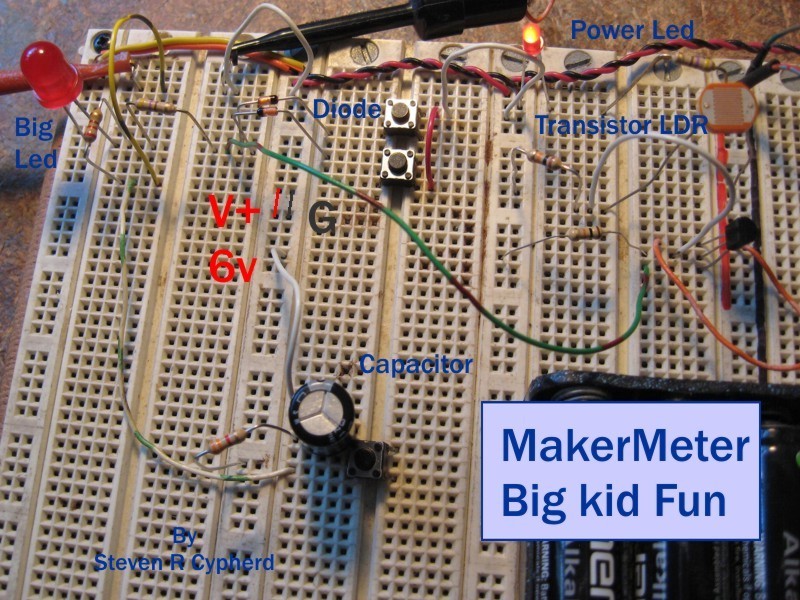
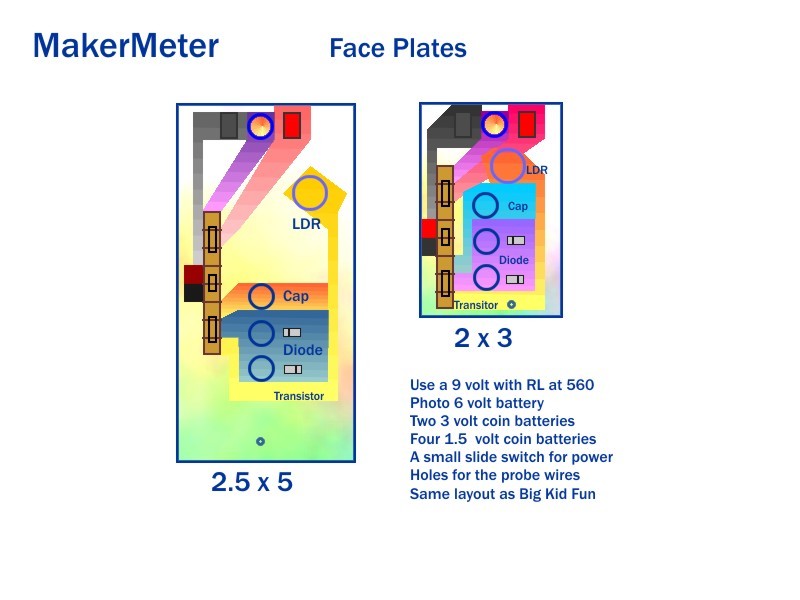
My big-kid fun MakerMeter is designed like a simple breadboard like what us big kids use to test electronics. In my MakerMeter the electronic tests only need the positive voltage because the ground is taken care of by the MakerMeter electronics. With proper instruction the kids will learn electronics like we did.
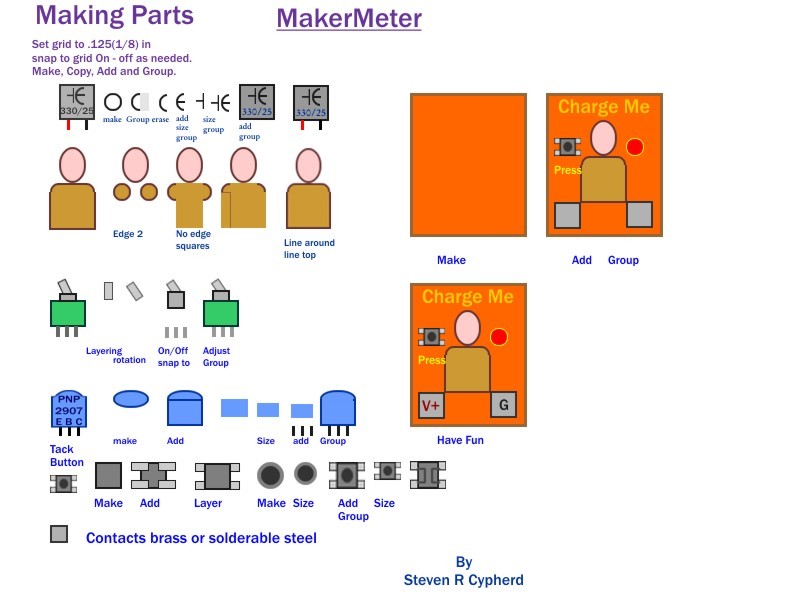
To make a MakerMeter you will need someone that knows electronics and the building and soldering of something like a MakerMeter. You need a graphics documentation person that can do the art and documents of the MakerMeter. A skilled builder of the parts of a MakerMeter would be nice, but most people just need a little help in this area in the form of a MakerMeter Build meeting.
It is endless what a MakerMeter can be!
MakerMeter should fun for the kids.
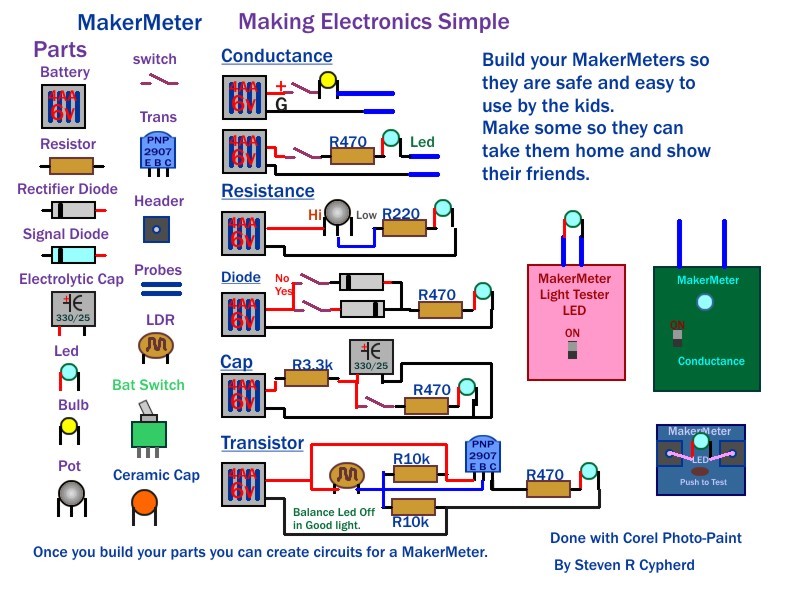
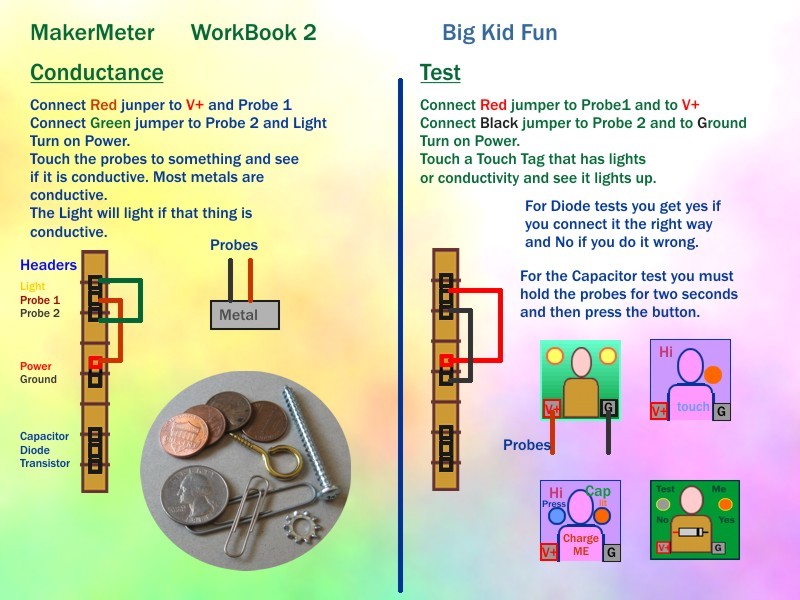
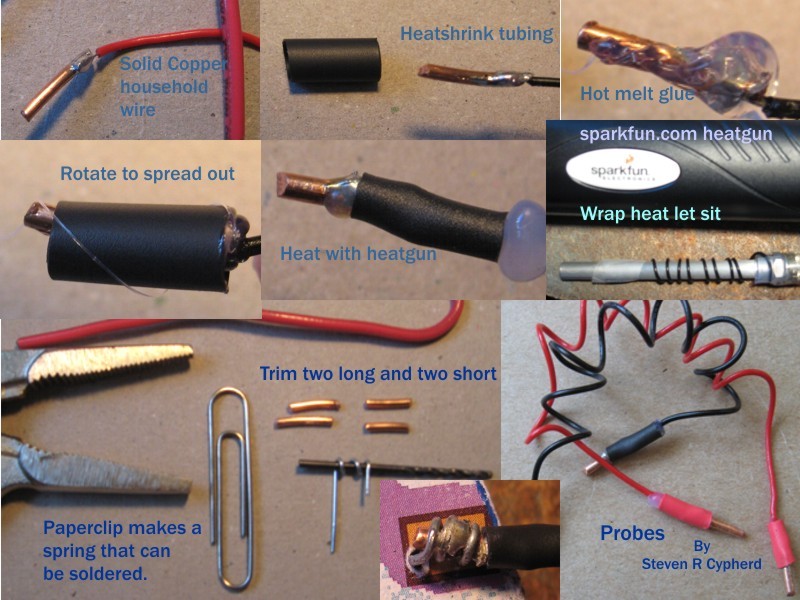
Conductivity is tested simply by two metal probes that, when they touch a conductive thing, cause a light to light up. The components needed are a two- to four-AA battery holder, hook-up wire, Thick solid wire for probes and an LED (if your battery source is above 3 volts use a resistor) or light bulb.
Resistance is demonstrated by adding a potentiometer (pot) or resistor between the light’s positive lead and the power lead. The light changes brightness as the pot is turned. Have an internal 220-330 ohm resistor connected between the pot’s output and the LED’s positive lead to protect the LED.
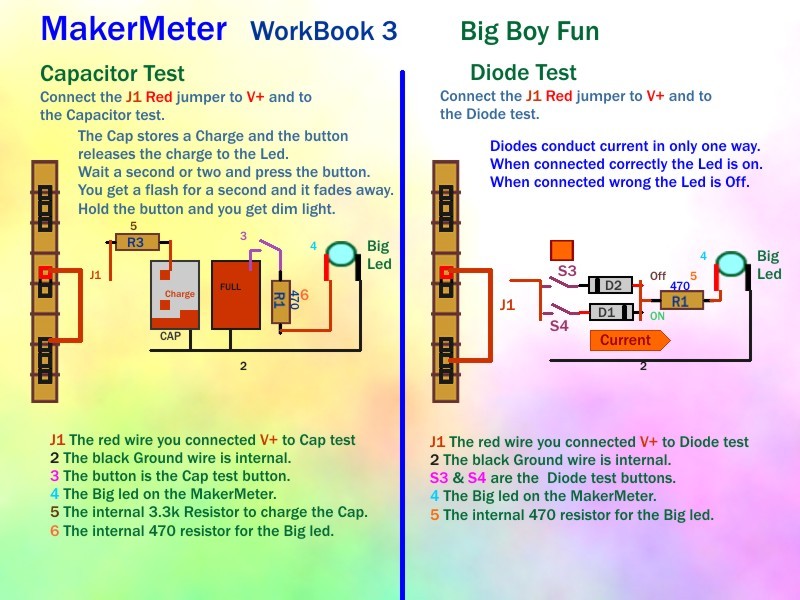
Capacitance is more fun if they see it in action. Hook the positive lead of the cap to a 3.3k resistor and the other lead of the resistor to V+. Connect a button to the cap’s positive lead on one side and then to the light’s positive lead on the other side. The battery charges the capacitor through the resistor. Only when the cap is full do the kids get a bright light for a second when button is pushed.
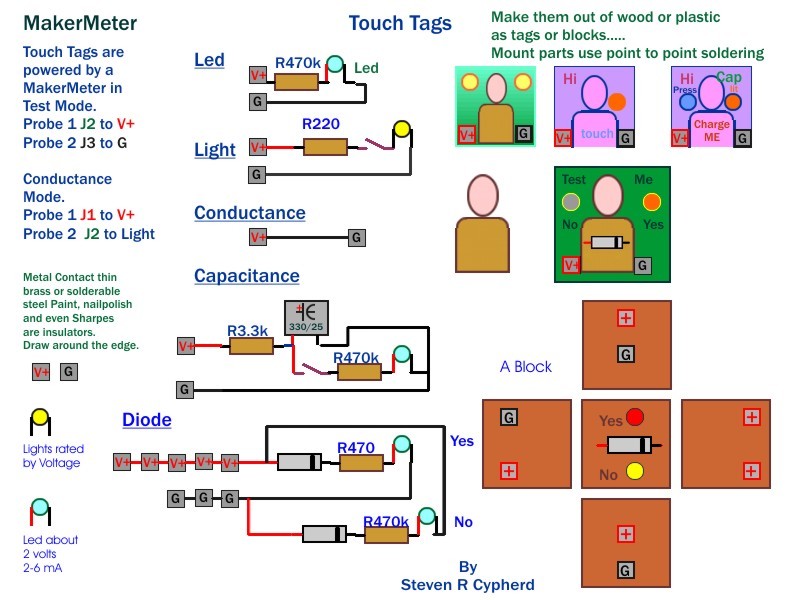
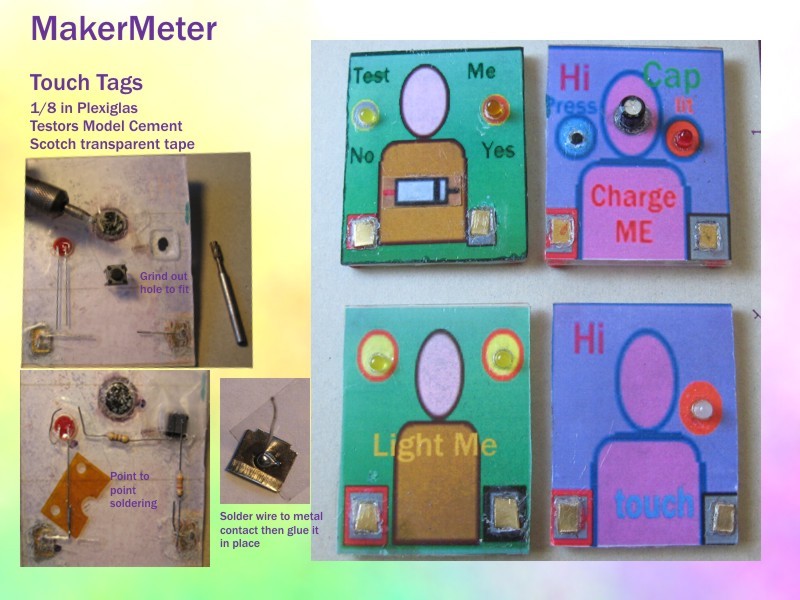
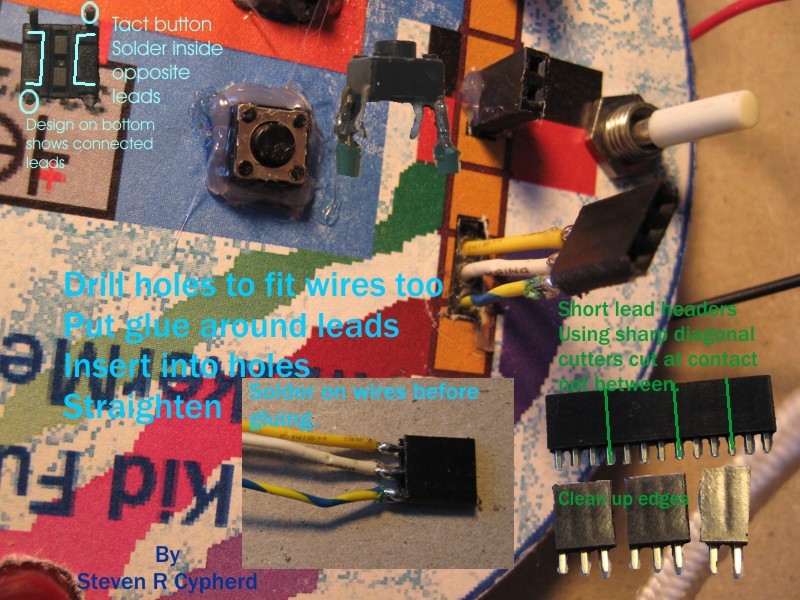
Diodes need hook-up wire or a socket. If the diode is connected one way the light lights and the other way it doesn’t. Explain it to them. In my big-kid fun MakerMeter the kid must also attach a jumper from V+ to the diode terminal. This is just how us big kids test a part. Great for a Touch Tag.
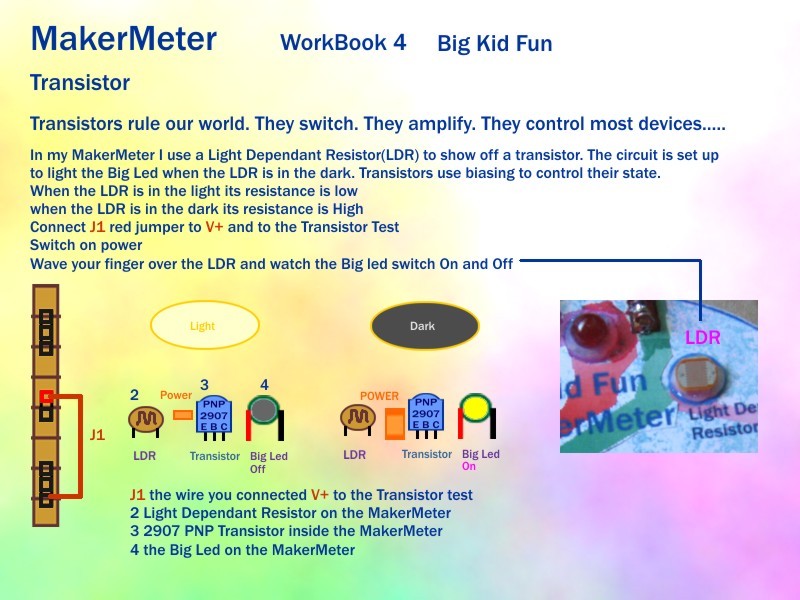
Transistors need hook-up wire or a socket. Use a light-dependent resistor (LDR) and the light changes with the wave of a hand. Use a microphone and the light changes with a sound. Many things are possible.


