You will learn how to:
- Power a circuit with a bike dynamo
- Get CO2 and GPS sensor data
- Communicate using a GSM module
- Set up a database and log data using PHP/MySQl
- Bring this all together using an Arduino microcontroller
We will demonstrate how to make a mobile, bicycle-powered carbon dioxide monitor.


Install an in-hub generator into one of the wheels of your bike. We used a Shimano 3N30 because it was (relatively) cheap on Amazon, but any Shimano or Sturmey Archer hub should work. A frame-mounted 12V generator should also work, but we haven’t looked into this.
This hub should put out around 6-12 V, depending on your speed.
How to build a wheel is well outside the scope of this guide, but for the ambitious: Sheldon Brown can teach you everything you could ever want to know: http://www.sheldonbrown.com/wheelbuild.h…
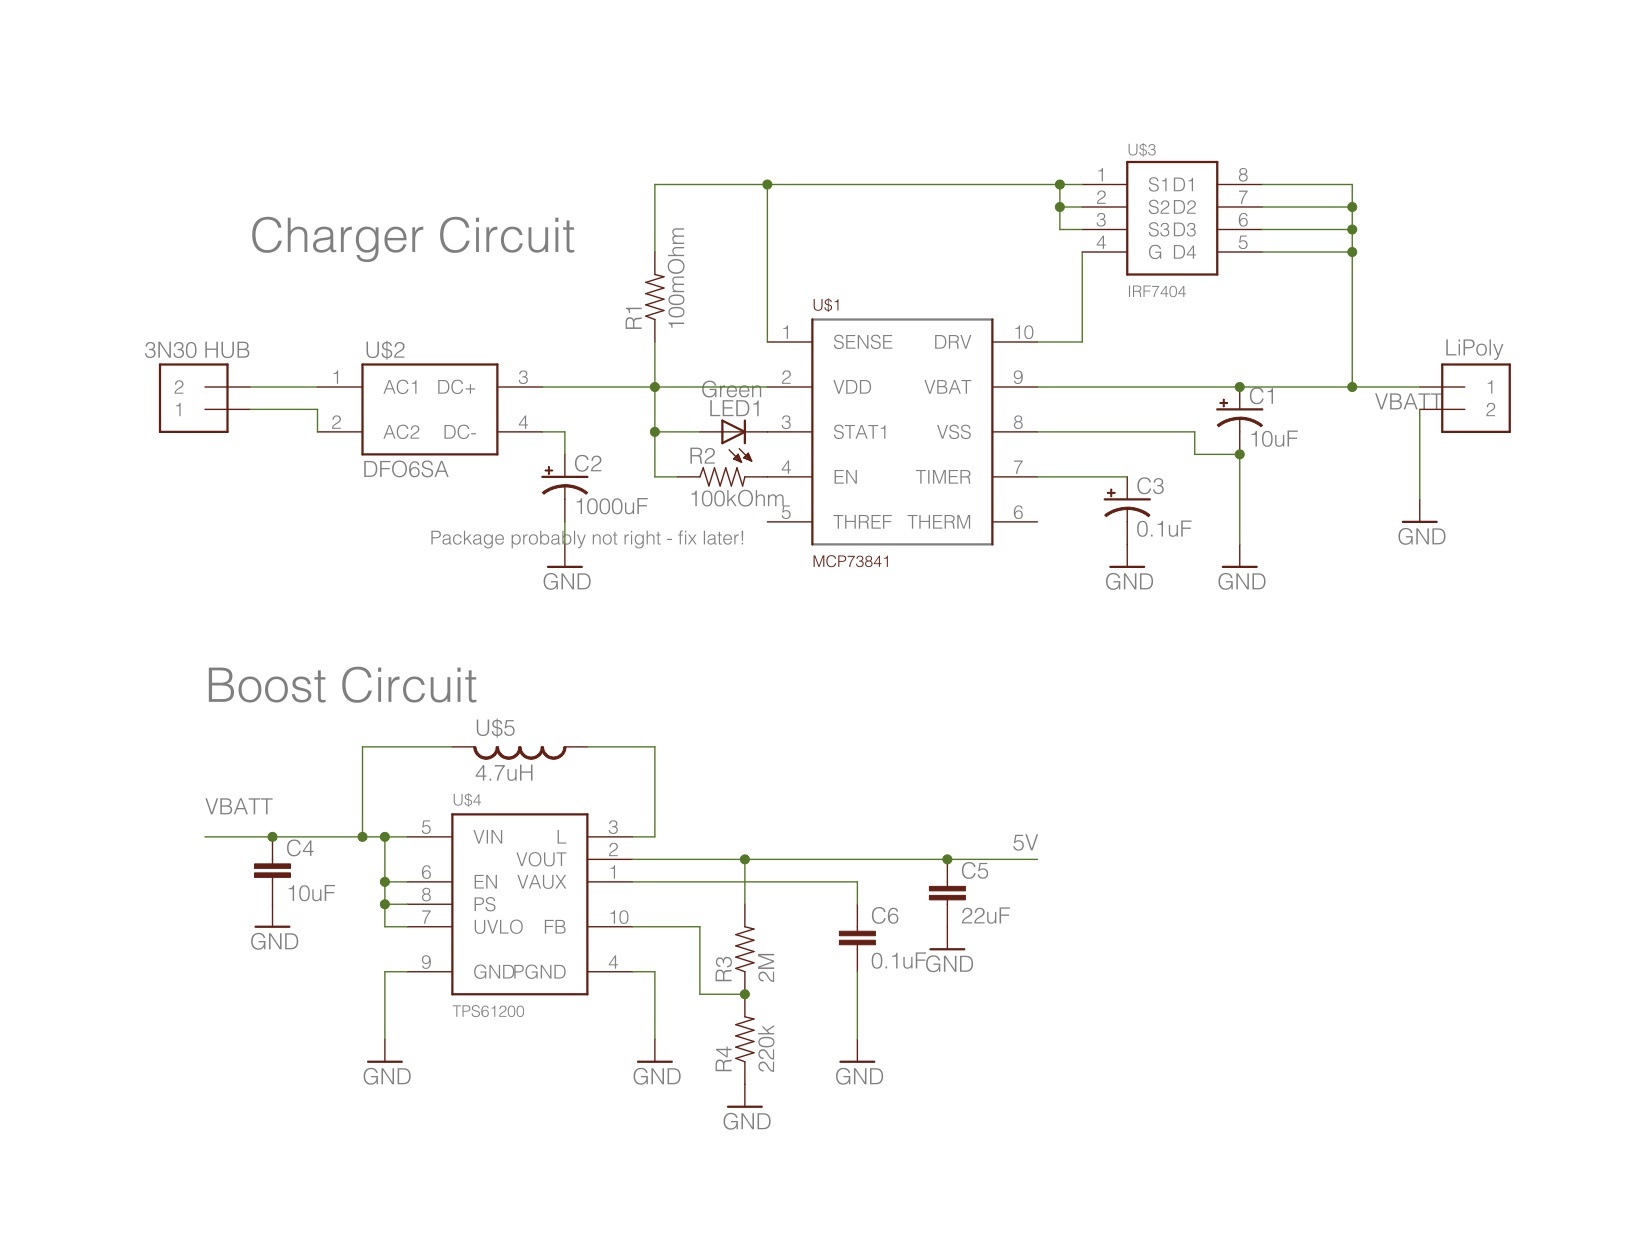
The general idea is to charge a 3.7 V lithium polymer battery with the bicycle dynamo, then to power a microcontroller with that battery.
Use the “Charger Circuit” schematic in the picture to safely charge a LiPo battery with little to no explosions. Alternatively, you can use the Sparkfun LiPo fast charger (http://www.sparkfun.com/products/8293), which also uses the MCP7384x chip.
Use the “Boost Circuit” as shown in the schematic to boost the power line up to 5V so it can be used by an Arduino board. Alternatively, use a Sparkfun LiPower boost convertor (http://www.sparkfun.com/products/10255, which also uses the TPS61200) or the Adafruit Mintyboost (http://www.ladyada.net/make/mintyboost/, which has the advantage of having a built-in USB port).
You can now power just about any piece of small electronics with your bicycle! Take that, global warming!
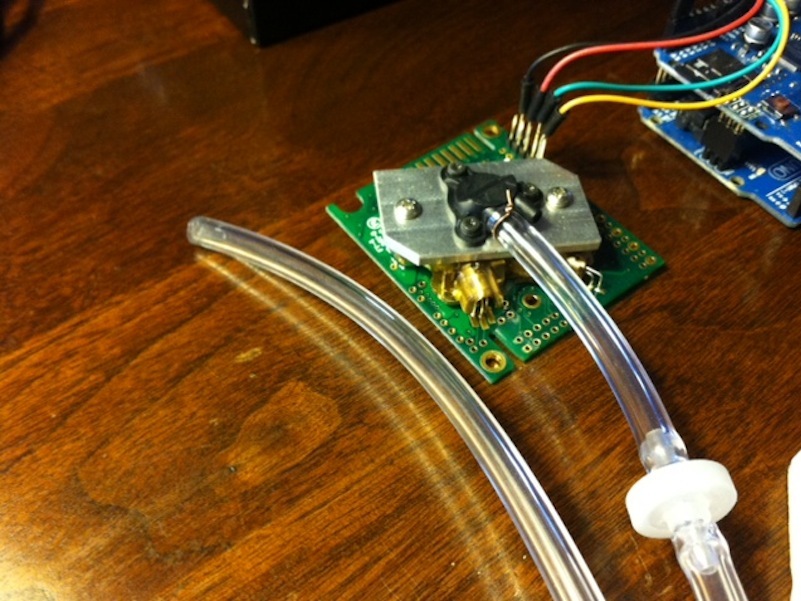
Solder 1×4 male pin header to the I2C pinout on the K30 sensor. Details on the K30 pin out and some communication documentation found here.
The communication lines can be connected to a breadboard or directly to the microcontroller with ribbon cable and IDC or wires.
Sample Arduino code for communication over I2C, courtesy of Andrew Robinson of Sensair available from Senseair.
Further communication documentation, including calibration and error messages can be found on the K30 product webpage.
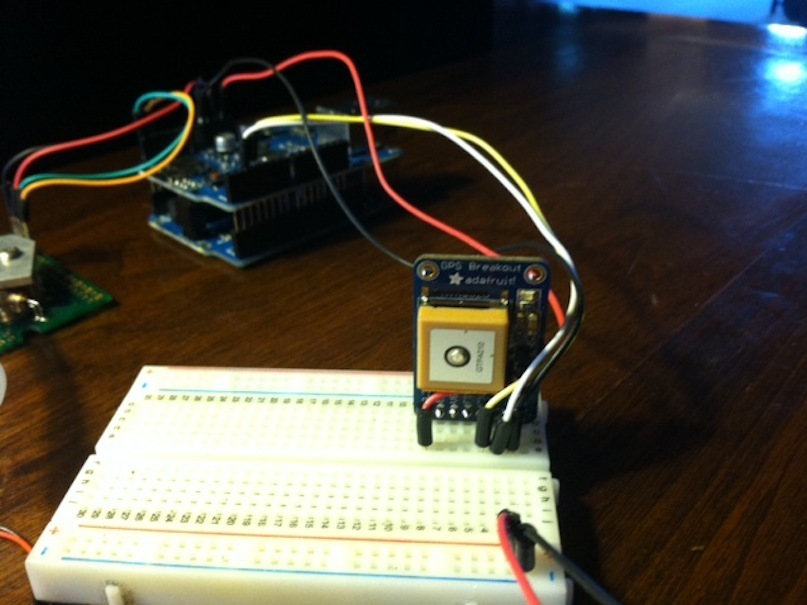
GPS
Carbon content measurements are accompanied by GPS coordinates
Utilized Adafruit Ultimate GPS Breakout – MTK3339 chipset. It is a user friendly and reliable device with a very accurate time base that comes with a great library to start taking position measurements right out of the box: http://www.adafruit.com/products/746. (See left image for Adafruit schematic)
The devices was powered with 5V supplied by a battery, but can also take 3.3V.
The position accuracy is 1.8m
Modified the accompanying Adafruit_GPS library to record nicely-parsed data, including: hour, minute, seconds, day, month, year, latitude degrees, latitude minutes, longitude degrees, longitude minutes
The module must be outdoors to reach a fixed status from satellites. The time until a fixed status is reached will vary depending on factors such as the degree of interference from structures.
Implemented a 1Hz update rate of GPRMC data in accordance with NMEA standard: http://www.teletype.com/pages/support/Do…. You can also update at 5Hz or 10Hz instead.
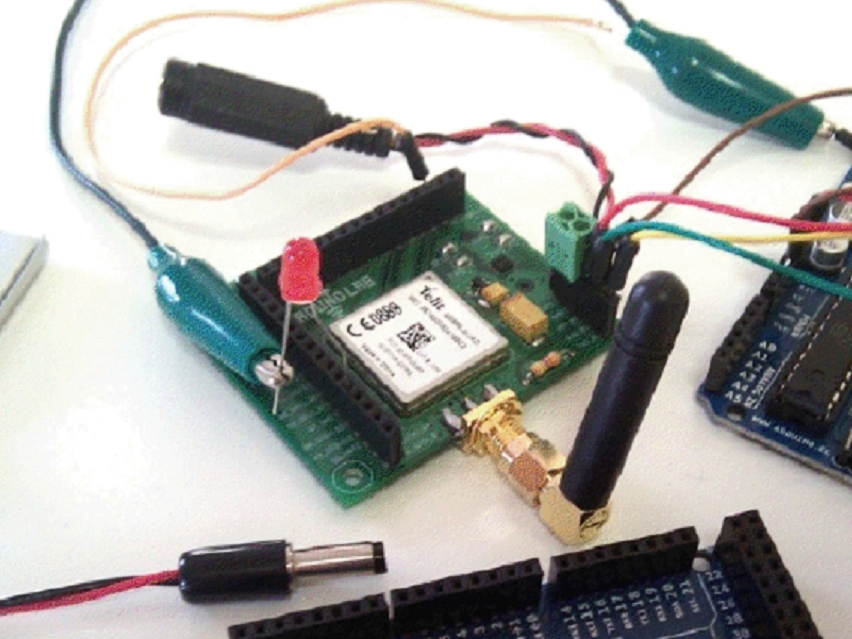
To send data over the cellular network a GSM/GPRS module is needed. We used one from Groundlab that had a Telit GE865, but you can find other modules on sparkfun and other places. You will also need a SIM card (make sure not to buy a micro SIM card) and a data plan. There are some companies that provide services specifically for M2M, but you should check your local cell companies.
The modules require power (specifically 3.7V from a battery for the Vbatt pin of the telit), ground, Rx, and Tx lines.
GPRS will allow you to interact with a webpage and use a request to send data to a server.
Groundlab provides an open source code that lets the Telit interact with the Arduino. We have a code available to the public on dropbox based on Groundlab’s with modified libraries as well that will send data over the web, but it is untested.
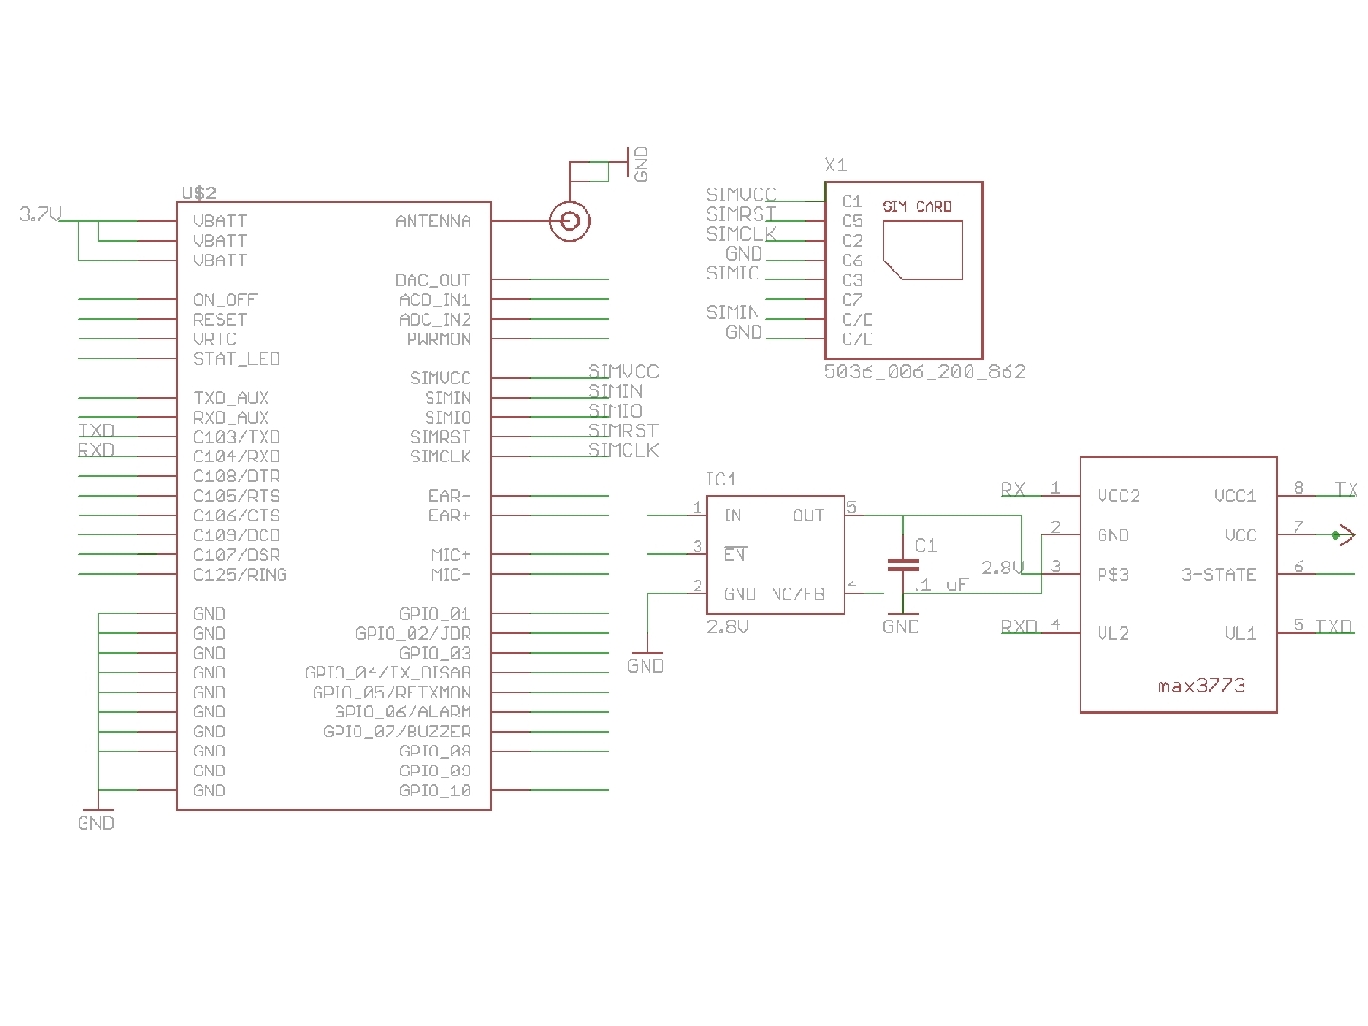
You may also decide that you want to make your own module. In that case, the primary components you’ll need are a Telit GE865, a LM3761,MAX3373, and a SIM card holder.
The LM3761 acts as a 2.8V voltage reference which you’ll need for the MAX3373.
The MAX3373 works a logic level shifter translating the 2.8V CMOS logic of the telit and the Arduino’s logic.
Use the schematic in the picture as the basis for your design. Groundlab’s schematic is also attached to the guide as a pdf for your reference as well.
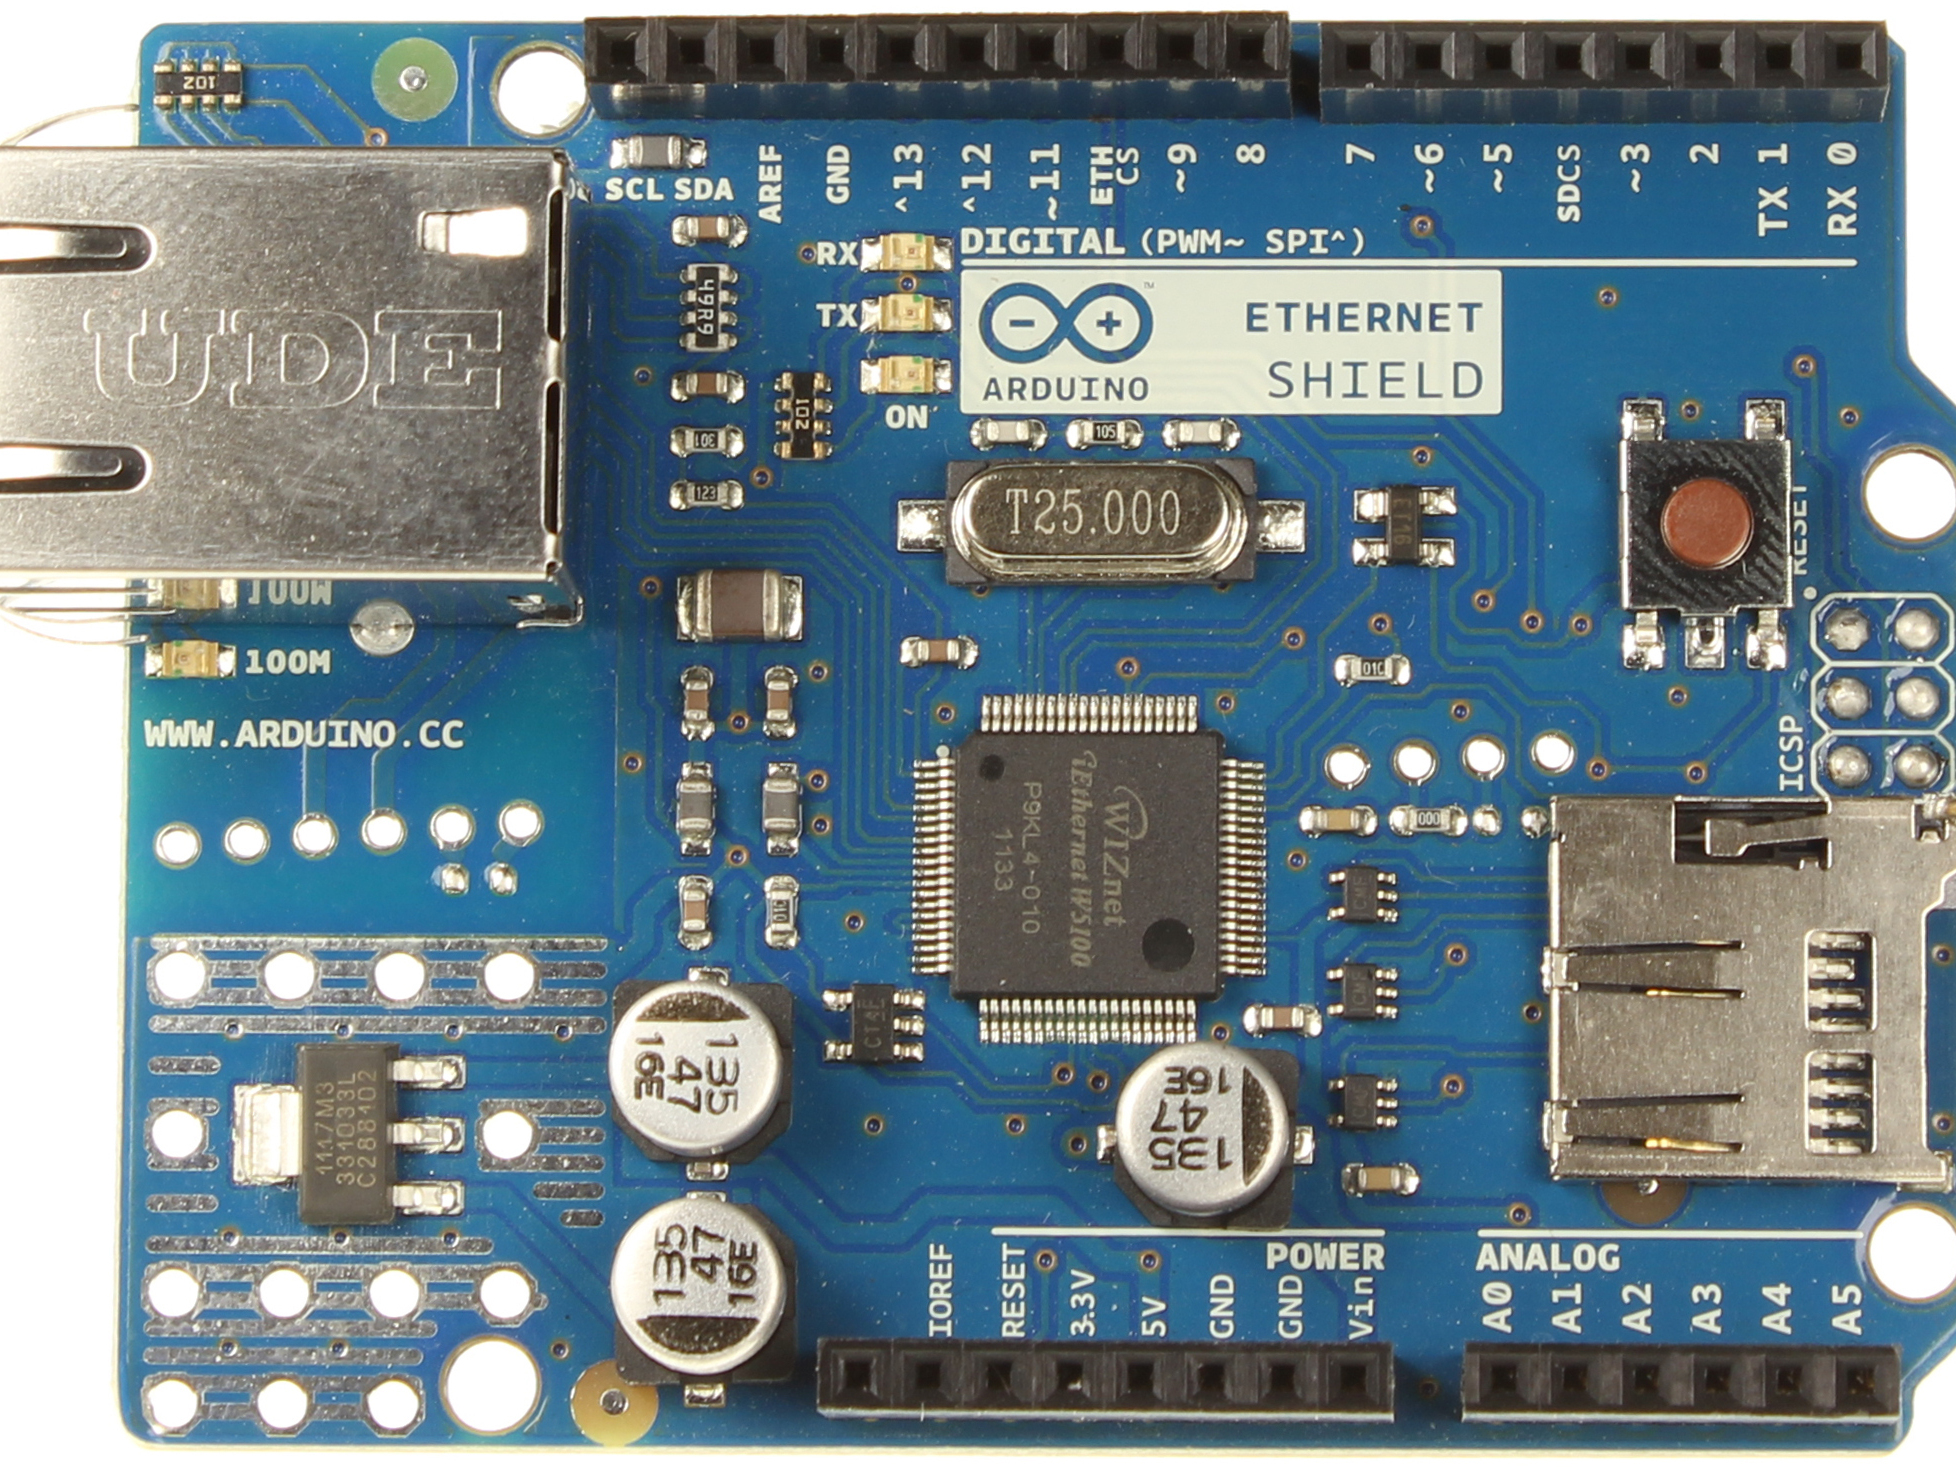
Due to difficulties with the Telit board, datalogging could not occur via GPRS at the present, so an ethernet shield was used in its to test putting data in a database via the internet.
PHP was placed online, so when it was called it would insert data into a database. The database was managed with MySQl.
The ethernet shield also contains a SD card slot that can be used for testing.
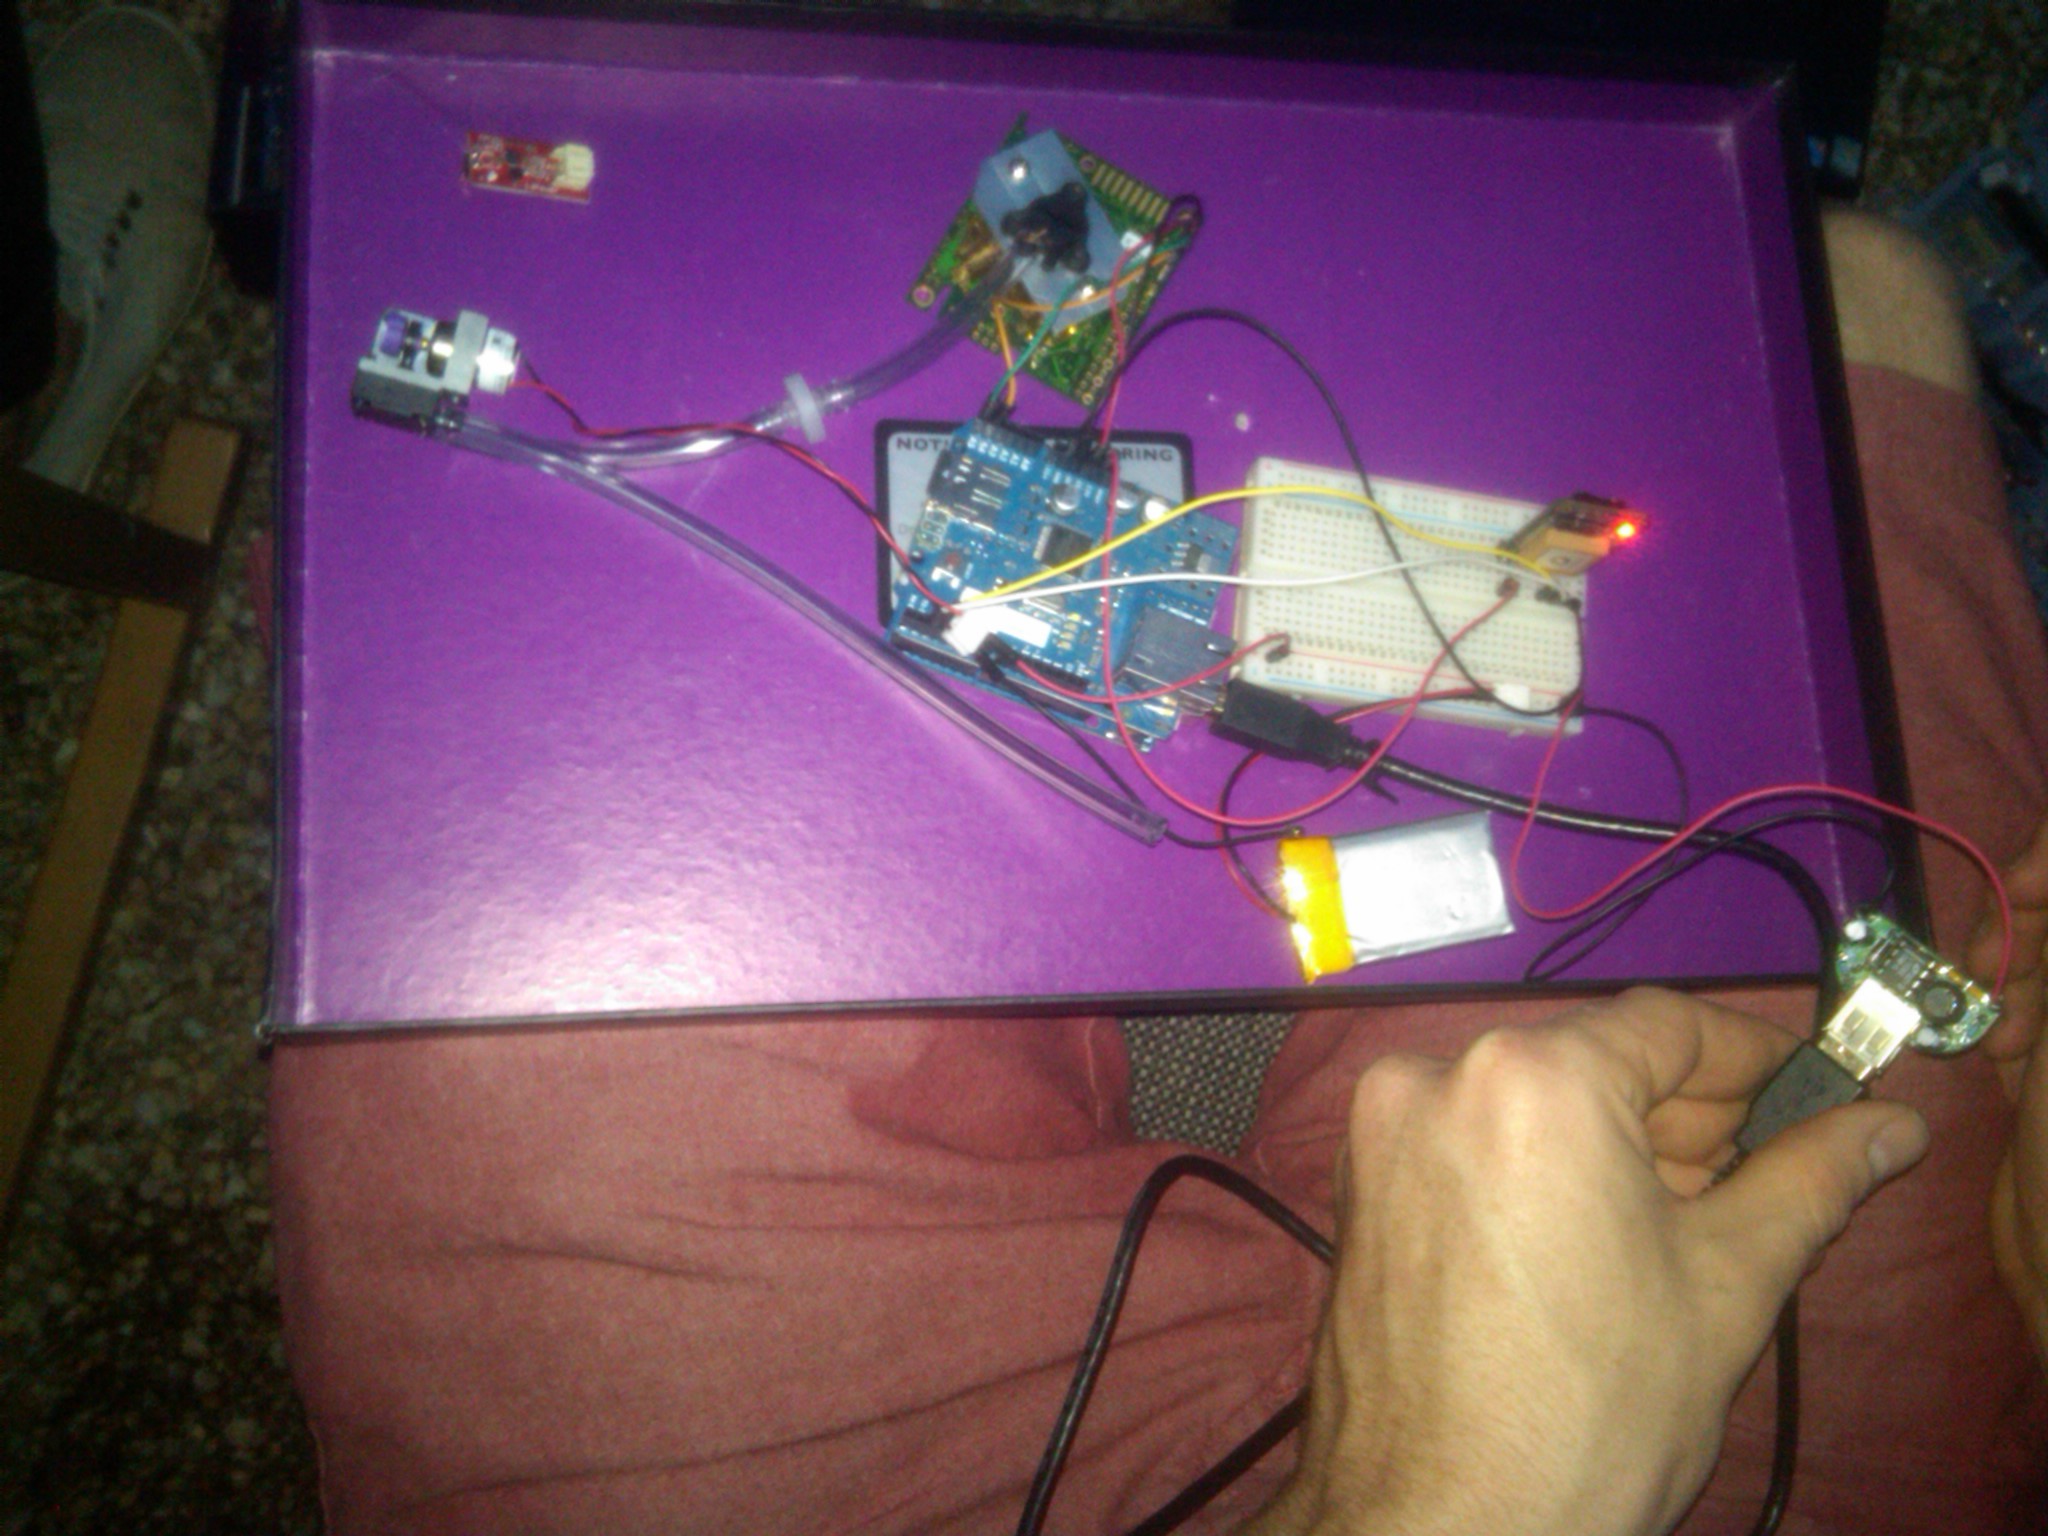
Now all the parts must come together. For this part an Arduino Uno was used for prototyping, but other Arduino based microcontrollers and boards will work fine as well.
All of the code can be found in the publicly available dropbox folder.
The ethernet shield is designed to sit on top of the Uno. The Co2 sensor’s data can be read back over an analog pin, and SoftwareSerial can be used to convert digital pins into Rx and Tx ones for communications.
The battery and dynamo can power the circuit independently of a computer. All of this can be placed in a package that sits on the front handle bars of a bike. For mobile datalogging, the Telit can be used if working or the SD card.
The next step is to test if the circuit works and will log the data.
Data Writing
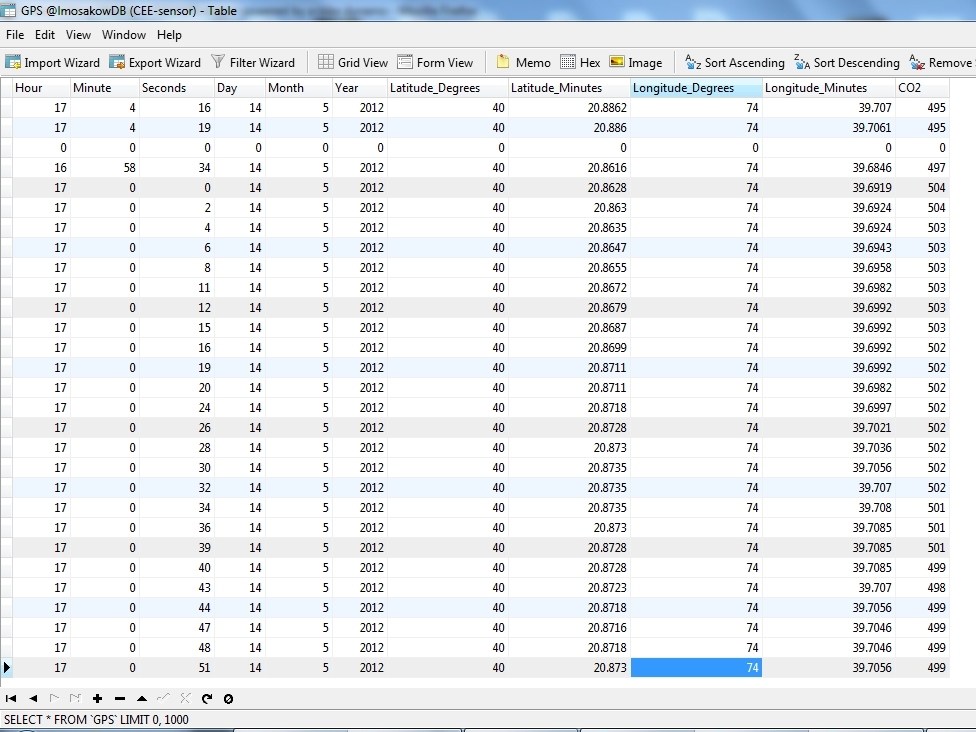
Two options for writing measured data: (default) upload to MySQL Database; (alternative) write to SD card if device cannot upload to the internet
Ideally the device uploads to the MySQL DB via GPRS. For prototyping purposes, the data was uploaded via the Arduino Shield via Ethernet connection
A standard datalogger method via the Arduino Shield was implemented to write the data to a SD card as a backup
Data was parsed to record the following every 2 seconds: hour, minute, seconds, day, month, year, latitude_degrees, latitude_minutes, longitude_degrees, longitude_minutes, CO2 content
All of the code can be found in the publicly available dropbox folder.