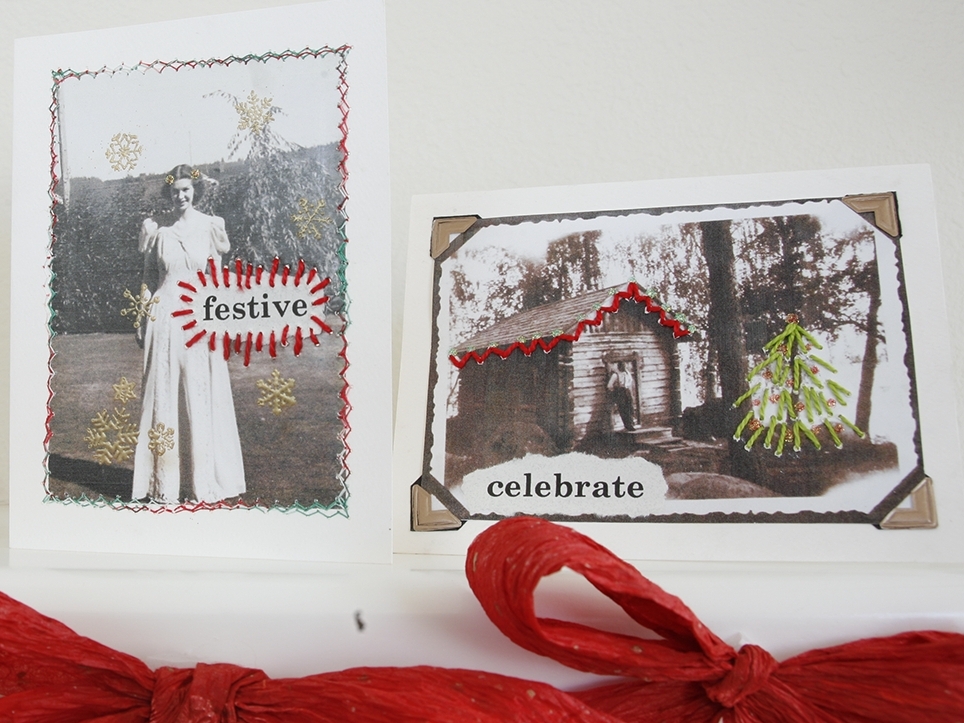
Here are 3 simple paper-crafting techniques you can combine and recombine to create gorgeous holiday cards. I’ve used machine sewing, heat embossing, and paper embroidery to make 2 very different sets of greetings. What other variations can you come up with?

What will the next generation of Make: look like? We’re inviting you to shape the future by investing in Make:. By becoming an investor, you help decide what’s next. The future of Make: is in your hands. Learn More.

Project Steps

MACHINE SEW

Adjust your machine.

When you use your sewing machine to sew on paper, it’s a good idea to switch to a heavy-duty needle and a teflon presser foot, if available. You may also need to loosen the tension a bit — make a few rows of stitches on a test card to see if this is the case.

Practice first.

Use your test card to sew a practice row before you work on an actual card. Some decorative stitches will need further tension adjustments, and you’ll want to know this before you start stitching on your handmade cards.

Tying off.

At the end of a seam, take the loose end of the thread on the front of the card and thread it onto a hand-sewing needle. Then sew it through to the back of the card, and tie the 2 ends in a double knot. Clip off the excess thread.

HEAT EMBOSS

Ink up and stamp.

Generously ink up a rubber stamp with embossing ink. This ink is often clear, so look for its sheen on the stamp to make sure you have enough coverage.

Then press the inked stamp firmly onto the greeting card.

Apply the powder.

Use a soft paintbrush to pick up the embossing powder from its container.

Hold the brush over the stamped design and tap it to scatter the powder.

Repeat this process until the stamped design has a generous coating of embossing powder.

Then tap the card over a wastebasket to remove any excess powder.

Heat.

Turn on the heat gun and hold it over the embossing powder, moving it constantly. After a few seconds, the powder will begin to melt and turn shiny.

Continue heating until all the powder has melted, then allow the embossing to cool before handling.

EMBROIDER

Plan and poke.

Decide what design to embroider on your card.

Open the card flat and place it on a padded surface.

Place a pattern or sketch over the front of the card and use a quilting pin to poke the holes you’ll need for embroidery through the cardstock.

Tape the ends.

Instead of knotting the floss at the beginning and end of stitching, secure the ends with small pieces of masking tape. They’ll lay flat and keep the card from getting bulky.

Stitch.

Follow your pre-punched holes to embroider on the card.

VINTAGE PHOTO CARDS

Find your image.

You can find lots of vintage images online. Try a group search on flickr.com for “vintage photographs.” But be sure to get the owner’s permission before using these images.

If you’re using your own old photographs for this project, I recommend that you scan them and print copies onto photographic paper instead of using originals.

Prepare to embellish.

Adhere the photo to the cardstock with a little glue stick before doing any sewing, stamping, or embroidery.

If you like, you can add some adhesive photo corners as well.

JUNK MAIL CARDS

Start collecting.

Save magazine subscription cards, postcards, and other cardstock junk mail.

Cut any silhouette you like — I’ve used an ornament motif here, but the possibilities are endless.

Glue the cutouts.

Adhere the cutouts to the card with a little glue stick before doing any sewing or embroidery.

If you want to heat-emboss the cutouts, do so before gluing them to the card.

Secure the back.

If you run machine stitching off the edge of the card, as I’ve done here, don’t worry about knotting the threads at the back of the card. Instead, just wrap both loose ends around to the back and secure them with a small piece of masking tape.

Finishing the cards.

Glue a coordinating piece of decorative paper to the inside front of the card, to cover up the back of your sewing and embroidery.

Write a quick message and you’re done!