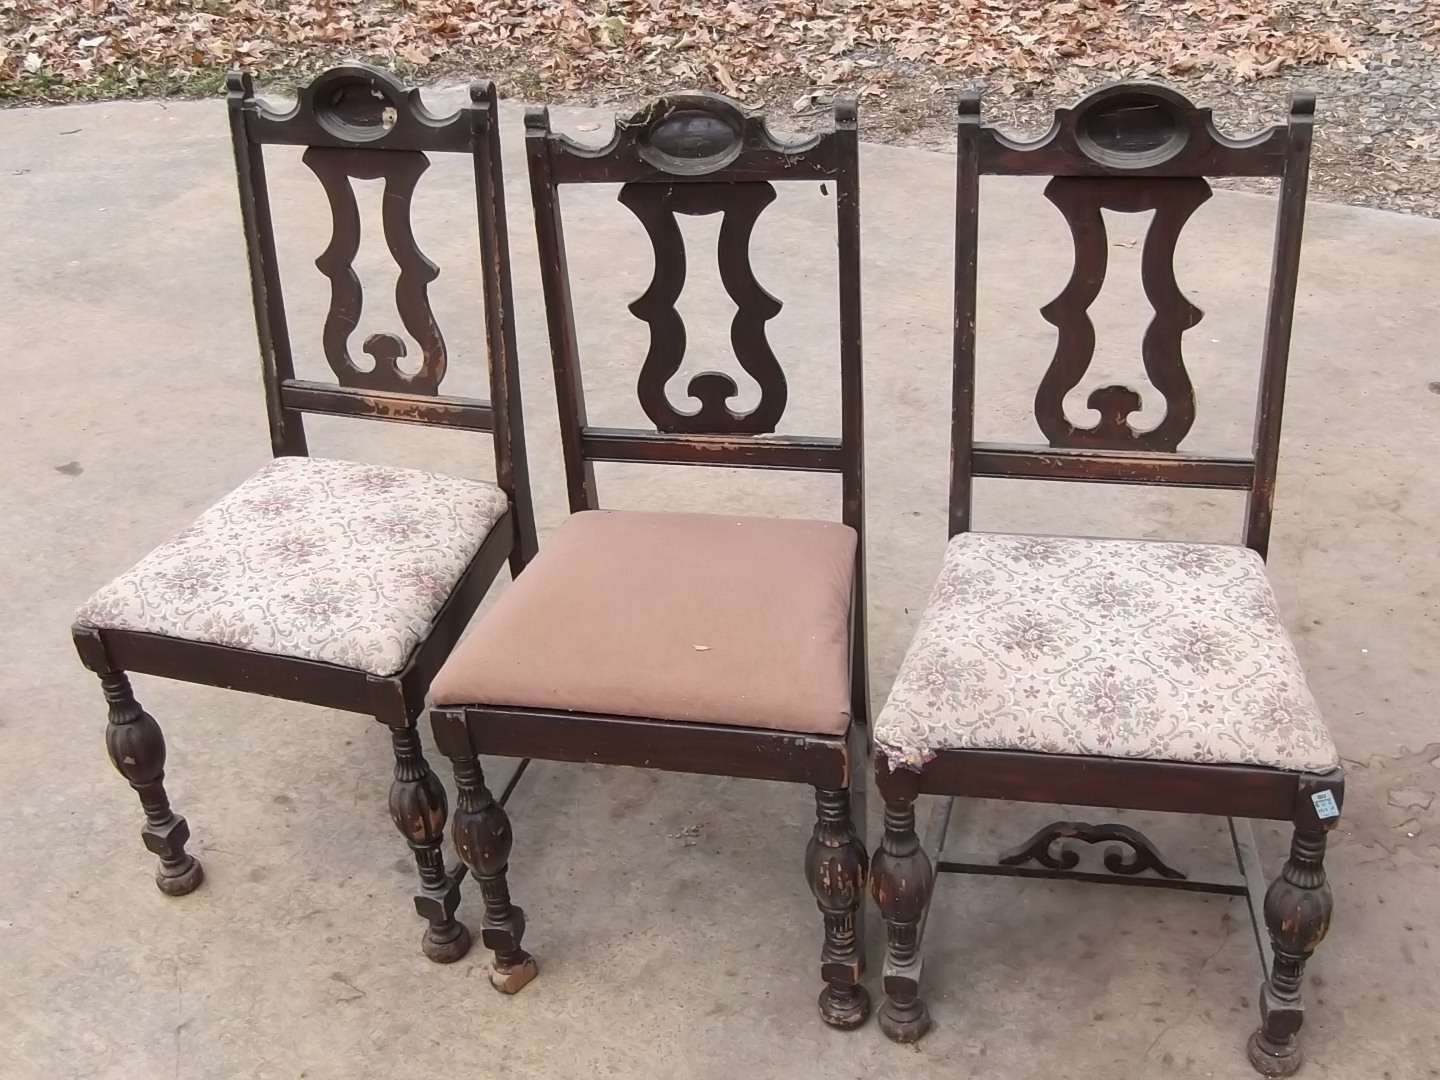
I couldn’t bear to trash a 70+ year old dining set that was in bad shape. There were too many nice pieces of wood begging to be used for something.

After sitting and looking at the broken, splitting, separated chair parts for several hours I decided to make flower pot and plant holders; “plant furniture.”

What will the next generation of Make: look like? We’re inviting you to shape the future by investing in Make:. By becoming an investor, you help decide what’s next. The future of Make: is in your hands. Learn More.

Project Steps

Here is what we have to work with. Notice the nice shapes of the backs and legs.

We begin disassembly by removing the seats, which are held on by a wood screw through the angle braces at the corners. The chair parts are, for the most part, held together by glued joints with wooden dowels. Most of the joints are loose and can be separated by a few taps with a hammer.

Here we see parts from two chair backs. Why not put them together? See step 3.

To make the “Mirror Pot Chair” all we need to do is:

1. Re-glue any loose joints on the back section with wood glue;

2. Re-aim the side pieces since the front of the chair was wider than the back;

3. Clamp the two backs together;

4. Sand or cut the angles on the corner braces to fit the clamped parts.

Use the old wood screws from the corner braces to fasten the braces in all four corners. Or if you prefer, use sheetrock screws with Phillips heads. You now have a solid assembly. Sand, paint and trim. Cut a scrap of plywood to fit the pot seat and mark the cut line for the size of pot to be inserted.

Cut the opening in the seat as marked. Fasten the seat with screws up from the bottom through the existing holes or drill screw holes if new wood was used for corner braces. Add small casters to the legs for easy movement of your “plant chair”. Now on to Step 6 for the next piece of plant furniture,

We have used the back and sides of two chairs. Now let’s use the front legs and side pieces to make a table. The side pieces will again need re-aligning and the corner braces will require re-fitting. Use glue and screws to fasten everything together. Add a scrap of plywood for a top. Sand, paint and trim.

For the next piece, a change of thought.

How about we make a wheelbarrow from the master chair? The arms will be the handles. The arm supports will be the axle supports. We’ll cut off the round legs for a lower profile and use the front wheel off my now-20-year-old granddaughter’s stroller from when she was a baby.

The wheelbarrow requires more cutting and fitting than the previous two items. In order for the handles to be sturdy enough for real lifting, the top corners of the legs need to be notched to the dimension of the handles, then fastened in all directions with glue and screws.

Two small triangle-shaped pieces of plywood are needed for the front corners. Two metal “T” brackets with slots for the axle are screwed to the axle supports.

Now we need to add the platform and the front. A scrap of plywood and a portion of a chair back will do the job. Edging the platform with ¾” x 1½” strips gives it a sturdier look.

Next we make a tray table. We shortened the backs of two chairs and fastened them together at an angle, then fitted a piece of plywood across the top for the tray.

For the fifth plant holder we will make a circular table. It turns out that the curvature of the scroll pieces from the chair backs fits the curvature of the front legs. As a trial fit we mounted the legs to a scrap of plywood to get the proper spacing for the scrolls between the legs. Then we cut a circle of plywood for the bottom and top pieces.

Next we used quick-setting epoxy to fasten the scrolls to the legs. A small caster was inserted into a hole drilled in each outer leg. Half-inch white plastic tubing was split lengthwise and slipped over the top edge for trim.

Next we made a sled using two back legs for the runners, part of a chair back for the sled back and parts of two front legs for the side rails. Trial-and-error fitting of the various parts eventually reveals a good layout. A scrap of quarter-inch plywood makes the bottom.

Since the runners are curved, the plywood needs to be screwed down in several places along the edges to fit the curve. Once the back is in place, the side rails can be fitted. The position of the front end of the rail foot is marked on the bottom in order to know where to drill a hole for the hold-down screw. Casters were added for easy movement.

Several coats of good enamel, some pinstriping and a pull rope finish this one.

With the few remaining parts from the six chairs, we make a small round table. By fastening the back legs at a right angle to the front legs, we have a base for an 18″ round top.

Some paint, trim stripes, and a flower pot and we are done.

Here we are, all seven “plant furniture” pieces.