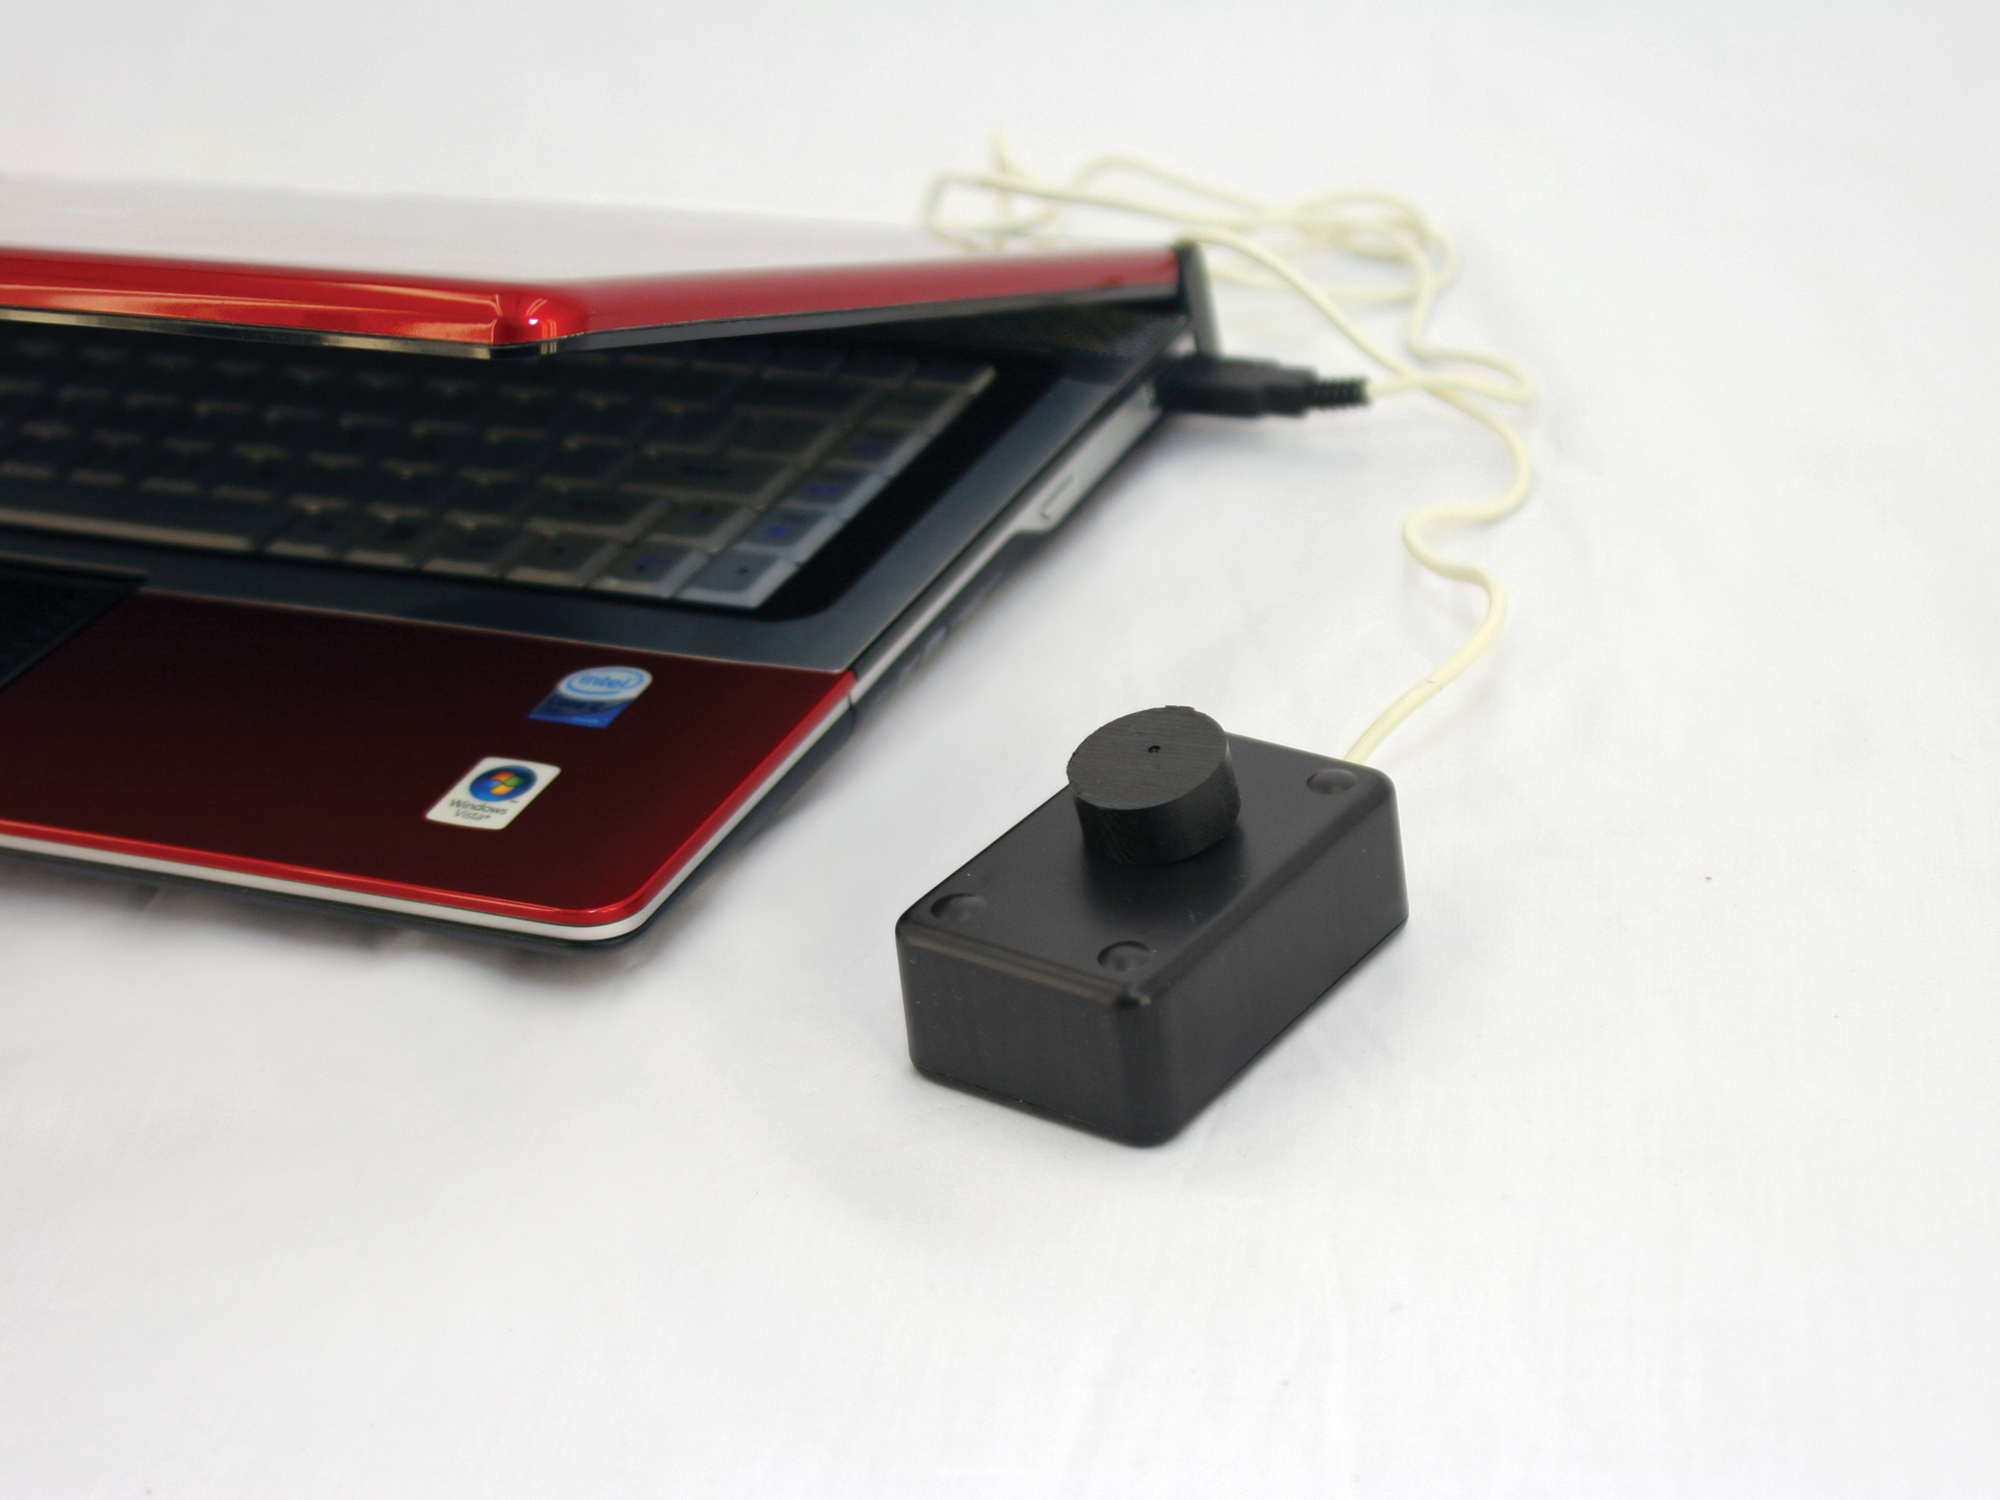
The Griffin PowerMate is an assignable USB knob controller that you can set up for many purposes, such as browsing Google Earth, scrolling web pages, controlling volume, and so on. I took a look at some YouTube videos of it in use and thought it was literally a scroll mouse on its side with a fancy knob and some software. A few Googles later, and I found a post on the bit-tech.net forums about a guy who made his own from a VCR spindle and an old mouse. I fancied a bit of that, so away I went, and this is what I came up with.

I call it the PowerFake. It’s made from an old PS/2 mouse, a project box, and an old R/C car wheel. The basic idea is to liberate the mouse’s scroll wheel encoder from its circuit board, reconnect it using wires, and set it up to run off of the knob of your choice.

What will the next generation of Make: look like? We’re inviting you to shape the future by investing in Make:. By becoming an investor, you help decide what’s next. The future of Make: is in your hands. Learn More.

Project Steps

Gut the mouse.

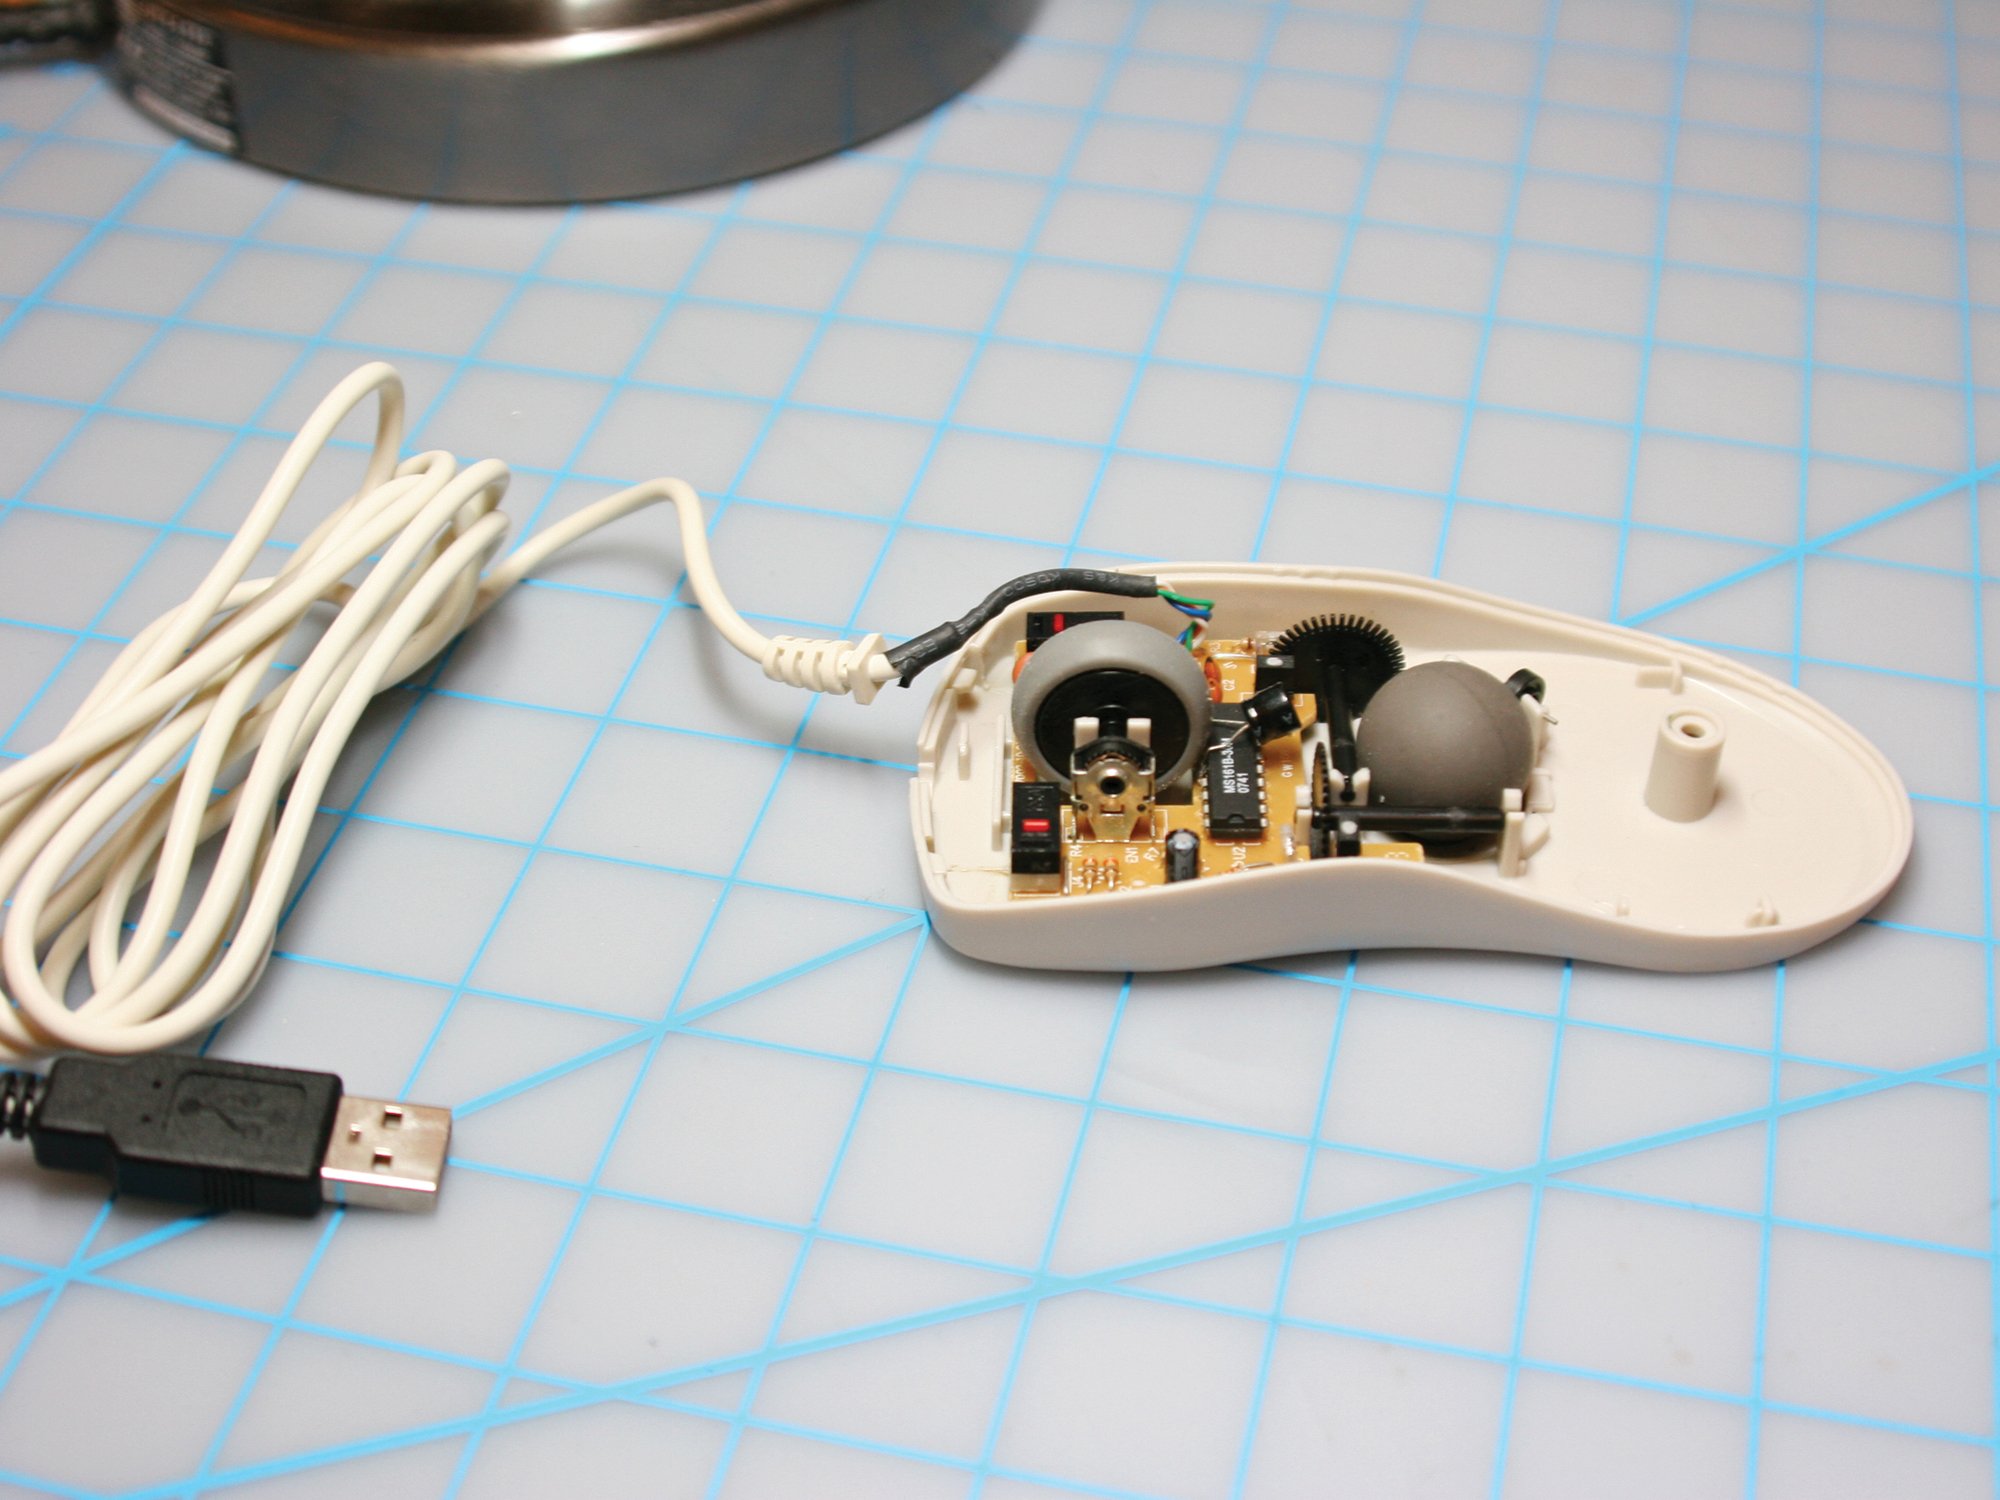
Time to rip apart your beloved mouse. Usually these just come apart with one screw, but maybe your manufacturer has decided to be a bit sneaky and put screws under stickers as a way of telling if the warranty has been voided.

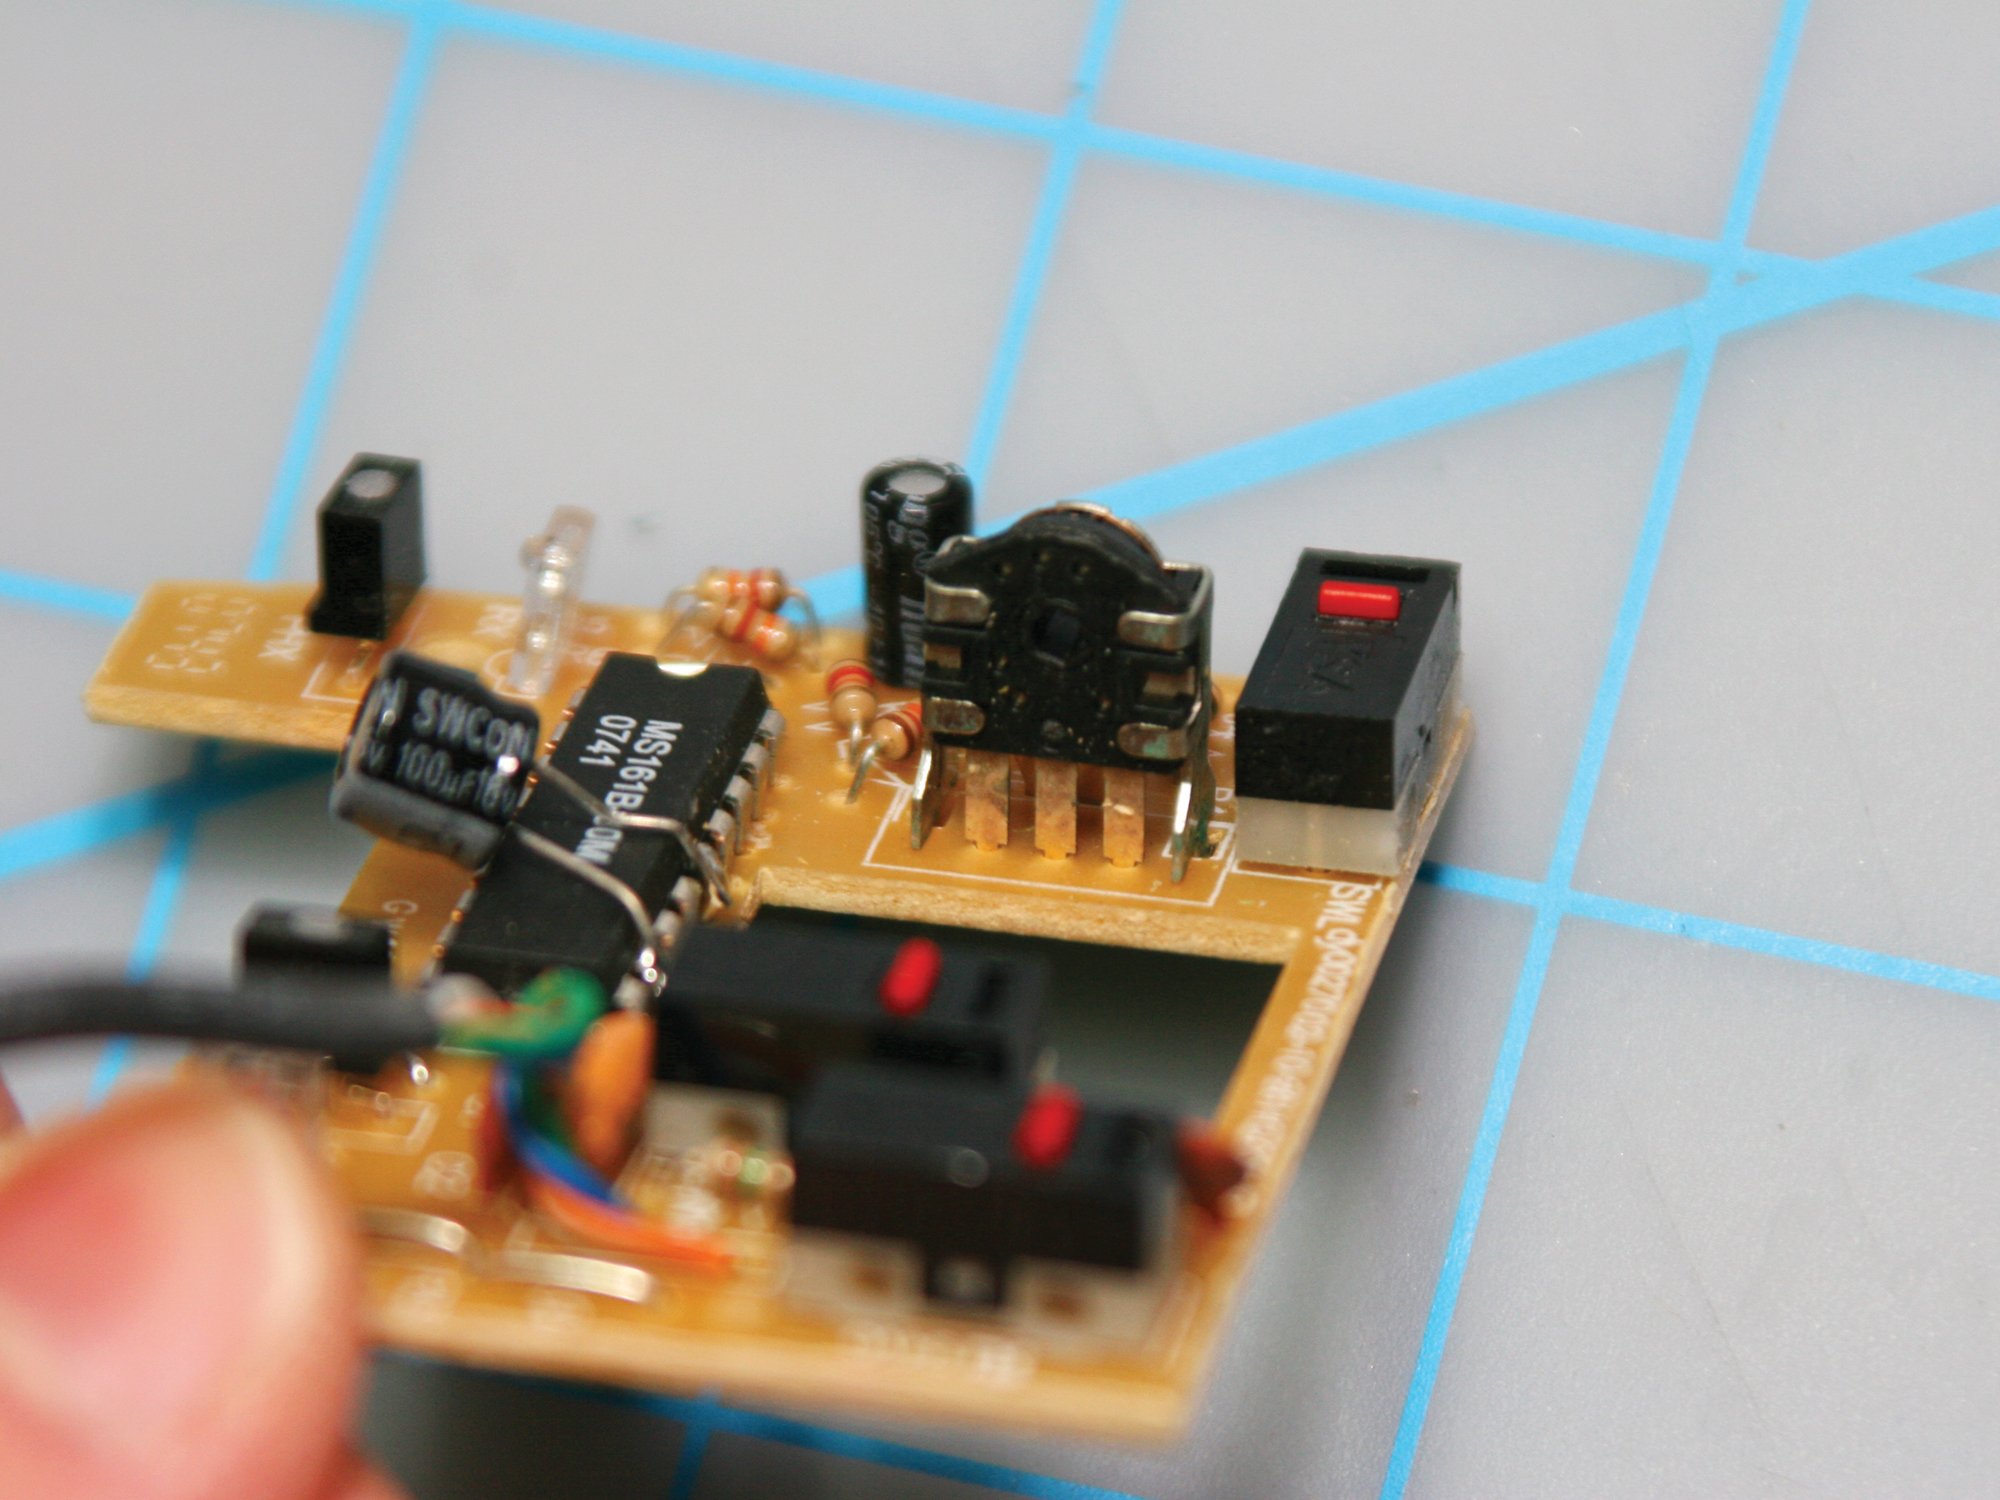
Here’s where you’ll find out if you have a rotary encoder or an IR transmitter as a scroller. A rotary encoder holds the scroll wheel’s axle and has 3 contacts below, whereas with an IR transmitter, the input probably comes from some type of sensors that the ball feeds.

If you have a rotary encoder, well done and carry on. If you have an IR transmitter (as is the case with cheapo mice) then it’s no good for this. Try a different mouse.

Pull out the mouse’s scroll wheel from the hole that it sits in and throw it away.

Remove and rewire the encoder.

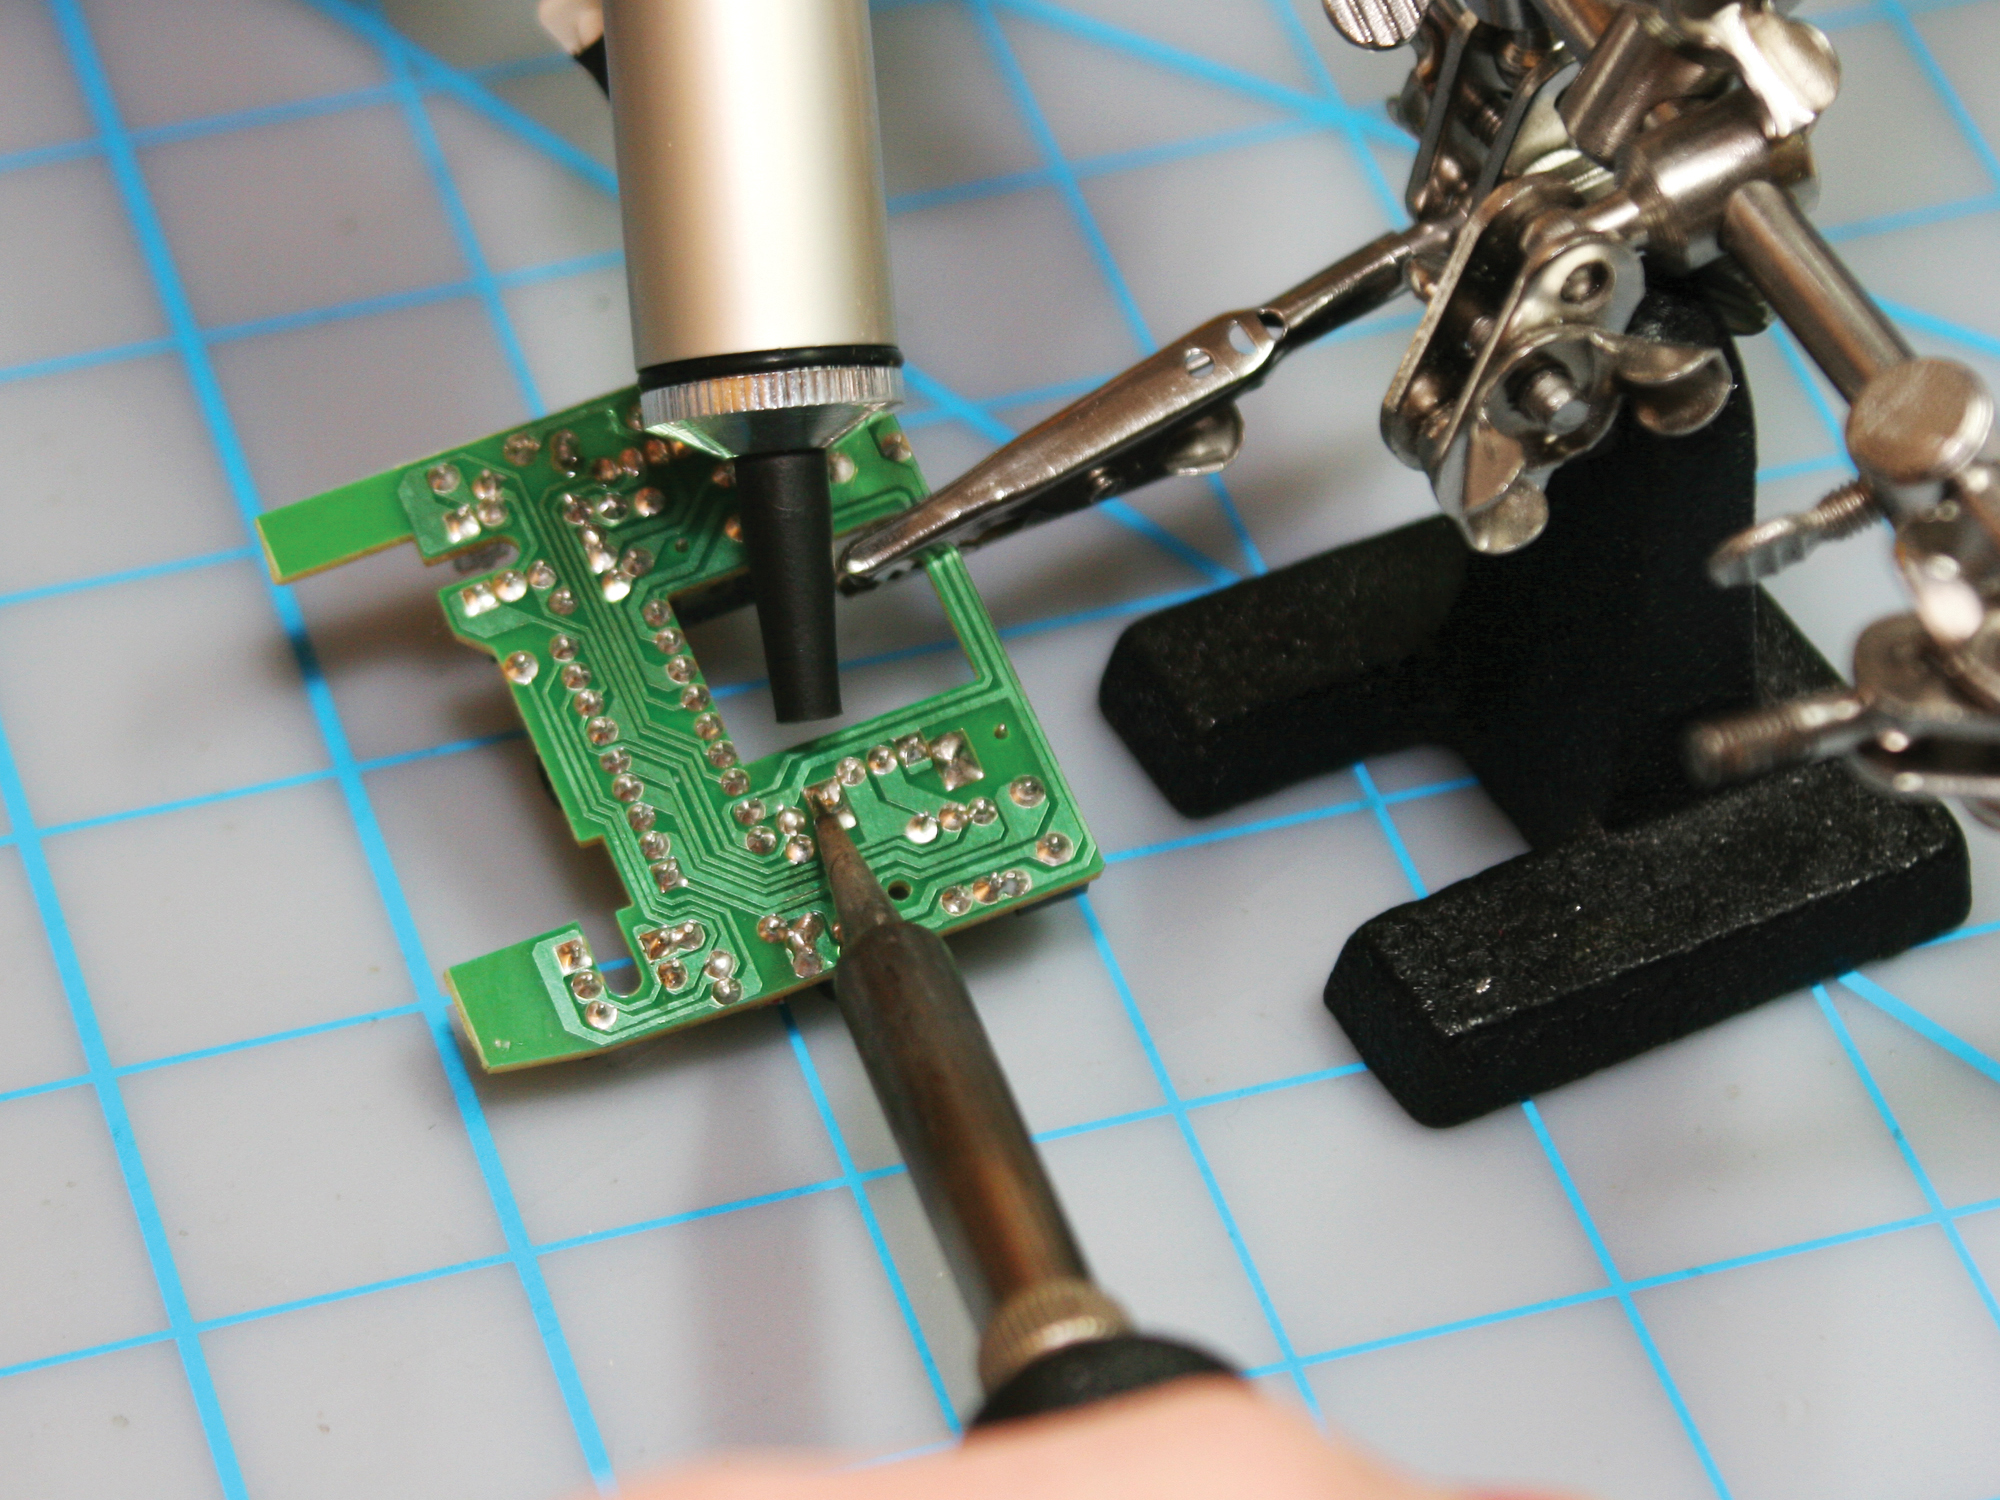
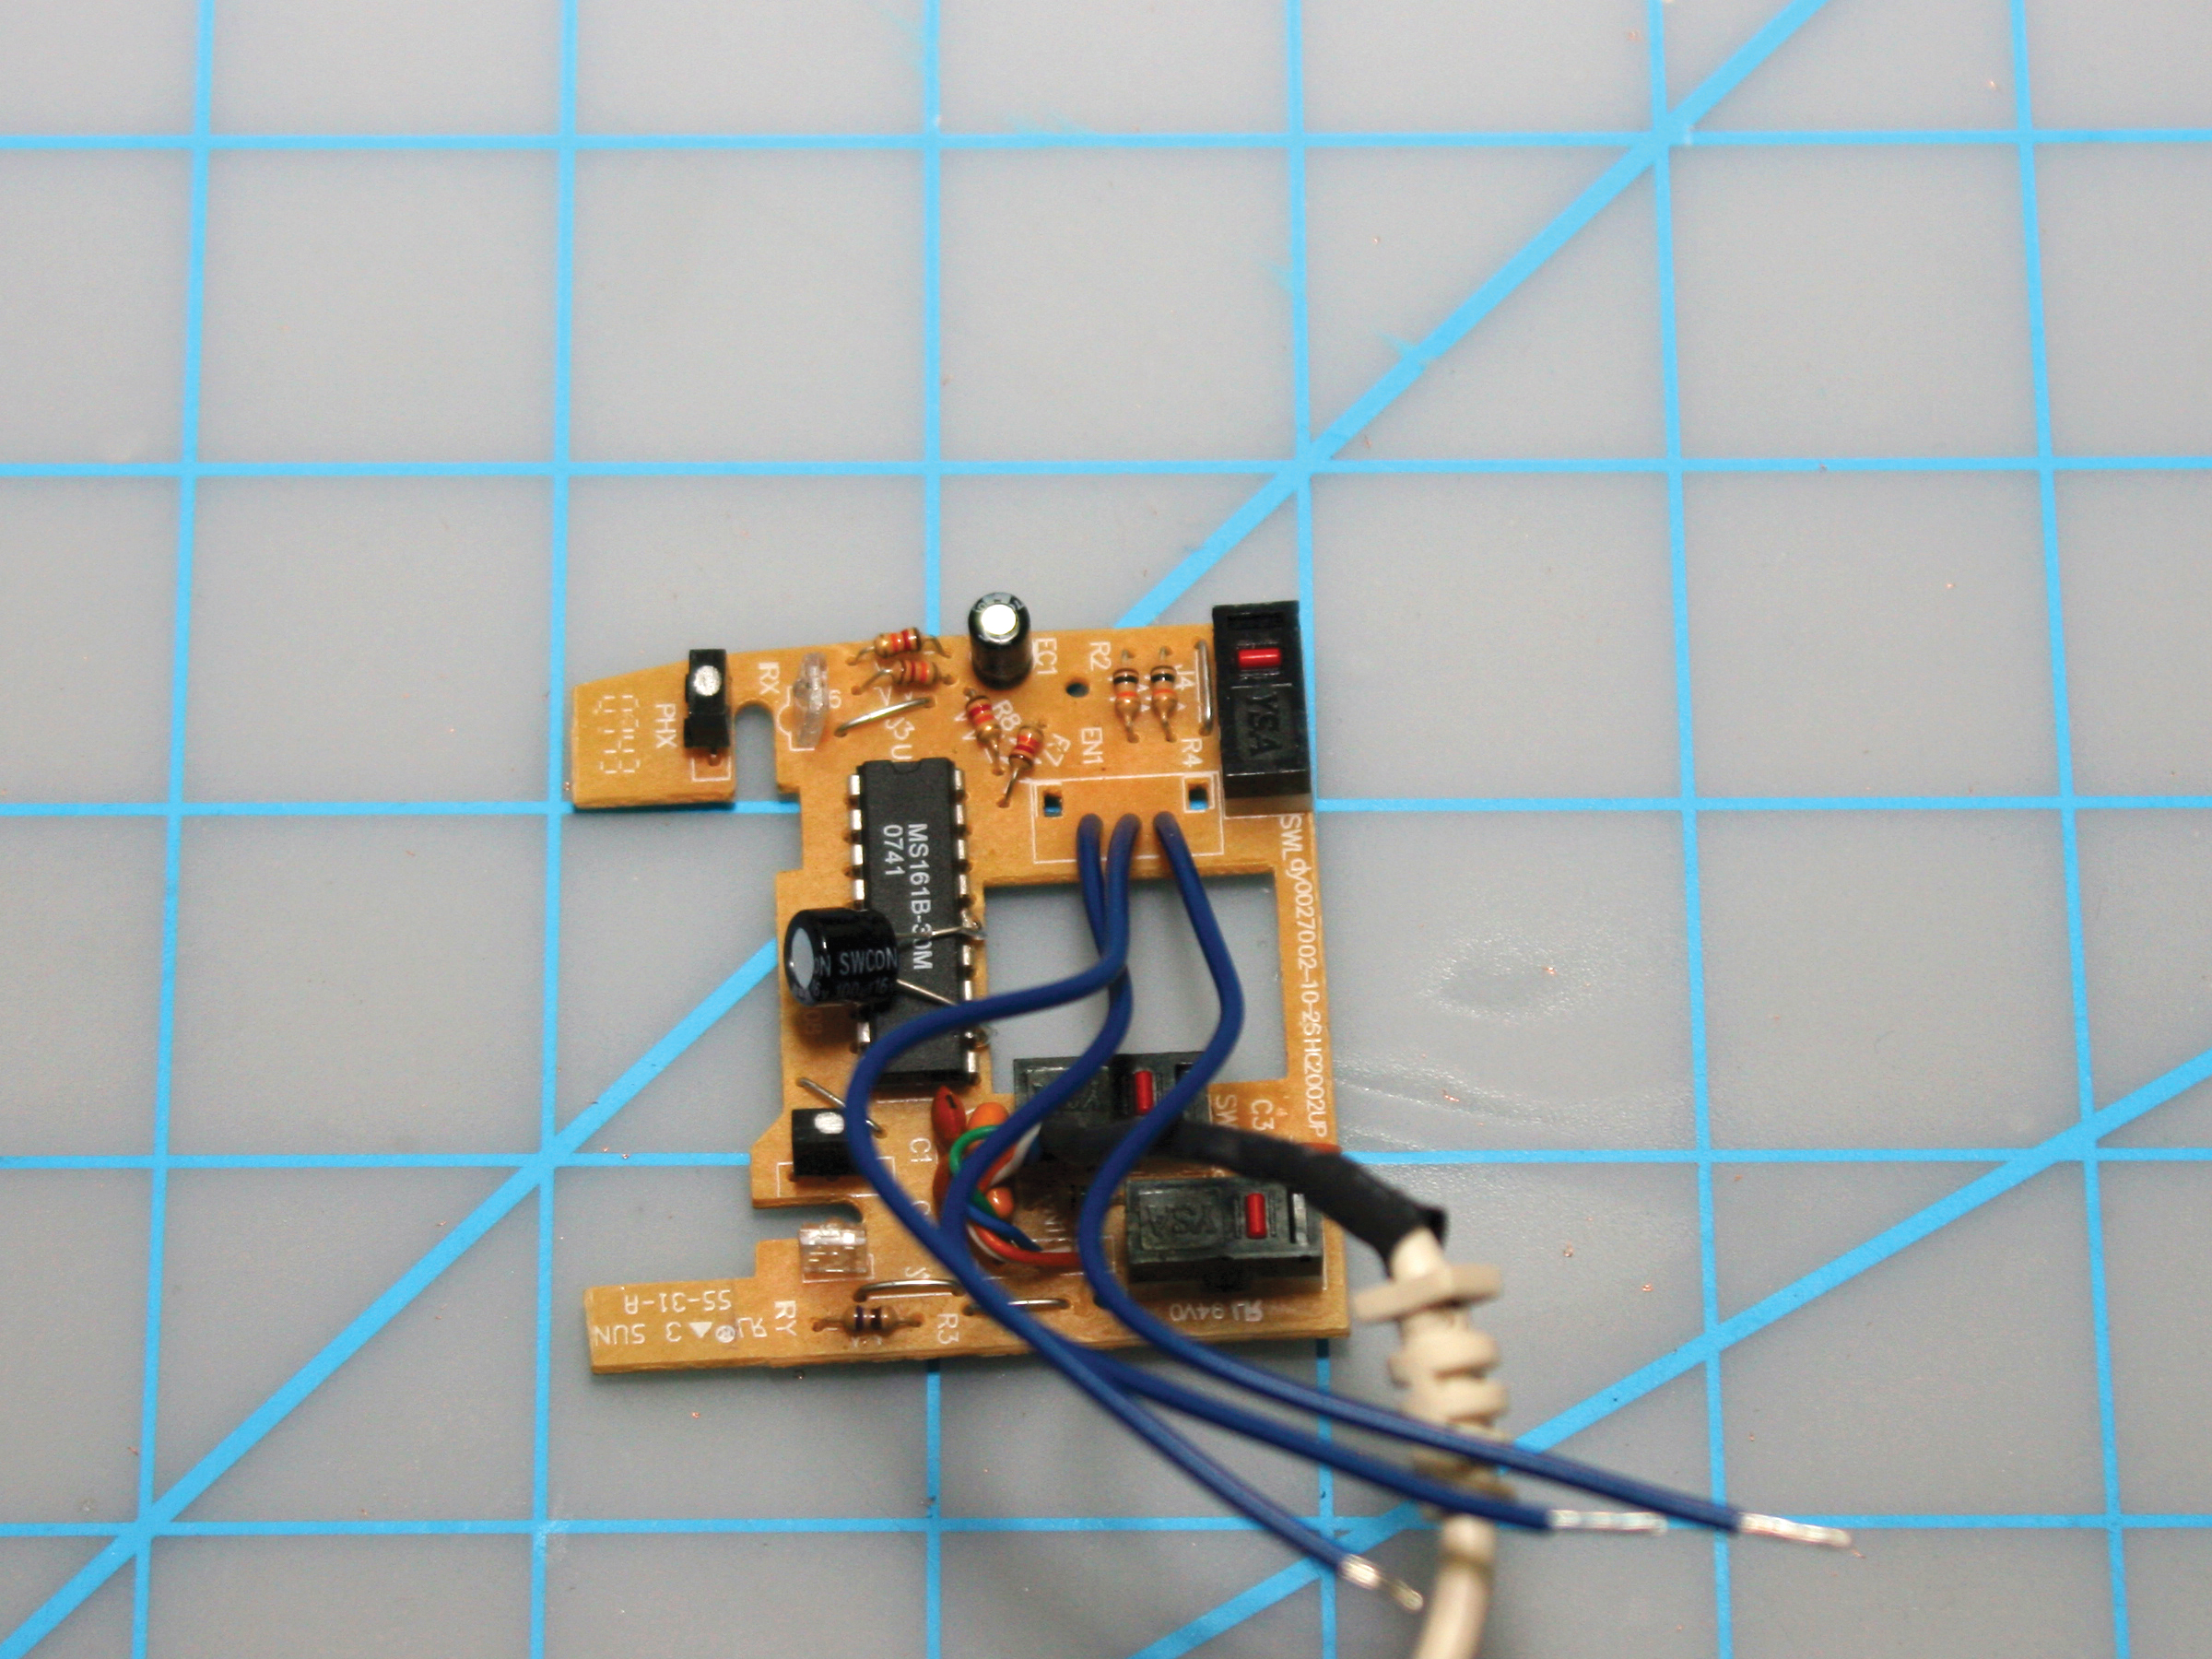
Flip over the board and find the holes where the rotary encoder is soldered in (there should be 3 in a row). Note which way the encoder points, or you’ll solder it backward and it won’t work properly.

Heat the solder points with your iron and use either solder wick or a desoldering pump to pull off the solder from the board, releasing the encoder.

Solder wires into the 3 encoder pin holes on the circuit board. These will need to be about 3″–6″ long depending on your project box size.

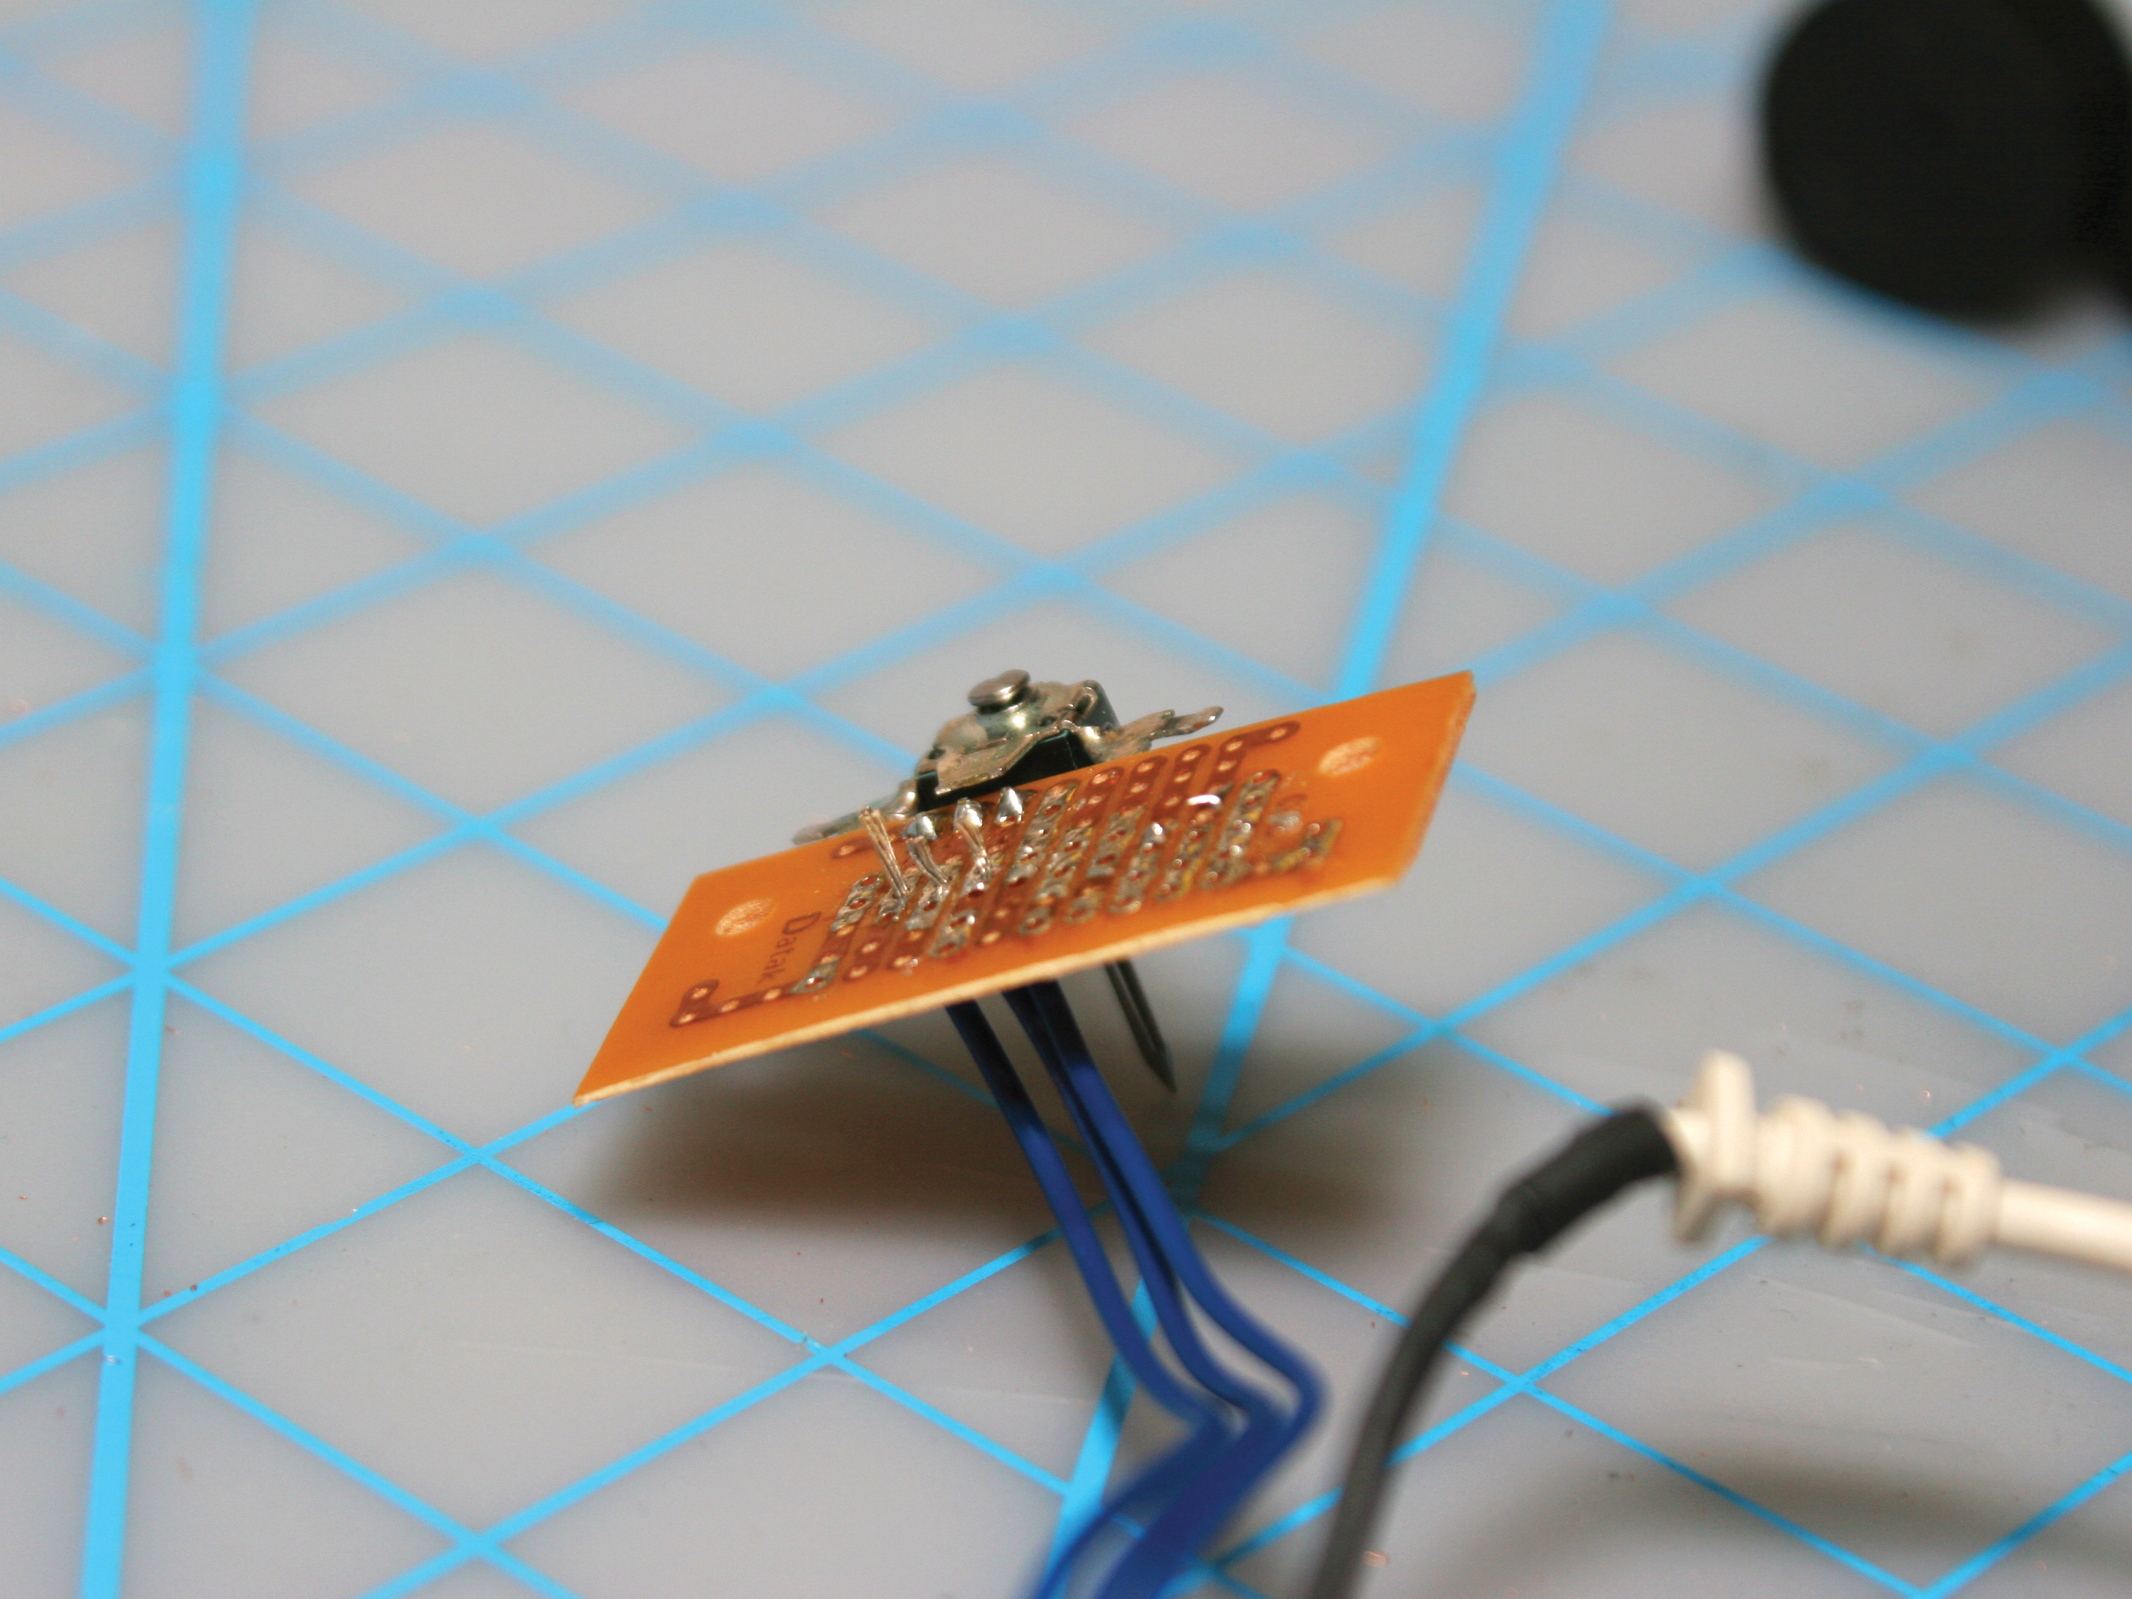
You can either solder the other ends of the wires directly onto the corresponding pins of the encoder, or you can use a piece of stripboard to connect the pins to the wires, as I did; this is a bit more durable.

To get the encoder to fit neatly along the edge of my stripboard so that the new axle could face upward, I bent apart the 2 metal tabs that secured each end of the package to the original board.

Glue the rod in.

Find a metal rod that fits through the center of your encoder, such as a thin nail or a large paperclip.

Cut your rod to about 3″. It needs to be long enough to fit through the encoder, through one side of the project box, and a good way into the car wheel.

Put a small dab of super glue onto the rod and slide it into the rotary encoder’s center hole.

Mount the encoder.

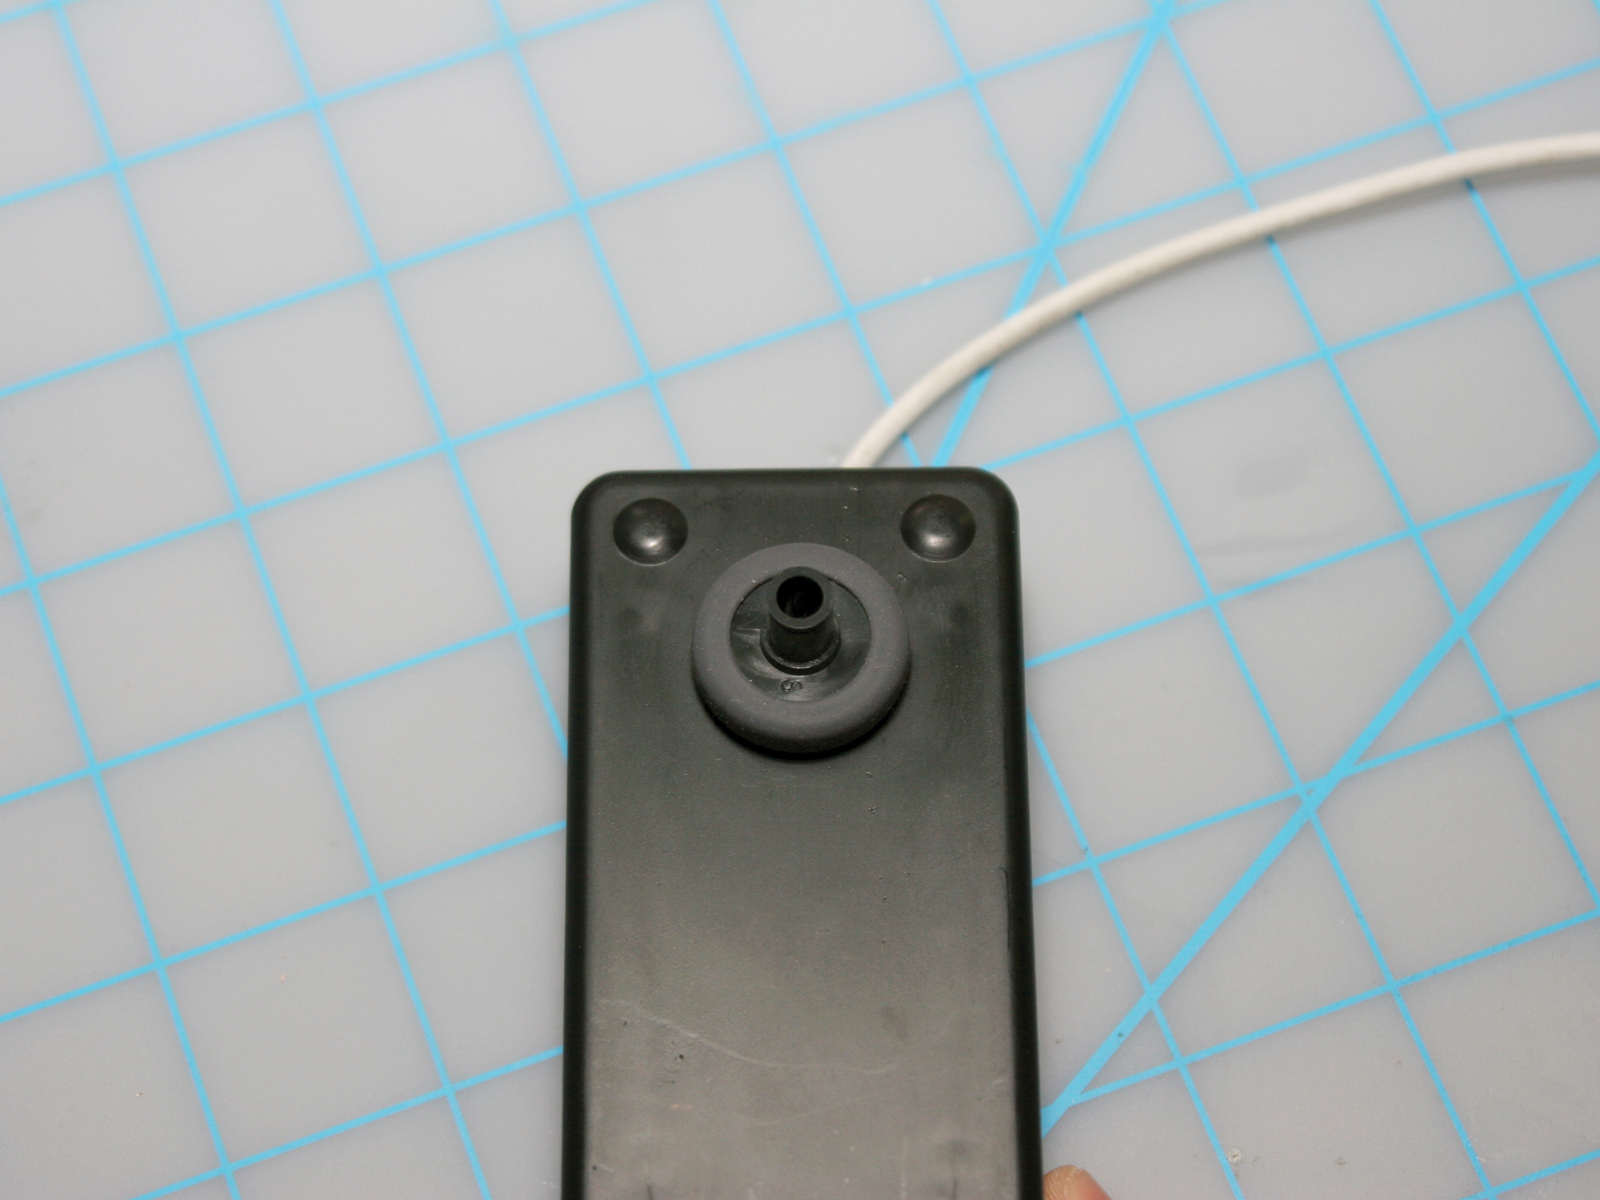
Drill a hole in your project box that’s the same diameter as your metal rod, and stick your rod through it.

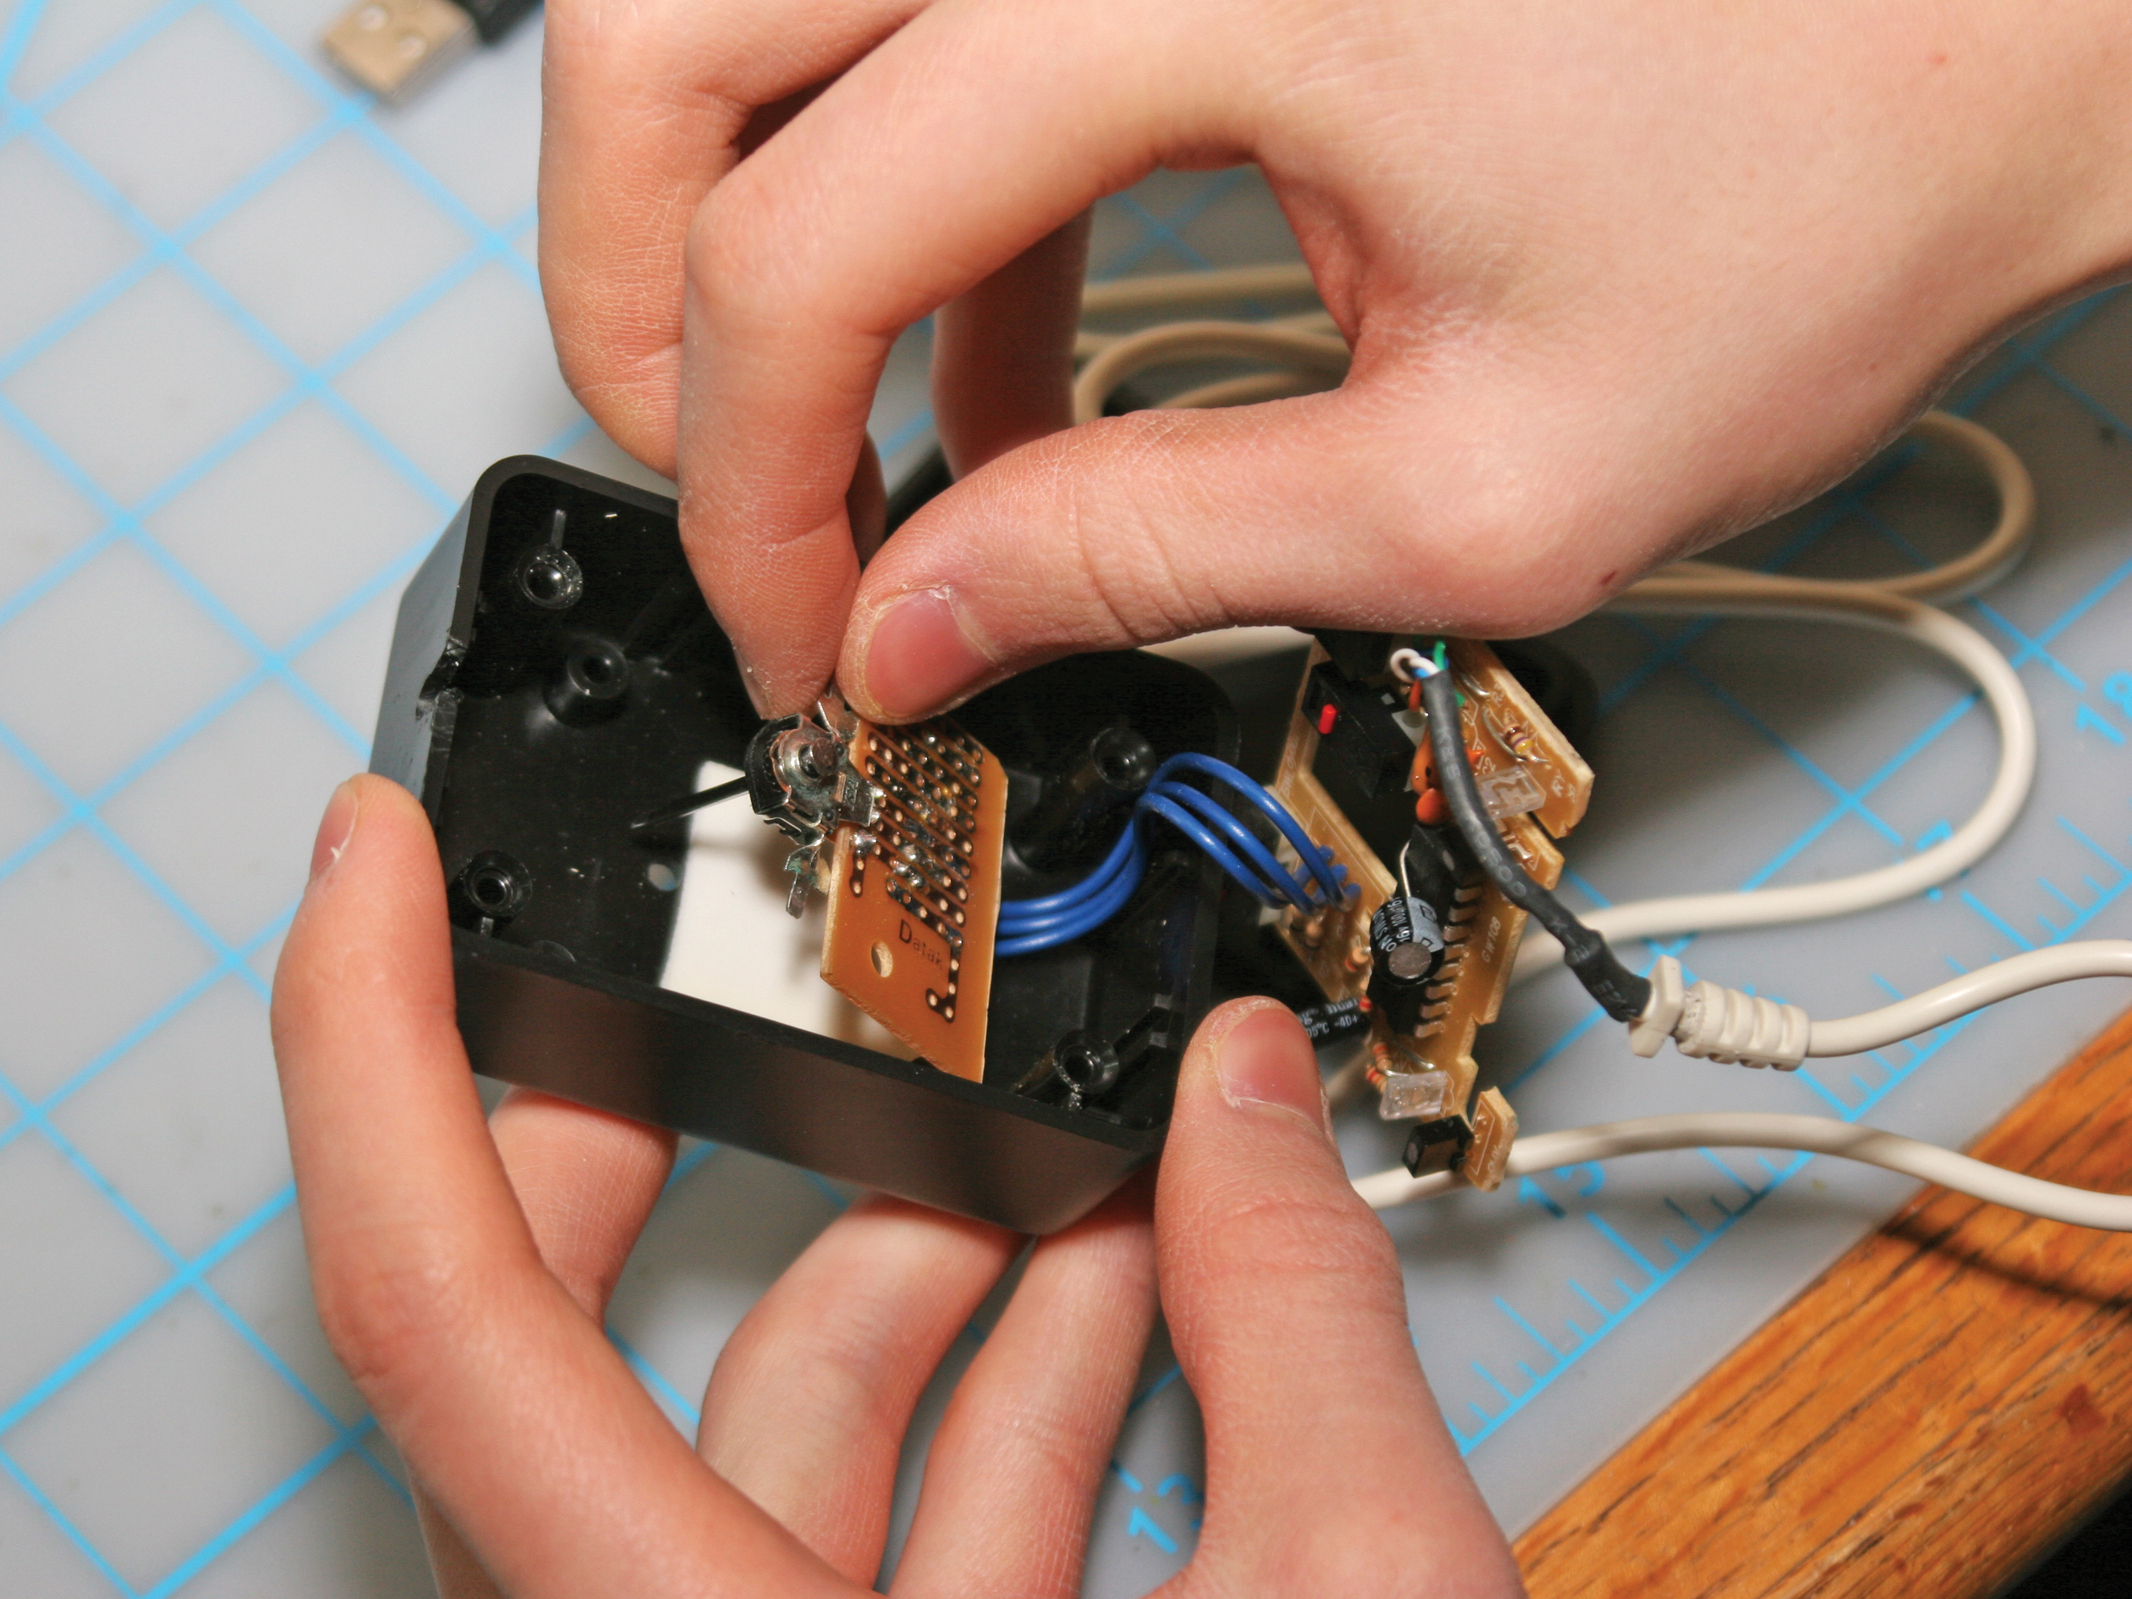
Now mount your encoder to the inside of your project box. I stuck it down with double-sided tape, then went over it with regular tape.

Mount the wheel and the board.

Time to rip the wheel from your R/C car. If it comes with a gear in it, as mine did, try leaving it in to act as a spacer for your wheel. I simply used super glue to mount my wheel.

If your wheel’s hole is wider than the rod, roll up some paper to pad out the hole, or gum it up with Blu-Tack poster putty.

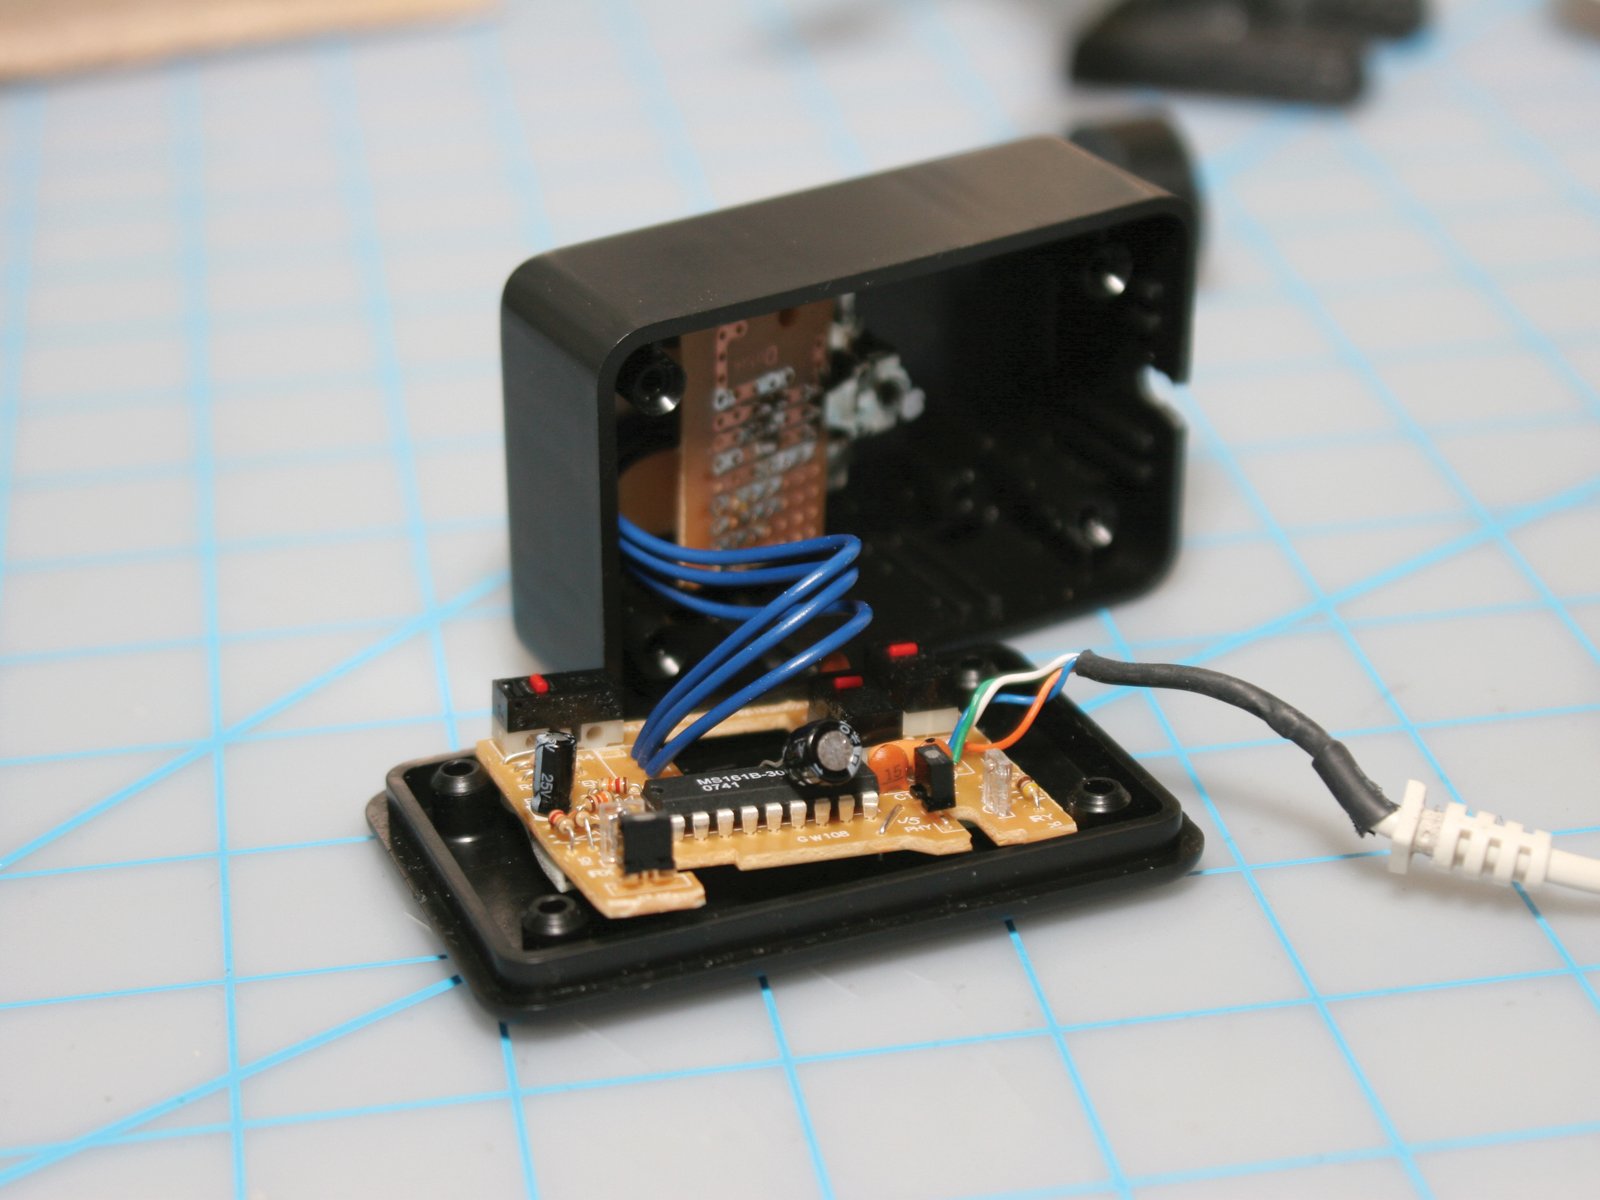
Tape the circuit board to the bottom of the project box and drill a hole in the side of the case for the cable to escape through. Then clip and/or screw the 2 halves of the box together and test it!

Test it.

Plug your new scroll wheel into your computer and give it a whirl. I use a USB mouse with my PC, so the PS/2 port was free. If you used a PS/2 mouse like I did, you’ll have to reboot your PC after plugging it in for the BIOS to recognize it.

Fire up something scrollable, be it your Winamp library, your browser, or a massive e-book, and give it a test. If you find it’s too sensitive or not sensitive enough, then go into your Control Panel and adjust your mouse properties, specifically, how many lines you scroll with 1 turn of the wheel.

As an added bonus, see if your wheel has enough momentum to scroll under its own weight with a flick of the wrist, like mine does.

Take it a step further.

I wanted to emulate the PowerMate as much as possible. A little Googling turned up an awesome piece of software called Volumouse. It lets you adjust your PC’s volume by holding a keyboard button and scrolling up or down. It will also resize windows and change brightness, all according to the conditions you give it.

See a video of the PowerFake controlling Volumouse at https://makezine.com/go/diyscrollwheel.

(This project was originally published on Instructables.)

Conclusion

This project first appeared in MAKE Volume 17.

Related Posts on Make: Online:

Weekend Project: The PowerFake

http://blog.makezine.com/archive/2009/04...

Guitar Game Controller Mods

http://blog.makezine.com/archive/2009/04...