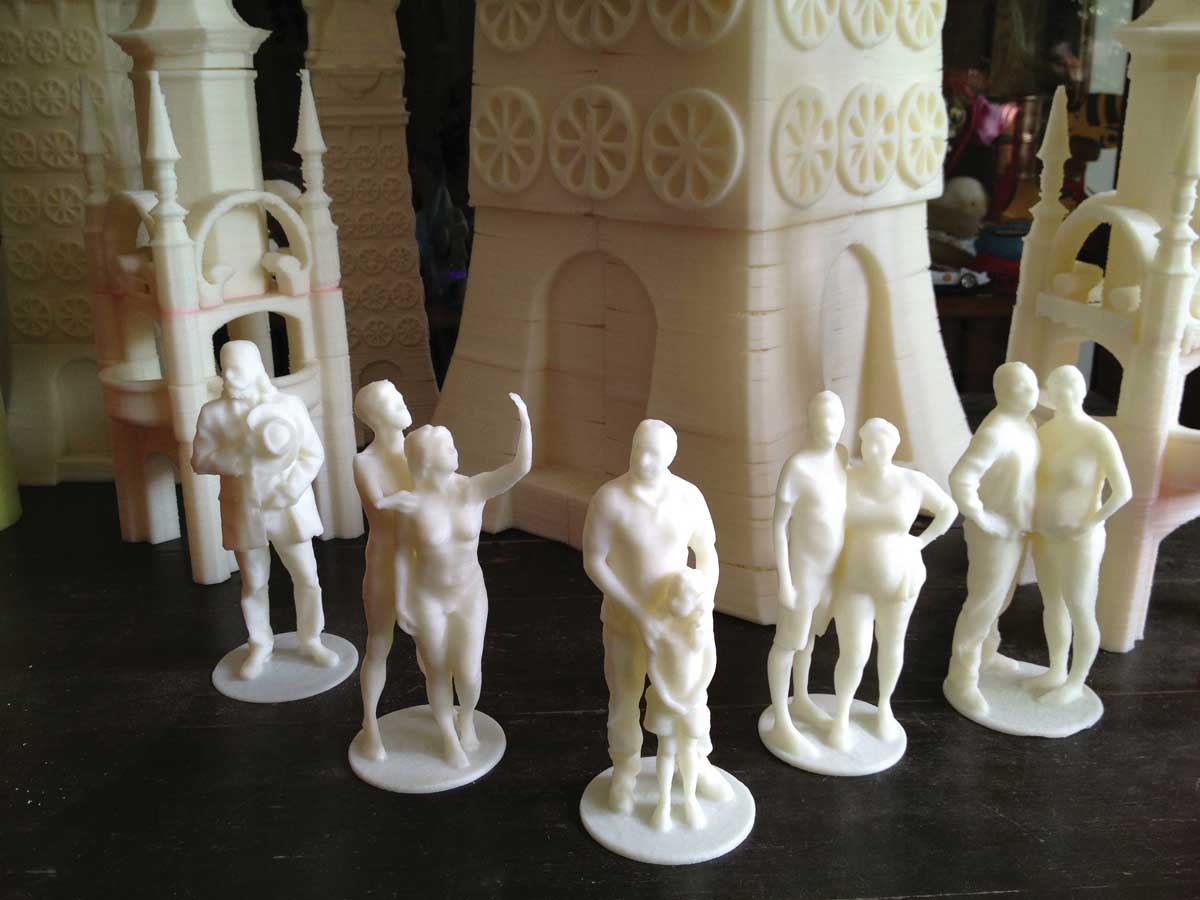
scanotron_3D-Prints

When the 3D scanning software ReconstructMe came out last year, I was really excited about scanning people, but the plethora of office-chair-spin 3D prints shared online left me a little disappointed. I wanted more!

Some people were doing full-body scans, but it involved painstaking work using mirrors or splicing together multiple meshes. I set out to devise a way to improve upon that and get a clean scanned mesh that can be ready to print in minutes. The result: the Scan-O-Tron 3000! (Why 3000? Because it’s better than 2000!)

Build this fast full-body 3D scanning rig and use it with Kinect or Primesense sensors and scanning software such as ReconstructMe or the new improved Skanect (which I’ll demonstrate here). Pair it with my DIY heavy-duty turntable and you can be spinning, scanning, and printing your party guests next weekend.

What will the next generation of Make: look like? We’re inviting you to shape the future by investing in Make:. By becoming an investor, you help decide what’s next. The future of Make: is in your hands. Learn More.

Project Steps

Build the vertical rail for kinect scanning

3D-print the parts from thingiverse.com/thing:127968. (Or try a couple modifications from Make Labs test build parts). I printed mine 100% solid with rectilinear fill. You need 2 of the MakerSlide end caps.

Assemble the 2 parts of the carriage hinge. I used a piece of 3mm filament as the pin and melted the tips to prevent it coming loose. Glue the Kinect mount on the end of the larger hinge part.

Glue together the 2 parts of the guillotine drop pin and slide it onto the carriage hinge from the top.

Drill the back of the smaller hinge part and bolt it to the MakerSlide carriage plate.

Cut the 1000mm MakerSlide rail down to 600mm and splice it to the 1800mm MakerSlide rail using the mending brackets, 10mm cap screws, and pre-assembly insertion nuts. This is the front rail.

Cut four 200mm segments of 40mm extrusion and attach them between the front rail and the 1800mm length of extrusion (the rear rail) using 8 angle brackets with insertion nuts and cap screws.

Fashion a base as shown, with 2 lengths of 40mm extrusion: one ~560mm and one 460mm. Use the two 20mm×500mm lengths of extrusion as diagonal supports between the base and front rail, using more angle brackets.

Press the skateboard bearings into the 3D-printed rod bearing parts, then mount them on the front and rear rails at about waist height. Put the threaded rod through them, and secure it with nuts and washers as shown.

NOTE: At the front rail, the rod should be flush with the nut or nearly so, to ensure the Kinect carriage will have clearance.

Mount the filament spool with its 3D-printed bearing discs on the threaded rod, using a stack of washers to provide clearance from the rear rail, and another washer and nut to secure it. Cut off excess threaded rod. Attach the cabinet knob to the spool as a handle for turning it.

Mount the 4 wheels on the MakerSlide carriage, mount the carriage on the vertical rail, and tie the string to the top of the carriage.

Put the end caps on the tops of the rails and then mount the clothesline pulleys in them. Thread the string over the tops of the pulleys and tie it to the filament spool.

Put several rubber bands around the 2 sides of the carriage hinge.

Finally, place the Kinect in its mount. You can secure it using rubber bands or zip ties. The hinge lets you tilt the Kinect for best results.

You’re ready to start scanning.

Scan and print your subjects.

Now we’re ready to get scanning! A year ago ReconstructMe was the only game in town, which meant Mac users were left out or had to jump through hoops installing Windows under Bootcamp. Fortunately, all that has changed with the release of Skanect (skanect.manctl.com). Though I still primarily use ReconstructMe, Skanect has several advantages that make it quite attractive. First off, it’s cross platform, offering both Mac and Windows versions. It’s easy to install and offers basic tools to clean up your file and prepare it for 3D printing.

A word of warning, though — both programs require a newer machine with a serious graphics card. I’m a Mac user, so it was simple to download and install Skanect. I found that I needed to install the latest Nvidia CUDA drivers (nvidia.com/object/mac-driver-archive.html) to get GPU acceleration while scanning.

Launch the application and you’ll see a series of 5 simple step tabs across the top to walk you through the scanning process.

Click the New button and you’ll see that you have controls to define the bounding box volume for the scan volume. For full-body scans, try 1m×1m×2.5m tall.

Before proceeding, you should also review the Settings. I found I had to lower the feedback quality settings to Medium or Low, or I would lose tracking while scanning.

Record your scan and reconstruct the data.

Hit the Record button and start scanning! There will be a little trial and error to find the right distance between the Kinect and turntable, and the right height to start scanning at. At your starting point you want to capture the top of the turntable in your scan volume, but not the floor. The diagrams show you my step-by-step process.

Skanect gives you visual feedback by highlighting the model green where you’re getting good data and red where you’re missing details. When the scan is complete, hit Record again to stop.

It will process the point cloud and “reconstruct” it for you automatically. The Reconstruct tab is used to revisit saved scan files if you need to reconstruct them again. You can skip this tab for now.

Process your mesh.

So now you’ve got a mesh scanned, but it’s not 3D-printable yet because it’s just a skin and it’s full of holes. It has to be converted to a watertight solid volume. Click the Watertight button to close the holes and make it solid. Set Smoothing to medium then click Run. After a moment the mesh will close and the full-color surface texture will appear. If you’re printing on a desktop 3D printer, you won’t need this texture — use the Remove Colors tool to see the actual geometry.

The Simplify tool gives you the option of “decimating” the model — reducing the number of polygonal faces — to make it faster and easier to print. I typically bring it down to 100,000–150,000 faces for a human figure, but you can play with it to see if that’s enough detail for your liking. After you’re done you can hit Colorize to reapply the texture if you want to store the color data with your model to “future proof” it.

Finally, perform a planar cut on the bottom of your model. Use the Move & Crop tool to rotate the scan on the x-, y-, or z-axis so the base is parallel to the ground. Use the Transform Z tool to position the cutting plane, then hit the Crop to Ground button.

Skanect lets you share your model to Sketchfab or 3D-print it online at Sculpteo, but here we’ll just use the Export feature. Export your file as an STL and you’re almost ready to print.

Scale the mesh and print.

The one issue Skanect doesn’t address is scaling. Your model is still life-size, so figures will be 6 feet tall, not the 6 inches your printer wants. Open your STL file in Netfabb (free from netfabb.com), scale it for your printer, then perform an Auto Repair before resaving. You can see a video of how I do it at

http://youtu.be/jwORqPxhNwc.

Load your STL file into the slicing program of your choice. I usually print in ABS with 3 perimeters and about 18% infill.

That’s all you need to know to set up your own 3D scanning booth. Happy scanning!

See more of my World Maker Faire crew scans at makezine.com/go/wmfscans

How to pose people for scanning.

When scanning people for 3D printing, I recommend posing them so that you won’t need to print with support material. Inevitably there are cases where I’ll have to manually add a few cylinders to the 3D model as support, but I personally hate having to clean off messy auto-generated support from my prints.

A few tips:

  • No eyeglasses or shiny garments like patent leather boots. These don’t reflect the Kinect’s infrared light very well and they’ll throw off the scan.
  • Look at your subject carefully, and pose them to create slow uphill lines with no sharp overhangs.
  • Have them spread their feet a little and give their pose a little contrapposto — a vertical twist of the frame to make it more dynamic and pleasing to the eye.
  • Hands on hips or against the body — no hands hanging in space. Arms folded or reaching upward can also work.
  • Think in terms of mass and volume: avoid spread fingers and thin layers of draped clothes. Beware of hat brims!
  • Chin up, a little toward one shoulder, “looking optimistically off into the future!”

Conclusion

This project first appeared in MAKE's Ultimate Guide to 3D Printing 2014, page 44.